
Summary of Contents for Workabout PRO4
-
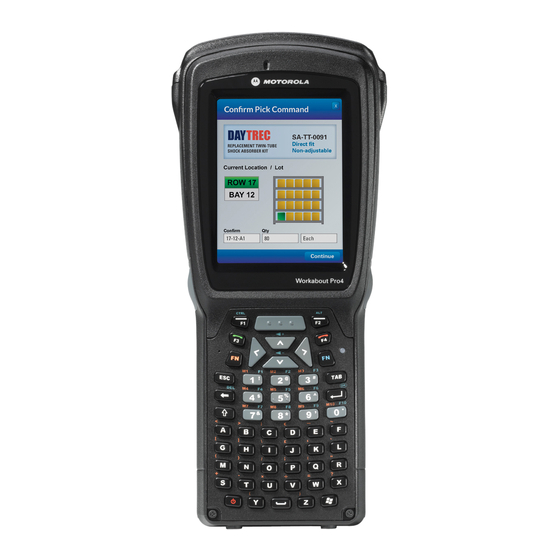
Page 1: User Guide
Draft #5 WORKABOUT PRO4 HAND-HELD COMPUTER (Windows Embedded Hand-Held 6.5) USER GUIDE... - Page 2 Draft #5...
- Page 3 Draft #5 WORKABOUT PRO4 HAND-HELD COMPUTER USER GUIDE 8000295.A December 20, 2013...
- Page 4 Motorola, the Motorola logo, Workabout Pro4 and the names of other products and services provided by Motorola are trademarks of Motorola.
-
Page 5: Revision History
Draft #5 Revision History Changes to the original guide are listed below: Change Date Description -01 Rev A 12/2013 Initial release. - Page 6 Draft #5 Workabout Pro4 User Manual...
-
Page 7: Table Of Contents
Table of Contents About This Guide About This Manual .......................... xi Text Conventions ..........................xi Overview of the Workabout Pro4 Hand-Held Computer ..............xii Chapter 1: Basic Operation Workabout Pro4 Features....................... 1-3 Workabout Pro4 Modules Available ....................1-3 Documents Available ........................1-3 Preparing the Workabout Pro4 for Operation ................. - Page 8 Managing Files and Folders ......................2-24 Creating a New Folder........................2-24 Renaming, Copying, and Deleting a File..................2-25 Using Menus........................... 2-25 Pop-Up Menus..........................2-25 Programs – Using Applications....................... 2-26 Settings............................2-26 HomeVU ............................2-27 Data Transfer Between Workabout Pro4 and a PC ............... 2-27...
- Page 9 The Phone ............................3-4 The Onscreen Phone Keypad......................3-4 Sending & Ending Phone Calls Using the Onscreen Phone Keypad........3-4 Sending & Ending Calls Using the Workabout Pro4 Keyboard........... 3-5 Making a Conference Call....................3-5 Programming Speed Dial ....................3-5 Managing Phone Settings ......................3-8 Text Messages ..........................
- Page 10 Draft #5 Workabout Pro4 (Windows Embedded Hand-Held 6.5) User Manual Creating and Converting Handwritten Notes to Text..............3-22 Renaming a Note..........................3-23 Recording Notes..........................3-23 Task Notification..........................3-24 File Explorer............................ 3-26 ActiveSync® ..........................3-26 Synchronization ..........................3-27 Internet Sharing ..........................3-27 Creating an Internet Connection ....................3-27 Using Internet Sharing........................3-28...
- Page 11 Draft #5 Table of Contents v Sound & Notifications........................4-12 Sounds Tab.............................4-12 Notifications Tab ..........................4-13 Connections Folder......................... 4-13 Beam ..............................4-13 Bluetooth Setup ..........................4-14 The Devices Tab - Scanning for Bluetooth Devices............4-14 Pairing a Device ........................4-16 Servers Tab ......................... 4-17 Mode Tab ...........................
- Page 12 Draft #5 Workabout Pro4 (Windows Embedded Hand-Held 6.5) User Manual Utilities ..........................4-49 Settings ..........................4-49 Encryption............................4-50 Error Reporting ..........................4-50 GPS (Global Positioning System) ....................4-50 Manage Triggers..........................4-51 Trigger Mappings ........................ 4-52 Managed Programs........................4-54 Memory............................4-54 Main Tab ..........................4-54 Storage Card........................4-55 Microphone .............................4-55...
- Page 13 Table of Contents vii Charging a Spare Battery .......................5-6 Battery Charge Duration.........................5-6 Charger LED Indicators........................5-6 Linking a Workabout Pro4 to a PC....................5-7 Troubleshooting the Docking Station Operations................5-7 AC Wall Adaptor – Model #PSA15R-050P ..................5-7 Peripherals ........................5-8...
- Page 14 Draft #5...
-
Page 15: About This Guide
Text Conventions ..........xi Overview of the Workabout Pro4 Hand-Held Computer ......xii... - Page 16 Draft #5...
-
Page 17: About This Manual
Draft #5 About This Guide About This Manual This user manual describes how to configure, operate, and maintain the Workabout Pro4 Hand-Held Computer. Chapter : About This Guide provides a basic overview of the Workabout Pro4 Hand-Held. Chapter 1: Basic Operation describes the steps required to get the Workabout Pro4 ready for operation. -
Page 18: Overview Of The Workabout Pro4 Hand-Held Computer
Overview of the Workabout Pro4 Hand-Held Computer The Workabout Pro4 is a modular, industrial hand-held computer. A variety of options are available to suit applications in courier/delivery, field service, meter reading, asset management, warehousing and logistics, manufacturing and other specialized data capture applications. - Page 19 Voice & Audio - Walkie-talkie style Push-to-Talk – VoIP over WiFi In the Americas, the Workabout Pro4 is not approved to be used with any VoIP application using Wide Area Network (WAN) or Wireless Local Area Network (WLAN). - Standard integrated microphone and receiver.
- Page 20 Draft #5 xiv Workabout Pro4 (Windows Embedded Hand-Held 6.5) User Manual...
-
Page 21: Chapter 1 Basic Operation
Workabout Pro4 Features ........1-3 Workabout Pro4 Modules Available ........1-3 Documents Available . - Page 22 Draft #5...
-
Page 23: Workabout Pro4 Features
Microphone (Light Emitting Diode) Workabout Pro4 Modules Available To see a current list of Workabout Pro4 accessories and modules, go to the website at: (need website) http://www.psion.com/us/products/handheld.htm. Documents Available To see a current list of documents and download what you need, go to the Knowledge Base on the Psion Inge- nuity Working community website: http://community.psion.com/knowledge/w/knowledgebase/product-manuals.aspx... -
Page 24: Switching The Workabout Pro4 On And Off
When the unit is turned off, normally it automatically enters a power-saving, “suspend” state. When the Worka- bout Pro4 is switched on from the suspend state, operation resumes within a few seconds in the screen in which you were working prior to turning the computer off. -
Page 25: Resetting The Workabout Pro4
• Press and hold down the [FN/ORANGE] key, the [FN/BLUE] key, and the [Power] button, simultane- ously for a minimum of four seconds. Performing a Clean Start A clean start returns the Workabout Pro4 to factory settings, flushes the registry keys and deletes volatile storage. •... -
Page 26: Boot To Boost
Press [1] to launch the OS. Calibrating the Touchscreen The Workabout Pro4 touchscreen feature is factory-calibrated and ready-to-go; however, over time the touch- screen's operating parameters may change, and it may need to be recalibrated for correct operation. Refer to “Calibrating the Touchscreen”... -
Page 27: Chapter 2 Getting To Know Your Workabout Pro4
Function Keys ........2-7 Macro Keys (Workabout Pro4 Long only) ..... .2-8 Numeric Keyboards —... - Page 28 Caring for the Touchscreen ........2-28 Cleaning the Workabout Pro4 ....... . .2-30...
-
Page 29: Operating System
The Suspend Threshold adjustment in the Power Properties tab allows you to determine the battery capacity at which the Workabout Pro4 will be shut down. If left at the default value, Maximum Operating Time, the unit will run until the battery is completely empty; the RAM is only backed up for a short period of time. If you choose Maximum Backup Time, the Workabout Pro4 shuts off with more energy left in the battery so RAM can be backed up for a longer period of time. -
Page 30: Charging The Battery
To switch on the hand-held, you will need to replace the overheated battery. However, if you supply AC power to the Workabout Pro4 with a battery that falls below the configured Suspend Threshold, the unit will switch on. -
Page 31: The [Power] Button
The [SCAN] Key The Workabout Pro4 is equipped with a single [SCAN] key at the top of the keyboard and two [SCAN] buttons located on the left and right sides of the unit. [SCAN] keys activate the scanner beam. For units that do not... -
Page 32: Modifier Keys
The [SHIFT], [CTRL], [ALT], [FN/BLUE] and [FN/ORANGE] keys are modifier keys. Pressing a modifier key changes the function of the next key pressed. For example, on a Workabout Pro4 Qwerty keyboard, a bracket is printed in orange print above the [U] key. Pressing the [FN/ORANGE] key followed by the [U] key displays a bracket rather than the letter U. -
Page 33: Function Keys And Macro Keys
All Workabout Pro4 keyboards are equipped with a total of 14 function keys. Function keys [F1] to [F4] located near the top of the keyboard are directly accessible – a key combination is not required. Ten additional function keys from [F1] to [F10] are colour coded in blue print on the unit body;... -
Page 34: Macro Keys (Workabout Pro4 Long Only)
“Macro Keys” on page 4-40 for details about creating macros. Workabout Pro4 Long units are equipped with 10 Macro keys. Macro keys can be programmed to replace frequently used keystrokes, along with the function of executable keys like the [ENTER] key, the [BACK- SPACE] key, any function key and arrow key, etc. -
Page 35: The Keypad Backlight
[FN/ORANGE] key ‘on’. Remember that depending on how your Workabout Pro4 is set up in the ‘One Shots’ tab, you may find that you need to press the [FN/ORANGE] key twice to lock it ‘on’. Refer to “One-... -
Page 36: The Display
2 - 10 Workabout Pro4 (Windows Embedded Hand-Held 6.5) User Manual The Display The Workabout Pro4 is equipped with display backlighting to improve character visibility in low light conditions. The backlight switches on when a key is pressed. Adjusting the Display Backlight To set the backlight intensity and the duration of time that the backlight will remain on, you’ll need to choose the... -
Page 37: Calibrating The Touchscreen
Draft #5 Getting to Know Your Workabout Pro4 2 - 11 Calibrating the Touchscreen If your touchscreen has never been aligned (calibrated) or if you find that the stylus pointer is not accurate when you tap on an item, follow the steps below. - Page 38 Draft #5 2 - 12 Workabout Pro4 (Windows Embedded Hand-Held 6.5) User Manual...
-
Page 39: Screen Orientation
Tap on the Screen icon. • In the General tab, tap on the orientation that best suits the way in which you use your Workabout Pro4. Locking the Touchscreen If you need to lock your touchscreen to protect against accidental actions: •... -
Page 40: Audio Indicators
(Secure Digital) card, which provides additional non-volatile memory to your Workabout Pro4, and the slot to the right is used to load a SIM (Subscriber Identity Module) card, which allows access to the Voice option, access to the Internet, and so on. -
Page 41: Navigating Using The Keyboard
Tap on the navigation bar to display additional icons. Navigating Using the Keyboard If you prefer to use the keyboard to move the cursor around the screens on your Workabout Pro4, refer to table following for a description of the navigation keys. -
Page 42: Customizing The Today Screen
Draft #5 2 - 16 Workabout Pro4 (Windows Embedded Hand-Held 6.5) User Manual Navigation bar Start button Softkey bar Softkeys • Use the stylus or your finger to scroll to and highlight the option you want to work with. The highlighted option displays information specific to the applet. -
Page 43: The Today Screen Default Options
Draft #5 Getting to Know Your Workabout Pro4 2 - 17 The Today Screen Default Options A list of options are available from the Today screen. Keep in mind that these can be altered using the method described above in “Customizing the Today Screen”... -
Page 44: Text Messages
Draft #5 2 - 18 Workabout Pro4 (Windows Embedded Hand-Held 6.5) User Manual Setting the Alarm You can set a maximum of three alarms. • In the Alarms tab, tap on the Time or Day in the Clock & Alarms screen. An Alarm Settings screen is displayed. -
Page 45: E-Mail Notification
Draft #5 Getting to Know Your Workabout Pro4 2 - 19 Menu softkey To compose and send a text message on your Workabout Pro4: • Tap on the Menu softkey, and choose New from the menu. • In the To field, type the name of the person to whom you want to send a text message, or to insert a number from your contacts list, tap on Menu>Add Recipient, and choose a name. -
Page 46: Calendar Of Upcoming Appointments
NOTE You can synchronize the Calendar so that any meetings, appointments and so on are displayed on your Workabout Pro4 Today screen as well as on your PC. Refer to “Synchronizing E-mail with Outlook (PC with Windows XP OS)” on page 3-9 “Synchronizing E-mail with Outlook (PC with Windows Vista or... - Page 47 If you’ve no further additions for the appointment, tap on OK. Otherwise, move to the Categories section following. Using Categories Categories help you organize and track the different types of data you keep on your Workabout Pro4. To assign an appointment to a category: •...
-
Page 48: Deleting Appointments
Draft #5 2 - 22 Workabout Pro4 (Windows Embedded Hand-Held 6.5) User Manual • Tap in the checkbox next to the category to which you want to assign the appointment. • Tap OK. Your appointment is assigned to the category or categories you chose. -
Page 49: The Softkey Bar
The Softkey Bar The Workabout Pro4 is equipped with a softkey bar at the bottom of the screen. It displays softkeys that allow you to access menus and commands. Note that the softkeys change to reflect the program with which you are working. -
Page 50: The Start Button
Creating a New Folder • Tap Start>File Explorer. • Tap the Menu softkey, and in the pop-up menu, choose New Folder. • Use the Workabout Pro4 keyboard or the soft keyboard to assign a name to the folder. -
Page 51: Renaming, Copying, And Deleting A File
Draft #5 Getting to Know Your Workabout Pro4 2 - 25 Renaming, Copying, and Deleting a File • To access any of these functions, press and hold the stylus on the file you want to work with. A ring of dots is displayed followed by a pop- up menu. -
Page 52: Programs - Using Applications
2 - 26 Workabout Pro4 (Windows Embedded Hand-Held 6.5) User Manual Programs – Using Applications • Tap the Start button in the softkey bar to display the programs installed on your Workabout Pro4. Program Icons Figure 2-4 Opening an Application •... -
Page 53: Homevu
Workabout Pro4 and your PC. You do need to install the Windows Mobile Device Center. By using a Snap Module or Desktop Docking Station with your Workabout Pro4, you can connect to a PC with a cable and: •... -
Page 54: Uploading Data In A Docking Station
The Desktop Docking Stations allow your hand-held to upload transaction data to a server computer when a radio link is not available. When Workabout Pro4 is properly inserted in a docking station, a dock icon is displayed in the navigation bar at the top of the screen. - Page 55 Draft #5 Getting to Know Your Workabout Pro4 2 - 29 If the touchscreen is used in harsh environments, consider applying a disposable screen protector (RV6105). These covers reduce the clarity of the display slightly but will dramatically extend the useful life of the touch- screen.
-
Page 56: Cleaning The Workabout Pro4
The plastic slowly decomposes in strong alkaline solutions. • Exposure to aircraft de-icing fluids can degrade the plastics on the Workabout Pro4. If the Workabout Pro4 is used near aircraft de-icing environments, regular rinsing with water is recommended. -
Page 57: Chapter 3: Programs Programs
Using the Camera ........3-16 Moving Photos to the Workabout Pro4 ......3-17 Opening a Photo . - Page 58 Draft #5 3 - 2 Workabout Pro4 (Windows Embedded Hand-Held 6.5) User Manual Editing a Photo .........3-18 Creating a Slide Show .
-
Page 59: Programs
Draft #5 Programs 3 - 3 Programs Workabout Pro4 programs are all available from the Start screen. • Tap on the Start button in the lower-left corner of the Today screen to display the Start screen. Tapping on an icon in this screen launches the associated applet. -
Page 60: The Phone
The onscreen phone keypad provides phone services like those you may find on your cellular phone. You can use the phone keypad provided with your Workabout Pro4 to, for example, send and receive phone calls, make conference calls, view your call history, set up speed dial numbers, etc. -
Page 61: Sending & Ending Calls Using The Workabout Pro4 Keyboard
When you’ve completed your call and want to disconnect: • Tap on [End] button on the onscreen phone keypad. Sending & Ending Calls Using the Workabout Pro4 Keyboard The keyboard provides a [Talk] and an [End] key on the physical keyboard. •... - Page 62 Draft #5 3 - 6 Workabout Pro4 (Windows Embedded Hand-Held 6.5) User Manual Speed dial number Call softkey This dialog box lists the phone numbers and the speed dial key to which the phone number has been assigned. • Tap on the Speed Dial Number (the number to the left of the phone number you want to dial), or Tap on the Call softkey in the softkey bar at the bottom of the screen;...
- Page 63 Draft #5 Programs 3 - 7 A sequential speed dial key is automatically assigned in the Location field. You can tap on the arrows to the right of the Location field to change the auto assignment. Using the Contact List to Program a Speed Dial •...
-
Page 64: Managing Phone Settings
Text Messages Tapping on the Text option in the Today screen displays this screen. This option allows you to compose, send and receive text messages using your Workabout Pro4. IMPORTANT For details about using the Text Messages feature, refer to “Text... -
Page 65: Folders
For POP3 accounts, if you move e-mail messages to a folder you create, the link between the messages on the Workabout Pro4 and the copies on the mail server are broken. When you next connect, the mail server will recognize that the messages are missing from the Workabout Pro4 Inbox folder and delete them from the server, preventing duplication of messages. -
Page 66: Changing Synchronization Settings
• Tap on the Select Folder button. • Add a check mark next to the folders in this screen that you want to synchronize with your Workabout Pro4, and tap on OK. The E-mail Synchronization screen is displayed again. •... -
Page 67: Sending An E-Mail
If an Exchange Server is detected, a screen is displayed where you can enter the Server address, your user name and so on, and sync the Workabout Pro4 with the Exchange Server directly over a cellular or wireless network when you are not connected to your PC. -
Page 68: Contacts
Draft #5 3 - 12 Workabout Pro4 (Windows Embedded Hand-Held 6.5) User Manual Keep in mind that you can also use your Contacts to choose an e-mail recipient provided an e-mail address is associated with the contact. • Tap Menu>Add Recipient, and then choose a contact from the list. -
Page 69: Communicate Tab - Adding Contacts
Draft #5 Programs 3 - 13 Searching for a Contact Type a contact name here Tap on an alpha group to narrow the search To search for a particular entry: • Tap on the Enter a name ... field, and type the name you are searching for in the Contacts list. •... -
Page 70: Info Tab
Draft #5 3 - 14 Workabout Pro4 (Windows Embedded Hand-Held 6.5) User Manual • When you’ve completed the information for the contact entry, tap on OK. The new contact is displayed in the Contacts list. Info Tab This tab allows you define a ring tone for a particular contact. You can also add additional addresses related to your contact (work and home), and information about your contact such as a job title, office location and fax number. -
Page 71: Internet Explorer
Draft #5 Programs 3 - 15 Internet Explorer You can connect to Internet Explorer in two ways: by connecting the Workabout Pro4 directly to the Internet or by connecting through your PC (see “ActiveSync®” on page 3-26). Browsing Web Sites There is little difference between the standard Internet Explorer found on your PC and that found on your Workabout Pro4, sometimes referred to as Pocket Internet Explorer. -
Page 72: Alarms
Draft #5 3 - 16 Workabout Pro4 (Windows Embedded Hand-Held 6.5) User Manual IMPORTANT Refer to “Calendar of Upcoming Appointments” on page 2-20 details about this feature. Alarms Refer to “Time, Date and Alarms” on page 2-17 for details about this applet. -
Page 73: Moving Photos To The Workabout Pro4
Draft #5 Programs 3 - 17 Keep in mind that if there are no pictures stored on your Workabout Pro4 as yet, you’ll only see the Camera icon in this screen. • Tap on the Camera icon to activate the camera. -
Page 74: Deleting A Photo
Draft #5 3 - 18 Workabout Pro4 (Windows Embedded Hand-Held 6.5) User Manual • Tap on a thumbnail to open the photo. NOTE If you’ve stored your photos on a storage card, you’ll need to tap on the storage card icon to display your photos. -
Page 75: Using The Video Recorder
Draft #5 Programs 3 - 19 Using the Video Recorder • Tap on the Camera icon. • In the bottom-right corner of the camera screen, tap on Menu>Video. • Press [ENTER] to begin recording. Video Recorder Icon Indicates that video is active. -
Page 76: Windows Media
3 - 20 Workabout Pro4 (Windows Embedded Hand-Held 6.5) User Manual Windows Media Windows Media allows you to play music and videos on your Workabout Pro4. You can use Windows Media to play digital audio and video files that are stored on your Workabout Pro4 or on the web. -
Page 77: Creating A Note Using The Soft Keyboard
Draft #5 Programs 3 - 21 • Tap on the New softkey to display a blank note. Creating a Note Using the Soft Keyboard The soft keyboard icon is available by default. It is a replica of a standard keyboard. Use your stylus to type letters, numbers, symbols and so on. -
Page 78: Creating And Converting Handwritten Notes To Text
• Choose Transcriber from the menu. When you choose Transcriber, you can write notes in your own handwriting. Workabout Pro4 converts the notes into typed text for you. A Transcriber Intro screen is displayed to provide information to help you work with the Transcriber. -
Page 79: Renaming A Note
Tap on the Record button – a beep alerts you that your device is now ready to record. • Begin speaking into the microphone on the Workabout Pro4. Make certain that you move the Workabout Pro4 to within a few feet of the source of the sound you want to record. -
Page 80: Task Notification
Draft #5 3 - 24 Workabout Pro4 (Windows Embedded Hand-Held 6.5) User Manual • Tap on OK to save the recorded note. A speaker icon is displayed in the note indicating the presence of a recording within the note. •... - Page 81 Draft #5 Programs 3 - 25 • Press [ENTER] to add the task to your list. Edit Editing a Task • Tap on a task in the task you want to edit. Tap on the Edit softkey in the softkey bar to display a detailed task screen where you can define task characteristics.
-
Page 82: File Explorer
“Managing Files and Folders” on page 2-24 for details about this feature. ActiveSync® ActiveSync® is Microsoft PC connectivity software that can be used to connect the Workabout Pro4 to PCs running this software. You can synchronize the Workabout Pro4 with your PC using this utility. -
Page 83: Synchronization
Internet Sharing This option allows you to use your Workabout Pro4 to connect your PC to the Internet. Before you can use Internet Sharing, you must make certain that you have established a data connection on your Workabout Pro4. -
Page 84: Using Internet Sharing
Right-click on Bluetooth Network Connections, and click on Bluetooth Network Devices. • If the Workabout Pro4 is listed as a Network Access Point, choose Connect. If it is not listed, choose Create a new connection and use the New Connection Wizard to add the Workabout Pro4 to the list. -
Page 85: Task Manager
Workabout Pro4 passcode on your PC and on your Workabout Pro4. • If a pairing code has not been assigned to your Workabout Pro4, choose Create a pairing code for me, and type the Workabout Pro4 passcode on your PC and on your Workabout Pro4. -
Page 86: Office Mobile
Excel Mobile allows you to copy Excel workbooks from your PC onto your Workabout Pro4 and update them while you’re away from your desk. -
Page 87: Onenote Mobile
• Prepare information in OneNote on your PC and then transfer it to your Workabout Pro4 where it will be available to you wherever you and your Workabout Pro4 go. IMPORTANT... - Page 88 Format: Tapping on this command lists the formatting options you can apply to your note: Bold, Italic, Underline, Strikethrough and Clear All. • Take Picture: When you tap on this option, the Workabout Pro4 switches to camera mode so that you can snap a picture to include in your note.
- Page 89 Draft #5 Programs 3 - 33 Press [ENTER] to snap a photo that is automatically inserted into your note. • Insert Picture: Tapping on this command automatically displays your My Pictures folder where you can tap on an existing picture to insert it into your note. •...
-
Page 90: Word Mobile
If you’ve already created a Word document, it will be listed in a Word Mobile win- dow. To launch a new Word document, you’ll need to tap on the New softkey. Text Input Modes In addition to the soft keyboard, you can enter text using the Workabout Pro4 keyboard, soft keyboard or the transcriber. IMPORTANT Refer to “Notes”... -
Page 91: Powerpoint Mobile
Additional pieces of software such as a server must be obtained through Motorola. HomeVU HomeVU allows the administrator to tailor how the Workabout Pro4 operates and the options the user can access. Note that the look of the Today screen will change from icons that are finger accessible to a list of... -
Page 92: Modem Link
Draft #5 3 - 36 Workabout Pro4 (Windows Embedded Hand-Held 6.5) User Manual IMPORTANT For details about this application, refer to “HomeVU” on page 4-56. Modem Link Modem link allows you to use the GPRS connectivity on your phone to connect your laptop or PC to... -
Page 93: Remote Desktop Mobile
IMPORTANT These commands are accessed from the Start menu in the Terminal Services screen used to access the PC’s commands. Do NOT use the Start menu on your Workabout Pro4. • In the Remote Desktop Connection window, tap on Start>Shutdown. - Page 94 Draft #5 3 - 38 Workabout Pro4 (Windows Embedded Hand-Held 6.5) User Manual The WiFiConnect A.R.C. utility provides a quick method to configure a device for use on a private network, primarily for use with Active Remote Configuration (A.R.C.). WiFiConnect A.R.C. configures the default WiFi interface. The WEP key is set to PsionPsion123. The SSID is set to Psion.
-
Page 95: Chapter 4 Settings
Draft #5 CHAPTER 4 SETTINGS SETTINGS Overview of Software ......... . .4-5 Motorola Software Advantage . - Page 96 Draft #5 4 - 2 Workabout Pro4 (Windows Embedded Hand-Held 6.5) User Manual Modem Connection Setup ........4-22 Advanced Modem Settings.
- Page 97 Draft #5 Settings 4 - 3 Storage Card ........4-55 Microphone .
- Page 98 Draft #5...
-
Page 99: Overview Of Software
Remote Desktop protocol Settings The applets contained under the Settings icon in the Start screen allow you to tailor how your Workabout Pro4 behaves, the appearance of the Today screen, and so on. The Settings applications are further divided into... -
Page 100: Clocks & Alarms
It is critical that you store your password in a safe place. If you forget it, a ‘clean start’ must be performed by certified personnel. A clean start returns the Workabout Pro4 to factory settings. Only the data stored in a CF or SD memory card are preserved. -
Page 101: Appearance Tab - Changing The Theme (Background)
• Choose a theme or background, and tap on the Beam button. The Workabout Pro4 scans for visible devices within range of the hand-held and lists them in the Beam screen. • Tap on the device to which you want to send the theme. -
Page 102: Items Tab - Customizing The Today Screen
“Customizing the Today Screen” on page 2-16 for details about this screen. Power The Power applet provides information about the battery installed in your Workabout Pro4, and it allows you to define the behaviour of your Workabout Pro4 to minimize power consumption. •... -
Page 103: Battery Power
This tab monitors and displays the current battery capacity of the battery installed in the Workabout Pro4. Advanced Tab This tab allows you to tailor how long the Workabout Pro4 can remain idle before the screen is turned off while running on battery power and also on external power. -
Page 104: Suspend Threshold And Estimated Battery Backup
The Estimated Battery Backup is the amount of battery power that has been reserved or set aside to protect data until a fully charged battery can be installed in the Workabout Pro4. When the battery capacity is depleted up to the Estimated Battery Backup Time reserve specified in the Suspend Threshold tab, the Workabout Pro4 shuts off automatically and uses the reserve power to preserve the data stored on the Workabout Pro4. -
Page 105: Battery Health
Draft #5 Settings 4 - 11 Battery Health The Battery Health tab provides an estimate of battery health based on a number of different measurements, beyond battery capacity. IMPORTANT The Battery Health Meter is an estimate and should not be depended on to provide a 100% account of battery condition. -
Page 106: Sound & Notifications
This dialog box allows you to choose the actions that will wake your unit from a suspend state. Sound & Notifications The Sounds & Notifications icon allows you to specify when your Workabout Pro4 will emit sounds. Sounds Tab •... -
Page 107: Notifications Tab
This tab allows you to choose an event, and for each event, choose the audio notification or sound that the Workabout Pro4 will emit for that event. For example, suppose you choose Wireless network detected from the Event: drop-down menu. If you check Play sound, the unit will emit an audible sound when a network is detected. -
Page 108: Bluetooth Setup
Turning the Bluetooth Radio On Before pairing a headset or any other Bluetooth device with your Workabout Pro4, make certain that the Blue- tooth device power is enabled and that the radio is switched on; it is enabled by default. If, for some reason, it has been disabled: •... - Page 109 Settings 4 - 15 • To discover and list all Bluetooth devices in range of the Workabout Pro4, tap on the Scan button in the softkey bar at the bottom of the screen. The Workabout Pro4 scans for Bluetooth devices within a 10 meter range. Any Bluetooth devices within range appear in the Bluetooth list box.
-
Page 110: Pairing A Device
The drop-down menu at the top of the Device tab allows you to limit the scope of the scan to a particular type of device. If, for example, you choose Computer from this menu, only computers within range of the Workabout Pro4 are listed in the Device tab. -
Page 111: Servers Tab
‘Bluetooth master’ and the hand-held, the ‘Bluetooth slave’. In order for the remote device to connect to the Workabout Pro4, the Workabout Pro4 must offer a service in the form of a server. The Servers tab allows these services to be enabled and configured. There are three server services available: Serial, Scanner and OBEX OPP (Object Exchange-Object Push Profile). -
Page 112: Mode Tab
OBEX OPP server enables the Object Push Profile server. A warm reset must be performed on the Workabout Pro4 after a change is made to this option. The OPP Server allows other Bluetooth devices to send files to this device. -
Page 113: Paired Tab
Draft #5 Settings 4 - 19 Paired Tab This tab lists all paired devices and their corresponding services. The format of the name is <Device Name>:<Service Name>. Additional information may appear in this screen such as the Port Numbers for Serial Profiles service. -
Page 114: Connecting Using A Bluetooth Gprs Phone
Before you begin, make certain that the Bluetooth phone is turned on, that the Bluetooth radios in your Worka- bout Pro4 and phone are enabled (turned on), and that the hand-held and phone are within 10 metres of each other. Both should be discoverable. -
Page 115: Connections - Connecting To The Internet
Connections – Connecting to the Internet To activate a connection, make certain that any necessary equipment (such as a radio) is installed in your Workabout Pro4. You’ll need the following information from your ISP to make an Internet connection: •... -
Page 116: Modem Connection Setup
TCP/IP settings. If your Workabout Pro4 does not have access to a mobile phone network, insert a modem card in the unit. 1. Tap Start>Settings. Tap on the Connections folder icon followed by the Connections icon. - Page 117 Draft #5 Settings 4 - 23 3. In the Make New Connection screen, type a name for the connection. 4. In the drop-down menu under Select a modem, tap on your modem type. WARNING If your modem is not listed in the drop-down menu, choose Hayes Com- patible on COM1.
-
Page 118: Advanced Modem Settings
Draft #5 4 - 24 Workabout Pro4 (Windows Embedded Hand-Held 6.5) User Manual 7. Type the User Name, Password and Domain Name as provided by your ISP or network administrator. NOTE Generally, you will not need to change any of the Advanced settings. For information about Advanced Modem Settings, review the next section. -
Page 119: Domain Enroll
Servers requiring assigned IP addresses may also need a way to map computer names to IP addresses. The Workabout Pro4 supports a variety of name resolution options: DNS, Alt DNS, WINS and Alt WINS. Your ISP or network administrator can determine which name resolution you need, and can also provide the server address. -
Page 120: Network Cards
If you uncheck Automatically discover server, a Server field is displayed where you must manually enter the server name. Allow a few minutes for your Workabout Pro4 to sync and enroll in your company domain. You may need to restart your unit after the enrollment process is completed. -
Page 121: Changing Network Card Settings
If necessary, use a network cable to connect the network card to your network. Refer to the documentation shipped with your network card for details. • To activate the connection, launch the desired program (e.g., Internet Explorer). The Workabout Pro4 will connect automatically. Changing Network Card Settings •... -
Page 122: Managing An Existing Connection
In Host name/IP, type the VPN server name or IP address. • Tap on the VPN type radio button next to the type of authentication for your Workabout Pro4: IPSec/L2TP or PPTP. Your network administrator will let you know which option applies to your unit. -
Page 123: Proxy Server Tab
Changing a Connection Setting Name Your Workabout Pro4 has two sets of connection settings: My ISP and My Work Network. If you want to change one or both of these options to something more familiar to you, follow these steps. -
Page 124: Selecting A Network
Draft #5 4 - 30 Workabout Pro4 (Windows Embedded Hand-Held 6.5) User Manual To set up the proxy server connection manually, you’ll need the following information: proxy server name, server type, port, type of Socks protocol used, and the user name and password. -
Page 125: Fusion Wireless Companion - Setting Up The Xwing2 802.11A/B/G/N Radio
ISP. The My Work Network settings are used for private network connections (corporate networks), while My ISP settings are used for Internet network connections. When you use programs such as Internet Explorer, your Workabout Pro4 automatically connects using private network settings under My Work Network or Internet settings under My ISP, depending on specifications. You can determine how your Workabout Pro4 connects. - Page 126 Draft #5 4 - 32 Workabout Pro4 (Windows Embedded Hand-Held 6.5) User Manual Connecting to the Internet To connect to the Internet on a WLAN when using Fusion Wireless Companion, ensure that the network card settings is set to Internet: •...
- Page 127 Draft #5 Settings 4 - 33 Application Description Wireless Diagnostics Provides tools with which to diagnose problems encountered with the wireless connection. Log on/off Displays the Network Login dialog box used to log on to a particular profile or to log off the currently active profile. Fusion Help Displays extensive on-device Help.
- Page 128 Draft #5 4 - 34 Workabout Pro4 (Windows Embedded Hand-Held 6.5) User Manual • In the Authentication drop-down menu, choose None. • Tap Next to display the Encryption dialog box. • Choose an Encryption Type from the drop-down menu. •...
-
Page 129: Resetting The Radio To Default Factory Settings
Draft #5 Settings 4 - 35 Resetting the Radio to Default Factory Settings Resetting your unit, including a clean start, will not return the radio settings to the default values. To reset the radio to factory settings: • Tap on Start>Wireless Companion>Wireless Launch to display the Fusion Launcher screen. •... -
Page 130: Personal Folder
Draft #5 4 - 36 Workabout Pro4 (Windows Embedded Hand-Held 6.5) User Manual Personal Folder • Tap on Start>Settings>Personal icon. App Launch Keys This icon allows you to map a key to an application so that you can then launch the application from a single key-press. - Page 131 Draft #5 Settings 4 - 37 • Press the key you want to use to launch an application. (If an unsupported key is pressed, a message appears on this screen letting you know.) The cursor moves to the App field and a new screen is displayed where you can choose the application to which you want to assign the application key.
-
Page 132: Buttons
Draft #5 4 - 38 Workabout Pro4 (Windows Embedded Hand-Held 6.5) User Manual • If you need to Edit, Remove or Add another App Launch Key, you can do it from this final screen. Other- wise, tap on OK to save your Application Launch Key. -
Page 133: Oneshots
Sliding the bar to the right increases the key repeat rate. OneShots The options in this tab allow you to determine how modifier keys on your Workabout Pro4 behave. For each modifier key – [ALT], [SHIFT], [CTRL], [FN/ORANGE] and [FN/BLUE] – you have the following options in the drop-down menu: Lock, OneShot, and OneShot/Lock. -
Page 134: Macro Keys
“Sincerely yours, Bob” with a single keypress. For all keyboard types, you can program up to 15 macro keys. Some Workabout Pro4 keyboards have macros keys ([M1], [M2] and so on) that are physically present on the keyboard. When you record a macro sequence and assign it to one of these predetermined macro keys, pressing that key (e.g., [M1]) executes the macro and... -
Page 135: Unicode Mapping
Draft #5 Settings 4 - 41 • Tap on OK to save your macro key assignment. Executing a Macro • To execute a macro, press the key to which you’ve assigned the macro. NOTE Keep in mind that if you plan to program additional macros beyond the Macro keys on your keyboard, or if your keyboard is not equipped with dedicated macro keys, you will need to use “Scancode Remapping”... -
Page 136: Scancode Remapping
Draft #5 4 - 42 Workabout Pro4 (Windows Embedded Hand-Held 6.5) User Manual • Tap on the Add/Edit button. • Highlight a value in the Unicode mapping list. • Position the cursor in the Unicode Mapping field, and type a Unicode value for the highlighted key. - Page 137 Draft #5 Settings 4 - 43 If the scancode is remapped to a function or a macro, the first and second columns remain blank while the third column contains the function name or macro key number (e.g., Macro 2). Adding a Remap To add a new remapping: •...
-
Page 138: Lock Sequence Tab
In the Key sequence drop-down menu, choose the key sequence you need to type to unlock the keyboard. • Reset the Workabout Pro4 – press and hold down the [FN/BLUE] key and the Power button. NOTE It is useful to leave the Show popup message enabled (default) so that anyone attempting to use the Workabout Pro4 keyboard will see the key sequence they will need to enter to unlock the keyboard displayed on the screen. -
Page 139: About
This tab allows you to tailor the Workabout Pro4 backlight behaviour to best preserve battery life. • To define how long the backlight should stay on when the Workabout Pro4 is not in use, tap in the check- box to the left of Turn off backlight if device is not used for. -
Page 140: External Power Tab
Keypad backlight This tab allows you to tailor the backlight behaviour of the Workabout Pro4 screen and keypad to best preserve battery life. The top sliding button adjusts the screen brightness while the bottom sliding button adjusts the keypad brightness. -
Page 141: Choosing A Certificate
Choosing a Certificate Normally, certificates already configured for your network are chosen automatically by the Workabout Pro4. If a certificate cannot be chosen automatically, you must choose it from the Certificates list. -
Page 142: Contrast
Drag the sliding button between Light and Dark to achieve the desired screen colour contrast. Customer Feedback This option allows Microsoft to track how you use your Workabout Pro4 so that they can make improvements to the software. The radio buttons in this screen allow you to turn this feature on or off. -
Page 143: Status
Draft #5 Settings 4 - 49 • Tap on Start>Settings>System. Tap on the Dr. Debug icon. Status This tab indicates the status (on/off) of the tools. Tapping on Browse logs displays error logs for your review. Utilities There are a number of utilities available through Dr. Debug. The NetLog utility is used to log network traffic. The RilLog utility captures Radio Interface Layer (RIL) debug outputs. -
Page 144: Encryption
GPS (Global Positioning System) With a Global Positioning System (GPS) receiver, you can locate your exact position on a map. However, even without a GPS receiver, several different mapping programs can run on your Workabout Pro4. • Tap on Start>Settings>System tab>GPS icon. -
Page 145: Manage Triggers
You can go to: http://www.microsoft.com/windowsphone/en-gb/howto/wp7/web/use-maps-to-find-a-place.aspx if a map-viewing program is not included with your Workabout Pro4, and copy the file to your Workabout Pro4. • Tap on the Hardware tab, and set the GPS hardware port to COM2. Set the Baud rate to 4800. -
Page 146: Trigger Mappings
Draft #5 4 - 52 Workabout Pro4 (Windows Embedded Hand-Held 6.5) User Manual • Tap on Start>Settings>System>Manage Triggers icon. Trigger Mappings A trigger mapping is an association between a particular key on the keyboard and a driver or application, the module(s) –... - Page 147 Draft #5 Settings 4 - 53 The OK button in the Manage Triggers screen saves all changes made. If the [ESC] key is pressed, all changes are discarded. Add and Edit Trigger Mapping • Tap on Add to add a new trigger map, or tap on Edit to edit an existing trigger map. Trigger Key This drop-down list allows you to specify the source of the trigger events, such as the Grip Trigger, Left Scan, etc., for the trigger module selected.
-
Page 148: Managed Programs
Draft #5 4 - 54 Workabout Pro4 (Windows Embedded Hand-Held 6.5) User Manual with the Up/down type has also been configured for the same source, it will only receive the first set of trigger events. Module to Trigger This identifies the driver or application receiving the trigger presses. -
Page 149: Storage Card
Draft #5 Settings 4 - 55 Storage Card The Storage Card screen indicates the total storage card or RAM disk memory along with the amount in use. Microphone Use this dialog box to adjust the gain for the specific microphones associated with your hand-held. •... -
Page 150: Partnerup
HomeVU HomeVU allows the administrator to tailor how the Workabout Pro4 operates and the options the user can access. Note that the look of the Today screen will change from icons that are finger accessible to a list of items best accessed using a stylus. -
Page 151: Homevu Menu
The Shell Settings option allows the administrator to tailor what operators see and what is available to them when Workabout Pro4 is powered on. Note that these changes are not visible until the unit switches from Administrator Mode to User Mode. A HomeVU Access screen, the screen in which you can switch from Administrator to User Mode, is displayed automatically once you’ve finished making changes and have tapped... - Page 152 Tap in the checkbox next to each application you want displayed on the Today screen. Once the Workabout Pro4 is set to User Mode, the selected items from the Application screen are listed in the Today screen. A HomeVU Access screen, the screen in which you can switch from Administrator to User Mode, is displayed automatically once you’ve finished making changes and have tapped on OK.
- Page 153 Tap here The View drop-down menu at the top of this screen displays the storage areas in the Workabout Pro4. Tapping on a storage area – Windows for example – displays the applications you can add to the Today screen...
- Page 154 Draft #5 4 - 60 Workabout Pro4 (Windows Embedded Hand-Held 6.5) User Manual Advanced Tab This tab provides a number of options to restrict what is available on start up. Start Button and Notification Restrictions The drop-down menu at the top of the Advanced tab allows you to limit access to the Notifications at the top of the screen and the Start button at the bottom of the screen.
- Page 155 Tap in the View menu at the top of the Select File screen, and choose the storage area from which you want to choose an application. • Next, tap on the application you want the Workabout Pro4 to launch on startup. Your choice is displayed in the Advanced tab.
-
Page 156: Restrictions
Remember that changes do not take effect until the Workabout Pro4 is set to User Mode and the unit is reset. Phone Tab The Phone tab allows you to define the phone buttons accessibility on the Workabout Pro4 keyboard by choosing an item from the Configure the Phone Dialer buttons drop-down menu. NOTE Remember that changes do not take effect until the Workabout Pro4 is set to User Mode and the unit is reset. - Page 157 Tapping in the View menu displays a drop-down menu where you can define restrictions for each storage area of the Workabout Pro4. Restricted items are marked in the checkbox to the left – in the sample screen above, solitaire.exe is restricted.
-
Page 158: Control Panel Settings
This options allows you to tailor items displayed in both the Settings screen and in the Today screen. NOTE Remember that changes do not take effect until the Workabout Pro4 is set to User Mode and the unit is reset. Refer to “Activating a Change –... - Page 159 Draft #5 Settings 4 - 65 IMPORTANT A copy of this file should also be saved in a central repository for all .xml files with a predefined name so that other utilities can locate it. Tapping on the Export button displays an Export Settings screen. The default Name – HomeVU_Settings – can be changed by the administrator even after it has been saved.
-
Page 160: Activating A Change - User Mode
A new screen, the HomeVU Access screen, is displayed. • Tap on Change to User mode. You’ll need to reset the Workabout Pro4 so that the changes you specified can take effect. • Tap on Yes to reset the Workabout Pro4 and activate your changes. -
Page 161: Remove Programs
Tap on the drop-down menu to choose your language and region. Once you’ve selected a language and region, you may need to adjust the way numbers, currency, the time and the date appear in your Workabout Pro4. • Tap on the tab associated with each of the items, and choose how each item should be displayed on your Workabout Pro4. -
Page 162: System Properties
Draft #5 4 - 68 Workabout Pro4 (Windows Embedded Hand-Held 6.5) User Manual This icon allows you to align (calibrate) your touchscreen, turn ClearType on and off and adjust the size of the text displayed on the Workabout Pro4 screen. -
Page 163: Total Recall
Draft #5 Settings 4 - 69 • End Task: To shut down an application, highlight the program in the list, and tap on the End Task softkey in the softkey bar at the bottom of the screen. Task Manager Menu The Task Manager menu provides additional options to help you manage your applications. -
Page 164: Creating A Backup
Draft #5 4 - 70 Workabout Pro4 (Windows Embedded Hand-Held 6.5) User Manual or a clone (the administrator can store different configurations for different uses to clone to other hand-held computers). NOTE Total Recall works differently (e.g. restore on cold boot or on clean boot) on dif- ferent OS platforms and versions (e.g. -
Page 165: Creating A Clone
A Settings Only Clone can be copied to a wider array of devices, but it should not be used as an autorestore profile. • Tap on the Create Clone button to begin the process. Your Workabout Pro4 model type and OS will be identified in the cloning statement to ensure that you target devices of the same type. •... -
Page 166: Managing Profiles
Draft #5 4 - 72 Workabout Pro4 (Windows Embedded Hand-Held 6.5) User Manual Managing Profiles You can view profiles and choose profile options from the menus in this section. Viewing a Profile • Tap on the Manage Profile button to see your list of profiles. Highlight a profile, and then you can choose to View the Profile Summary and go on to the next menu, Profile Details. - Page 167 Draft #5 Settings 4 - 73 • Next, tap on the option button you want to use: • Restore Now – restores the profile immediately. If you are restoring a profile that is a backup or Full Clone, the computer will clean reset first; if the profile is a Settings Only Clone, it will not. •...
-
Page 168: Deleting A Profile
Draft #5 4 - 74 Workabout Pro4 (Windows Embedded Hand-Held 6.5) User Manual USB drive prepared for cloning Autorun installation on next Workabout Pro Deleting a Profile • In the Total Recall home screen, tap on Delete Profile. • Highlight the backup you want to delete, and tap on the [-->](Next) button. -
Page 169: Advanced Ce Services Settings
Draft #5 Settings 4 - 75 This utility allows you to ‘tweak’ or adjust system settings such as the interface, network and servers. Advanced CE Services Settings FTP Server This option is enabled by default to allow file transfers. Keep in mind that data transfer in either direction is restricted to the Temp folder –... -
Page 170: Advanced Interface And Network Settings
SNTP (Simple Network Time Protocol) Server The SNTP Server Name typed in this dialog box is used to synchronize Workabout Pro4 time with that of the time server. A warm reset must be performed once the server name has been entered. - Page 171 Draft #5 Settings 4 - 77...
- Page 172 Draft #5 4 - 78 Workabout Pro4 (Windows Embedded Hand-Held 6.5) User Manual...
- Page 173 Draft #5 Settings 4 - 79...
- Page 174 Draft #5 4 - 80 Workabout Pro4 (Windows Embedded Hand-Held 6.5) User Manual...
- Page 175 Draft #5 Settings 4 - 81...
- Page 176 Draft #5 4 - 82 Workabout Pro4 (Windows Embedded Hand-Held 6.5) User Manual...
-
Page 177: Chapter 5: Peripheral Devices & Accessories Carrying Accessories
Linking a Workabout Pro4 to a PC ........ - Page 178 Draft #5...
-
Page 179: Carrying Accessories
Keep in mind when ordering a charger or docking station, you must also order the appropriate power cord separately. Motorola offers a variety of chargers and docking stations for the Workabout Pro4. These include: • AC Adaptor – Model No. PSA15R-050P •... -
Page 180: Power Consumption Considerations
Do not use the charger if any of the batteries or the charger get more than lukewarm. The equipment should be inspected by qualified personnel. Desktop Docking Station The Workabout Pro4 can be inserted in a desktop docking station, model number WA4003-G2. - Page 181 Draft #5 Peripheral Devices & Accessories 5 - 5 Desktop Docking Station Figure 5-1 Workabout Pro44 Release Button Charge Well Connector Pins (Indicates charge status of a spare battery inserted in the rear charge well of the docking station.) NOTE The desktop docking charger is shipped with its own user manual.
-
Page 182: Charging A Battery Installed In The Workabout Pro4
– The LED on the Workabout Pro4 lights up indicating that the unit has external power and battery charging will begin. It is safe to leave the unit in the desktop docking station while it is not in use – the battery will not be overcharged. -
Page 183: Linking A Workabout Pro4 To A Pc
AC power supply, snapping it into place. These two pieces, coupled together, are referred to as an AC wall adaptor. • Insert the DC power plug into the DC IN socket at the base of Workabout Pro4, located between the tether and LIF ports. •... -
Page 184: Bluetooth Peripherals
5 - 8 Workabout Pro4 (Windows Embedded Hand-Held 6.5) User Manual Bluetooth Peripherals The Workabout Pro4 is equipped with a Bluetooth radio, making it is possible to communicate with a variety of Bluetooth peripherals, including GSM/GPRS handsets, scanners, printers, and so on. - Page 185 Draft #5 APPENDIX A PORT PINOUTS APort Pinouts LIF (Low Insertion Force) Pinout ........A-3 Tether Port Pinout .
- Page 186 Draft #5...
-
Page 187: Lif (Low Insertion Force) Pinout
USB Host Power, for powering USB devices (5V, 100mA Max) DC Power in, for supplying power to Workabout Pro4/ charging battery (5V, 3A) DC Power in, for supplying power to Workabout Pro4 / charging battery (5V, 3A) LIF Detect, determines if a device is attached to the LIF... -
Page 188: Battery Contact Pinout - Wa3010
Draft #5 A - 4 Workabout Pro4 (Windows Embedded Hand-Held 6.5) User Manual PIN # Signal Name Ground Ground Battery Contact Pinout – WA3010 PIN # Signal Name Function Power Pin for Battery Pack Negative Maxim DS2762 Data TH (GND) -
Page 189: Specifications
BWorkabout Pro4 Specifications The Workabout Pro4 Hand-Held Computer ......B-3 Hardware ..........B-3 Regulatory Approvals . - Page 190 Draft #5...
-
Page 191: Appendix B: Workabout Pro4 Specifications
Draft #5 Workabout Pro4 Specifications B - 3 The Workabout Pro4 Hand-Held Computer NOTE Performance specifications are nominal and subject to change without notice. Hardware Dimensions and Weight 7528 Long • 223 mm x 75/100 mm x 31/42 mm (8.78 x 2.95/3.94 x 1.22 x 1.65 inches) •... - Page 192 Draft #5 B - 4 Workabout Pro4 (Windows Embedded Hand-Held 6.5) User Manual • CE Mark • RoHS compliant • WEEE compliant • REACH compliant...
-
Page 193: Battery Specifications
Draft #5 Workabout Pro4 Specifications B - 5 Battery Specifications High Capacity Lithium-ion Battery – 4400 mAh Electrical Specifications NOTE The electrical specifications apply for ambient temperature TAMB of 0° to +40°C unless otherwise stated. Item Description Specifications Remark Interface Chipset... - Page 194 Draft #5 B - 6 Workabout Pro4 (Windows Embedded Hand-Held 6.5) User Manual Safety Data Description Condition Test Condition/Result Short Circuit Test After a standard charge, short terminals Protection circuit board to operate. and discharge for 1 hr. No explosion, fire, smoke, or leakage.
- Page 195 Draft #5 Workabout Pro4 Specifications B - 7 Description Test References Test Condition/Result Vibration resistance BS2011 Part 2.1 After standard charge, tested under the fol- lowing conditions: Random vibration FDC (IEC68-2-37) 5Hz-500Hz ASD 0.02g2/Hz in 3 axis for 15 mins. After which, carry out a standard dis- charge, charge, discharge.
- Page 196 Draft #5...
-
Page 197: Appendix C Wireless Zero Config Settings
Draft #5 APPENDIX C WIRELESS ZERO CONFIG SETTINGS CWireless Zero Config Settings Wireless Zero Config ......... . C-3 Configuring the Unit Using Wireless Zero Config . - Page 198 Draft #5...
- Page 199 Draft #5 Wireless Zero Config Settings C - 3 Wireless Zero Config This appendix describes how to set up your radio using Windows Wireless Zero Configuration – an alternative to the Fusion Wireless Companion. NOTE For details about using Fusion Wireless Companion, refer to “Fusion Wireless Companion - Set- ting Up the XWing2 802.11a/b/g/n Radio”...
-
Page 200: Configuring The Unit Using Wireless Zero Config
Draft #5 C - 4 Workabout Pro4 (Windows Embedded Hand-Held 6.5) User Manual Configuring the Unit Using Wireless Zero Config • In the Wi-Fi screen, tap on Add New..• Type the appropriate SSID (Service Set Identifier) in the Network name: dialog box. The Network name field can contain a maximum of 32 characters. - Page 201 Draft #5 Wireless Zero Config Settings C - 5 • Key Index: This field becomes available if you deselect The key is automatically provided. This field is used to identify the WEP key. • Tap on Next to display the screen in which you can choose the EAP (Extensible Authentication Proto- col) type.
- Page 202 Draft #5 C - 6 Workabout Pro4 (Windows Embedded Hand-Held 6.5) User Manual...
-
Page 203: Index
Draft #5 INDEX Index Numerics Restore ........4-73 restoring . - Page 204 Draft #5 Index - II Workabout Pro4 (Windows Embedded Hand-Held 6.5) User Manual Boot to BooSt typing ........1-6 .
- Page 205 Draft #5 Index - III headset, adjusting volume shift-state indicator icon ......4-55 ..... . . 2-23 headsets, pairing ( SPACE Bluetooth...
- Page 206 Draft #5 Index - IV Workabout Pro4 (Windows Embedded Hand-Held 6.5) User Manual Battery (capacity) tab ......4-9 Battery Details tab .
- Page 207 Draft #5 Index - V Set for AutoRestore ......4-73 Settings .
- Page 208 Draft #5 Index - VI Workabout Pro4 (Windows Embedded Hand-Held 6.5) User Manual Voice phone communication ......1-6 VPN connection, setting up .
- Page 209 Draft #5...
- Page 210 Draft #5 Motorola Solutions, Inc. 1301 E. Algonquin Rd. Schaumburg, IL 60196-1078, U.S.A. http://www.motorolasolutions.com MOTOROLA, MOTO, MOTOROLA SOLUTIONS and the Stylized M Logo are trademarks or registered trademarks of Motorola Trademark Holdings, LLC and are used under license. All other trademarks are the property of their respective owners. ©...
Need help?
Do you have a question about the PRO4 and is the answer not in the manual?
Questions and answers