Table of Contents
Advertisement
GETTING
CONNECTED
Installation instructions for your
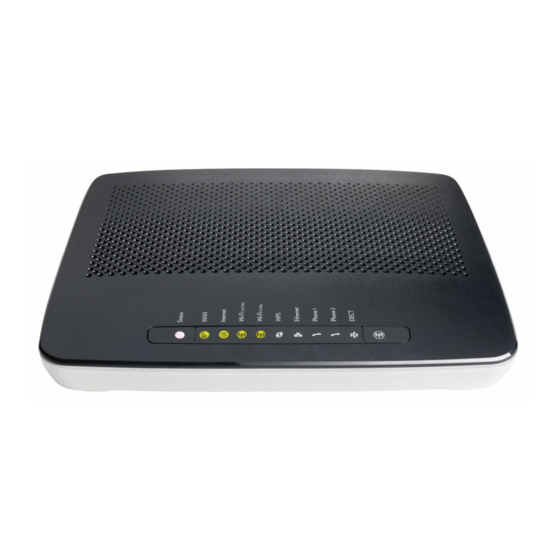
Home Network Gateway (HNG) TG799
This guide is designed to help you get started with your new HNG.
It relates to services being delivered over NBN FTTB and FTTN
connections. Please make sure you keep it in a safe place, as you
may find you need to refer to it again at a later date.
Advertisement
Table of Contents

Related Manuals for Technicolor TG799


Summary of Contents for Technicolor TG799
-
Page 1: Getting Connected
GETTING CONNECTED Installation instructions for your Home Network Gateway (HNG) TG799 This guide is designed to help you get started with your new HNG. It relates to services being delivered over NBN FTTB and FTTN connections. Please make sure you keep it in a safe place, as you... - Page 2 IMPORTANT: READ BEFORE YOU START For your new HNG to operate successfully with your existing ADSL broadband service until you change over to the NBN, you will need to re-establish your current ADSL broadband service on the HNG using your existing user ID and password details. If you need assistance, please contact your service provider.
- Page 3 CONTENTS 01. Home Network Gateway (HNG) 02. WAN Ethernet cable (white with red ends) 03. LAN Ethernet cable (white with yellow ends) 04. Telephone cables (grey) x 3 05. Power supply adaptor and cable 06. Wi-Fi Information label (sample)
- Page 4 LIGHTS ON THE HNG Light Definition Function Notes Off – No power Status Status Indicator Green Solid – Normal operation (Status has no other button Green Flashing – Device starting up functionality) Red – No internet connection Off – No network connection Wide Area Network Green Solid –...
- Page 5 BUTTONS ON THE HNG Button Definition Function Reset Reset Button When pressed for more than seven seconds it will reset the HNG to its factory settings. Any configuration changes you have made previously will be lost. Power Switch To turn the HNG on or off WPS –...
- Page 6 SOCKETS ON THE HNG PSTN Ports Before cutover to an NBN Power service, your phone line can Connect your data devices be connected here to enable (PC, laptop, smart TV) to these Connect the Power DECT and the phone ports. Ethernet ports.
- Page 7 STEP-BY-STEP GUIDE TO INSTALLING THE HNG Follow the connection configuration instructions given on the following pages. The configuration will vary according to the type of NBN connection and the existing services you have. Your service provider can provide more information if you are unsure. Plug the Power Supply Adaptor cable into the HNG power inlet on the back of the device.
- Page 8 HNG CONNECTION CONFIGURATIONS The following section includes connection configurations for your new HNG. If you are not sure which of these configurations apply to you, contact your service provider for assistance. I am: Refer to: Connecting a new NBN broadband and home phone service Page 8 (I didn’t previously have a broadband or home phone service at this address) * Changing my existing home phone and ADSL broadband service to an NBN broadband and home phone service...
- Page 9 FIGURE 1 – PHONE AND BROADBAND SERVICES (FTTB OR FTTN) This configuration is for new home phone and broadband services delivered over an NBN FTTB or FTTN connection when there are no existing working ADSL broadband or home phone services in the premises. 1.
- Page 10 FIGURE 2 – NBN READY FOR TRANSITION: PHONE AND BROADBAND SERVICES (FTTB OR FTTN) The NBN-ready configuration (for existing working ADSL broadband and home phone services before the changeover to the NBN) is relevant only if you have an existing working ADSL broadband and home phone service and you want it to work with your new HNG device before you change over to the NBN.
- Page 11 OTHER SCENARIOS...
- Page 12 FIGURE 3 – NBN READY FOR TRANSITION TO BROADBAND SERVICE ONLY (FTTB OR FTTN) This configuration applies if you have an existing working ADSL broadband service and you want it to work with your new HNG device before the changeover to the NBN. 1.
- Page 13 FIGURE 4 – NBN READY FOR TRANSITION TO PHONE SERVICE ONLY (FTTB OR FTTN) This configuration applies if you have an existing working home phone service and you want it to work with your new HNG device before the changeover to the NBN. 1.
- Page 14 FIGURE 5 – BROADBAND SERVICE ONLY (FTTB OR FTTN) This configuration is for new broadband services delivered over an NBN FTTB or FTTN connection when there are no existing working services in the premises. 1. Connect your HNG as shown in the figure below. Then follow the instructions under ’Step-by-Step Guide to Installing the HNG’...
- Page 15 FIGURE 6 – PHONE SERVICE ONLY (FTTB OR FTTN) This configuration is for new phone services delivered over an NBN FTTB or FTTN connection when there are no existing working services in the premises. 1. Connect your HNG as shown in the figure below. Then follow the instructions under ‘Step-by-Step Guide to Installing the HNG’...
-
Page 16: Advanced Features
ADVANCED FEATURES HNG Graphical User Interface The user interface of your HNG supports a number of advanced features, including media sharing, firewall/parental control, USB device support, DECT cordless base station, and Wi-Fi wireless network settings for 2.4G and 5G wireless local area networks. To access the user interface, enter //10.0.0.138/ or //mygateway/ in your internet browser’s address window.
Need help?
Do you have a question about the TG799 and is the answer not in the manual?
Questions and answers