
Related Manuals for EUFY RoboVac 11


Summary of Contents for EUFY RoboVac 11
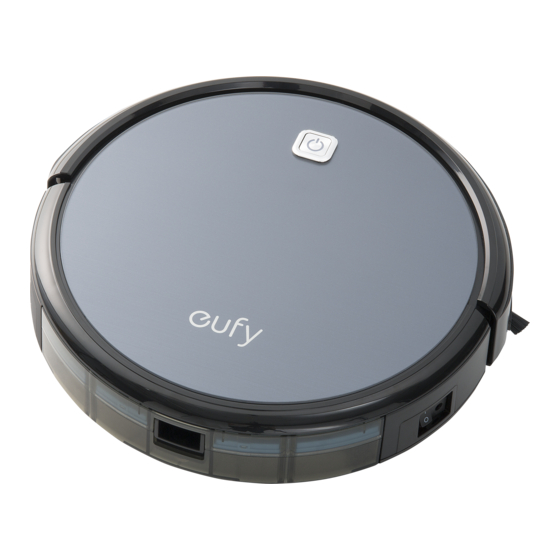
- Page 1 Cleaning For FAQs and more information, please visit: www.eufylife.com Owner’s Manual RoboVac 11 取扱 説明 書 SM-A441-V02...
-
Page 2: Table Of Contents
English English Table of Contents Important Safety Instructions About Your RoboVac What's In the Box RoboVac Anatomy 08 Using Your RoboVac Before You Start Install the Charging Base Charge Your RoboVac Start/Stop Cleaning Cleaning Modes Time Setting English Scheduled Cleaning Cleaning and Maintenance Clean the Dust Collector and Filter 日本語... -
Page 3: Important Safety Instructions
English English Important Safety Instructions To reduce the risk of injury or damage, keep these safety • The external flexible cable or cord of the power supply unit instructions in mind when setting up, using and maintaining this cannot be replaced; if the cord is damaged, the power supply unit shall be disposed of. -
Page 4: About Your Robovac
• Drop sensors are used to prevent the device from tumbling RoboVac 11 Charging Base Remote Control down stairs and steep drops. They may work less effectively when they are dirty, or on reflective or dark colored floors. -
Page 5: Robovac Anatomy
English English RoboVac Anatomy Dust Collector Top & Side Filter door Filter cover Foam filter AUTO button Bumper HEPA-style filter Filter door release button Charging Base O F F Power switch (On / O ) Status light Charging socket Dust collector Charging contact pins Power socket Dust collector release button... -
Page 6: Using Your Robovac
English English Using Your RoboVac 2. Remove objects within 1 m of the left and right side and within 2 m of the front. Before You Start 1. Take RoboVac and the Charging Base out and remove the protective film. 3. -
Page 7: Start/Stop Cleaning
English English Start/Stop Cleaning Method 2: Press on the remote control to return RoboVac to the Charging Base. 1. Turn the main power supply on Press the power switch on the side of RoboVac to turn on the main power supply. Method 3: Charge RoboVac directly by plugging the round connector of the adapter into 2. -
Page 8: Time Setting
English English 5. Single Room cleaning - RoboVac will return to the Charging Base automatically when the power level RoboVac intensively cleans one single room and stops when cleaning is complete. Select becomes low. this mode when only one specific room needs to be cleaned. Make sure to confine RoboVac - Whenever you turn RoboVac on, it will start Auto cleaning. -
Page 9: Scheduled Cleaning
English English Separate the filter cover by pulling the hooks as shown. - Make sure you point the remote control directly at RoboVac and RoboVac is on. - You must set the time before setting scheduled cleaning. Scheduled Cleaning You can schedule RoboVac to start cleaning at a particular time. To cancel scheduled cleaning, long press for 3 seconds until RoboVac beeps twice and disappears. -
Page 10: Clean The Rolling Brush
English English Clean the Rolling Brush Clean the Side Brushes Lift the brush guard up by pushing the fixing hooks as shown. Foreign substances such as hair can easily get tangled in the side brushes and dirt may adhere to them. -
Page 11: Troubleshooting
English English Troubleshooting Red indicator steady on Error Tone Cause Solution Turn off RoboVac and remove any hair or One beep RoboVac’s wheel is stuck. Problem Solutions debris from the wheel. Turn off RoboVac and remove any hair or • Check whether the power switch is in the ON position. Two beeps RoboVac’s side brush is stuck. -
Page 12: Customer Service
English FCC Statement This device complies with Part 15 of the FCC Rules. Operation is subject to the following two conditions: (1) This device may not cause harmful interference, and (2) this device must accept any interference received, including interference that may cause undesired operation. - Page 13 日本語 目次 22 安全上のご注意 RoboVac について パッケージ内容 RoboVacの各部分の名称 RoboVacの使用方法 お使いになる前に 充電ステーションの設置方法 RoboVac本体の充電方法 掃除の開始/停止 掃除モード 時間設定 掃除予約 33 本体清掃とメンテナンス ダスト容器とフィルターの清掃方法 回転ブラシの清掃方法 センサーと充電端子の清掃方法 サイドブラシの清掃方法 サイドブラシの交換 37 ト ラブルシ ューテ ィ ング 38 製品の仕様 39 カスタマーサービス...
- Page 14 日本語 日本語 安全上のご注意 人への危害や物的損害のリスクを防ぐために、製品を設定、 • 本製品を使用する前に、衣類や散らかった紙類に加え、見えない場所にあるコード 使用、メンテナンスする際は以下の安全に関する説明をよく やカーテンおよび電源コード、その他壊れやすいものは片付けてください。本製品 が電源コードの上を通過したり、電源コードを引きずると、テーブルや棚の上から お読みください。 物が落下するおそれがあります。 • もしバルコニーを含む部屋を掃除したい場合、バルコニーへのアクセスを防ぐため 警告表示について に障害物を必ず設置してください。 これは警告シンボルです。利用者が死亡もしくは重傷を負う、または • 本製品の上には何も物を置かないでください。 物的損害が生じる危険性がある場合に警告します。 • 本製品が自動で移動します。本製品を踏みつけてしまうことを防ぐため、本製品が 稼働している場所を歩く際は、十分注意してください。 • 本製品は身体的または精神的に未成熟な方、経験や知識が十分でない方(子供を含む) のご利用を意図していません。安全に関して責任を持つことのできる方が監視また • 電源コンセントが床に露出している部屋で、本製品を使用しないでください。 は指示できない場合は使用しないでください。 • 本製品、内蔵バッテリーおよび充電ステーションの電子部分を外部に露出しないで • 子供が本製品で遊ぶことがないように必ず監視をしてください。 ください。お客様ご自身で操作できる部分はありません。 • 十分に注意を払える環境でない場合、本製品を使用しないでください。. • ワックスがけされた床や凹凸の激しい床の上では、本製品を使用しないでくださ い。床や製品自体が損傷するおそれがあります。 表面が硬い床もしくは毛並みが深 • 本製品を充電する際は、付属のACアダプタをご使用ください。 くないカーペット上でのみご使用ください。...
- Page 15 日本語 日本語 RoboVac について RoboVacの各部分の名称 パッケージ内容 上面と側面 バンパー オートボタン RoboVac 11 充電ステーション リモコン O F F 電源スイッチ (オン / オフ) 充電ソケット ダスト容器 ダスト容器取り外しボタン サイドブラシ (×4) 裏面 ACアダプタ 清掃ブラシ (交換用の2個を含む) 充電端子 落下防止センサー 回転ホイール バッテリーカバー サイドブラシ ブラシガード 車輪 HEPA式フィルター 交換用フォームフィルター 取扱説明書 回転ブラシ...
- Page 16 日本語 日本語 RoboVacの使用方法 ダスト容器 お使いになる前に フィルタードア フィルターカバー 1. RoboVacと充電ステーションを取り出し、保護フィルムを外します。 フォームフィルター HEPA式フィルター フィルタードア取り外しボタン 充電ステーション 2. RoboVacをひっくり返して、サイドブラシをしっかりと取り付けてください。 ステータスライト 充電端子 充電ソケット リモコン RoboVacを充電ステーションに戻す 自動モードの開始 掃除のスタート/ストップ 手動で向きを調節 充電ステーションの設置方法 掃除の予約をする 現在時刻の設定 1. 平らな表面の壁と床に充電ステーションを設置します。 スポッ トモードの開始 エッジモードの開始 マックスパワーモードの開始 シングルルームモードの開始 リモコンをお使いになる際は、単4電池を2本取り付けてください。...
- Page 17 日本語 日本語 2. 左右1m以内、前方2m以内の範囲から障害物を取り除きます。 方法2: リモコンの ボタンを押して、RoboVacを充電ステーションに戻してくだ さい。 3. ACアダプタの丸型コネクタを充電ステーションの電源ポートに接続し、反対側を コンセントに接続します。 方法3: RoboVacの電源ポートにACアダプタの丸型コネクタを接続し、反対側をコン セントへ接続して、RoboVac本体を直接充電してください。 - 充電ステーションは、RoboVac がアクセスしやすい場所に設置 してください。 - 充電ステーションは常に電源と 接続してください。接続してい ない場合、RoboVacは自動で充 電ステーションに戻りません。 RoboVac本体の充電方法 RoboVacの表示 赤色に点滅 バッテリー残量少 RoboVacは、バッテリーを内蔵しています。初めてご使用する際は、満充電してか らご使用ください。 青色に点滅 充電中 掃除が終了、またはバッテリー残量が少なくなった時、RoboVacは自動で充電ステ 青色に点灯 充電完了 / 掃除中 / 充電ステーションへ戻る ーションに戻ります。 赤色に点滅 / 点灯 エラー...
- Page 18 日本語 日本語 掃除の開始/停止 - バッテリー残量が少なくなると、RoboVacは自動で充電ステーション に戻ります。 1. 主電源をオンにする - RoboVacの電源をオンにした時、自動掃除で開始します。 RoboVac本体の裏面にある電源スイッチを押し、主電源をオンにします。 2. スポットモード RoboVacは特定の場所を円を描くように集中的に掃除します。ごみやほこりなどが 集中している場所を掃除したい場合に最適です。 リモコンの ボタンを押すと、スポットモードで掃除を開始します。 2. 掃除を開始する ボタン、もしくはリモコンの ボタンを押し、自動モードで掃 RoboVac本体の 除を開始します。 3. エッジモード RoboVacは壁を自動検知すると、壁周辺を確実に掃除するために速度を落としま 3. 掃除を停止する す。 ボタン、もしくはリモコンの ボタンを押すと、掃除を停止し RoboVac本体の リモコンの ボタンを押すと、エッジモードで掃除を開始します。 ます。 掃除モード 1. 自動モード RoboVacは部屋の大きさを自動で検出し、掃除が終わるまで異なるモードを自動で 選びながら移動経路を最適化します。 ボタン、もしくはリモコンの ボタンを押すと、自動モード RoboVac本体の で掃除を開始します。 4. マックスパワーモード RoboVacは吸引力を最大にして、自動モードにて掃除を行います。カーペットを掃 除する際に最適なモードです。...
- Page 19 日本語 日本語 5. シングルルームモード - リモコンを使う場合は必ずRoboVacの方向に直接向けて操作し、 RoboVacの電源がオンになっていることを必ず確認してください。 RoboVacはひとつの部屋を集中的に掃除し、掃除が完了すると停止します。1つの部 屋だけを掃除する必要があるときにこのモードを選択してください。ドアを閉めて - 掃除予約をする前に必ず時間を設定してください。 おくことにより、RoboVacは他の部屋へ出て行かずに掃除を行います。 リモコンの ボタンを押すと、シングルルームモードで掃除を開始します。 掃除予約 好きな時間を設定し、RoboVacが自動で掃除を開始するように予約できます。掃除予約 をキャンセルするためにはRoboVacから2度音が鳴り、 の表示が消えるまで ボタ ンを3秒以上長押ししてください。 リモコンの ボタンを押すと、 がディスプレイに表示されます。 ボタンを押して、時間と分を設定します。 ボタンまたは ボタン を押すと設定が保存され、時間が設定されたことを 知らせる音が RoboVacから一度鳴ります。 6. マニュアルモード リモコンにある方向ボタンを操作することで、特定の位置を掃除するようRoboVac をコントロールすることができます。 リモコンを使う場合は必ずRoboVacの方向に直接向けて操作し、RoboVac の電源がオンになっていることを必ず確認してください。 前方 左 本体清掃とメンテナンス 右 後方 時間設定 RoboVac本体のメンテナンスをする際は、事前にRoboVacの側面にあ る主電源を必ずオフにしてください。...
- Page 20 日本語 日本語 回転ブラシの清掃方法 下図のようにフックを引っ張り、フィルターカバーを外します。 画像のように、固定用フックを引き、ブラシガードを持ち上げます。 回転ブラシを取り出します。 清掃ブラシまたは掃除機を使用して、回転ブラシを清掃します。 突き出した部分を先にはめ込み、全体がきちっと収まるように回転ブラシを再 度取り付けます。 ブラシガードをしっかりとはまるまで押し下げ、閉じます。 フィルタードア取り外しボタンを押し、フィルタードアを開け、フィルターを 取り出します。 ダスト容器とフィルターを掃除機または清掃ブラシを使ってきれいにします。 ダスト容器の中にフィルターとフィルターカバーを戻し、閉じます。 センサーと充電端子の清掃方法 各機能の最適なパフォーマンスを維持するために、定期的に落下防止センサーと充 電端子の清掃を行ってください。 布か清掃ブラシを使って落下防止センサーと充電端子のほこりを落とします。 ダスト容器をRoboVac本体部分に取り付けます。 - ご使用後にはダスト容器を空にしてきれいにしてください。 - ダスト容器、フィルターカバー、フォームフィルターは水洗いができ ます。組み立て直す前に十分に空気乾燥させてください。 HEPA式フィ ルターは水洗いできません。万が一水につけてしまった場合、フィル ターが破損し、吸引力が弱くなる恐れがあります。...
- Page 21 日本語 日本語 トラブルシューティング サイドブラシの清掃方法 髪の毛のような異物がサイドブラシに付着するので、定期的に清掃を行ってください。 問題 解決策 RoboVac本体とサイドブラシの間にある髪の毛や異物を注意深く取り除いてくだ さい。 • 電源スイッチがオンになっているか確認してください。 温かい水で湿らせた布を使用し、汚れを取り除き、丁寧に形を戻します。 • バッテリーが充電されているか確認してください。 RoboVacが動か • リモコンの電池を交換してください(単4電池x2本)。 ない • リモコンが操作範囲内にあるか確認してください(3m以 内)。 • RoboVacが障害物に引っかかっていないか、または絡まっ ていないか確認してください。 RoboVacが急に止 まる • バッテリー残量が少なくなっていないか確認してくださ い。 予約した時間に • 掃除予約がきちんと設定されているか確認してください。 RoboVacが掃除を開 • RoboVacが十分に充電されているか確認してください。 完全に乾いた状態のサイドブラシのみ使用してください。 始しない • 吸入口に異物が詰まっていないか確認してください。 吸引力が弱くなる •...
- Page 22 日本語 日本語 カスタマーサービス 赤色のランプが点滅している状態 エラー音 原因 解決策 18ヶ月保証 1回の警 RoboVacが掃除中に段差に差し RoboVacの電源をオフにし、 新しい位置で再 告音 迫ったり、 障害物に絡まっている 度スタートしてください。 テクニカルサポート 2回の警 RoboVacのバンパーが詰まっ RoboVacのバンパーを何回か軽くたたき、 底 support@eufylife.com 告音 ている にたまっているホコリをおとしてください。 3回の警 RoboVacの落下防止センサーが 乾いた布で落下防止センサーを清掃してく 03-4455-7823 | Mon-Fri 9:00-17:00 (日本) 告音 汚れている ださい。 4回の警 手動でRoboVacを少なく とも5時間充電して バッテリー残量が少ない 告音...
Need help?
Do you have a question about the RoboVac 11 and is the answer not in the manual?
Questions and answers