Table of Contents
Advertisement
Advertisement
Table of Contents

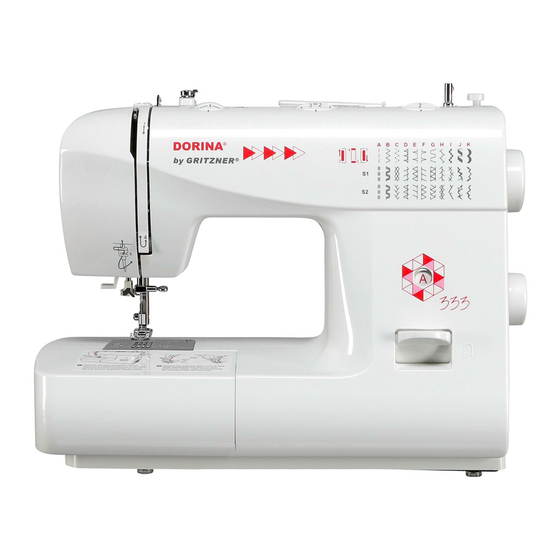
Summary of Contents for Dorina 333
- Page 1 INSTRUCTION MANUAL...
-
Page 3: Important Safety Instructions
IMPORTANT SAFETY INSTRUCTIONS When using an electrical appliance, basic safety should always be followed, including the following: Read all instructions before using this sewing machine. DANGER - To reduce the risk of electric shock: 1. An appliance should never be left unattended when plugged in. 2. - Page 4 10. Always unplug the machine if you leave it unattended, to avoid injury by expediently switch on the machine. 11. Always unplug the machine if you changing the lamp or carry out maintenance (oiling, cleaning). 12. Don't use the machine if it's wet or in humid environment. 13.
- Page 5 Congratulations! As the owner of a new sewing machine, you will enjoy precision quality stitching on all types of fabrics, from multiple layers of denim to delicate silks. Your sewing machine offers the ultimate in simplicity and ease of operation. For your safety and to fully enjoy the many advantages and ease of operation of your sewing machine, we recommend that you read all the important safeguards and use and care instructions in this instruction book.
-
Page 6: Table Of Contents
List of contents Details of the machine ..............7/8 Overlock stitches ...............27 Accessories .................9 Sewing on buttons ..............28 Fitting the snap-in sewing table ..........10 How to sew buttonholes ............29 Connecting machine to power source........11 Zippers and piping ..............30 Two-step presser foot lifter ............12 Sewing with hemmer foot ............31 Adjust presser foot pressure (optional) -
Page 7: Details Of The Machine
Details of the machine 1. Thread tension dial 2. Presser foot pressure (optional) 3. Thread take-up lever 4. Thread cutter 5. Presser foot 6. Needle plate 7. Sewing table and accessory box 8. Bobbin winder spindle 9. Bobbin winder stopper 10. -
Page 8: Details Of The Machine
Details of the machine 15. Horizontal spool pin 16. Hole for second spool pin 17. Handwheel 18. Pattern selector dial 19. Power switch 20. Main plug socket 21. Bobbin thread guide 22. Upper thread guide 23. Handle 24. Presser foot lifter 25. -
Page 9: Accessories
Accessories Standard accessories Standard accessories a. All purpose foot b. Zipper foot c. Buttonhole foot d. Button sewing foot 006806008 006905008 006909008 006VG50012 L-screwdriver Seam ripper/ brush Oil bottle Pack of needle Edge/quilting guide Bobbin (3x) Darning plate I Spool holder (large&small) m. -
Page 10: Fitting The Snap-In Sewing Table
Fitting the snap-in sewing table Keep the snap-in sewing table horizontal, and push it in the direction of the arrow. (1) The inside of the snap-in sewing table can be utilized as an accessory box. To open, flip cover down as shown. -
Page 11: Connecting Machine To Power Source
Connecting machine to power source Connect the machine to a power source as illustrated. (1) For appliance is equipped with a polarized plug which must be used with the appropriate polarized outlet. (2) Attention: Unplug power cord when machine is not in use. Foot control Foot control regulates the sewing speed. -
Page 12: Two-Step Presser Foot Lifter
Two-step presser foot lifter When sewing several layers or thick fabrics, the presser foot can be raised a second stage for easy positioning of the work. (A) Adjust presser foot pressure (optional) The presser foot pressure of the machine has be n pre-set and Tighten presser requires no particular readjustment according to the type of adjusting screw... -
Page 13: Attaching The Presser Foot Holder
Attaching the presser foot holder Raise the presser foot bar (a). (1) Attach the presser foot holder (b) as illustrated. Attaching the presser foot Lower the presser foot holder until the cut-out (c) is directly above the pin (d). (2) Raise the lever (e). -
Page 14: Winding The Bobbin
Winding the bobbin - Place thread and spool holder onto spool pin. (1) - For smaller spools of thread place spool holder with small side next to spool. (2) - Wind thread clockwise around bobbin winder tension discs. (3) - Thread bobbin as illustrated and place on spindle. (4) - Push bobbin to right. -
Page 15: Inserting The Bobbin
Inserting the bobbin When inserting or removing the bobbin, the needle must be fully raised. 1. Open the hinged cover. 2. Hold the bobbin case with one hand. Insert the bobbin so that the thread runs in a clockwise direction (arrow). 3. -
Page 16: Inserting The Needle
Inserting the needle Change the needle regularly, especially if it is showing signs of wear and causing problems. Insert the needle following the illustrated instructions. A. Loosen the needle clamp screw and tighten again after inserting the new needle. (1) B. -
Page 17: Threading The Upper Thread
Threading the upper thread This is a simple operation but it is important to carry out correctly as by not doing so several sewing problems could result. - Start by raising the needle to its highest point (1), and also raise the presser foot to release the tension discs. -
Page 18: Automatic Needle Threader (Optional)
Automatic needle threader (optional) * The automatic needle threader is a factory installed option. If your machine has this option use the following instructions: - Raise the needle to its highest position. - Press lever (A) right down. - The threader automatically swings to the threading position (B). - Take the thread round the hook (C). -
Page 19: Thread Tension
Thread tension Upper thread tension (1) Basic thread tension setting: "4" To increase the tension, turn the dial to the next number up. To reduce the tension, turn the dial to the next number down. A. Normal thread tension B. Upper thread tension too loose C. -
Page 20: Bringing Up The Lower Thread
Bringing up the lower thread Hold the upper thread with the left hand. Turn the handwheel forwards until the needle is raised. (1) Pull on the upper thread to bring the lower thread up through the stitch plate hole. Lay both threads to the back under the presser foot. (2) -
Page 21: Reverse Sewing/ Remove The Work/ Cutting The Thread
Reverse sewing At the end of seam, press down the reverse sewing lever. Sew a few reverse stitches. Release the lever and the machine will sew forwards again. (1/A) Removing the work Turn the handwheel towards to bring the thread take up lever to its highest position, raise the presser foot and remove work towards the back. -
Page 22: Matching Needle/ Fabric/ Thread
Matching needle/ fabric/ thread NEEDLE, FABRIC, THREAD SELECTION GUIDE NEEDLE SIZE FABRICS THREAD 9-11(65-75) Light-duty thread in cotton, nylon or Lightweight fabrics-thin cottons, voile, serge, silk, muslin, Qiana, interlocks, polyester. cotton knits, tricot, jerseys, crepes, woven polyester, shirt & blouse fabrics. 12(80) Most threads sold are medium size and Medium weight fabrics-cotton, satin, kettleclote, sailcloth, double knits,... -
Page 23: How To Choose Your Pattern
How to choose your pattern straight stitch , select pattern " " or " " with the pattern selector dial. Adjust the stitch length with the stitch length dial. You may choose any needle position, by turning the stitch width dial (for 3-dial model). -
Page 24: Straight Stitching
Straight stitching Turn the stitch selection dial so that the pointer is set to the straight stitch position. Generally speaking, the thicker the fabric, thread and needle, the longer the stitch should be. Straight stitches Stitch width dial Stitch length dial a. -
Page 25: Zigzag Stitching
Zigzag stitching Turn the stitch selection dial to " " or " ". For 2-dial model Function of zigzag dial The maximum zigzag stitch width for zigzag stitching is "5", however, the width can be reduced on any patterns. The width increases as you move zigzag dial from "0"... -
Page 26: Blind Hem/ Lingerie Stitch
Blind hem/ lingerie stitch * The blind hem foot is an optional accessory not supplied with your machine. For hems, curtains, trousers, skirts, etc. Blind hem for stretch fabrics. Blind hem/ lingerie for firm fabrics. Set the machine as illustrated. (1) Note: It takes practice to sew blind hems. -
Page 27: Overlock Stitches
Overlock stitches * The overcasting foot is an optional accessory not supplied with your machine. Seams, neatening, visible hems. Turn stitch length dial to "S1" or "S2", The stitch width can be adjusted to suit the fabric. Stretch overlock (A) For fine knits, jerseys, neck edges, ribbing. -
Page 28: Sewing On Buttons
Sewing on buttons Install the darning plate. (1) Change presser foot to button sewing foot. Position the work under the foot. Place the button on the marked position and lower the foot. Set the pattern selector knob on " " and sew a few securing stitches. Select the zig-zag stitch width according to the distance between the two holes of the button. -
Page 29: How To Sew Buttonholes
How to sew buttonholes Preparation: Remove the zigzag foot and attach the buttonhole foot. Adjust the stitch length dial between "0.5" - "1". The density of the stitch depends on thickness of the fabric. Note: Always test sew a buttonhole. To prepare the fabric: Measure the diameter of the button and add 0.3cm (1/8") for the bartacks. -
Page 30: Zippers And Piping
Zippers and piping Set the machine as illustrated. Set stitch length control between "1" - "4" (according to thickness of fabric). The zipper foot can be inserted right or left, depending on which side of the foot you are going to sew. (1) To sew past the zipper pull, lower the needle into the fabric, raise the presser foot and push the zipper pull behind the presser foot. -
Page 31: Sewing With Hemmer Foot
Sewing with the hemmer foot * The hemmer foot is an optional accessory not supplied with this machine. For hems in fine or sheer fabrics. Set the machine as illustrated. Neaten the edge of the fabric. At the beginning of the hem, turn under the edge twice by about 3 mm (1/8") and sew 4-5 stitches to secure. -
Page 32: 3-Step Zig-Zag
3-step zig-zag Sewing on lace and elastic, darning, mending, reinforcing edges. Set the machine as illustrated. Place patch in position. The stitch length can be shortened to produce very close stitches. (1) When mending tears, it is advisable to use a piece of backing fabric to reinforce. -
Page 33: Stitch Selection
Stitch selection Triple straight stitch: (1) For hardwearing seams. Turn the stitch length dial to "S1" or "S2". The machine sews two stitches forwards and one stitch backwards. This gives triple reinforcement. Triple zig-zag: (2) For hardwearing seams, hems and decorative seams. Turn the stitch length dial to "S1"... -
Page 34: Smocking Stitch
Smocking stitch Seams, hems, T-shirts, underwear, etc. Set the machine as illustrated. This stitch can be used for all types of jersey as well as for woven fabrics. (1) Sew at 1cm (1/4") from the fabric edge and trim the surplus fabric. -
Page 35: Sewing With The Cording Foot
Sewing with the cording foot * The cording foot is an optional accessory not supplied with this machine. Decorative effects, cushions, tablecloths, etc. Set the machine as illustrated. Various stitches are suitable for sewing on cord, e.g. Zig-zag, Triple zig-zag, decorative stitches. Single cording (2) - Set stitch width slightly greater than width of cording. -
Page 36: Darning
Darning * The darning foot is an optional accessory not supplied with this machine. Set the machine as illustrated. Install the darning plate. (1) Remove the presser foot holder. (2) Attach the darning foot to the presser foot bar. The lever (a) should be behind the needle clamp screw (b). -
Page 37: Practical Stitches
Practical stitches Set the machine as illustrated. Turn the stitch length dial to suit the fabric. Shell hem (1) For decorative edges. Suitable for edges on sheer, fine and stretch fabrics. The larger stitch should go just over the edge of the fabric to create the shell effect. -
Page 38: Quilting
Quilting * The quilting foot is an optional accessory not supplied with this machine. Set pattern selector as illustrated. Insert the dge/quilting guide in presser foot holder and set the space as you desired. Move the fabric over and sew successive rows with the guide riding along on the previous row of stitching. -
Page 39: Gathering
Gathering * The gathering foot is an optional accessory not supplied with this machine. Set the machine as illustrated. 1. Attach the gathering foot. 2. Sew a single row or multiple rows of straight stitches. Pull the lower thread to gather more of the material. 3. -
Page 40: Patch Work
Patch work These stitches are used to join two pieces of fabric while leaving a space between their edges. 1. Fold over the edges of the two pieces of fabric for the hem and baste the edges to a thin piece of paper leaving a small space between them. -
Page 41: Twin Needle
Twin needle * The t win needle is an optional accessory not supplied with this machine. - Turn stitch selector to straight stitch, center needle position. - For twin needle sewing, insert the extra spool pin into the hole on top of the machine. - Make sure that the two threads used to thread the twin needle are of the same weight. -
Page 42: Applique
Applique - Turn pattern selector dial to small zig zag width. - Cut out the applique design and baste it to the fabric. - Sew slowly around the edge of the design. - Trim excess material outside the stitching. Make sure not to cut any stitches. -
Page 43: Monogramming And Embroidering With Embroidery Hoop
Monogramming and embroidering with embroidery hoop* - Set the machine as illustrated above. - Remove the presser foot and the presser foot holder. - Attach the darning plate. - Lower presser foot lever before starting to sew. - Adjust the stitch width according to the size of lettering or design. -
Page 44: Monogramming And Embroidering With Embroidery Hoop
Monogramming and embroidering with embroidery hoop* Monogramming 1. Sew, moving the hoop slowly along the lettering at a constant speed. 2. Secure with a few straight stitches at the end of the last letter. Embroidering 1. Stitch the outline of the design by moving the embroidery hoop. -
Page 45: The Walking Foot Accessory
The walking foot accessory * The walking foot accessory is an optional accessory not supplied with this machine. Presser foot bar Always try to sew first without the walking foot accessory which should be used only when necessary. It is easier to guide the fabric and you have a better view of the seam when using the standard, regular foot on your machine. -
Page 46: Maintenance
Maintenance Attention: Disconnect the machine from the electricity supply by removing the plug from the mains socket. When cleaning the machine, it must always be disconnected from the electricity supply. Remove the stitch plate (1): Turn the handwheel until the needle is fully raised. Open the hinged front cover and unscrew the needle plate screws with the screw driver. -
Page 47: Trouble Shooting Guide
Trouble shooting guide Problem Cause Correction Upper thread breaks 1.The machine is not threaded correctly 1.Rethread the machine 2.The thread tension is too tight 2.Reduce the thread tension (lower number) 3.The thread is too thick for the needle 3.Select a larger needle 4.The needle is not inserted correctly 4.Remove and reinsert the needle (flat side towards the back) 5.The thread is round wound the spool holder pin... - Page 48 Do not dispose of electrical appliances as unsorted municipal waste, use separate collection facilities. Contact your local government for information regarding the collection systems available. If electrical appliances are disposed of in landfills or dumps, hazardous substances can leak into the groundwater and get into the food chain, damaging your health and well-being.
Need help?
Do you have a question about the 333 and is the answer not in the manual?
Questions and answers