Table of Contents
Advertisement
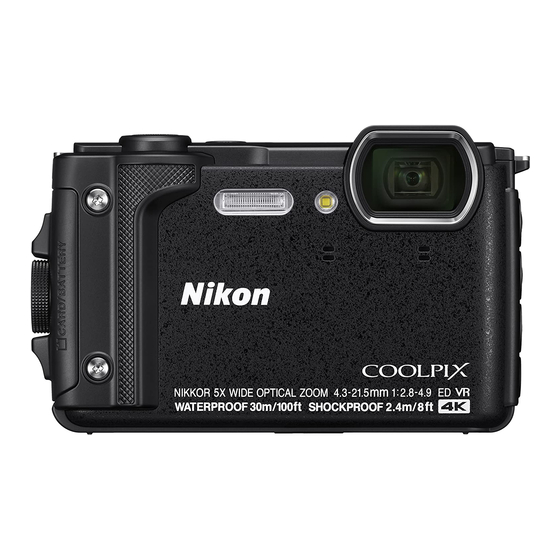
DIGITAL CAMERA
Quick Start Guide
Read this manual thoroughly before using the camera.
To ensure proper use of the camera, be sure to read "For
Your Safety" (page vi) and "<Important> Notes About
Shockproof, Waterproof, and Dustproof Performance and
Condensation" (page ix).
After reading this manual, keep it in a readily accessible
place for future reference.
ii
1
2
9
15
21
Advertisement
Table of Contents

Related Manuals for Nikon coolpix W300


Summary of Contents for Nikon coolpix W300
-
Page 1: Table Of Contents
DIGITAL CAMERA Quick Start Guide Introduction Parts of the Camera Getting Started Basic Shooting and Playback Operations Other Functions Technical Notes Read this manual thoroughly before using the camera. To ensure proper use of the camera, be sure to read “For Your Safety”... -
Page 2: Introduction
Introduction Read This First Thank you for purchasing the Nikon COOLPIX W300 digital camera. Downloading the “Reference Manual” The Reference Manual (PDF format) provides details in various languages on how to use this product. Download the Reference Manual from our Download Center at the URL below and save it on your smart device or computer for reference. -
Page 3: Confirming The Package Contents
Confirming the Package Contents In the event that any items are missing, please contact the store where you purchased the camera. COOLPIX W300 Camera strap for land use EN-EL12 Rechargeable Digital Camera Li-ion Battery EH-73P Charging AC UC-E21 USB Cable... -
Page 4: Information And Precautions
Before taking pictures on important occasions (such as at weddings or before taking the camera on a trip), take a test shot to ensure that the camera is functioning normally. Nikon will not be held liable for damages or lost profits that may result from product malfunction. -
Page 5: Conformity Marking
Care should be taken to avoid injury or damage to property when physically destroying memory cards. For the COOLPIX W300, the log data saved on the memory card is handled in the same way as other data. To erase the log data that is obtained but not stored on the memory card, select Create log M End all logs M Erase logs. -
Page 6: For Your Safety
For Your Safety To prevent damage to property or injury to yourself or to others, read “For Your Safety” in its entirety before using this product. Keep these safety instructions where all those who use this product will read them. Failure to observe the precautions marked DANGER with this icon carries a high risk of death or... - Page 7 Keep this product out of reach of children. Failure to observe this precaution could result in injury or product malfunction. In addition, note that small parts constitute a choking hazard. Should a child swallow any part of this product, seek immediate medical attention.
- Page 8 Do not leave the product where it will be exposed to extremely high temperatures, for an extended period such as in an enclosed automobile or in direct sunlight. Failure to observe this precaution could result in fire or product malfunction. DANGER for Batteries Do not mishandle batteries.
- Page 9 Notes About Shockproof Performance This camera has passed Nikon’s in-house test (drop test from a height of 240 cm (7 ft 10 in.) on a 5 cm (2 in.) thick plywood panel) compliant with the MIL-STD 810F Method 516.5-Shock* standard.
- Page 10 Notes About Shockproof, Waterproof, and Dustproof Performance Do not drop the camera, strike it against a hard object such as a rock, or throw it against a water surface. Do not subject the camera to shock when using it underwater. - Do not subject the camera to water pressure by exposing it to rapids or waterfalls.
-
Page 11: Before Using The Camera Underwater
Before Using the Camera Underwater Check the items below before using the camera underwater. Remove the camera strap for land use. Make sure that there are no foreign substances inside the battery-chamber/ memory card slot cover. Make sure that the waterproof packing of the battery-chamber/memory card slot cover is not cracked or deformed. - Page 12 If the camera is exposed to shock, it is recommended to consult your retailer or Nikon-authorized service representative to confirm the waterproof performance (charged service). If the waterproof packing begins to deteriorate, consult your retailer or Nikon- authorized service representative. The waterproof performance of the waterproof packing may start to deteriorate after one year.
-
Page 13: Parts Of The Camera
Parts of the Camera The Camera Body 9 10 11 Shutter-release button Zoom control Power switch/power-on lamp Charge lamp Flash lamp Flash b (e movie-record) button LED light c (playback) button Self-timer lamp AF-assist illuminator Multi selector* Movie light k (apply selection) button Battery-chamber/memory card slot l (delete) button cover latch... -
Page 14: Getting Started
Getting Started How to Attach the Camera Strap for Land Use Remove the strap for land use before using the camera underwater. Getting Started... -
Page 15: Inserting The Battery And Memory Card
Inserting the Battery and Memory Card Battery latch Memory card slot Press the battery-chamber/memory card slot cover latch release (1) and rotate the battery-chamber/memory card slot cover latch (2) to open the cover (3). With the battery’s positive and negative terminals oriented correctly, move the orange battery latch (4), and fully insert the battery (5). -
Page 16: Removing The Battery Or Memory Card
Formatting a Memory Card The first time you insert a memory card that has been used in another device into this camera, make sure to format it with this camera. Note that formatting a memory card permanently deletes all images and other data on the memory card. -
Page 17: Charging The Battery
Charging the Battery Charge lamp Charging AC Adapter Electrical outlet USB cable (included) If a plug adapter* is included with your camera, securely connect it to the Charging AC Adapter. Once the two are connected, attempting to forcibly remove the plug adapter could damage the product. - Page 18 Notes About the USB Cable Do not use a USB cable other than the UC-E21. Using a USB cable other than the UC-E21 could result in overheating, fire or electric shock. Check the shape and direction of the plugs and do not insert or remove the plugs at an angle.
-
Page 19: Camera Setup
Camera Setup Press the power switch to turn on the camera. Use the multi selector to select and adjust settings. Power switch Multi selector Left Right k button (apply selection) Down d button A language selection screen will be displayed. Use Language the multi selector HI to highlight a language and press the k button to select. - Page 20 Highlight your home time zone and London, Casablanca press the k button. You can set daylight saving time by pressing H. When it is turned on, the clock is set one hour faster and W is displayed above the map. Press I to turn it off.
-
Page 21: Basic Shooting And Playback Operations
Basic Shooting and Playback Operations Shooting Images o (scene auto selector) mode is used here as an example. In o (scene auto selector) mode, the camera recognizes the shooting conditions when you frame a picture, and you can take pictures in accordance with the conditions. Hold the camera steady. - Page 22 When the camera recognizes the shooting Shooting mode icon conditions, the shooting mode icon changes accordingly. Battery level indicator b: The battery level is high. B: The battery level is low. 1 5 m 1 5 m Number of exposures remaining 1 0 1 0 h P a 1 0 1 0 h P a C is displayed when no memory card is inserted...
-
Page 23: Recording Movies
The Auto Off Function When no operations are performed for about one minute, the screen turns off, the camera enters standby mode, and then the power-on lamp flashes. The camera turns off after remaining in standby mode for about three minutes. To turn the screen back on while the camera is in standby mode, perform an operation such as pressing the power switch or shutter-release button. -
Page 24: Playing Back Images
Playing Back Images Press the c (playback) button to enter playback mode. If you press and hold down the c button while the camera is turned off, the camera turns on in playback mode. Use the multi selector to select an image to display. Press and hold down HIJK to scroll through Display the previous image the images quickly. -
Page 25: Deleting Images
Deleting Images Press the l (delete) button to delete the image currently displayed on the screen. Use the multi selector HI to select the desired deletion method and press the Delete k button. Current image To exit without deleting, press the d button. Erase selected images All images Select Yes and press the k button. -
Page 26: Playback Mode
Action Control The operations described below can be performed by shaking the camera. Displaying the Previous or Next Image in Full-frame Playback Mode In full-frame playback mode, shake the camera up/down to display the next image, or forward/backward to display the previous image (when Playback action control in the setup menu (A19) is set to On). -
Page 27: Other Functions
Other Functions Selecting a Shooting Mode The shooting modes described below are available. o Scene auto selector The camera recognizes the shooting conditions when you frame a picture, and you can take pictures in accordance with those conditions. b Scene mode Select any one of scene modes based on the shooting conditions, and you can take pictures with the appropriate settings for those conditions. - Page 28 Help Display The descriptions of functions are displayed while changing the shooting mode or while the setting screen is displayed. You can show or hide the descriptions using Help display in Monitor settings in the setup menu. Setting Shooting Functions with the Multi Selector When the shooting screen is displayed, you can press the multi selector H (m) J (n) I (p) K (o) to set the functions described below.
- Page 29 Operations Available with Location Data Functions When Use built-in location data in Location data options in the z (location data options) menu (A19) is set to On, the camera starts receiving signals from the positioning satellites. Location data reception can be checked on the shooting 1 5 m 1 5 m screen.
- Page 30 Displaying POI Information When Embed POI in Points of interest (POI) in the location data options menu is set to On while the camera is positioning, the nearest location name information for the current position is also recorded on the images to be captured. When Display POI in the location data options menu is set to On while the camera is positioning, the nearest location name information for the...
-
Page 31: Menu Operations
Menu Operations You can set the menus listed below by pressing the d (menu) button. 1, 2 A Shooting menu D Movie menu 3, 4 G Playback menu J Network menu z Location data options menu z Setup menu Press the d button when the shooting screen is displayed. Menu icons and available setting options vary depending on the shooting mode. - Page 32 Select a menu option and press the k button. Time zone and date Monitor settings Certain menu options cannot be Date stamp set depending on the current Photo VR shooting mode or the state of the AF assist camera. Digital zoom Select a setting and press Date stamp the k button.
-
Page 33: Technical Notes
Technical Notes Notices Notices for Customers in Europe CAUTIONS RISK OF EXPLOSION IF BATTERY IS REPLACED BY AN INCORRECT TYPE. DISPOSE OF USED BATTERIES ACCORDING TO THE INSTRUCTIONS. This symbol indicates that electrical and electronic equipment is to be collected separately. The following apply only to users in European countries: This product is designated for separate collection at an appropriate collection point. - Page 34 (products purchased in the EU or EFTA can be used anywhere within the EU and EFTA). Nikon does not accept liability for use in other countries. Users who are unsure as to the original country of sale should consult with their local Nikon service center or Nikon-authorized service representative.
- Page 35 Notice for Customers in Europe Declaration of Conformity (Europe) Hereby, Nikon Corporation declares that the radio equipment type COOLPIX W300 is in compliance with Directive 2014/53/EU. The full text of the EU declaration of conformity is available at the following internet address: http://imaging.nikon.com/support/pdf/DoC_W300.pdf.
- Page 36 “Disposing of Data Storage Devices” (Av). Notes about measurement functions The COOLPIX W300 is a camera. Do not use this camera as a navigation device or measuring instrument. Use information (such as direction, altitude and water depth) measured by the camera as a guideline only.
-
Page 37: Caring For The Product
Caring for the Product Observe the precautions described below in addition to the warnings in “For Your Safety” (Avi–viii) and “<Important> Notes About Shockproof, Waterproof, and Dustproof Performance and Condensation” (Aix) when using or storing the device. The Camera Do Not Apply Strong Impact to the Camera The product may malfunction if subjected to strong shock or vibration. -
Page 38: The Battery
If you notice any abnormalities such as excessive heat, smoke, or an unusual smell coming from the battery, immediately discontinue use and consult your retailer or Nikon- authorized service representative. After removing the battery from the camera or optional battery charger, put the battery in a plastic bag, etc. -
Page 39: The Charging Ac Adapter
Charging an Exhausted Battery Turning the camera on or off while an exhausted battery is inserted in the camera may result in reduced battery life. Charge the exhausted battery before use. Storing the Battery Always remove the battery from the camera or optional battery charger when it is not being used. -
Page 40: Cleaning And Storage
Cleaning and Storage Cleaning After Using the Camera Underwater Follow the procedure below to rinse the camera with fresh water within 60 minutes after using it underwater or at the beach. 1. Keep the battery-chamber/memory card slot cover closed and wash off the camera with fresh water. - Page 41 Storage If you do not intend to use the camera for an extended period, remove the battery and avoid storing the camera in any of the following types of locations: Places that are poorly ventilated or subject to humidity of over 60% Places exposed to temperatures above 50°C (122°F) or below –10°C (14°F) Places next to equipment that produces strong electromagnetic fields, such as televisions or radios...
-
Page 42: Troubleshooting
Troubleshooting If the camera fails to function as expected, check the list of common problems below before consulting your retailer or Nikon-authorized service representative. Also, refer to the Reference Manual (PDF format) for further details on how to use this camera (Aii). -
Page 43: Memory Cards That Can Be Used
United States and/or other countries. ® word mark and logos are registered trademarks owned by Bluetooth SIG, Inc. and any use of such marks by Nikon Corporation is under license. Apple®, App Store®, the Apple logos, Mac, OS X, macOS, iPhone®, iPad®, iPod touch®... - Page 44 All other trade names mentioned in this manual or the other documentation provided with your Nikon product are the trademarks or registered trademarks of their respective holders. “Made for iPod,” “Made for iPhone,” and “Made for iPad” mean that an electronic...
- Page 45 It is protected by copyright, and is subject to the following terms and conditions which are agreed to by you, on the one hand, and Nikon Corporation (“Nikon”) and its licensors (including their licensors and suppliers) on the other hand.
- Page 46 Department of Commerce and the Bureau of Industry and Security of the U.S. Department of Commerce. To the extent that any such export laws, rules or regulations prohibit Nikon and its licensors from complying with any of its obligations hereunder to deliver or distribute Data, such failure shall be excused and shall not constitute a breach of this Agreement.
- Page 47 Government End Users. If the Data supplied by HERE is being acquired by or on behalf of the United States government or any other entity seeking or applying rights similar to those customarily claimed by the United States government, the Data is a "commercial item" as that term is defined at 48 C.F.R.
- Page 48 Austria: Bundesamt für Eich- und Vermessungswesen Belgium: - Distribution & Copyright CIRB Croatia/Cyprus/Estonia/Latvia/Lithuania/Moldova/Poland/Slovenia/Ukraine: EuroGeographics Denmark: Contains data that is made available by the Danish Geodata Agency (FOT) Retrieved by HERE 01/ 2014 Finland: Contains data from the National Land Survey of Finland Topographic Database 06/2012. (Terms of Use available at (http://www.maanmittauslaitos.fi/en/NLS_open_data_licence_version1_20120501) Contains data that is made available by Itella in accordance with the terms available at...
- Page 49 Contains data under the Norwegian licence for Open Government data (NLOD) distributed by Norwegian Public Roads Administration (NPRA) Portugal: Source: IgeoE – Portugal Spain: Información geográfica propiedad del CNIG Contains data that is made available by the Generalitat de Catalunya Government in accordance with the terms available at (http://www.gencat.cat/web/eng/avis_legal.htm) .
- Page 50 Nikon Europe B.V. will, without charge for labor and parts, repair the product in the terms and conditions set as below. Nikon reserves the right (at its sole discretion) to replace or repair the product.
- Page 51 Nikon, in order to comply with local or national technical standards in force in any other country than the ones for which the product was originally designed and/or manufactured.
- Page 52 No reproduction in any form of this manual, in whole or in part (except for brief quotation in critical articles or reviews), may be made without written authorization from NIKON CORPORATION. CT7E02(11) 6MQA6911-02...
Need help?
Do you have a question about the coolpix W300 and is the answer not in the manual?
Questions and answers