Table of Contents
Advertisement
Advertisement
Table of Contents

Related Manuals for Motorola GM300 Series


Summary of Contents for Motorola GM300 Series
- Page 1 Professional Radio GM300 Series Basic Service Manual 68P64115B51 Issue: July 2000...
-
Page 2: Computer Software Copyrights
Accordingly, any copyrighted Motorola computer programs contained in the Motorola products described in this manual may not be copied or reproduced in any manner without the express written permission of Motorola. Furthermore, the purchase of Motorola... -
Page 3: Safety Information
Read this information before using your radio. SAFE AND EFFICIENT OPERATION OF MOTOROLA TWO-WAY RADIOS This document provides information and instructions for the safe and efficient operation of Motorola Portable and Mobile Two-Way Radios. The information provided in this document supersedes the general safety information contained in user guides published prior to 1 January 1998. -
Page 4: Operational Warnings
The table below lists the minimum distance for several different ranges of rated radio power. Table 1 Rated Power and Distance Rated Power of Vehicle-Installed Minimum Distance from Mobile Two-Way Radio Transmitting Antenna 7 to 15 Watts 30.5 cm (1 Foot) 16 to 50 Watts 61 cm (2 Feet) More than 50 Watts... -
Page 5: Table Of Contents
Table of Contents SAFETY INFORMATION..................iii Chapter 1 INTRODUCTION 1.0 Scope of Manual ....................1-1 2.0 Warranty and Service Support................1-1 2.1 Warranty Period and Return Instructions ............1-1 2.2 After Warranty Period ..................1-1 2.3 European Radio Support Centre (ERSC)............1-2 2.4 Piece Parts .....................1-2 2.5 Technical Support...................1-3 3.0 Radio Model Information..................1-4 Chapter 2... - Page 6 8.0 Radio Exploded Mechanical Views and Parts Lists ........... 3-11 8.1 Radio Assembly - 25W Models ..............3-11 8.2 Radio Assembly - 60W Models ..............3-12 8.3 Control Head - GM340 ................. 3-13 8.4 Control Head - GM360 ................. 3-14 8.5 Control Head - GM380 .................
-
Page 7: Chapter 1 Introduction
In instances where the product is covered under a "return for replacement" or "return for repair" warranty, a check of the product should be performed prior to shipping the unit back to Motorola. This is to ensure that the product has been correctly programmed or has not been subjected to damage outside the terms of the warranty. -
Page 8: European Radio Support Centre (Ersc)
Aftermarket and Accessory Division (AAD). If no part number is assigned, the part is not normally available from Motorola. If the part number is appended with an asterisk, the part is serviceable by Motorola Depot only. If a parts list is not included, this generally means that no user-serviceable parts are available for that kit or assembly. -
Page 9: Technical Support
Warranty and Service Support Technical Support Motorola Product Services is available to assist the dealer/distributors in resolving any malfunctions which may be encountered. UK/Ireland - Richard Russell Telephone: +44 (0) 1256 488 082 Fax: +44 01256 488 080 Email: BRR001@email.mot.com... -
Page 10: Radio Model Information
INTRODUCTION Radio Model Information The model number and serial number are located on a label attached to the back of your radio. You can determine the RF output power, frequency band, protocols, and physical packages. The example below shows one portable radio model number and its specific characteristics. Table 1-1 Radio Model Number (Example: MDM25KHC9AN1AE) Type of Model... -
Page 11: Model Chart And Test Specification
Chapter 2 MODEL CHART AND TEST SPECIFICATION Model Chart (UHF 403-470 MHz) GM Series UHF 403-470 MHz Model Description MDM25RHC9AN1_E GM340, 403-470 MHz, 1-25W, 6 Ch MDM25RHF9AN5_E GM360, 403-470 MHz, 1-25W, 255 Ch MDM25RHN9AN8_E GM380, 403-470 MHz, 1-25W, 255 Ch Item Description GCN6112_... -
Page 12: Model Chart (Vhf 136-174 Mhz)
MODEL CHART AND TEST SPECIFICATION Model Chart (VHF 136-174 MHz) GM Series VHF 136-174 MHz Model Description MDM25KHC9AN1_E GM340, 136-174 MHz, 1-25W, 6 Ch MDM25KHF9AN5_E GM360, 136-174 MHz, 1-25W, 255 Ch MDM25KHN9AN8_E GM380, 136-174 MHz, 1-25W, 255 Ch Item Description GCN6112_ Control Head GM340 GCN6120_... -
Page 13: Model Chart (Low Band 29-50 Mhz)
Model Chart (Low Band 29-50 MHz) Model Chart (Low Band 29-50 MHz) GM Series Low Band 29-50 MHz Model Description MDM25BKF9AN5_E GM360 LB1, 29.0-36.0 MHz, 25-60W, 255 Ch MDM25CKF9AN5_E GM360 LB2, 36.0-42.0 MHz, 25-60W, 255 Ch MDM25DKF9AN5_E GM360 LB3, 42.0-50.0 MHz, 25-60W, 255 Ch Item Description GCN6120_... -
Page 14: Specifications
MODEL CHART AND TEST SPECIFICATION Specifications General Specification LB1, LB2, LB3 Frequency Range: 136-174 MHz 403-470 MHz 29.7-36.0 MHz 36.0-42.0 MHz 42.0-50.0 MHz Frequency Stability ±2.5 PPM ±2 PPM ±5.0 PPM (-30°C to +60°C, 25°C Ref.) Channel Capacity: GM340 - 6 GM360 - 255 GM380 - 255 Channel Spacing:... - Page 15 Specifications Transmitter Specification LB1, LB2, LB3 Modulation Limiting: ±2.5 kHz @ 12.5 kHz ±4.0 kHz @ 20 kHz ±5.0 kHz @ 20/25 kHz FM Hum and Noise: -40 dB@12.5 kHz -45 dB@ 20/25 kHz Conducted/Radiated -36 dBm < 1 GHz -26 dBm Emissions: -30 dBm >...
- Page 16 MODEL CHART AND TEST SPECIFICATION...
-
Page 17: Chapter 3 Maintenance
Chapter 3 MAINTENANCE Introduction This chapter provides details about the following: Preventive maintenance (inspection and cleaning). Safe handling of CMOS and LDMOS devices. Disassembly and reassembly of the radio. Repair procedures and techniques. Installation of Option Boards. Preventive Maintenance The radios do not require a scheduled preventive maintenance program; however, periodic visual inspection and cleaning is recommended. -
Page 18: Safe Handling Of Cmos And Ldmos Devices
0180386A82), which includes a wrist strap, two ground cords, a table mat, and a floor mat. Wear a conductive wrist strap in series with a 100k resistor to ground. (Replacement wrist straps that connect to the bench top covering are Motorola part number RSX4015_.) Do not wear nylon clothing while handling CMOS devices. -
Page 19: Repair Procedures And Techniques - General
When damaged parts are replaced, identical parts should be used. If the identical replacement part is not locally available, check the parts list for the proper Motorola part number and order the part from the nearest Motorola Communications parts center listed in the “Piece Parts” section of this manual. -
Page 20: Radio Disassembly - Detailed
MAINTENANCE Radio Disassembly - Detailed The procedure to remove and replace a Control Head, Top Cover or Transceiver Board is similar for all models of radio. A typical procedure is therefore shown followed by specific disassembly procedures for Control Heads on radio models without a display and radio models fitted with a display. -
Page 21: Top Cover Removal
Radio Disassembly - Detailed Flexible Connection ZWG0130210-O Figure 3-2 Flexible Connection Removal Remove the flexible connection from the socket on the control head board. Top Cover Removal Insert the dismantling tool in the middle of the radio assembly side groove as shown in Figure 3-3. -
Page 22: Transceiver Board Removal
MAINTENANCE Transceiver Board Removal Remove the screws securing the diecast cover to the chassis, using the T20 TORX™ driver as shown in Figure 3-4. Lift the cover from the chassis. Screws (6 on 25W models) (9 on 60W models) Diecast Cover Radio Chassis... -
Page 23: Disassembly Of Control Head - Gm340 (Without Display)
Radio Disassembly - Detailed Disassembly of Control Head - GM340 (without display) To dismount the control head housing from the back housing, insert the dismantling tool in the groove between the two housings as shown in Figure 3-6. ZWG0130214-O Figure 3-6 Control Head Back Housing Removal Press the dismantling tool until the snap connectors on the side of the back housing release from the control head. -
Page 24: Disassembly Of Control Heads - Gm360 And Gm380 (With Display)
MAINTENANCE ZWG0130216-O Figure 3-8 Board, Keypad and Speaker Removal Remove the speaker from the control head housing. Disassembly of Control Heads - GM360 and GM380 (with display) Dismount the control head housing from the back housing as described for control heads without displays, Figure 3-6 and 3-7. -
Page 25: Radio Assembly
Radio Assembly Remove the display and the top and bottom elastomeric connectors from the control head housing (GM360 only). NOTE Care should be taken not to touch or contaminate the conductive pads on the under side of the keypad, the elastomeric connectors or the conductive contacts on the printed circuit board . -
Page 26: Radio Chassis And Transceiver Board
3-10 MAINTENANCE Radio Chassis and Transceiver Board Inspect the transceiver board chassis and if required reapply thermal grease to the heatsink area on the chassis and heat dissipating devices. You may have to remove damaged thermal pads from the chassis and devices prior to applying the grease. Insert the transceiver board at an angle (approximately 30°) into the chassis taking care to slide the antenna connector and accessory connector into their cut-outs in the chassis. -
Page 27: Radio Exploded Mechanical Views And Parts Lists
Radio Exploded Mechanical Views and Parts Lists 3-11 Radio Exploded Mechanical Views and Parts Lists Radio Assembly - 25W Models ZWG0130202-A Figure 3-10 Radio Assembly - 25W Models Table 3-1 Radio Assembly Parts List - 25W Models Item No. Description Part Number Chassis 25W 2786082B02... -
Page 28: Radio Assembly - 60W Models
3-12 MAINTENANCE Radio Assembly - 60W Models ZWG0130203-A Figure 3-11 Radio Assembly 60W Models Table 3-2 Radio Assembly Parts List - 60W Models Item No. Description Part Number Chassis 60W 2786149B01 Gasket, Controlhead 3202620Y01 Main PCB (items 4, 5 and 8 included) Antenna Connector, Mini UHF 0986166B02 Power Connector... -
Page 29: Control Head - Gm340
Radio Exploded Mechanical Views and Parts Lists 3-13 Control Head - GM340 ZWG0130198-A Figure 3-12 Control Head GM340 Table 3-3 Control Head GM340 Parts List Item no Description Part No Housing Front, including: 1586086B01 Gasket, Lens, Lightguide Knob, Volume 3686098B02 Label 1364279B13 Speaker... -
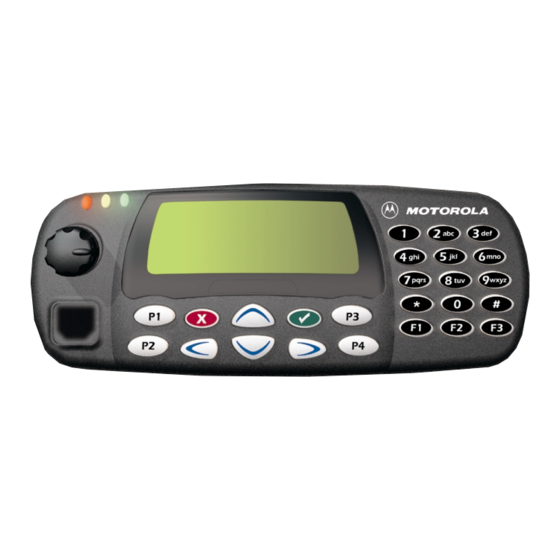
Page 30: Control Head - Gm360
3-14 MAINTENANCE Control Head - GM360 ZWG0130200-A Figure 3-13 Control head - GM360 Table 3-4 Control Head GM360 Parts List Item no Description Part No. Housing Front 1586088B01 Gasket, Lens, Lightguide Knob, Volume 3686098B02 Label 1364279B14 Speaker 5086126B01 Tube, Speaker with Gasket 3786107B01 Keypad, including: 7586091B02... -
Page 31: Control Head - Gm380
Radio Exploded Mechanical Views and Parts Lists 3-15 Control Head - GM380 ZWG0130201-A Figure 3-14 Control Head - GM380 Table 3-5 Control Head GM380 Parts List Item No Description Part No Housing Front, including: 1564304B01 Gasket, Lens, Lightguide Knob, Volume 3686098B02 Label 1364279B15... -
Page 32: Service Aids
Table 3-6 lists the service aids recommended for working on the radio. While all of these items are available from Motorola, most are standard workshop equipment items, and any equivalent item capable of the same performance may be substituted for the item listed. -
Page 33: Test Equipment
Test Equipment 3-17 10.0 Test Equipment Table 3-7 lists test equipment required to service the radio and other two-way radios. Table 3-7 Recommended Test Equipment Motorola Part Description Characteristics Application R2600_NT Comms System This monitor will Frequency/deviation meter Analyzer (non MPT) -
Page 34: 11.0 Programming/Test Cable - Rkn4083
3-18 MAINTENANCE 11.0 Programming/Test Cable - RKN4083_ P1 (Male) J1 (Female) To Radio To RIB Test Set RLN4008 1000 50mm Cable 1000 50mm Cable J2 (Female) To Mobile Radio Accessory Connector Viewed from Front (pin end) of Connector FLO830308-0 FL0830308O Figure 3-15 Programming/Test Cable J2 Mobile Radio... -
Page 35: Transceiver Performance Testing
Chapter 4 TRANSCEIVER PERFORMANCE TESTING General These radios meet published specifications through their manufacturing process by utilizing high- accuracy laboratory-quality test equipment. The recommended field service equipment approaches the accuracy of the manufacturing equipment with few exceptions. This accuracy must be maintained in compliance with the manufacturer’s recommended calibration schedule. -
Page 36: Rf Test Mode
TRANSCEIVER PERFORMANCE TESTING RF Test Mode When the radio is operating in its normal environment, the radio’s microcontroller controls the RF channel selection, transmitter key-up, and receiver muting. However, when the unit is on the bench for testing, alignment, or repair, it is removed from its normal environment and cannot receive commands from its system. - Page 37 RF Test Mode Table 4-2 Test Environments No. of Description Function Beeps Carrier Squelch RX: unsquelch if carrier detected (high pitch) (CSQ) TX: mic audio RX: constant unsquelch TX: mic audio RX: constant unsquelch TX: mic audio Unsquelch RX: constant unsquelch (UNSQ) TX: mic audio Digital...
- Page 38 TRANSCEIVER PERFORMANCE TESTING Table 4-4 Test Frequencies Test Test Test Channel Channel Mode Low Power High Power 136.025 403.025 29.725 36.025 42.025 136.050 403.050 29.750 36.050 42.050 142.325 414.150 30.225 37.125 43.225 142.350 414.175 30.325 37.225 43.125 148.625 425.325 31.025 38.225 44.525 148.650...
- Page 39 RF Test Mode Table 4-5 Transmitter Performance Checks (Continued) Communications Test Name Radio Test Set Comment Analyzer Voice Mode: PWR MON As above As above, Deviation: Modulation 4th channel test meter selector 2.5 kHz Max. frequency* to mic (12.5 kHz Ch. Sp). atten to -70, input to RF 4 kHz Max.
- Page 40 TRANSCEIVER PERFORMANCE TESTING Table 4-6 Receiver Performance Checks Communications Test Name Radio Test Set Comment Analyzer Reference Mode: PWR MON TEST MODE, PTT to Frequency Frequency 4th channel test frequency* Test Channel 4 continuous error to be Monitor: Frequency error carrier squelch (during the ±150 Hz VHF...
-
Page 41: Radio Tuning And Programming
Chapter 5 RADIO TUNING AND PROGRAMMING Introduction This chapter provides an overview of the Customer Programming Software (CPS) and tuner program which are designed for use in a Windows 95/98 environment. These programs are available in separate kits as listed in the Table 5-1. An Installation instruction manual is also included with each kit. - Page 42 RADIO TUNING AND PROGRAMMING +13,2VDC Power Supply Programming Cable RKN4081 Tx Data Rx Data DB25 ZWG0130339-0 Figure 5-2 CPS Programming Setup Cable with Internal RIB Adapter Programming Cable Cable RLN4853 Tx Data RKN4081 Rx Data DB25 +13,2VDC Power Supply ZWG0130340-0 Figure 5-3 CPS Programming Setup Cable with Internal RIB and Rear Adapter Cable...
-
Page 43: Radio Tuning Setup
Radio Tuning Setup Radio Tuning Setup A personal computer (PC), Windows 95/98 and a tuner program are required to tune the radio. To perform the tuning procedures, the radio must be connected to the PC, radio interface box (RIB), and test equipment setup as shown in Figure 5-4. Audio In Audio Generator Test Box... - Page 44 RADIO TUNING AND PROGRAMMING...
-
Page 45: Power Up Self-Test
Once Hardware codeplug error, Reprogram codeplug. If message possibly codeplug structure re-occurs, replace main board or mismatch or non-existant return it to the nearest Motorola codeplug. depot. “Test 2 Failed” Twice Select 5 Application Vector Reprogram codeplug and retest the corrupted. - Page 46 POWER UP SELF-TEST...