Table of Contents
Advertisement
Quick Links
Advertisement
Table of Contents
Troubleshooting

Related Manuals for Philips SLM5500


Summary of Contents for Philips SLM5500
-
Page 1: User Manual
Wireless Multimedia Adapter SLM5500 User manual... -
Page 3: Table Of Contents
Start the configuration wizard...15 Enjoy ... 16 Compression formats ...16 Digital Rights Management (DRM)...16 Turn the product on ...16 Start the Philips Media Manager ...16 Share a movie file ...17 Play a movie file ...17 Share a music file...18 Play a music file...19 Share a picture file ...20... - Page 4 Configure... 21 Open the Settings menu...21 Overview...22 Change the language...22 Start the configuration wizard...23 Start the network wizard ...23 Restore the factory default values ...24 Change the slide show interval ...24 Change the TV shape ...24 Change the TV system...25 Change the image quality ...26 Enable the screen saver ...27 View the device name ...27...
-
Page 5: What's In The Box
What’s in the box SLM5500 Wireless Multimedia Adapter Installation CD What else you’ll need Television Computer Result after installation WiFi Optional components (not supplied) Digital audio High-definition television Coaxial Audio cable audio cable 2x RCA Remote control 2x AA batteries... -
Page 6: Your Product
Club Philips: club.philips.com Check out what you can do with your latest Philips product! Club Philips is your portal to a variety of content, services and product information. Come here for content to enrich your Philips product! -
Page 7: Before You Start
Before you start User manual • Follow the procedures described in the user manual. • Keep the installation CD for future reference. Tip The documents of the connected devices can contain additional information. For example, the user manual of your TV. Broadband internet •... -
Page 8: European Regulations
European regulations The product has been designed, tested and manufactured according to the European R&TTE directive 1999/5/EC. Under this directive, the product can be put into service in the following countries: SLM5500/00 SLM5500/05... -
Page 9: Need Help
Club Philips Refer to club.philips.com for: • Interactive help • Internet services Registration can be required. Philips Media Manager Refer to the embedded help of the Philips Media Manager software. Helpline Country Telephone number België/Belgique/Belgien 070 253 010 Danmark 3525 8761... -
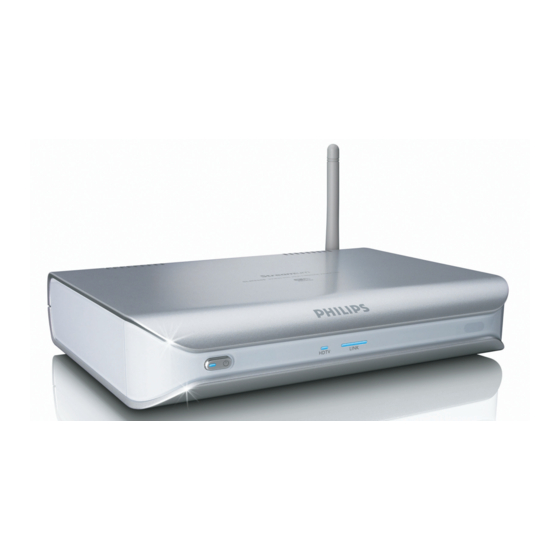
Page 10: Overview
Overview Wireless multimedia adapter 1 On/off light Shows the on/off status of the product. • Off - Not connected to a power supply • Red - Stand-by mode • Blue - On 2 On/off button Turns the product on and off. 3 High-definition TV light Indicates the type of video signal. -
Page 11: Remote Control
8 SCART port Connects a SCART cable to all types of TVs. 9 Video output switch • Left - The SCART port is used • Right - The component video port is used 10 Component video port Connects a video cable to a high-definition TV. 11 Digital audio port Connects a coaxial audio cable to a digital audio system. -
Page 12: Power Adapter
21 Settings button • Navigation - Opens and closes the Settings menu 22 Info button • Movies, music, pictures - Shows and hides extra information about the media file Text and digit entry Action Select the available characters Select the next or previous character Confirm a choice Select characters . -
Page 13: Install
LCD or plasma TVs). The YPbPr connection is also known as YUV, 3x RCA (blue, green, red). When you connect the YPbPr signal to a Philips TV, a YPbPr adapter can be required. A YPBPr adapter is supplied with some Philips TVs. -
Page 14: Install The Digital Audio Connection (Optional)
Audio WiFi Ethernet 5 Take a SCART to 3x RCA output adapter (not supplied). 6 Take a stereo audio cable (2x RCA, not supplied). 7 Plug the SCART to 3x RCA output adapter into the SCART port on the product. 8 Plug the stereo audio cable into the SCART to 3x RCA output adapter. -
Page 15: Install The Power Connection
Install the power connection 1 Take the power cable. 2 Plug the connector of the power cable into the power socket of the product. 3 Plug the power adapter into the power supply. Install the batteries 1 Open the battery compartment of the remote control. 2 Insert the batteries correctly. -
Page 16: Enjoy
DRM, make sure that the product supports the compression format of the media file with DRM (refer to page 35). Either – A future version of Philips Media Manager might include the option to stream WM-DRM protected music. Or – Windows Media Connect can be used to stream WMA-DRM protected music.The Philips SLM5500 must be added to the safe list of Windows Media Connect. -
Page 17: Share A Movie File
Music All Movies Pictures Movies Share a movie file 1 Start the Philips Media Manager. 2 Click on Movies. 3 Click on Add Movies. 4 Click on Add Files or Folders. 5 Add the movie file. > The properties of the movie file show. -
Page 18: Share A Music File
Go to the previous movie file Pause the movie file Stop the movie file Share a music file 1 Start the Philips Media Manager. 2 Click on Music. 3 Click on Add Music. 4 Click on Add Files or Folders. -
Page 19: Play A Music File
Home Network PMM (My PC) Internet (0 items) Music PMM (My PC) Music All Music Pictures Artists Movies Artists/Album Albums Genres Play a music file 1 Share the music file. 2 Turn the product on. > The home menu shows. 3 Select the media file server that shares the music file and press OK. -
Page 20: Share A Picture File
Music All Pictures Pictures Movies Share a picture file 1 Start the Philips Media Manager. 2 Click on Pictures. 3 Click on Add Pictures. 4 Click on Add Files or Folders. 5 Add the picture file. > The properties of the picture file show. -
Page 21: Play A Picture Slideshow With Music
6 Play the picture slideshow with the supplied remote control. Action Start the picture slide show Go to the next picture Go to the previous picture Pause the picture slide show Stop the picture slide show Tip To change the settings of the picture slide show, use the Settings menu. Play a picture slideshow with music 1 Play the music file. -
Page 22: Overview
Settings Setup Language Preferences Configuration wizard Network settings Network wizard Internet services Factory defaults Product info Setup Language English Configuration wizard Français Network wizard Español Factory defaults Deutsch Nederlands Italiano Overview Setup Language Configuration wizard Network wizard Factory defaults Preferences Slide show interval TV settings Screen saver... -
Page 23: Start The Configuration Wizard
Settings Setup Language Preferences Configuration wizard Network settings Network wizard Internet services Factory defaults Product info Setup Language Start Configuration wizard Network wizard Factory defaults Settings Setup Language Preferences Configuration wizard Network settings Network wizard Internet services Factory defaults Product info Setup Language Start... -
Page 24: Restore The Factory Default Values
Settings Setup Language Preferences Configuration wizard Network settings Network wizard Internet services Factory defaults Product info Setup Language Resets all preferences and network settings to their initial values. Configuration wizard Press OK to start clearing all settings. Network wizard Factory defaults Settings Setup Slide show interval... -
Page 25: Change The Tv System
Preferences Slide show interval TV Shape TV settings TV System Screen saver Image quality TV settings TV Shape Widescreen (16:9) TV System Standard (4:3, Cut sides) Image quality Standard (4:3, Black bars) Settings Setup Slide show interval Preferences TV settings Network settings Screen saver Internet services... -
Page 26: Change The Image Quality
TV settings TV shape TV system NTSC Image quality Settings Setup Slide show interval Preferences TV settings Network settings Screen saver Internet services Product info Preferences Slide show interval TV Shape TV settings TV System Screen saver Image quality TV settings TV shape Standard-definition (576i) TV system... -
Page 27: Enable The Screen Saver
Settings Setup Slide show interval Preferences TV settings Network settings Screen saver Internet services Product info Preferences Slide show interval TV settings 5 minutes Screen saver 10 minutes 20 minutes Settings Setup View Preferences Change Network settings Internet services Product info NTSC, TV connected to SCART port Item Description... -
Page 28: View The Ip Details
Network settings View Device name Change IP details Connection method Wireless details Settings Setup View Preferences Change Network settings Internet services Product info Network settings Device name View Change IP details Connection method Wireless details Settings Setup View Preferences Change Network settings Internet services Product info... -
Page 29: View The Wireless Details
> The Network settings menu shows. 3 Select Change and press OK. > The Change menu shows. 4 Select Device name and press OK. > The device name shows. The default name is Philips SLM5500. 5 Change the device name and press OK. -
Page 30: Change The Ip Assignment
Settings Setup View Preferences Change Network settings Internet services Product info Network settings Device name View Change IP Assignment Connection method Network settings Device name DHCP IP Assignment Static IP Connection method Change the IP assignment 1 Open the Settings menu. 2 Select Network settings and press OK. -
Page 31: Change The Connection Method
Settings Setup View Preferences Change Network settings Internet services Product info Network settings Device name View Change IP Assignment Connection method Network settings Device name Wired (Ethernet) IP Assignment Wireless, wizard Connection method Wireless, manual Change the connection method 1 Open the Settings menu. 2 Select Network settings and press OK. -
Page 32: Register For Internet Services
> The Internet services menu shows. 3 Select Register and press OK. > A wizard starts. 4 Enter your e-mail address so that Club Philips can send a registration e-mail to your computer. 5 Follow the instructions in the e-mail. -
Page 33: View The Product Information
Settings Setup Register Preferences Software upgrade Network settings Bandwidth Internet services Product info Internet services Register High SW upgrade Medium Bandwidth Settings Setup Software Version: V4.2.107D41.SD5.1 Preferences Hardware Version: R0A Network settings Internet services Product info 2 Select Internet services and press OK. >... -
Page 34: Troubleshooting
Make sure that the wireless network uses the first security code of the base station or router. Start the Philips Media Manager. Make sure that the Philips Media Manager shares media files with the product. Connect the product to the correct network. -
Page 35: Technical Data
Picture enhancement Thumbnail view Connectivity Encryption/security LAN wired Video output - Analog Wireless connections Audio output - Digital Software Philips Media Manager System requirements CD-ROM drive Hard disk space PC OS Processor RAM memory PC network required Internet connection Club Philips DivX 3.11, DivX 4, DivX 5, MPEG1,... -
Page 36: Dimensions
Product weight Power Mains power On/Off switch Power consumption Power LED indicator Internet services Refer to Club Philips for the latest list of Internet services. Audio services Video services Photo services My media 207 x 152 x 40 mm 0.84 kg AC 100-240 V 50-60 Hz 15 W (2.5 W stand-by) -
Page 37: Information
Neither your consent nor the consent or approval of Philips is necessary for any of them to deny, withhold or otherwise restrict your access to Secure Content or to disable your device's ability to transfer, store, access, copy, display, and/or play Secure Content. -
Page 38: Wireless Transmission
Philips is committed to develop, produce and market products that cause no adverse health effects. Philips confirms that if its products are handled properly for their intended use, they are safe to use according to scientific evidence available today. -
Page 39: Glossary
Domain Name Server. A server that changes the names of domains (for example, www.philips.com) in IP addresses. Digital Rights Management. DRM protects the integrity of the media file so that the intellectual property, including copyright, in such media file is not misappropriated. - Page 40 Specifications are subject to change without notice. Trademarks are the property of Koninklijke Philips Electronics N.V. or their respective owners. 2005 © Koninklijke Philips Electronics N.V. All rights reserved. www.philips.com 3122 337 0341...