Table of Contents
Advertisement
Advertisement
Table of Contents

Related Manuals for Huion GT-220 v2


Summary of Contents for Huion GT-220 v2
- Page 1 GT-220v2 User Manual...
- Page 2 Key Safety Measures 1) Please read all the specifications written in this manual and keep it for the future reference. 2) Please read all the notices and specifications on the monitor. 3) When cleaning, unplug the monitor. Do not use any cleanser, clean only with soft saturated cloth. 4) Please do not use accessories that are not recommended by the manufacturer.
-
Page 3: Table Of Contents
Content 1. Brief Introductions ................. 1.1 Packing List ................... .. 1.2 Overview of the Monitor ... -
Page 4: Brief Introductions
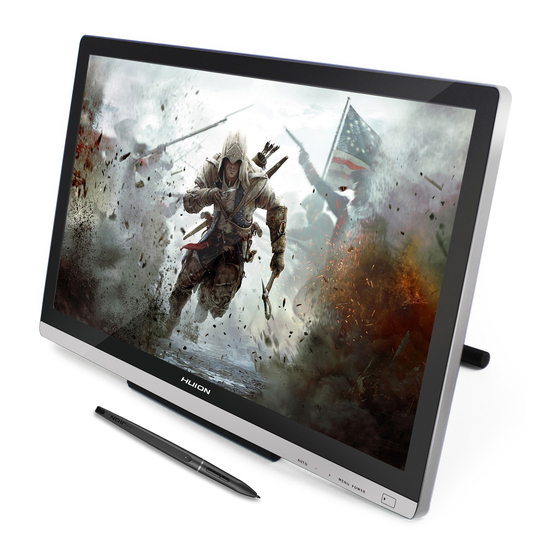
I. Brief Introduction After opening the packing, please confirm that the following articles are in the packing box: 1.1 Packing List: • LCD screen × 1 • AC adapter × 1 • VGA cable × 1, USB cable × 1, Pen charging cable ×... - Page 5 1.2.3 Ports Overview 1) VGA input & USB output First connect the VGA port with PC through which hand input screen can display the PC screen. Realization of hand input function requires USB port to be connected with the USB port of the PC. 2) DC IN port (power supply) Plug the port of the AC adapter into this port and then connect the AC adapter to the nearest AC socket.
-
Page 6: Installation
Insert the disc in the CD-ROM drive. (If your MAC doesn’t have a CD-ROM, please download the driver from our official website www.huion-tablet.com.) b. A disc icon will appear on your MAC. Double-click the icon to see the file structure. -
Page 7: Hardware Installation
g. If prompted, enter your password. h. Once the installation is complete, click “Close” button to exit the installer. 2.1.3. Hardware Installation Connect your PC with the monitor by the cables enclosed according to your needs. You must connect the USB cable if you want to use the pen input capabilites of the pen monitor. 1) After connecting the monitor, click "System Preferences", then double-click the monitor's icon to set up the resolution for your monitor. - Page 8 1.3.2 Software Installation For Win Please close all painting software and antivirus software before driver installation. Please don't connect the USB cable before driver installation. We kindly recommend downloading latest drivers form our official website since they are regularly updated. 1)If your PC operating system is Windows 7/8/8.1/10, you need to install pen input driver program.
-
Page 9: Driver Interface Introduction
II. Driver Interface Introduction The configuration dialog allows you to modify pressure sensitivity, monitor selection, customize the buttons, etc. 1 . For Mac Go to Applications/HUION Driver a. TabletDriverPanel is to change settings of the pen display. b. TabletDriverUnin l allows you to restart the driver process or uninstall the driver. -
Page 10: Pen Setting
1.4. Pen Buttons Settings 1.4.1 Key Functions You can configure various mouse functions for the rechargeable pen (see the picture above). "Mouse Left Button, Mouse Middle Button, Mouse Right Button, None Button, Switch Screen and Keyboard key" on the corresponding right drop-down menu of the "Second Button and First Button". - Page 11 2. For Win Driver Interface Introduction 2.1 Control Interface When you double click the Pen display icon ( ) which normally appears in the system tray at the corner of the screen, you will see the control panel (pictured above). It will display driven-related information. Controlling the panel by enclosed rechargeable pen can set up functions for the rechargeable pen, regulate the pen pressure sensitive and modify the working area and shortcut keys.
- Page 12 2.4 Screen setting When your computer is connected to two screens in the extended mode, you can choose the corresponding work area of the monitor in the setup screen area. 1. Monitor 1: Choose this monitor, the cursor can only move accordingly in your main monitor. 2.
-
Page 13: Rechargeable Li-Ion Battery & Tip
III. Pen Storage and Maintenance 1. Rechargeable Li-ion Battery Pen Charging port 1. Tap on any surface with the tip of a pen to “wake it up”. 2. It will “ auto sleep” if not used for a period of time. Note: If the line is unstable, Plug in USB cable to charge it means you have to charge. - Page 14 2. Pen Operation Usage Tips Prior to using the pen, ensure it is fully charged (about 1 hour) by plugging it into a USB charging source with the original USB charging cable. LED Indicator The LED on the pen indicates the charge status with the following patterns: LED glows red: Charging is in progress.
-
Page 15: Using Osd (Screen Image Adjustment)
IV. Using OSD (Screen Image Adjustment) 1. Type A 1.1 AUTO IMAGE ADJUSTMENT 1.2 CONTRAST/BRIGHTBESS C O N T R A S T / B R I G H T N E S S C O N T R A S T B R I G H T N E S S 1 : E X I T S E L E C T :... - Page 16 1.5 MANUAL IMAGE ADJUST M A N U A L I M A G E A D J U S T H . / V. P O S I T I O N H O R I Z O N T A L S I Z E F I N E T U N E...
-
Page 17: Type B
2. Type B 2.1 BRIGHTNESS B R I G H T N E S S B R I GH T NE SS C O N TR AS T E CO S T A N D AR D D CR O FF 1) BRIGHTNESS: Adjusting background brightness of the screen images. - Page 18 2.4 OSD SETTING O S D S E T T I N G O S D S E T T I N G LANGU A GE E N G L I SH E S P AÑ O L Р У С С К И Й P O S.
-
Page 19: Possible Breakdowns And Solutions
Possible breakdowns and solutions 5.1 Possible Breakdowns Related to the Pen Display Abnormal phenomena Suggesstions *Whether the power is on or not? *Whether the power wire is connected or not? The power indicator does not flash *Check the socket. *Replace the power wire. 1. -
Page 20: Support Tabletpc
5.3 Support Tablet PC Also called Electronic Ink Function, which is normally used for supporting pressure sensitivity under Office 2007, Journal or later version. For Sketchbook 6.0, Photoshop CC2014(or later) on Windows8 or later system, checking "Support TabletPC" is needed to support pressure sensitivity. As for other drawing software, please read the software instruction carefully to see whether it supports windows TabletPC or not, and try to disable Support TabletPC if it is needed. -
Page 21: Product Specifications
VI. Product Specifications 1. Specifications of the Monitor Items Specifications Product Names Pen input LCD Display Equipment TFT LCD Effective Display Size 19-inch/409.8mm ( H ) x 255mm ( V ) Resolution 1440 x 900 Monitor Features Dot Pitch 0.283mm x 0.283mm Display Colors 16, 700, 000 colors Viewing Angles... - Page 22 Shenzhen Huion Animation Technology Co., Ltd Tel: +86-755-32998548 Fax: +86-755-23313505 Email: service@huion.com Http: www.huion.com Address: Building 28, Quater 4, HuaiDeCuiGang Industrial Park, Fuyong Street, Bao'an District, Shenzhen, China. FACEBOOK WEBSITE -22-...
Need help?
Do you have a question about the GT-220 v2 and is the answer not in the manual?
Questions and answers