Table of Contents
Advertisement
Advertisement
Table of Contents

Related Manuals for Bella 6 Litre Pressure Cooker


Summary of Contents for Bella 6 Litre Pressure Cooker
- Page 1 6 LITRE PRESSURE COOKER If n Instruction Manual Recipe Guide...
-
Page 3: Table Of Contents
Keep these instructions in a safe place for future reference. What can you expect from the Bella Pressure Cooker? This fantastic unit is one pot cooking and it saves time by cooking up to 70% faster than conventional cooking. -
Page 4: Product Safety
PRODUCT SAFETY Read this manual thoroughly before first use, even if you are familiar with this type of product. The safety precautions enclosed herein reduce the risk of fire, electric shock and injury when correctly adhered to. Keep the manual in a safe place for future reference. -
Page 5: Electrical Safety
oatmeal and other cereals, noodles, pasta and rhubarb. Extra care should be taken when cooking anything containing these. 17. Do not touch the pressure release valve when in use. Only turn to release the pressure after the unit has finished cooking. 18. - Page 6 ELECTRICAL SAFETY The wires in the power cable of this product are coloured in accordance with the following code: Blue = Neutral, Brown = Live, Green/Yellow = Earth If the markings on the terminals of your plug do not correspond to the colours of the wires in the power cable, proceed as follows: •...
-
Page 7: Features
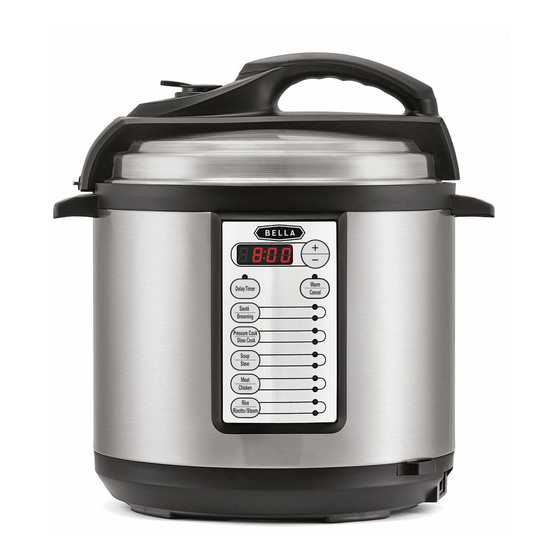
Features Figure 1 Lid Handle Pressure Release Valve Floating Safety Valve Inner Aluminum Plate with Silicone Washer and Metal Peg Clear Silicone Sealing Ring Removable Cooking Pot Base Handles Condensation Collector 10. Base Unit 11. Control Panel 12. Heating Plate (inside) 13. - Page 8 Figure 1 (cont’d) Underside of the lid 17. Floating Valve with Sealing Ring 18. Pressure Release Valve Cover 19. Centre Post Control Panel 20. LED Display 21. Increase/Decrease time button 22. Delay Timer 23. Warm/Cancel 24. Sauté/Browning 25. Pressure Cook/Slow Cook 26.
-
Page 9: Introduction To Pressure Cooking
Introduction to Pressure Cooking Discover the secrets of pressure cooking with this wonderful pressure cooker that will help you cook faster, healthier and tastier meals with unbelievable speed and ease. This pressure cooker offers 11 cooking settings with the touch of a button. Slow cook all day long or whip up a quick delicious meal, this pressure cooker is the perfect sous-chef. - Page 10 3. If you are sautéing or browning food first before cooking, add some oil or butter Figure 4 to the cooking pot and select either option make sure you do this with the lid OFF. When you have finished browning press the cancel option. 4.
-
Page 11: The Delay Function
The Delay Function • Before selecting the cooking function press the DELAY TIMER button to delay the start of the cooking time. The delay timer can be adjusted up to a maximum delay time of 2 hours. Continue to press the button until the desired time delay is reached. -
Page 12: One Touch Digital Functions
One Touch Digital Functions For your convenience the pressure cooker has 11 pre-set options with default cook times. Based on your recipe you can choose any one of these settings Sauté, Browning, Pressure Cook, Slow Cook, Soup, Stew, Meat, Chicken, Rice, Risotto/Steam and Warm. Every button has 2 settings and a corresponding pair of lights next to it. To select a setting simply press the button and the corresponding light will indicate the selected setting (see Figure 7). - Page 13 Chicken This setting is great for cooking a whole chicken for a delicious pot roast, then pop it under a pre-heated grill to crisp up the skin if you prefer it golden. You can also cook chicken legs, thighs, drumsticks and fillets. Rice Cook perfect fluffy rice on this setting.
-
Page 14: Cooking Times
Cooking Times Cooking Rice White rice (Basmati, Long Grain) takes 3 minutes to cook and uses the fully absorption method. The rice will be slightly sticker than rice cooked on the stove top. Use the marking on the pot as a guide i.e 2, 4, 6 cups. Fill the water in the pot FIRST to the level required and then add the corresponding cup of rice. -
Page 15: Hints And Tips For Pressure Cooking
Cooking Meat and Poultry Food Cooking Time (in minutes) Chicken Whole 1.5kg 25-30 Breast fillets Thigh and leg bone in Thigh boneless Beef Brisket Oxtail 40-45 Shin 40-50 Stewing Steak Mince 10-15 Lamb 35-40 Shanks Shoulder, cubed Stewing, cubed Pork Chops 10 (brown first) Shoulder... -
Page 16: Care And Cleaning
• When cooking dried beans and peas, soak them for a minimum of 3 hours in boiling water first or overnight, this will ensure that they remain intact and do not split. Or you can use the quick soak method which is to pre-cook them in the pressure cooker before adding to your recipe for further cooking. Simply rinse and pick out any broken or discolored beans, for every 1 cup of beans add 4 cups of water and a teaspoon of salt to the cooking pot, this prevents the beans from splitting. -
Page 17: Guarantee
GUARANTEE This product is guaranteed for twelve months from the date of original purchase. Any defect that arises due to faulty materials or workmanship will either be replaced or refunded where possible during this period by the dealer from whom you purchased the unit. -
Page 18: Recipes
Recipes Risotto with Butternut Squash, Sage and Chestnuts Serves 4-6 Ingredients • 60g butter • 500g risotto rice • 20 cooked chestnuts, chopped • 450g butternut squash, chopped • 16 sage leaves, shredded • 1400ml vegetable stock • 1 onion •... - Page 19 Recipes Asian Style Aromatic Pulled Pork This is the perfect recipe for the pressure cooker; it produces meltingly tender meat in 70 minutes. Fabulous for a party, simply prepare everything in advance and just let the pressure cooker do all the work.
- Page 20 Recipes Celeriac and Stilton Soup This soup is made using Celeriac which is a very underrated vegetable. The combination of the subtle sweetness from the pear and the creaminess from the Stilton is a real winner. Serves 4 Ingredients • Knob of butter •...
- Page 21 Recipes Beef Shin Ragu This is comfort food at its best made with a great cheap cut Shin of Beef. The long slow cooking time tenderises the meat and makes it deliciously tender. This thick meaty sauce needs to be served with wide pasta such as pappardelle.
- Page 22 Recipes Pot Roast Chicken with Rosemary and Garlic This is one pot cooking at its best. This recipe cooks a whole chicken in 30 minutes; this means that you can have a mid-week roast in no time at all! Serves 4-6 people depending on how hungry you are! Ingredients •...
- Page 23 Recipes Chicken with Chorizo This dish is a delicious combination of chicken with smoky chorizo; make sure you have lots of crusty bread to mop up the rich sauce. Serves 4-6 Ingredients • 1 tsp. oil • 2 sticks celery, sliced •...
- Page 24 Recipes South Indian Vegetable Curry with Paneer This curry is lightly spiced and lovely and fragrant, the addition of Paneer gives the curry more body, serve it with warm naan bread to soak up the sauce. Serves 4-5 Ingredients • 2 tbsp.
- Page 25 Recipes Hearty Winter Soup with Ham Hock This soup is delicious in the cold winter months and is substantial enough for a main meal. It is thick and wholesome with exceptionally tender meat. Serves 6 Ingredients • 1 unsmoked bacon/ham hock •...
- Page 26 Recipes Perfect Mash Potato This has got to be one of the best ways to cook potatoes; steaming retains all the nutrients and keeps them dry which makes fantastic creamy mash potato. Serves 4 Ingredients • 1kg Maris Piper potatoes evenly sized, •...
- Page 27 Recipes Boston Style Baked Beans This is a fantastic side dish perfect with sausages and mashed potato or a perfect side dish for a gang when having a BBQ! Serves 6-8 Ingredients • 500g dried haricot beans, rinsed and • 100g treacle picked over to remove any broken beans •...
- Page 28 www.bellahousewares.co.uk facebook.com/BellaLifeUK twitter.com/BellaLifeUK pinterest.com/bellalifeuk/ instagram.com/bellalifeuk #mybellalifeuk MPL Home Ltd, HP2 7DX...
Need help?
Do you have a question about the 6 Litre Pressure Cooker and is the answer not in the manual?
Questions and answers
How to set temperature on Bella 6 liter pressure cooker
The Bella 6 Litre Pressure Cooker does not have a manual temperature setting. Instead, you select a pre-programmed cooking function using the control panel. After choosing the appropriate food type, you can adjust the default cooking time using the +/- button to suit your recipe. The cooker automatically controls the temperature based on the selected function.
This answer is automatically generated
How to set the timer on the instant ****
To set the timer on the Bella 6 Litre Pressure Cooker, follow these steps:
1. Press the DELAY TIMER button before selecting the cooking function.
2. Adjust the delay time using the button until the desired time (up to 2 hours) is reached. The selected delay time will be displayed on the screen.
3. Use the CONTROL PANEL to choose the desired cooking setting (e.g., rice, soup, chicken).
4. Adjust the cooking time using the +/- button.
5. The display will flash and then switch to the delay time.
6. The delay timer will start counting down, and cooking will begin once the delay time has elapsed.
Note: Do not leave perishable foods like meat, poultry, fish, cheese, or dairy products at room temperature for longer than 2 hours.
This answer is automatically generated