Table of Contents

Summary of Contents for GE HEALTHCARE MAC 5500
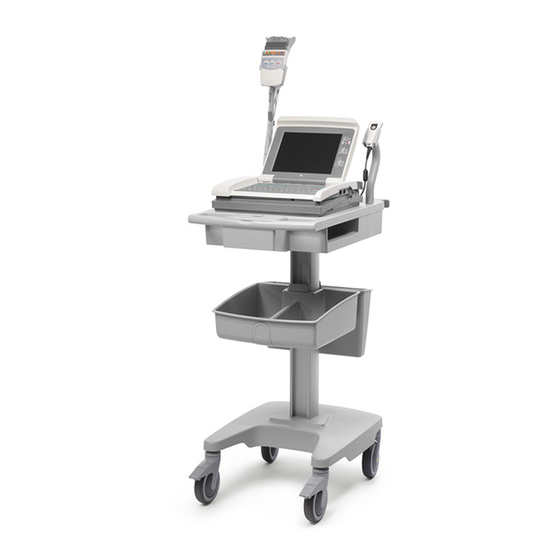
- Page 1 GE Healthcare ® 5500/MAC ® 5500 HD Resting ECG Analysis System Operator's Manual Software Version 10 2046275-016 B MAC® 5500/MAC® 5500 HD Resting ECG Analysis System English © 2010-2013 General Electric Company. All Rights Reserved.
- Page 2 Due to continuing product innovation, specifications in this manual are subject to change without notice. MAC, MULTI-LINK, MUSE, MACTRODE, Ultra-Archivist, MobileLink, and 12SL are trademarks owned by GE Medical Systems Information Technologies, Inc., a General Electric Company going to market as GE Healthcare. All other marks are the properties of their respective owners.
-
Page 3: Table Of Contents
Contents Introduction Product Information..................9 Indications for Use ..................9 Prescription Device Statement. - Page 4 Connecting the Modem Option ..............33 Connecting the MobileLink Wireless Option .
- Page 5 Test End Phase ..................73 Editing Protocols Protocol Overview..................75 Editing or Creating Protocols ..............77 Printing ECG Reports Printing Another Report ................81 Printing Stored ECGs ................. 81 Storing Printouts..................82 Transmitting ECGs Transmitting ECGs via Modem ..............83 Transmitting ECGs Locally ................
- Page 6 Locking and Unlocking the SD Card............. 100 Inserting and Ejecting the SD Card.
- Page 7 Hi-Res...................... 148 Setting Up a Card Reader................ 149 Automatic Configuration................150 Manual Configuration .
- Page 8 Exercise Final Reports ................176 Exercise Report Codes................177 Master's Step Data Master's Step Table ................. 179 ST-T Changes ..................182 Creating Bar Codes and Magnetic Cards Manual Reader Configuration..............183 Automatic Reader Configuration ............185 2046275-016B ® 5500/MAC ® 5500 HD...
-
Page 9: Introduction
ECG data to and from a central ECG cardiovascular information system is optional. The MAC 5500 HD is intended to be used under the direct supervision of a licensed healthcare practitioner, by trained operators in a hospital or medical professional’s facility. -
Page 10: Accuracy Of The Input Signal Reproduction
Supplies and Accessories For ordering information and a list of supplies and accessories that have been approved by GE Healthcare for use with this device, see the MAC 3500/MAC 5500 HD Resting ECG Analysis Supplies and Accessories Reference Manual. Equipment Symbols The following symbols may appear on the product or its packaging. - Page 11 Introduction Symbol Description Equipotential Charge the battery. The flashing amber LED next to this symbol indicates you must connect the system to AC power to recharge the battery. LAN port for connecting an Ethernet cable with a standard RJ-45 jack. Internal modem port for connecting a phone line with a standard RJ-11 jack.
-
Page 12: Product And Packaging Labeling
Introduction Product and Packaging Labeling This section identifies the product labels and their locations on the product and packaging. 2046275-016B 5500/MAC 5500 HD ® ®... - Page 13 Introduction Refer to the previous illustrations for the locations of the labels identified in the following table. No. Label Description Located on the bottom of the device, this label indicates the device contains mercury and must be disposed of in accordance with state and local laws.
-
Page 14: Equipment Identification
• Country of Origin • EC Representative information Equipment Identification Every GE Healthcare device has a product label that identifies the product name, part number, manufacturing information, and unique serial number. This information is required when contacting GE Healthcare for support. - Page 15 Introduction Product Label The product label is laid out in the following format. Depending on the product, the label may vary slightly in format, but it contains the same information. Product Label Format Item Description Product part number Product description Date of manufacture in YYYY-MM format Manufacturer name and address Country of origin...
-
Page 16: Regulatory And Safety Information
Fiscal Week A two-digit code identifying the week the device Manufactured was manufactured. Values range from 01 to 52. GE Healthcare's fiscal weeks correspond to the calendar week. For example, 01 = the first week in January. Product Sequence A four-digit number identifying the order in which this device was manufactured. -
Page 17: Safety Messages
Introduction This manual uses the terms DANGER, WARNING, CAUTION, and NOTICE to point out hazards and to designate a degree or level of seriousness. Familiarize yourself with the following definitions and their significance. Definitions of Safety Conventions Safety Definition Convention DANGER Indicates an imminent hazard, which, if not avoided, will result in death or serious injury. - Page 18 Introduction WARNING: DEFIBRILLATOR PRECAUTIONS — Do not come into contact with patients during defibrillation. Otherwise, serious injury or death could result. Patient signal inputs labeled with the CF and BF symbols with paddles are protected against damage resulting from defibrillation voltages. To ensure proper defibrillation protection, use only the recommended cables and leadwires.
- Page 19 IEC 60601–1–1 medical electrical systems standards. To ensure patient safety, use only parts and accessories manufactured or recommended by GE Healthcare. CAUTION: ACCESSORIES (EQUIPMENT) — The use of accessory equipment that does not comply with the equivalent safety requirements of this equipment may lead to a reduced level of safety of the resulting system.
-
Page 20: Classification
Introduction CAUTION: DISPOSAL — At the end of its service life, the product described in this manual, as well as its accessories, must be disposed of in compliance with local, state, or federal guidelines regulating the disposal of such products. If you have questions concerning the disposal of the product, please contact GE Healthcare or its representative. -
Page 21: Underwriters Laboratories, Inc
The device or system is labeled under the original equipment manufacturers label (for example, USA FCC 47CFR15, CE EU EMC 2004/108/EC), and deemed sufficient by GE Healthcare to be in compliance with EN/IEC 60601-1-2 when used according to the device or system’s intended use. GE Healthcare-supplied hardware meets the applicable country requirements. -
Page 22: Responsibility Of The Manufacturer
Additional Assistance GE Healthcare maintains a trained staff of application and technical experts to answer questions and respond to issues and problems that may arise during the installation, maintenance, and use of this system. -
Page 23: Intended Audience
It is expected that the user of this manual will complete thorough product training as well as read and understand all instructions in this manual before attempting to use the product. Request training from GE Healthcare, if needed. Document Conventions This manual uses the following conventions. -
Page 24: Related Documentation
This manual is intended as a supplement to, not a substitute for, thorough product training. If you have not received training on the use of the system, you should request training assistance from GE Healthcare. To see available training, go to the GE Healthcare training Web site (www.gehealthcare.com/training). Select Education>Product Education-Technical>Diagnostic Cardiology. -
Page 25: System Overview
System Overview This chapter describes the device's hardware components, software screen components, report layout, and basic navigation and data entry. Familiarize yourself with this information before using the device. Hardware Description This section identifies the key components of the MAC system hardware. Familiarize yourself with these components, their location, and their use before attempting to use the equipment. -
Page 26: Back View
System Overview Name Description LAN Port Connect to a LAN cable. LEDs provide information about connection status. • The green LED indicates a good Ethernet link. • The amber LED flashes to indicate network traffic. Keyboard Controls the system and enters data. Back View Name Description... -
Page 27: Back Panel
System Overview Name Description Battery Supplies power when unit is not connected to AC power. Recharge the battery when the battery icon flashes on-screen. Writer door Provides access to the writer, paper tray, and battery. Acquisition module Connects the unit to an acquisition module. connector Paper tray Contains the paper used to print ECGs. -
Page 28: Keyboard - Standard Keys
System Overview Name Description Exchanges ECG data with a MAC system or MUSE CV system via infrared transmission. NOTE: Depending on the age of your system, infrared transmission may not be supported. Card slot Houses a system card for external data storage or to update software. -
Page 29: Keyboard - Exercise Test Keys (Option)
System Overview Name Description Rhythm key Prints continuous ECG data, which cannot be stored or transmitted. Stop key Stops the writer from printing. Arrow pad Moves the cursor left, right, up, or down. Pressing the center button selects the highlighted menu or screen item. -
Page 30: Acquisition Equipment
System Overview Name Description Recovery Advances the exercise test to the recovery phase or to the next stage within the current recovery phase. Test end Ends the test and starts the test end phase. Speed W Adjusts the belt speed on treadmills or load on ergometers. -
Page 31: Leadwire Labels
System Overview Name Description Leadwires Attaches to the patient electrodes. The acquisition module uses either 10 or 14 leadwires. Rhythm button Initiates the printing of a rhythm strip. Stop writer button Cancels the current print job. Acquisition module cable Connects the acquisition module to the MAC system. ECG Button Initiates the recording of an ECG. -
Page 32: Leadwire Adapters
System Overview 10 Leadwire AHA 10 Leadwire IEC 13 Leadwire AHA Pediatric 13 Leadwire IEC Pediatric 14 Leadwire AHA 14 Leadwire IEC 14 Leadwire AHA Aux 14 Leadwire IEC Aux Leadwire Adapters MULTI-LINK leadwires require one of the following adapters to connect to electrodes. 4 mm pin Grabber MACTRODE clip... -
Page 33: Connecting The Lan Option
System Overview Connecting the LAN Option If you purchased the LAN option, insert an Ethernet cable with an RJ-45 jack to the LAN port as shown in the following illustration. Before you can use the LAN option, you must configure the LAN settings on both the MAC device and the MUSE system to which it will communicate. -
Page 34: Connecting External Exercise Devices
• The Ergoline 900 ergometer NOTE: Other bicycle ergometers and treadmill models with an analog port can be connected to the analog output of the MAC 5500. A TTL QRS trigger signal for external devices can be connected to the ANA/TTL port. -
Page 35: Verifying Correct Operation
• If the system starts up without displaying error messages, the system is operational. • If the system displays error messages, turn the system power off, then on again. If error messages persist, contact GE Healthcare Service. Software Overview This section provides an overview of the system software. It describes the basic screen layout, main menu functions, and basic data entry and navigation techniques. - Page 36 System Overview Resting ECG Screen The following illustration is the standard test screen. Name Description Software Version Displays the system's software version during the first few seconds of power up. User Prompts Provides additional information for the user. Hookup Advisor Displays the quality of the patient hookup.
- Page 37 System Overview Exercise Test Screen The following illustration is the exercise test screen. Name Description System Messages Provides error or other information. Current Heart Rate Bar Provides a graphical representation of the patient's Graph latest heart rate. The top horizontal line is the maximum predicted heart rate (220 - age).
-
Page 38: Main Menu
System Overview Name Description Current Heart Rate Displays the patient's heart rate. Determined using the three leads displayed on your screen during the pre-test phase. These leads can be changed during the test by selecting the Measurements function. Function Icon Indicates the Main Menu function currently being used. - Page 39 System Overview Function Description Creates new or edits existing exercise test protocols. Also, a protocol can be saved, printed, or erased. EditProtocol Conducts the 12-lead exercise test and allows you to print reports. This is a purchased option. Exercise 12 Conducts the 15-lead (12 standard, 3 user-defined leads) exercise test and allows you to print reports.
- Page 40 System Overview Function Description Requests, displays, and prints confirmed ECGs retrieved from a MUSE CV system. This is a purchased option. Remote Query Acquires, prints, and stores ECG orders received from a MUSE system with a Hospital Information System (HIS) interface. Ord Mgr Int.
-
Page 41: Report Layout
System Overview Using the Arrow Pad Press the arrow keys on the Arrow Pad until the desired menu item is highlighted. Press the middle button on the Arrow Pad to select the highlighted menu item. Report Layout The following illustration and table describe the basic report layout. For more information about reports, refer to “ECG Reports”... - Page 42 System Overview Name Description Patient Demographics Displays information about the patient, including patient name, birth date, gender, race, height, weight, room, and location. Vital Signs Displays information about the patient's vital signs, including heart rate, PR interval, QRS duration, QT/QTc, P-R-T axes, and blood pressure. ECG Header Displays information about the ECG, including patient ID, ECG date and time, and hospital name.
-
Page 43: Entering Data
System Overview Entering Data You have two methods for entering data into the MAC system: • Typing data into a highlighted field • Selecting data from a drop-down list Typing Data into a Highlighted Field Using the Arrow Pad, press the arrow keys to highlight the desired field. Type the relevant data into the field. - Page 44 System Overview Selecting Data from a Drop-down List Using the Arrow Pad, press the arrow keys to highlight the desired field. Press the middle button of the Arrow Pad. A list of available values drops down. Using the Arrow Pad, press the arrow keys to highlight the desired value. Press the middle button of the Arrow Pad to select the desired value.
-
Page 45: Preparing The Patient
Preparing the Patient This chapter provides the procedures for preparing the patient's skin and properly placing electrodes. NOTE: These instructions do not cover the application of electrodes for the KISS Electrode Application System (not available in the United States). To use the KISS system, see the KISS operator’s manual for instructions. -
Page 46: Preparing The Patient's Skin
Look at the lead-check screen for indication of lead problems. NOTE: Use only electrodes and contact agents recommended by GE Healthcare. The signal quality on the lead-check screen is not indicated until the RA/R electrode is applied. If RA/R becomes disconnected, the system will report that all electrodes are off the patient. -
Page 47: Electrode Placement
Preparing the Patient Electrode Placement This section describes various methods for placing electrodes for both resting and exercise ECGs. CAUTION: DELAYED DIAGNOSIS Improper connection of the leadwires will cause inaccuracies in the ECG. Ensure the leadwires are connected properly. Trace each leadwire from its acquisition module label to its colored connector and then to its electrode to ensure that it is matched to the correct label leadwire connection location. - Page 48 Preparing the Patient Standard 15 Lead Placement AHA Label IEC Label Description V1 red C1 red Fourth intercostal space at the right sternal border V2 yellow C2 yellow Fourth intercostal space at the left sternal border V3 green C3 green Midway between location 2 and 4 V4 blue C4 brown...
- Page 49 Preparing the Patient Frank X, Y, Z Placement AHA Label IEC Label Description LA black L yellow Just below the clavicle of the left arm E orange E light blue Mid-sternum on the same horizontal level as 3 and 4 V4 blue C4 brown Mid-clavicular line in the fifth intercostal space...
- Page 50 Preparing the Patient NEHB Placement AHA Label IEC Label Description A1 orange Nst white Attachment point of the second rib to the right sternal edge A2 orange Nax white Fifth intercostal space on the left posterior axillary line (Same position as V8 or C8) V4 blue Nap white Mid-clavicular line in the fifth intercostal space (Same...
- Page 51 Preparing the Patient Pediatric Placement AHA Label IEC Label Description V1 red C1 red Fourth intercostal space at the right sternal border V2 yellow C2 yellow Fourth intercostal space at the left sternal border V3 green C3 green Midway between location 2 and 4 V4 blue C4 brown Mid-clavicular line in the fifth intercostal space...
-
Page 52: Exercise Ecg Placement
Preparing the Patient Exercise ECG Placement The following methods are applicable only if the Exercise option has been enabled. In addition to the standard electrodes, apply one electrode on the sternum (A1) and one in location V5R/C5R (A2). It is recommended that arm electrodes be placed on the patient’s torso, just under the clavicles. - Page 53 Preparing the Patient CM5, CC5, CH Lead Placement Electrode Description Mid-sternum at the second intercostal space In the fifth intercostal space in the right anterior axillary line (V5R/C5R) On either side of the neck or anywhere above the shoulders 2046275-016B 5500/MAC 5500 HD ®...
- Page 54 Preparing the Patient 2046275-016B 5500/MAC 5500 HD ® ®...
-
Page 55: Entering Patient Information
Entering Patient Information The first step in conducting any ECG test (resting, pediatric, 15-lead, vector loops, or exercise) is to identify the patient. Patients can be identified by manually entering the data, by bar code scanner or magnetic card reader, or by retrieving it from a MUSE CV system. -
Page 56: Manually Entering Patient Information
Entering Patient Information Manually Entering Patient Information You can manually enter patient data on all MAC systems. For each new patient, select Patient Data. The Patient Data entry window opens. Using the arrow pad, navigate from field to field and enter data as appropriate. For more information on how to manually enter data in the MAC system, refer to “Entering Data”... -
Page 57: Connecting The Card Reader
Entering Patient Information Connecting the Card Reader Before you can use the card reader, it must be connected to the MAC system and the system must be configured to correctly use the peripheral. Typically, this is done only once and the card reader remains attached and ready for use. Connect the magnetic card reader to port A on the back panel of the system. -
Page 58: Scanning A Bar Code (Option)
Entering Patient Information Do one of the following: • Select the correct order to load it. You can then modify the order information or begin the test. • Select Cancel to load the patient information directly from the card. You can then use or modify the patient information as needed. For information on configuring your system, refer to Appendix “Creating Bar Codes... -
Page 59: Entering Orders
Entering Patient Information Accept or modify the data as needed. • If the system locates only one ADT record, it loads that record and displays it in the Patient Data window. Accept or modify the data as needed. • If the system locates multiple matching ADT records, it displays a list of those records. - Page 60 MUSE system. Consult your hospital IT department or your local GE Healthcare networking professional regarding modification of your wireless LAN to improve system performance.
-
Page 61: Manually Entering Orders
Entering Patient Information Manually Entering Orders If you do not have a MUSE CV system, or cannot connect to the MUSE CV system for some reason, you can manually create the order directly on the MAC system using the following procedure. NOTE: The option to add orders locally must be in System Setup. - Page 62 Entering Patient Information 2046275-016B 5500/MAC 5500 HD ® ®...
-
Page 63: Recording An Ecg
Recording an ECG The method for recording an ECG varies depending on the type of ECG to be recorded. This chapter describes how to record the following ECG types: • Standard ECGs • Signal Averaged ECGs • Master's Step ECGs Some methods may not be available on your system, depending on which options have been purchased and enabled. - Page 64 Recording an ECG • Red indicates a lead-fail condition or extreme baseline shifts. The red indicator is always the left-most circle of the of the indicator and flashes when lit. • Yellow indicates muscle artifact, power line interference, baseline wander, or electrode noise.
-
Page 65: Standard Ecgs
Recording an ECG Prompt level in the system setup. If a message and prompt is displayed, the lead quality indicator will reflect the overall 10-second lead quality. • If Preview before analysis is enabled, the system setup Prompt level is disregarded and the system immediately displays the Preview screen. - Page 66 Recording an ECG This opens a list of available gains. Options include 2.5 mm/mV, 5 mm/mV, 10 mm/mV, 20 mm/mV, and 10/5. The selected value appears on the function key on the screen. • To adjust the filter of the printed ECG, press 150 Hz. This opens a list of available filters.
-
Page 67: Signal Averaged Ecgs
Select Hi-Res or PHi-Res to enable the system to record a signal averaged ECG. NOTE: GE Healthcare recommends a target noise level of 0.3 μV or less when recording a PHi-Res ECG. Select Template to initiate the signal averaged ECG recording. -
Page 68: Master's Step Ecgs
Recording an ECG Select Store to store the ECG data. You are now ready to transmit the ECG data to a MUSE system. Refer to Chapter “Transmitting ECGs” for details. Master's Step ECGs This is an optional test method that is available only in Japan. For information on enabling the Master's Step Exercise option, refer to “Option Activation”... -
Page 69: Exercise Stress Testing
Exercise Stress Testing Exercise Stress Tests are optional features that allow you to conduct ECG tests while the patient exercises on a treadmill or ergometer. For information on enabling the 12–Lead Exercise and 15–Lead Exercise options, refer to “Option Activation” on page 118. -
Page 70: Pretest Phase
Exercise Stress Testing The Rhythm Leads window opens. This window allows you select the lead groups to use in the test, check lead connections, and check lead placement. Highlight the appropriate option and press Return. After the settings have been adjusted, select Select Proto. A list of available stress test protocols opens. -
Page 71: Exercise Phase
Exercise Stress Testing • Press the emergency stop button (usually mounted on the treadmill) to stop the treadmill IMMEDIATELY. • Press the Speed W +, Speed W –, and Grade keys to manually control the test. However, once you press these keys, the pre-programmed protocol becomes inactive: you must manually control the speed and grade during the remainder of the exercise and recovery phases. - Page 72 Exercise Stress Testing The exercise test advances automatically through the exercise stages unless the operator manually overrides the test. NOTE: When the stages in the treadmill protocol have durations other than infinite, the exercise test advances from stage to stage automatically. However, you can press Exercise (on the treadmill controller keyboard) at any time to manually advance to the next exercise stage.
-
Page 73: Recovery Phase
Exercise Stress Testing Recovery Phase In recovery, the treadmill speed and grade or the ergometer load decreases based on the protocol configuration. Press the Recovery button to advance to the recovery phase. The clock begins timing the recovery phase. A maximum 12-lead measurement is taken (if that is part of the selected protocol). - Page 74 Exercise Stress Testing Select Continue to return to the Test-End menu. • A final report prints automatically if you selected this option in the Edit Protocol function (select System Setup > Exercise Test > Final Report). • To change the type of reports that print automatically, see “Final Report”...
-
Page 75: Editing Protocols
Select this option for digital treadmills that can connect to and be controlled by the MAC system. You would select this option if you are using GE Healthcare's T2000 treadmill. • Analog Treadmill in MPH or Km/h Select this option for analog treadmills that cannot be connected to the MAC system. - Page 76 Editing Protocols Protocol Parameters (cont'd.) Parameter Description Ramp Protocol Determines how frequently the intensity of the exercise should change. • Select Yes if you want the ergometer workload or treadmill speed and grade to change every 6 seconds. • Select No if you want the ergometer workload or treadmill speed and grade to change with each stage change.
-
Page 77: Editing Or Creating Protocols
Editing Protocols Parameter Description Treadmill Sets the treadmill speed in MPH or Km/h and grade in percentages. • MPH can range from 0.0 to 25.0 in 0.1 MPH increments. • Km/h can range from 0.0 to 40.0 Km/h in 0.1 Km/h increments •... - Page 78 Editing Protocols The current stage information is displayed. Edit the information. When you are done, press Return. • To change the duration: Use the arrow pad to select the Duration field. Enter the desired duration. To enter an infinite duration, delete the value in the field. When you are done, press Return.
- Page 79 Editing Protocols When you are done editing the stages of the Pretest phase, press Phase > Exercise. This opens the Exercise phase window. Press the Stages/Manual function key to toggle between the Stages and Manual modes of the phase as appropriate. With the Stages mode selected, repeat step to edit the stages of the Exercise phase.
- Page 80 Editing Protocols 2046275-016B 5500/MAC 5500 HD ® ®...
-
Page 81: Printing Ecg Reports
Printing ECG Reports The MAC system can be configured to print a report automatically during an ECG test. In addition, you can choose to reprint an ECG report in a different format during the test. Finally, you can print ECG reports that are stored on the system. This chapter explains how to print another report during the ECG test, how to print a stored ECG report, and how to store the printouts after they print. -
Page 82: Storing Printouts
Printing ECG Reports Storing Printouts When imaged and stored properly, ECG tracings will resist fading for several years. To ensure the tracing is imaged properly, the equipment must be maintained in accordance with its service manuals and technical memoranda. To ensure the tracing lasts for the paper's expected lifespan, observe the following precautions when storing your printouts: •... -
Page 83: Transmitting Ecgs
• MUSE Network • Ethernet Line • Wireless Most methods transmit ECGs in GE Healthcare's Hilltop format, but you can also choose to transmit ECGs in XML format. The MAC system can be configured to transmit ECGs during an ECG test. However, you can also manually transmit stored ECGs at any time. -
Page 84: Transmitting Ecgs Locally
Transmitting ECGs Internal Modem External Modem Select File Manager. A list of ECGs opens. Select Location. A list of devices to which the ECG report can be transmitted opens. Do one of the following • If the receiving device is shown, select it and continue to step 4. •... -
Page 85: Transmitting Ecgs Wirelessly
MUSE system. You may also wish to consult your hospital IT department or your local GE Healthcare networking professional regarding modification of your wireless LAN to improve system performance. -
Page 86: Transmitting Ecgs In Xml Format
Transmitting ECGs Transmitting ECGs in XML Format Most methods transmit ECGs in GE Healthcare's proprietary Hilltop format. You can, however, use the following procedure to transmit ECGs in XML to a PC; the data can then be extracted for analysis. -
Page 87: Receiving Ecgs
Receiving ECGs This chapter explains how to receive ECGs from other MAC systems and from a MUSE CV system. Receiving ECGs from Another MAC System Chapter “Transmitting ECGs”, explains how to manually transmit ECGs from one MAC system to another. However, in order to receive those ECGs on the other MAC system, the receiving system must be set up to receive them. -
Page 88: Receiving Ecgs Locally
Receiving ECGs After all the ECGs have been received, select Cancel to take the system out of receiving mode. Select Main Menu. Receiving ECGs Locally Use the following procedure to prepare the MAC system to receive ECGs locally, that is, from within the facility. This method receives ECGs via infrared or direct connection between the two systems. - Page 89 Receiving ECGs This is a purchased option. Before receiving ECGs via modem, connect your modems as described in “Receiving ECGs via Modem” on page • MobileLink wireless This is a purchased option. Before receiving ECGs via MobileLink, connect and configure the MobileLink wireless system as described in the MobileLink Installation and Troubleshooting Guide.
- Page 90 Receiving ECGs • Rhythm displays rhythm information for the current ECG. • Next displays the next selected ECG. • Return closes the display and returns to the list of ECGs. • To print the selected ECG(s), press Print. The system retrieves and prints the test(s). The report format set up in System Setup is used.
-
Page 91: Editing Ecgs
Editing ECGs While it usually not necessary to modify an ECG, the MAC system allows you to edit an ECG's demographic information, ECG measurements, and interpretive statements. After you have edited the ECG, you are prompted to save the updated file. NOTE: If you plan to store ECGs in XML format (see “Transmitting ECGs in XML Format”... -
Page 92: Editing Ecg Measurements
Editing ECGs Select Store to save the edited file. This will replace the original file. Select Cancel or press ‘Esc’ to discard the changes made to the current file. Select Store to save the edited file. Editing ECG Measurements Only overreaders can modify ECG measurements. You must enter an overreader's password and reviewer information before you can edit the measurements. -
Page 93: Editing Interpretive Statements
Editing ECGs Editing Interpretive Statements The MAC system automatically adds interpretive statements to ECG reports. The system allows you to edit these statements as you deem necessary. You can add, modify, join, and delete statements. You must enter an overreader's password and reviewer information before you can edit the statements. - Page 94 Editing ECGs The new statement will be inserted AFTER the current statement. Select statement type… Select the type of statement to insert. The options are: • Acronym • Freetext • Newline Enter a 12SL library acronym or free form text and press Return. To join the selected statement with another statement, select the second statement and press Join.
-
Page 95: Deleting Ecgs And Orders
Deleting ECGs and Orders To free up storage space, the MAC system allows you to delete ECGs and uncompleted orders. This chapter describes those procedures. Deleting ECGs To delete ECGs, you must enter a System or Overread password, if the passwords are defined. -
Page 96: Deleting Orders
Deleting ECGs and Orders Deleting Orders Use the following procedure to delete orders stored locally on the device. From the Main Menu, select Ord Mgr Int. NOTE: Depending on the options enabled on your system, you may need to select More to toggle through the menu until Ord Mgr Int is available. - Page 97 Deleting ECGs and Orders The orders are not deleted and you return to the opening set of menu options. To delete all the completed orders, select Del Completed. The message Are you sure you want to delete all completed orders? opens. Do one of the following: •...
- Page 98 Deleting ECGs and Orders 2046275-016B 5500/MAC 5500 HD ® ®...
-
Page 99: Using An Sd Card
• 512 MB • 1 GB • 2 GB NOTE: The system does NOT support SDHC (High Capacity) SD cards. While cards from any manufacturer work with the system, GE Healthcare recommends and provides cards from SanDisk Corporation. 2046275-016B ® 5500/MAC ®... -
Page 100: Preparing The Sd Card
Using an SD Card Preparing the SD Card Before using the SD card, you must know how to lock, unlock, insert, eject, and format the card. Locking and Unlocking the SD Card You can lock an SD card to secure the data. Before using the SD card, unlock it by moving the lock tab into the unlocked position (1). -
Page 101: Managing Files On The Sd Card
Using an SD Card Select Yes to format the card. Managing Files on the SD Card To use the SD card for external storage, use the File Manager to copy files to the card, restore files from the card, and save files in XML format to the card. Displaying Stored ECGs Power on the unit. -
Page 102: Restoring Files From The Sd Card
Using an SD Card Restoring Files from the SD Card After files have been copied to an SD card, you can use the Restore All function to copy files from the SD card to internal storage. NOTE: If CT Data Guard is enabled and its Prevent deleting of untransmitted records field is set to Yes, you will receive the following warning if any of the records in internal storage have not been transmitted: The operation deletes existing records. -
Page 103: Updating Software From The Sd Card
Using an SD Card Updating Software from the SD Card Software updates are provided on an SD card. NOTE: Before applying a software update, do the following: • Confirm the update is compatible with the main board in your device. •... - Page 104 Using an SD Card Proceed to step 7. Do one of the following: • To cancel the update to the boot code, press any key other than Enter. The following messages are displayed: Boot code not updated. Can update later from service setup. •...
-
Page 105: System Setup
System Setup This chapter describes how to use System Setup to configure your system. It provides an overview of the setup process and details on how to set up: • Automatic tasks • System basics • ECGs • Signal Averaged ECGs •... - Page 106 System Setup • Order Manager Interface • Input Method Select • ECG • ECG Acquisition • ECG Analysis • Patient Questions • Writer Setup • Resting ECG Reports • Report Leads • Confirmed Reports • Unconfirmed Reports • Pediatric ECG Reports •...
-
Page 107: Process Overview
System Setup • 15 Lead Exercise • Extra Leads • Report Leads • Exercise Reports • Final Report • Screen • Inputs/Outputs • Hi-Res • Master's Step • Print Setup • Save Setup • To System • To SD Card •... -
Page 108: Setting Up Automatic Tasks
System Setup Use this option if you want to use the settings to quickly configure other MAC systems. Be sure that an SD card is inserted into the system's card slot. • To cancel, select Do not save setup. Select Main Menu to exit System Setup. Setting Up Automatic Tasks The MAC system can be configured to perform the following tasks automatically: •... -
Page 109: Setting Up Resting Ecg Report Printing
System Setup Setting Up Resting ECG Report Printing This option allows you to select the report format that will print for different resting ECGs. Log into the System Setup function. Refer to “Process Overview” on page 107. Select ECG. Select the type of ECG reports to configure. You have the following options: •... -
Page 110: Setting Up Automatic Ecg Transmission
System Setup Setting Up Automatic ECG Transmission Use the following procedure to set up the system to automatically transmit ECGs. NOTE: Before setting up automatic transmission, you must define the receiving device, its default location, and its transmission paramters. Refer to “Transmission”... -
Page 111: Setting Up System Basics
System Setup Setting Up System Basics This section describes the following basic system settings: • Miscellaneous Setup • Patient Questions • Screen Colors • Transmission • Network Setup • Option Activation • Date and Time • Language • Order Manager Interface •... - Page 112 System Setup Miscellaneous Setup (cont'd.) Description Field Site number Identifies the site where the unit is located. This corresponds with a site number used by the MUSE CV system with which this unit communicates. Valid values range from 1–254, inclusive. Location number Identifies the location where the unit is located.
-
Page 113: Patient Questions
System Setup Miscellaneous Setup (cont'd.) Description Field Device password Prevents unauthorized persons from accessing the system. The password must be entered to use the system. Enter a 6–character password. By default, the password is blank. Keep track of all assigned passwords. SD Card Storage Determines where the ECGs are automatically stored. - Page 114 System Setup Patient Questions (cont'd.) Description Field Determines the method the system uses to enter the patient's age. Select one of the following values: • Date of birth Select this option to enter the patient's birth date in day-month-year format. The system will calculate the patient's age.
- Page 115 System Setup Patient Questions (cont'd.) Description Field Referred by number Determines whether the system will prompt you to enter the ID number of the referring physician. Select Yes to prompt for this information. When entering the referring physician's number, enter numbers that are compatible with the MUSE CV system to which the MAC system communicates.
-
Page 116: Screen Colors
System Setup Screen Colors To configure the system's screen colors, log on to the System Setup screen, select Basic System > Screen Colors, and complete the field described in the following table. Screen Colors Field Description Screen Colors Defines the system colors. Select the desired color scheme: •... - Page 117 • To transmit by LAN, select Ethernet (MUSE). NOTE: Infrared communication is not available on MAC 5500 HD systems. If transmitting ASCII or XML data, the PC that receives XML data through the serial line must be running a terminal emulator program (for example, HyperTerminal).
-
Page 118: Network Settings
System Setup Network Settings To configure the system's local area network settings, log on to the System Setup screen, select Basic System > Network Setup, and complete the fields described in the following table. Network Settings Field Description IP Address Identifies the network's IP address. - Page 119 System Setup A list of the following options is displayed. Option Description Code ST12 12 Lead Enables 12–lead stress tests. Exercise ST15 15 Lead Enables 15–lead stress tests. Exercise Hi-Res HRES Enables QRS signal averaging. PHi-Res PRES Enables P-wave signal averaging, which enhances measurement accuracy by maximizing signal fidelity.
-
Page 120: Date And Time
System Setup Option Code Description CRIT Critical Values Enables the critical value function, which allows you to define custom alerts based on key ECG values. If the Critical Values function is enabled, you must configure the alerts. Refer to “Critical Values Setup” on page 136 for more information. -
Page 121: Power Up Options
System Setup Power Up Options To configure the system's power up application, log on to the System Setup screen, select Basic System > Power Up Options, and complete the fields described in the following table. NOTE: For detailed instructions, refer to “Setting Up Power Up Function”... -
Page 122: Input Method
System Setup Order Manager Interface (cont'd.) Description Field Auto order delete Determines whether an order will deleted automatically when the associated ECG is deleted. Select Yes to automatically delete an order when its associated ECG is deleted. An ECG is deleted automatically in either of the following conditions: •... -
Page 123: Setting Up Ecgs
System Setup Input Method Field Description Patient Data Input Determines which device will be connected to the PS/2 port. Valid Device options are: • PS/2 Keyboard • Card Reader • Bard Code Reader • Internal Keyboard Query Configuration Determines how the input device should be configured. Valid values vary depending on the selected device. -
Page 124: Ecg Acquisition
ECG acquisition. NOTE: GE Healthcare recommends that this be set to No unless it is known that the majority of this cardiograph usage will be on patients with pacemakers. The pacemaker pulse enhancement can always be enabled on a per-patient basis at the time of ECG acquisition within the resting ECG programs. -
Page 125: Ecg Analysis
System Setup ECG Acquisition (cont'd.) Description Field Prompt Level Determines the level at which the Hookup Advisor prompts users regarding patient hookup quality. This field is available only if Hookup Advisor is enabled. There are three possible settings: • Never The system will not prompt the user when the signal quality is poor. - Page 126 Store XML format Determines whether the system will automatically save ECGs in XML format in addition to the proprietary GE Healthcare Hilltop format. If this option is selected, the XML files are stored to the following path on a blank SD Card Drive: \XML\*.XML.
-
Page 127: Patient Questions
System Setup ECG Analysis (cont'd.) Description Field Auto ECG Determines which ECGs are transmitted automatically: transmission • All ECGS All ECGs are transmitted upon completion. • No ECGS No ECGs are transmitted automatically. • Only ABNORMAL ECGs Only ECGs that the 12SL interpretation mark as abnormal are transmitted automatically. -
Page 128: Ecg Reports
System Setup ECG Reports You can configure the reports generated for Resting ECGs, Pediatric ECGs, 15-Lead ECGs, and Vector Loops ECG. For each ECG, you can configure the: • leads used for the reports, • report formats used for confirmed ECGs, and •... - Page 129 System Setup Report Leads (cont'd.) Description Field Rhythm leads Defines the lead option for each of the six rhythm groups to determine the rhythm leads that print when you select the rhythm key within an application. • Select 3 leads to define which three leads in a three-lead Rhythm report print.
- Page 130 System Setup Extra Leads Description Field Lead Set Determines the three additional leads used for 15–lead reports. You can: • Select a predefined set of leads. • Right Precordial [V4r, V5r, V6r] • Posterior [V7, V8, V9] • NEHB [D, A, J] •...
- Page 131 System Setup System Setup > ECG> Vector Loops ECG Reports > Confirmed Reports The following table identifies the available report settings for confirmed ECGs. Confirmed Reports Settings Field Description Interpretation with Available for each report format, this field determines how many copies of the report with 12SL interpretation will print.
- Page 132 System Setup Confirmed Reports Formats (cont'd.) Formats Resting Vector Loops Pediatric 15 Lead 5 by 2s + 3 rhythm lds 5 by 10s 12 Rhythm leads Autorhythm Expanded Median Pharma 4 by 2.5s + 2 rhythm lds Swedish Format 1 Swedish Format 2 Unconfirmed Reports The Unconfirmed Reports settings allow you to configure the following values:...
- Page 133 System Setup The following table identifies the available report settings for unconfirmed ECGs. Unconfirmed Reports Settings Description Field Interpretation with Available for each report format, this field determines how many copies of the report with 12SL interpretation will print. You can enter any value from 0 to 10.
-
Page 134: Analog Outputs
System Setup Unconfirmed Reports Formats (cont'd.) Formats Resting Vector Loops Pediatric 15 Lead 5 by 2s 5 by 2s + 1 rhythm ld 5 by 2s + 3 rhythm lds 5 by 10s 12 Rhythm leads Autorhythm Expanded Median Pharma 4 by 2.5s + 2 rhythm lds Swedish Format 1 Swedish Format 2... -
Page 135: Ct Data Guard
System Setup Analog Outputs (cont'd.) Description Field Delay Defines the delay in milliseconds for the TTL Output QRS detector signal. Enter a value from 0 to 100. QRS Beep Determines whether the system beeps for each QRS complex. Select On to enable the beep. CT Data Guard To configure the Clinical Trial Data Guard, log on to the System Setup screen, select ECG >... -
Page 136: Critical Values Setup
System Setup CT Data Guard — Clinical Trial Setup (cont'd.) Description Field Dose Type Determines whether the dose type is required on each test. Select Yes to require the dose type. If you require dose type, you can edit the list of dose types. You can have up to 20 types. - Page 137 System Setup Notifications Setup To configure the critical value notifications, log on to the System Setup screen, select ECG > Critical Values Setup, and complete the fields described in the following tables. Critical Values Notification Setup Field Description Enabled Enables or disables the critical value notifications. Select Yes to notifications enable the critical value notifications.
- Page 138 System Setup Critical Values Notification Setup (cont'd.) Description Field Ischemia detection Ischemia detection enables the notification for ECGs in which ischemia is detected. Select Yes to enable ischemia notifications. AV Block detection AV Block detection enables the notification for ECGs in which an AV block is detected.
-
Page 139: Setting Up Signal Averaged Ecgs
Healthcare recommends averaging to a minimum of 250 beats. Target Noise Level Determines the target level of noise in microvolts. Enter a value from 0.1 to 1.0. GE Healthcare recommends averaging a noise level of 0.3 microvolts. Correlation Determines the degree of correlation threshold. GE Healthcare Threshold recommends the Very High setting. -
Page 140: Miscellaneous Setup
System Setup Miscellaneous Setup To configure the exercise tests' basic settings, log on to the System Setup screen, select Exercise Test > Miscellaneous Setup, and complete the fields described in the following table. Miscellaneous Setup Field Description Timeout Interval Determines how long it takes for a menu or prompt to close if it is not being used. -
Page 141: Writer Setup
System Setup Writer Setup To configure the writer settings for exercise tests, log on to the System Setup screen, select Exercise Test > Writer Setup, and complete the fields described in the following table. Writer Setup Field Description Speed Determine the writer's default speed in millimeters per second. Gain Determines the writer's default gain setting in millimeters per millivolts. - Page 142 System Setup Use the following instructions to select the correct Report Leads for each report type: • 12 Lead Exercise Report System Setup > Exercise Test > 12 Lead Exercise > Report Leads • 15 Lead Exercise Report System Setup > Exercise Test > 15 Lead Exercise > Report Leads Report Leads Field Description...
- Page 143 System Setup Report Leads (cont'd.) Description Field Swedish format Sets the rhythm lead(s) to print in the Swedish Format reports. rhythm leads When you change a rhythm lead, the new lead will print on all reports that include the lead. For example, if you select V5 for the Swedish format rhythm lead 1, then the V5 waveform will print on all reports that include Swedish format rhythm lead 1.
- Page 144 System Setup The following table identifies the available report settings for exercise reports. Exercise Reports Settings Description Field Exercise Reports Determines which format will be used for each exercise report. Refer to the following table for a list of the available formats. Median Report Determines which format will be used for each median report.
- Page 145 System Setup To configure the final report, select System Setup > Exercise Test > Final Report and complete the fields in the following table. Final Report Field Description Storage Option Selects the method for storing the final report. Options are: •...
-
Page 146: Screen
System Setup Screen To configure how your exercise tests are displayed on the screen, log on to the System Setup screen, select Exercise Test > Screen, and complete the fields described in the following table. Screen Field Description Display Rhythm Determines whether the median complex is displayed in front of the Medians Rhythm Lead 1, 2, and 3. - Page 147 System Setup Inputs/Outputs Field Description Slow Analog Output Determines the slow analog output for controlling external exercise equipment. Options include: • Not Used • DC Heart Rate • Workload • Speed (x1) • Speed (x3) • Grade If using exercise protocols for an ergometer or an analog treadmill (see Chapter “Editing...
-
Page 148: Hi-Res
System Setup Inputs/Outputs (cont'd.) Description Field TTL Output Determines how the TTL output will be used. Options are: • Not Used • QRS Detect • BP Prompt NOTE: If selecting any of the external blood pressure devices, the TTL output must be configured to provide a QRS Trigger that meets the specifications of the blood pressure device. -
Page 149: Setting Up A Card Reader
System Setup Hi-Res Settings (cont'd.) Description Field Correlation Determines the correlation threshold. Options are: Threshold • Medium • High • Very High • Ultra High Template Format Determines how many copies of this report print for the Hi-Res function. Enter a value from 0 to 10. If you enter 0, the report will not print. -
Page 150: Automatic Configuration
System Setup Automatic Configuration Use the following procedure to automatically configure your magnetic card reader. Obtain a configuration card. For information on creating magnetic patient ID cards, refer to Appendix “Creating Bar Codes and Magnetic Cards”. With the card reader properly mounted, connect to port A on the back of the system. -
Page 151: Setting Up A Bar Code Reader
System Setup Setting Up a Bar Code Reader This section describes two methods for configuring the bar code reader: • Automatic Configuration • Manual Configuration NOTE: When configured for a bar code reader, the system will prompt you to scan the patient ID bar code when you select Patient Information. -
Page 152: Setting Up Master's Step Test
System Setup Enter the bar code configuration information. For information on creating bar codes, refer to Appendix “Creating Bar Codes and Magnetic Cards”. Press esc twice. Select Save Setup > To System. Setting Up Master's Step Test To configure the Master's Step Test, log on to the System Setup screen, select Master's Step, and complete the fields described in the following table. -
Page 153: Managing System Setup
System Setup Master's Step Setup (cont'd.) Description Field Continuous Determines whether the rhythm is printed continuously between Recording post exercise ECGs. Post Exercise ECG Defines the time, in minutes, after the first post exercise ECG when Time an additional ECG should be taken. You can take up to nine ECGs. Set any undesired tests to 0. - Page 154 System Setup An SD card with the system settings must be inserted into the device's card slot. • To cancel the restore, select Do Not Restore Setup. 2046275-016B 5500/MAC 5500 HD ® ®...
-
Page 155: Maintenance
Maintenance Regular maintenance, irrespective of usage, is essential to ensure that the equipment will be functional when required. For the MAC system, regular maintenance includes the following: • Equipment Inspection and Cleaning • Paper Maintenance • Battery Maintenance • Leadwire Adapter Replacement For the maintenance procedures for your peripheral equipment, refer to the documentation provided with that equipment. -
Page 156: Cleaning And Disinfecting Exterior Surfaces
Maintenance • Verify that all cords and connectors are securely seated. • Inspect keys and controls for proper operation: • Toggle keys should not stick in one position. • Knobs should rotate fully in both directions. Cleaning and Disinfecting Exterior Surfaces Clean and disinfect the exterior surfaces of all equipment and peripheral devices monthly, or more frequently if needed. -
Page 157: Cleaning, Disinfecting, And Storing Ecg Cables And Leadwires
Maintenance Cautions • Follow the cleaning instructions exactly. • Wring excess disinfectant from wipe before using. • Never immerse the device, cables, or leadwires in any liquid, as this may corrode metal contacts and affect signal quality. • Do not allow fluid to pool around connection pins. If this happens, blot dry with a soft, lint-free cloth. - Page 158 Maintenance • Unit malfunction • Voided warranty Use the following procedure to clean and disinfect the cables and leadwires. Remove cables and leadwires from the device or system before cleaning. Use care in cleaning leadwires to prevent pulling the long wires from the connector ends.
-
Page 159: Cleaning, Disinfecting, And Storing Handheld Devices
Maintenance • Never use solutions or products that contain any type of Ammonium Chloride such as, but not limited to: • Dimethyl Benzyl Ammonium Chloride • Quaternary Ammonium Chloride solutions • Abrasive cleaners or solvents of any kind • Acetone •... - Page 160 Maintenance Do NOT use any of the following cleaning products, or products that contain the same active ingredients and solutions, which are known to cause the problems previously listed: • Sani-Cloth® Wipes • Ascepti® Wipes • HB Quat® • Clorox® Wipes (they do not contain bleach) •...
-
Page 161: Paper Maintenance
Maintenance Storage Use the following guidelines when storing acquisition modules: • Always remove the batteries when the device is not in use, even for short periods of time. • Store in a dry, well-ventilated area. • Hang the device, using a holder if available. •... -
Page 162: Setting The Correct Paper Size
Maintenance Setting the Correct Paper Size The MAC system can accommodate standard (US Letter) and A4 fanfold thermal ECG paper. To ensure that the paper feeds correctly, you must adjust the paper guide Open the MAC writer drawer. To set the tray for A4 paper, slide the paper guide toward the rear of the device. To set the tray for standard (US Letter) paper, slide the guide toward the front of the device. -
Page 163: Loading The Paper
Maintenance Loading the Paper Use the following instructions to load paper into the MAC system. Refer to the following illustration. Open the writer drawer. Place the pad of paper with the holes on the left. Advance the first sheet of paper. Close the writer drawer securely. -
Page 164: Charging The Battery
Maintenance Charging the Battery A fully charged battery ensures that the MAC system will operate without being connected to an AC outlet. The MAC system's battery should be charged at the following times: • Before initial use • Between acquisitions •... -
Page 165: Conditioning The Battery
A deep discharge cycle occurs when the battery is discharged until the system shuts down and then recharged until it is full. GE Healthcare recommends one deep discharge cycle once every three months, but does not recommend over-exercising the battery with multiple deep discharge cycles. -
Page 166: Replacing Leadwire Adapters
Maintenance WARNING: BATTERY PACK DISPOSAL — Do NOT dispose of the battery pack by fire or burning. Follow local environmental guidelines concerning disposal and recycling. WARNING: CHEMICAL BURN — If battery fluid contacts your skin, eyes, or clothing, immediately wash the area with clean water and see a doctor. Replacing Leadwire Adapters The following diagram shows how to replace the acquisition leadwire adapters: 2046275-016B... - Page 167 Maintenance 2046275-016B 5500/MAC 5500 HD ® ®...
- Page 168 Maintenance 2046275-016B 5500/MAC 5500 HD ® ®...
-
Page 169: Troubleshooting
The following sections identify some of the more common problems with the MAC system and list their potential causes and solutions. If this information cannot resolve your issue, contact GE Healthcare Technical Support. General Troubleshooting Guidelines If the system is not working properly, save time troubleshooting by asking these basic questions: •... -
Page 170: Aci-Tipi Report Does Not Print
Troubleshooting Slipped or misplaced electrodes can result in faulty readings. Refer to “Preparing the Patient's Skin” on page • Verify proper electrode application. Perspiration, excessive hair, lotions, and dead skin cells must be removed from the electrode site. Refer to “Electrode Placement”... -
Page 171: System Errors
Troubleshooting • Check the Emergency Stop switch on the device. Verify it is not depressed. • Check the device settings. Verify that it does not retain settings from the previous patient. System Errors The following errors may occur while you are operating this system. You may be required to perform some action. - Page 172 Troubleshooting Cause Problem Solution Cannot use the system because Device Password has been Contact your administrator for the Device Password does not work. changed or has not been Device Password. adequately communicated to the staff. You are prompted to format to The internal storage has been Format the internal storage to recover the file system.
-
Page 173: Report Formats
Report Formats The MAC system provides several report formats to provide the information you need to analyze and evaluate the patient's ECG. The following sections describe the available formats so you can choose the correct report for your needs. Numeric Reports Several reports use numeric titles that describe the way in which the data is presented. -
Page 174: Additional Reports
Report Formats • 2 by 10s • 3 by 5 @ 50mm/s • 3 by 10s • 4 by 2.5s • 4 by 2.5s + 1 rhythm lead • 4 by 2.5s + 3 rhythm leads • 4 by 10s •... -
Page 175: In-Test Reports
Report Formats Report Description ACI-TIPI The analysis of the acquired ECG data appears at the top of the report. Hi-Res or PHi-Res X,Y,Z data at two different amplitudes. Signal Overlapped One median complex for each of the 12 leads combined with 10 seconds of 3-lead rhythm. -
Page 176: Exercise Final Reports
Report Formats Report Description 12 or 15-Lead Based on Exercise report setups, a variety of 12 or 15 Lead report Report formats will print without ECG analysis when the 12 ld key is pressed or when 12/15 lead reports are configured in the protocol. 5 Second Rhythm This report can be chosen from the Edit Protocol application to print Report... -
Page 177: Exercise Report Codes
Report Formats Exercise Report Codes The following report codes are printed in the lower left corner of the exercise reports. Code Description Auto Arrhythmia Reporting is ON. Auto Arrhythmia Reporting is OFF. Stag Hold is ON. Stag Hold is OFF. Cubic Spline is ON. - Page 178 Report Formats 2046275-016B 5500/MAC 5500 HD ® ®...
-
Page 179: Master's Step Data
Master's Step Data The following sections provide the information you need to run a Master's Step stress test. NOTE: The Master's Step is an option and is available only in Japan. Master's Step Table The following table identifies the number of steps to set according to the patient's age, gender, and weight. - Page 180 Age (Years) Weight (kg) Gender 5–9 10–14 15–19 20–24 25–29 30–34 35–39 40–44 45–49 50–54 55–59 60–64 65–69 70–74 75–79 Male 18–22 Female Male 22–26 Female Male 27–31 Female Male 32–35 Female Male 36–40 Female Male 41–44 Female Male 45–49 Female Male 50–53...
- Page 181 Age (Years) Weight (kg) Gender 5–9 10–14 15–19 20–24 25–29 30–34 35–39 40–44 45–49 50–54 55–59 60–64 65–69 70–74 75–79 Male 73–76 Female Male 77–81 Female Male 82–85 Female Male 86–90 Female Male 91–93 Female Male 94–99 Female Male 100–104 Female...
-
Page 182: St-T Changes
Master's Step Data ST-T Changes The existence of any ST-T change is assessed by classifying ST-T into three assessment levels: • Positive One of the following criteria must be met on 2 or more leads: • ST Depression ≥ 0.1 mV •... -
Page 183: Creating Bar Codes And Magnetic Cards
Creating Bar Codes and Magnetic Cards The following sections provide the information you need to configure bar codes and magnetic patient ID cards. The bar code reader can read Code 39, 39EX, 128, PDF-417 (2-D), Interleaved Code 2 of 5, and Data Matrix bar codes. The card reader can read magnetic cards that adhere to ISO 7810 and 7811. - Page 184 Creating Bar Codes and Magnetic Cards Bar Code Reader and Magnetic Card Reader Configuration Fields Field Byte Length Total number of Enter the total number of bytes contained in the magnetic patient card bytes or patient bar code. This is typically, but not necessarily, the sum of the bytes listed in the following fields.
-
Page 185: Automatic Reader Configuration
Creating Bar Codes and Magnetic Cards Bar Code Reader and Magnetic Card Reader Configuration Fields (cont'd.) Field Byte Length Enable data Determines whether the system will issue a query for matching orders retrieval or patient information when scanning the bard code or magnetic card. To enable data retrieval, select Yes. - Page 186 Creating Bar Codes and Magnetic Cards Automatic Configuration Settings Field Character used to reserve byte space Patient ID First name Last Name Year of birth Month of birth Day of birth Gender Visit Number 2046275-016B 5500/MAC 5500 HD ® ®...
- Page 188 +49 761 45 43 -233 Shanghai, People's Republic of China 201203 Fax: +1 414 355 3790 Tel: +86 21 3877 7888 Fax: +86 21 3877 7451 GE Medical Systems Information Technologies, Inc., a General Electric Company, going to market as GE Healthcare. www.gehealthcare.com 0459...
Need help?
Do you have a question about the MAC 5500 and is the answer not in the manual?
Questions and answers
the ekg print is very light. hard to see
the ekg ink is very light. Hard to see