Table of Contents
Advertisement
Advertisement
Table of Contents

Summary of Contents for Cardinal MED VUE Mv1
- Page 1 Model MV1 Medical Weight Analyzer Owner’s Manual 8555-M512-O1 Rev D 01/15...
- Page 2 8555-M512-O1 Rev D 01/15...
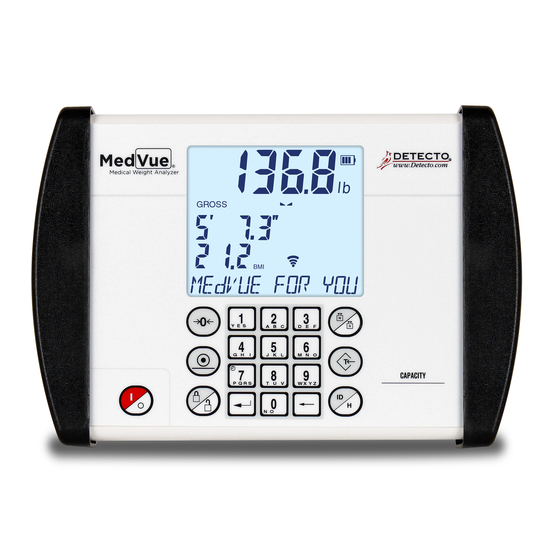
- Page 3 INTRODUCTION ® Thank you for purchasing our MedVue Model MV1 Medical Weight Analyzer. It has been manufactured with quality and reliability at our factory in Webb City, MO USA. The MV1 has been tested before leaving our factory to insure accuracy and dependability for years to come. This manual is provided to guide you through installation, operation and maintenance of the MedVue Model MV1 Medical Weight Analyzer.
- Page 4 FCC COMPLIANCE STATEMENT This equipment generates uses and can radiate radio frequency and if not installed and used in accordance with the instruction manual, may cause interference to radio communications. It has been tested and found to comply with the limits for a Class A computing device pursuant to Subpart J of Part 15 of FCC rules, which are designed to provide reasonable protection against such interference when operated in a commercial environment.
-
Page 5: Table Of Contents
TABLE OF CONTENTS SPECIFICATIONS ..........Page 1 Standard Features . - Page 6 TABLE OF CONTENTS ERROR AND STATUS DISPLAYS ........Page 49 BEFORE YOU CALL SERVICE .
-
Page 7: Specifications
Power Requirements ..6 “C” cell Alkaline, Ni-Cad or NiMH batteries (not included) OR an optional 12 VDC 1.25A wall plug-in AC power adapter (Cardinal part number MV1PWR). Operating Temperature ..14 to 104 ºF (-10 to +40 ºC) Display . -
Page 8: Site Preparation Requirements
SITE PREPARATION REQUIREMENTS The MedVue Model MV1 Medical Weight Analyzer is a precision weight indicating instrument. As with any precision instrument, it requires an acceptable environment to operate at peak performance and reliability. This section is provided to assist you in obtaining such an environment. -
Page 9: Installation
INSTALLATION Unpacking Carefully remove the MedVue Model MV1 Medical Weight Analyzer from the shipping carton and inspect it for any damage that may have taken place during shipment. You should keep the carton and packing material for return shipment if it should become necessary. -
Page 10: Mounting
Mounting The MedVue Model MV1 Medical Weight Analyzer is mounted to the scale (or an optional desktop/wall bracket) using a swivel ball and socket assembly. To install the MV1 Rubber Ball in to the Swivel Ball Socket, slightly loosen the Adjustment Knob to allow the two parts of the socket to open enough to insert the Rubber Ball. -
Page 11: Interconnections
Note that pins 3, 4, 8 and 9 are not used. Figure No. 4 MATING CONNECTOR INFORMATION DESCRIPTION ITEM Cardinal Part # CONNECTOR DE9-P 6610-2379 CONNECTOR SHELL C883010001 6610-1131 The USB port on the MV1 is a device (or upstream) port and uses readily available cables with the industry standard “B”... -
Page 12: Serial I/O Port
Serial I/O Port The serial I/O port is a 9-pin "D" connector on the rear panel of the MV1. Figure No. 5 shows the Serial I/0 connector along with the identity of the pins used. Make certain that the pins are correctly identified before soldering a wire to them. Use the connector retaining screws to hold the serial cable connector securely to the rear panel. -
Page 13: Battery Status Symbol
Battery Status Symbol A battery status symbol will be displayed when 4 Bars = 100% batteries are installed. The number of bars 3 Bars = 75% indicates the level of charge remaining in the 2 Bars = 50% batteries. 1 Bar = 25% No Bars = Low Battery Low Battery Indicator When the batteries are near the point they need to be replaced (Alkaline) or recharged... -
Page 14: Keypad Functions
KEYPAD FUNCTIONS DO NOT operate the keypad with pointed objects (pencils, pens, etc). Damage to keypad resulting from this practice is NOT covered under warranty. Figure No. 7 This is the ON/OFF key. With the MV1 off, pressing this key will apply power to it and turn on the display. -
Page 15: Body Mass Index Functions
Basic Functions, Cont. This is the LOCK/RELEASE key. It is used to lock and unlock the display. If the HOLD feature was enabled during setup and calibration, pressing this key (after obtaining a stable weight) will cause the MV1 to lock onto the weight. Pressing this key again will unlock the display and return it to zero. -
Page 16: Ncontrol Feature
Body Mass Index (BMI) Functions This is the CLEAR (BACKSPACE) key. It is used to clear an incorrect entry from the display without processing the data. If an incorrect entry is made, press this key and re-enter the correct data. When entering the ID, pressing this key will act as a “backspace”... -
Page 17: Annunciators
ANNUNCIATORS The annunciators are turned on to indicate that the display is in the mode corresponding to the annunciator label or that the status indicated by the label is active. Weight Battery Display Status Height or Clock Display Displayed Display when optional hardware is Messages... - Page 18 The CAL annunciator will be turned on after pressing the calibration switch, to show that the MV1 is in the Setup and Calibration mode. This annunciator is turned on to indicate that the displayed weight is in pounds. The kg annunciator is turned on to indicate that the displayed weight is in kilograms. ' '' The ( ' ) feet and ( '' ) inches annunciators are turned on when the displayed height measurement is in feet and inches.
-
Page 19: Operation
OPERATION Basic Operation To Weigh 1. Press ON/OFF key to turn the MV1 on. 2. Press ZERO key to zero weight display. ZERO, GROSS and lb or kg annunciator will turn on to show that the scale is ready for use. 3. - Page 20 Tare Weight Entry (Tare weight is known) 1. In Gross Weight mode (GROSS annunciator on), press the TARE key. 2. The Display will change to show ENTER TARE WT and the TARE annunciator will turn on. 3. Use the numeric keys and enter a tare weight. Note that when entering tare weights, a maximum of 4 digits can be entered and the numbers advance from right to left in the display.
-
Page 21: Tare Storage And Recall
Tare Storage and Recall NOTE: ID must be enabled to use stored Tare. Refer to SYSTEM Menu, Enable ID. To Store Tare Weight 1. In Gross Weight mode (GROSS annunciator on), press the TARE key. 2. The Display will change to show ENTER TARE WT and the TARE annunciator will turn on. 3. -
Page 22: Basic Operation With Id
Basic Operation with ID To Weigh 1. Press ON/OFF key to turn the MV1 on. 2. Press ZERO key to zero weight display. ZERO, GROSS and lb or kg annunciator will turn on to show scale is ready for use. 3. - Page 23 Tare Weight Entry (Tare weight is known) 1. In Gross Weight mode (GROSS annunciator on), press TARE key. 2. Display will show )0 or previously entered tare and TARE annunciator will turn on. 3. If weight displayed is acceptable, press PRINT/ENTER key to save it. Otherwise, use the numeric keys and enter a new tare weight.
-
Page 24: Body Mass Index (Bmi) Operation
Body Mass Index (BMI) Operation Using Mechanical Height Rod or Manually Entering Height 1. Press ON/OFF key to turn the MV1 on. 2. Press ZERO key to zero weight display. ZERO, GROSS and lb or kg annunciator will turn on to show scale is ready for use. 3. -
Page 25: Body Mass Index (Bmi) Operation With Dhr Using Digital Height Rod
Body Mass Index (BMI) Operation with DHR Using Digital Height Rod IMPORTANT! Before performing the operations on this page, the digital height rod must be in its “starting position” (inner sliding tube must be down completely inside outer stationary tube and headpiece folded flat against stationary tube) prior to turning on the MV1. -
Page 26: Body Mass Index (Bmi) Operation With Id And Dhr Using Digital Height Rod
Body Mass Index (BMI) Operation with ID and DHR Using Digital Height Rod IMPORTANT! Before performing the operations on this page, the digital height rod must be in its “starting position” (inner sliding tube must be down completely inside outer stationary tube and headpiece folded flat against stationary tube) prior to turning on the MV1. -
Page 27: Calibration Setup (Protected Setup Parameters)
CALIBRATION SETUP (Protected Setup Parameters) Your MedVue Model MV1 Medical Weight Analyzer has been thoroughly tested and calibrated before being shipped to you. If you received it with a scale, calibration is not necessary. If the MV1 is being connected to a scale for the first time or recalibration is necessary for other reasons, the following describes the steps to perform calibration setup on the MV1. - Page 28 Navigation Keys, Cont. ID/HEIGHT – (Next Menu or Parameter) If at the menu level, this will take you to the previous menu item in the list below. If SCALE is currently displayed and the setup has been accessed through the calibration switch, then this will return you to TIME SETTINGS. If setup has been accessed through setup review, then pressing this when SYSTEM is displayed will return you to TIME SETTINGS.
- Page 29 SCALE With SCALE displayed, press the PRINT/ENTER key. The display will change to CAPACITY. Proceed to the CAPACITY (Scale Capacity) parameter. Otherwise, press the ID/HEIGHT key to advance to the ZERO menu. CAPACITY (Scale Capacity) The display will show CAPACITY and the current setting. If the value displayed is acceptable, press the PRINT/ENTER key to save it.
- Page 30 SAMPLE RATE (Sample Rate) The display will show SAMPLE RATE and the current setting. If the value displayed is acceptable, press the PRINT/ENTER key to save it. Otherwise, using the numeric keys, enter a new value and then press the PRINT/ENTER key to save it. The sample rate may be set from a minimum of 1 sample per second to a maximum of 100 samples per second in one sample per second intervals.
- Page 31 ZERO With ZERO displayed, press the PRINT/ENTER key. The display will change to ZERO LIMIT. Proceed to the Two Percent Zero Tracking Range Limit parameter. Otherwise, press the ID/HEIGHT key to advance to the FILTER menu. ZERO LIMIT (Two Percent Zero Tracking Range Limit) This setting limits the scale to zero only + or - 2% of the scale capacity.
- Page 32 FILTER With FILTER displayed, press the PRINT/ENTER key. The display will change to FILTER MOdE. Proceed to the Filter Type parameter. Otherwise, press the ID/HEIGHT key to advance to the CALIBRATION menu. FILTER MOdE (Filter Type) The display will show FILTER MOdE and the current setting. If the value displayed is acceptable, press the PRINT/ENTER key to save it.
- Page 33 CALIbRATION With CALIbRATION displayed, press the PRINT/ENTER key. The display will change to CALIbRATE. Proceed to the Perform Calibration parameter. Otherwise, press the ID/HEIGHT key to advance to the GRAVITY menu. CALIbRATE (Perform Calibration) The display will show CALIbRATE and the current setting (NO). ...
- Page 34 Single Calibration Point LOAdEd CAL WT (Load Calibration Weight) The display will show LOAdEd CAL WT (which is a prompt for entry of the calibration weight value) and placement of this amount of test weight on scale platform. 1. Make certain scale platform is empty and free of debris. 2.
- Page 35 Multi-point Calibration CAL WEIGHT 1 (First Calibration Weight) The display will show CAL WEIGHT 1 (which is a prompt for entry of the first calibration weight value) and placement of this amount of test weight on scale platform. Note that the MV1 defaults to half (½) of the scale capacity.
- Page 36 GRAVITY With GRAVITY displayed, press the PRINT/ENTER key. The display will change to GRAVITY ENAbLE. Proceed to the Enable Gravity Constant parameter. Otherwise, press the ID/HEIGHT key to advance to the LOCK menu. GRAVITY ENAbLE (Enable Gravity Constant) ® The Detecto MedVue Model MV1 Weight Analyzer is equipped with a gravity constant function which means that it can be calibrated in one location and then adjusted to match the gravity at the location where it will used.
- Page 37 LOCK With LOCK displayed, press the PRINT/ENTER key. The display will change to HOLd MOdE. Proceed to the Hold Mode parameter. Otherwise, press the ID/HEIGHT key to advance to the SYSTEM menu. HOLd MOdE (Hold Mode) The Hold Mode Sets the locking functionality of the MV1. The display will show HOLd MOdE and the current setting.
- Page 38 8555-M512-O1 Rev D 01/15...
-
Page 39: Calibration Setup (Non-Protected Setup Parameters)
CALIBRATION SETUP (Non- Protected Setup Parameters) SYSTEM With SYSTEM displayed, press the PRINT/ENTER key. The display will change to LANGUAGE. Proceed to the Language parameter. Otherwise, press the ID/HEIGHT key to advance to the CALIBRATION menu. LANGUAGE (Language) The display will show LANGUAGE and the current setting. If the value displayed is acceptable, press the PRINT/ENTER key to save it. - Page 40 SLEEP MOdE (Sleep Mode) The Sleep Mode feature also conserves power when the MV1 remains unused for a selected period of time (approximately 1 to 9 minutes). When enabled the display will show the date and time and the backlight will be turned off. The Sleep Mode feature requires the MV1 to remain at a stable zero weight to activate.
- Page 41 bARCOdE (Use ID Scanner) This setting determines whether the MV1 allows a scanner to be used to input an ID number to be entered prior to beginning the weighing operation. This applies to both Basic Operation and with the BMI feature enabled. The display will show bARCOdE and the current setting.
- Page 42 HI RESOLUTION (High Resolution Mode) The High Resolution Mode feature will display the weight at 10 times the standard resolution. For example, a MV1 configured for 400 lb x 0.2 lb will display weight in high resolution mode at 400 lb x 0.02 lb. NOTE: If dECIMAL=3, the High Resolution Mode is not available.
- Page 43 SERIAL PORT With SERIAL PORT displayed, press the PRINT/ENTER key. The display will change to RS232 MOdE. Proceed to the RS232 Port Output Mode parameter. Otherwise, press the ID/HEIGHT key to advance to the USB PORT menu. RS232 MOdE (RS232 Port Output Mode) The display will show RS232 MOdE and the current setting.
- Page 44 USb PORT With USb PORT displayed, press the PRINT/ENTER key. The display will change to USb MOdE. Proceed to the USB Port Output Mode parameter. Otherwise, press the ID/HEIGHT key to advance to the TIME SETTINGS menu. NOTE: If an Ethernet or WiFi option card is installed, pressing the ID/HEIGHT key will advance to the ETHERNET/WIFI menu.
- Page 45 ETHERNET/WIFI – ( If Option Card Installed With ETHERNET/WIFI displayed, press the PRINT/ENTER key. The display will change to ETHERNET MOdE. Proceed to the Ethernet Port Output Mode parameter. Otherwise, press the ID/HEIGHT key to advance to the TIME SETTINGS menu. ETHERNET MOdE (Ethernet Port Output Mode) The display will show ETHERNET MOdE and the current setting.
- Page 46 TIME SETTINGS With TIME SETTINGS displayed, press the PRINT/ENTER key. The display will change to YEAR [YYYY]. Proceed to the YEAR parameter. Otherwise, press the ID/HEIGHT key to advance to the SCALE menu. YEAR [YYYY] (Year) The display will show YEAR [YYYY] and the current setting. If the value displayed is acceptable, press the PRINT/ENTER key to save it.
- Page 47 24 HOUR TIME (Use 24 Hour Time Format) The display will show 24 HOUR TIME and the current setting. If the value displayed is acceptable, press the PRINT/ENTER key to save it. Otherwise use the numeric keys 0/NO or 1/YES and enter a new setting. Press the PRINT/ENTER key to save it. Allowable values are YES or no.
- Page 48 8555-M512-O1 Rev D 01/15...
-
Page 49: Setup Review
SETUP REVIEW (Non-Protected Setup Parameters) The MedVue Model MV1 Medical Weight Analyzer allows several operational parameters to be reviewed and changed as necessary without having to remove the end cap and pressing the calibration switch to enter the Calibration Setup mode. To Enter Setup Review With the MV1 on and in the Gross weight mode: 1. - Page 50 SERIAL PORT RS232 MOdE Set the mode of the RS232 serial port Set baud rate for RS232 serial port (If RS232 MOdE = 1, 2 or 3) bAUd RATE PRINTER TYPE Set the type of printer output (If RS232 MOdE = 3) End OF PRINT Set Number of End Of Print linefeeds (If RS232 MOdE = 3) USb PORT...
-
Page 51: Weight On Demand Formats
WEIGHT ON DEMAND FORMATS Weight On Demand If the continuous output was not selected for the serial port, RS232 MOdE=0, the USB Device port, USb MOdE=0 or the optional Ethernet/WiFi port, ETHERNET MOdE=0 and the indicator is connected to a computer for transmission of weight data to a PC-based EMR (electronic medical record) software program, it will transmit a single set of weight data each time the computer sends an weight request “ENQ”... -
Page 52: Serial And Usb Device Port Commands
SERIAL AND USB DEVICE PORT COMMANDS The following commands and formats apply to both the Serial port and the USB Device port. Both the Serial port and USB Device port on the MedVue weight analyzer are bi-directional ports and can receive and transmit data. However, the USB Device port can only communicate with a computer. - Page 53 Journal Mode Print Command The host device (computer) sends: <LF> J <CR> This command is equivalent to pressing the PRINT/ENTER key on the MedVue weight analyzer keypad. The MedVue weight analyzer will respond by printing a ticket using the serial port (or transmit data using the USB Device port).
- Page 54 <LF>P<CR> Weight analyzer will respond with all information formatted with each item on its own line. <LF>J<CR> Weight analyzer will respond with all information formatted with each item separated by commas (comma delimited) followed by a carriage return. <LF>Z<CR> Zero the scale within the constraints of the zero settings. <LF>T<CR>...
-
Page 55: Error And Status Displays
ERROR AND STATUS DISPLAYS Display Meaning ERROR General error, invalid keypad entry was attempted. ERR OVERFLOW Attempting to display a negative number greater than –9,999 or a positive number greater than 99,999 ERR ZERO LIM Indicates an attempt to zero a weight outside scale zero range. Refer to the Calibration Setup ZERO Menu, ZERO LIMIT (Two Percent Zero Tracking Range Limit) parameter. -
Page 56: Care And Cleaning
(as viewed from the MV1 front) MUST be replaced with two drilled screws. They are available from the Cardinal/Detecto Parts Department. The part number is MVSK (MEDVUE SEALING KIT). To install a lead and wire security seal, refer to Figure No. -
Page 57: Parts Identification
PARTS IDENTIFICATION Item Part Number Description 5930-B126-08 LABEL: ETL 593GR986 SERIAL TAG ASSY 6021-1065 SCW THUMB..MACHINE-SCW 06-32X.375 6021-2069 SCW TRUSS HEAD SHEET METAL #6 X .50 6021-6008 SCW TRUSS HEAD SHEET-METAL #6 X.375 6024-0126 WASHER FLAT FOR 5/32” POP RIVET 6560-1125 ADHESIVE LOCTITE 290 THRD LCKR, WICKING 6610-2000... - Page 58 8555-M512-O1 Rev D 01/15...
-
Page 59: Appendix A (Top Plate Mounting Configurations)
APPENDIX A (Top Plate Mounting Configurations) “Type One” “Type Three” (0033-B104-0A) (0033-B104-0A) Uses Center Mounting Hole Uses Front Mounting Hole Center Mounting Hole Front Mounting Hole Models using “Type One” Models using “Type Three” 6495 8430 6437 8430M 6437DHR 8431 6437KGDHR 8431M 6438... - Page 60 “Type Four” “Type Five” (8555-B517-08) (1930-C199-08) TRANSITION PLATE MOUNTING BASE Models using “Type Four” Models using “Type Five” 6550 6854DHR 6857DHR 6857KGDHR “Type Desk/Wall Mount” (8555-B516-08) DESKTOP PLATE Models using “Desk/Wall Mount” 6500 BRW1000 CD-1000D CR-500D FHD-133-II FHD-143-II FHD-144-II FHD-164-II GP-400-MV1 GP-600-MV1 GP-600-RP...
-
Page 61: Appendix B (Connecting To A Welch Allyn Cvsm Device)
APPENDIX B (Connecting to a Welch Allyn CVSM Device) This section describes the required settings of the MedVue Model MV1 Medical Weight Analyzer in order to connect to a Welch Allyn CVSM device. To enter Setup on the MedVue Model MV1 Medical Weight Analyzer, remove the two (2) phillips head screws from the right end cap (as viewed from the back of the MV1) and remove the end cap. - Page 62 STATEMENT OF LIMITED WARRANTY Detecto Scale warrants its equipment to be free from defects in material and workmanship as follows: Detecto warrants to the original purchaser only that it will repair or replace any part of equipment which is defective in material or workmanship for a period of two (2) years from date of shipment.
- Page 63 STATEMENT OF LIMITED WARRANTY Conditions Which Void Limited Warranty This warranty shall not apply to equipment which: A.) Has been tampered with, defaced, mishandled or has had repairs and modifications not authorized by Detecto. B.) Has had serial number altered, defaced, or removed. C.) Has not been grounded according to Detecto’s recommended procedure.
- Page 64 Cardinal Scale Mfg. Co. PO Box 151, Webb City, MO 64870 Telephone: 417-673-4631 FAX: 417-673-5001 www.detectoscale.com Technical Support: 866-254-8261 E-mail: techsupport@cardet.com Printed in USA 8555-M512-O1 Rev D 01/15 8555-M512-O1 Rev D 01/15...
Need help?
Do you have a question about the MED VUE Mv1 and is the answer not in the manual?
Questions and answers