Siemens GIGASET SL55 Manual
Hide thumbs
Also See for GIGASET SL55:
- User manual (144 pages) ,
- Repair documentation (52 pages) ,
- Owner's manual (33 pages)
Table of Contents
Advertisement
Issued by
Siemens Home and Office Communication Devices GmbH & Co. KG
Schlavenhorst 66
D-46395 Bocholt
© Siemens Home and Office Communication Devices GmbH & Co. KG 2005
All rights reserved. Subject to availability.
Rights of modification reserved.
www.siemens.com/gigaset
s
Gigaset SL55, S45, E45
➔
SX353isdn / SX303isdn
➔
SX255isdn / SX205isdn
➔
CX253isdn / CX203isdn
Advertisement
Table of Contents

Related Manuals for Siemens GIGASET SL55


Summary of Contents for Siemens GIGASET SL55
- Page 1 Siemens Home and Office Communication Devices GmbH & Co. KG Schlavenhorst 66 D-46395 Bocholt Gigaset SL55, S45, E45 © Siemens Home and Office Communication Devices GmbH & Co. KG 2005 All rights reserved. Subject to availability. ➔ SX353isdn / SX303isdn Rights of modification reserved.
-
Page 2: Handset E45 At A Glance
Handset E45 at a glance Handset E45 at a glance 1 Display in idle status 2 Battery pack charge status = e V U (flat to full) flashes: battery pack almost flat e V U flashes: battery pack charging 3 Display keys 4 Message key Access to calls and message lists (depending on the base station) -
Page 3: Handset S45 At A Glance
Handset S45 at a glance Handset S45 at a glance 1 Display in idle status 2 Battery pack charge status = e V U (flat to full) flashes: battery pack almost flat e V U flashes: battery pack charging 3 Display keys 4 Message key Access to calls and message lists (depending on the base station) -
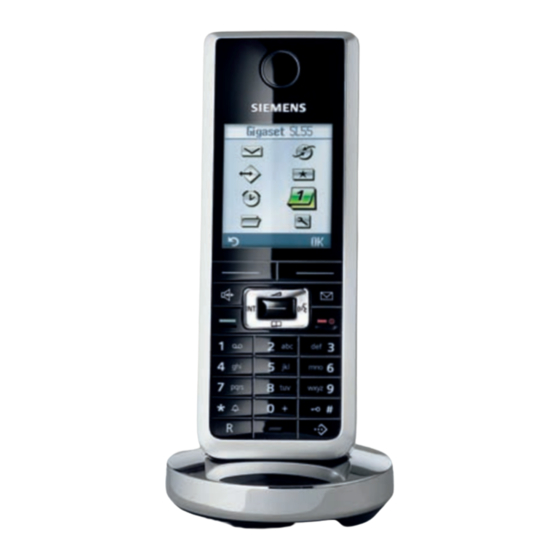
Page 4: Handset Sl55 At A Glance
Handset SL55 at a glance Handset SL55 at a glance 1 Display in idle status 2 Battery pack charge status = e V U (flat to full) flashes: battery pack almost flat e V U flashes: battery pack charging 3 Display keys 4 Message key Access to calls and message lists (depending on the base station) -
Page 5: Table Of Contents
Contents Contents Handset E45 at a glance ..... . 1 Handset S45 at a glance ..... . 2 Handset SL55 at a glance . - Page 6 Contents Opening lists with the message key ... 31 Caller lists ............31 SMS (text messages) .
- Page 7 Contents System settings ......66 Changing the names for internal subscribers ....... 66 Setting up/deleting an ISDN phone number (MSN) .
- Page 8 Contents Playing a message to another caller ........90 Playing back memos .
-
Page 9: Safety Precautions
Safety precautions Safety precautions Read the safety precautions and the user guide before use. ◆ Explain their contents to your children, and the potential hazards ◆ associated with using the telephone. Only use the mains adapter supplied, as indicated on the underside of the base station or charging cradle. - Page 10 Safety precautions All electrical and electronic products should be disposed of separately from the municipal waste stream via designated collection facilities appointed by the government or the local authorities. This crossed-out wheeled bin symbol on the product means the product is cov- ered by the European Directive 2002/96/EC.
-
Page 11: Notes On The User Guide
Notes on the user guide Notes on the user guide This section explains the meaning of certain means of representation, symbols and typographical conventions that are used in this user guide. Means of representation A table below the heading specifies the base stations on which this function is available. Example: A function affecting base stations with an answering machine: On base station: CX253isdn... -
Page 12: Setting Up The Base Station - Getting Started Wizard
Setting up the base station – Getting started wizard Setting up the base station – Getting started wizard A few settings are necessary before using your telephone. The Getting started wizard (page 12) is designed to help you with this. It can be opened at any time using your handset. - Page 13 Setting up the base station – Getting started wizard Example of how to assign an MSN: You have requested four MSNs, two for business use (MSN1, MSN2) and two for private purposes (MSN3, MSN4). Four handsets are connected to a base station. Two handsets (Int.11 and 12) and the answering machine AM 91 are intended for business use, and two handsets (Int.13 and 14) and the answering machine AM 92 are intended for pri- vate use.
- Page 14 Setting up the base station – Getting started wizard Making basic settings Setting the date and time Depending on the network provider, the date and time are transferred automatically from the telephone network during the first outgoing call. The display shows: Enter time? Press the display key to set the date and time.
- Page 15 Setting up the base station – Getting started wizard Entering your phone numbers (MSNs) manually and entering names for MSNs The display shows: Find own numbers (MSN)? Press the display key to confirm the prompt. [RRRRRRRRRRRRRRRRRRRRRRRRRRR] Press the display key to confirm the prompt. [RRRRRRRRRRRRRRRRRRRRRRRRRRR] Enter name.
- Page 16 Setting up the base station – Getting started wizard Setting the receive MSN The display shows: Set incoming MSN? The receive MSN is used to answer incoming calls. The MSNs allocated to your ISDN con- nection can be allocated to various terminals according to your preferences. You can assign a terminal multiple receive MSNs.
- Page 17 Setting up the base station – Getting started wizard Operation on a PABX Only carry out the following steps if you want to connect your telephone to a private PABX (not directly to the NTBA). Depending on the PABX, it may be necessary for you to enter an access code (outside line code) for external calls during installation;...
-
Page 18: Making Calls
Making calls Making calls Making an external call External calls are calls using the public telephone network. either ... Enter the number and press the Talk key. or ... Press and hold the talk key c and then enter the number. -
Page 19: Answering A Call
Making calls Calling all handsets ("group call") Start the internal call. Press the star key. All handsets are called. Ending a call Press the End call key. Answering a call The handset indicates an incoming call in three ways: by ringing, by a display on the screen and by flashing of the handsfree key d. -
Page 20: Handsfree Mode
Making calls Withholding number identification In some cases, you may not want the other party to be able to identify your phone number. You can selectively withhold identification of your number for the next call or permanently. With the permanent setting, the other subscriber will not be able to see your number when you make an outgoing call. -
Page 21: Picking Up A Call During Ring Delay (Call Pickup)
Making calls Picking up a call during ring delay (Call Pickup) You can pick up a call despite a ring delay (page 73) being set. Requirements: The subscriber who picks up the call must have at least Incoming only authorisa- ◆... -
Page 22: Defining The Send Msn For The Next Call
Making calls Defining the send MSN for the next call Even if you have defined an individual send MSN for the handset (page 67), you can select another MSN as the send MSN before each call, e. g. for individual recording of charges. -
Page 23: Identify Caller
Making calls Checking and deleting a callback To delete an incoming callback: The handset is ringing and the screen displays the callback number. Press the display key. The callback function is can- [RRRRRRRRRRRRRRRRRRRRRRRRRRR] DELETE celled. To check or delete the callback before it arrives: ¢... -
Page 24: Registering/Deregistering Handsets
Registering/deregistering handsets Registering/deregistering handsets The handset can be registered on up to four base stations. If all internal numbers for wireless terminals are already assigned on your telephone, before registering make sure that you deregister another handset that is no longer required (page 23). - Page 25 Registering/deregistering handsets Changing the base station The following settings are possible if your handset is registered on more than one base station: Set to one specific base station e. g. the base station at home or the base station at ◆...
-
Page 26: Functions During A Call
Functions during a call Functions during a call Muting the handset You can mute your handset during a call, e. g. if you wish to talk confidentially to another person in the room. The person on the line cannot hear your conversation dur- ing this time. - Page 27 Functions during a call To make a call to the second external subscriber: Enter the second subscriber's telephone number. You can also make a call via the directory or other lists. If the second external subscriber you have dialled is busy: Press the display key to return to the first subscriber.
- Page 28 Functions during a call Press the display key to return to the external sub- [RRRRRRRRRRRRRRRRRRRRRRRRRR] BACK scriber. The internal subscriber has answered: either ... Toggle (page 27): Switch between subscribers. or ... Conference call (page 27): Press the display key to establish a conference call. [RRRRRRRRRRRRRRRRRRRRRRRRRR] CONF.
-
Page 29: Diverting An Incoming Call - Cd (Call Deflection)
Functions during a call Establishing a conference call You are making an enquiry call. The first subscriber is put on hold. Press the display key to establish a conference call. CONF. Ending a conference call You have several options for ending a conference call: either ... -
Page 30: Dealing With A Waiting External Call - Cw (Call Waiting)
Functions during a call Transferring a call to another handset You are making an external call and would like to transfer it to another handset. Establish an internal enquiry call (page 26) and press the End call key a (also before answer), to transfer the call. -
Page 31: Putting A Call On Hold (Call Hold)
Functions during a call Putting a call on hold (Call Hold) To put an external subscriber on hold: During an external call: Press the display key. The external subscriber is put on hold. The waiting external subscriber hears the waiting melody (page 75) if the connection is on hold internally (page 74). -
Page 32: Opening Lists With The Message Key
Opening lists with the message key Opening lists with the message key Providing a new entry is present in the relevant list, you can open the following lists using the message key f: 1. Incoming SMS message list Textmessage (SMS) (page 43) 2. - Page 33 Opening lists with the message key the date and time of the last call. ◆ Opening caller lists You can open both caller lists using the menu. The missed calls list can also be opened using the f key, providing it contains a new entry (page 31). New entries in the missed calls list are indicated by the f key flashing and by a confirmation tone.
- Page 34 Opening lists with the message key Changing the caller's phone number Open the list of missed or answered calls (page 32). Then: Select entry and open the submenu. Select and confirm. The number is displayed. Change number Change the number. Í...
-
Page 35: Sms (Text Messages)
SMS (text messages) SMS (text messages) You can send and receive SMS text messages (Short Message Service) with your hand- set. You can send a text message to any fixed network or mobile phone network number. Your text message can be received as a text message by any device with SMS functionality (mobile phone, PC, another telephone). -
Page 36: Managing Sms Service Centres
SMS (text messages) Managing SMS service centres SMS messages are exchanged through SMS service centres. To send and receive a text message, you require the phone number for your service provider's SMS centre. You have to store this phone number in your telephone. You may enter up to ten SMS centres in your telephone. -
Page 37: Activating/Deactivating Sms Send Centre
SMS (text messages) Activating/deactivating SMS send centre To send a text message you must activate the phone number for the required SMS cen- tre as the send centre. By doing this you determine the SMS centre used to send the text message. -
Page 38: Memory
SMS (text messages) Memory The number of text messages that can be stored in the base station depends on the size of the messages (about 11 text messages of up to 160 characters each). The memory is used for both the incoming and outgoing message lists. If the memory is full, the mes- sage Text list full! Please delete entries is displayed. - Page 39 SMS (text messages) Write a text messages as follows: ¢ ¢ î Write message Input your text (for text input see page 103). 572(1) with tomorrow Ç Options 1 Remaining number of characters, in brackets: SMS part 1-n 2 SMS text 3 Selection line 4 EATONI is activated 5 Upper/lower case or digits...
- Page 40 SMS (text messages) Sending a text message without saving Requirement: You have written a text message (page 37) and the input field is open. Open the submenu. Options Confirm. Send either ... Enter the recipient's number (with access code). Dest.call no. 089123456 X Í...
- Page 41 SMS (text messages) Opening the outgoing message list The outgoing message list shows you: Text messages which you saved before you sent them (page 38). ◆ Text messages you could not send, e. g. because you were interrupted by an incom- ◆...
- Page 42 SMS (text messages) Deleting the entire outgoing message list This function deletes all the messages in the outgoing message list. Requirement: You have opened the outgoing message list (page 40). ¢ Delete list Press the display key to confirm the prompt. [RRRRRRRRRRRRRRRRRRRRRRRRRR] Sending or editing text messages in the outgoing message list Requirement: You have opened a text message in the outgoing message list to read...
-
Page 43: Sending A Text Message To An E-Mail Address
SMS (text messages) Sending a text message to an e-mail address You can send a text message to an e-mail address. To do this you should write the recip- ient's e-mail address at the start of the text message and send this text message to the number for your SMS send centre's e-mail service. -
Page 44: Receiving Text Messages, Incoming Message List
SMS (text messages) Receiving text messages, incoming message list Notes on receiving a text message New text messages are indicated by a message on the display, flashing of the message key f and by a confirmation tone for on all handsets with the same receive MSN. The date and time (transferred from the SMS centre) are indicated for each text mes- sage received. - Page 45 SMS (text messages) Opening with the menu ¢ î Select and confirm. Inbox 2/ 5 An example of a new message display is as follows: Text message status: New, Old, Error Total number of new text messages 01/02 Phone number of the sender 1234567890 Current number of text messages displayed...
- Page 46 SMS (text messages) Replying to or forwarding text messages While you are reading a text message you can use the following functions: Press the display key to open the menu. Options either ... Reply to an incoming message: Confirm. You can reply to the SMS immediately in a Reply blank input field.
- Page 47 SMS (text messages) On a PABX: The access code (outside line code) is automatically placed before the phone number (page 79). Copying a phone number from a text message to the directory Your telephone can "identify" phone numbers in a received text message. It indicates this by highlighting the sequence of digits (max.
-
Page 48: Sms On A Pabx
SMS (text messages) You can create a special directory for text messages within your main directory by putting an star (*) before the names. on a PABX You can only receive a text message if Calling Line Identification is forwarded to the extension on the PABX (CLIP). - Page 49 SMS (text messages) Errors when receiving a text message A message appears on the screen if your phone cannot receive any more text messages. You cannot receive text messages under the following conditions: Call diversion is activated with All Calls, ◆...
-
Page 50: Making Cost-Effective Calls
Making cost-effective calls Making cost-effective calls Sign up with a network provider who offers particularly low-cost call rates (call-by-call) or view the call charges on the handset. You can use the call-by-call list to manage your call-by-call numbers. You manage entries in the call-by-call list in the same way as entries in the directory by opening the call-by-call list with the C key instead of the directory. - Page 51 Making cost-effective calls If you have also entered a factor (see next section "Entering the price per unit"), the call charges are multiplied by this figure. You can also use a fac- tor if you want to charge higher call charges (e. g. charges displayed to be increased by a factor of 2);...
- Page 52 Making cost-effective calls Displaying and deleting the charge overview Call or charge units for either each internal subscriber, each configured MSN or the entire system are displayed, depending on the setting. ¢ ¢ ¢ í Call Charges Cost overview Scroll to the accounts for the individual internal sub- scribers or configured MSNs.
-
Page 53: Setting Up The Answering Machine
Setting up the answering machine Setting up the answering machine On base station: CX253isdn SX255isdn SX353isdn Once you have connected your telephone your answering machine is ready for use. Answering machine AM1 is activated. It records all messages (on all receive MSNs). AM1 can be played back and set from all handsets (factory default). -
Page 54: Specifying The Number Of Rings Before The Answering Machine Starts
Setting up the answering machine ¢ ¢ ¢ ¢ ¢ Ð Base Settings Setup user Setup device Select the internal numbers for the answering machine (INT91, INT92 or INT93). Open the submenu. either ... To hide an answering machine: Select and confirm. Hide AM? or ... -
Page 55: Setting The Recording Time And Recording Quality
Setting up the answering machine Setting the recording time and recording quality You can set the maximum length of a message and its recording quality. The recording quality determines the total recording time of your answering machine. With the High quality setting the total recording time is up to 12 min., with Long recording (standard quality is generally adequate) up to 25 min. -
Page 56: Activating/Deactivating Automatic Pause
Setting up the answering machine Activating/deactivating automatic pause If automatic pause is activated the answering machine switches to pause mode after playing back a message or memo. The next message is only played back when you press display key. >... By default, automatic pause is deactivated. -
Page 57: Setting The Time Control
Setting up the answering machine Setting the time control You can set up the answering machine so that it is automatically activated and deacti- vated depending on the time (i. e. at a particular time of day) and responds with differ- ent announcements at different times. - Page 58 Setting up the answering machine Í Press the display key to open the submenu. Confirm. Save entry Setting time control for Saturday or Sunday By default, the time control for workdays is used – As for Mon-Fri. Requirement: You have selected an answering machine (page 85). Select and confirm.
-
Page 59: Activating/Deactivating Automatic Listen In
Setting up the answering machine Activating/deactivating automatic listen in You can set up your answering machine so that it automatically switches a handset assigned to it or the base station (CX263 or SX353 only) to automatically listen in when it is recording a message. By default, automatic listen in is deactivated. -
Page 60: Activating/ Deactivating Automatic Pickup
Setting up the answering machine Activating/ deactivating automatic pickup With automatic pickup you can take a call directly from the answering machine (during announcement or recording) on any handset or by lifting a receiver (telephone with cord) providing the same receive MSN is assigned to all devices. All you have to do is press the Talk key c on the handset or lift the receiver from the base station. - Page 61 Setting up the answering machine Changing or deleting the destination number for a text message Requirement: You have selected an answering machine (page 85). Select and confirm. Settings Select and confirm. SMS notificat. either ... To enter or change the destination number: Confirm.
-
Page 62: Security Settings
Retype the new system PIN and confirm. Memorise the new system PIN! If you forget it, the device will require technical intervention. If this happens, contact the Siemens Hotline (page 98). Defining authorisations You can set different authorisations for all registered devices: ◆... -
Page 63: Emergency Numbers
Security settings Emergency numbers By default, the country-specific emergency numbers are entered. These cannot be edited or deleted. You may enter five emergency numbers of your own choice. An emergency number may also be dialled from a handset with limited authorisation (e. -
Page 64: Time Functions
Time functions Time functions Setting the date and time The first time you make a call on your phone, the date and time are transmitted by the exchange. You can choose between 12 hour and 24 hour format for the time (a.m. = 1st half of the day;... - Page 65 Time functions ¢ ¢ ¢ Ð Base Night service Select the MSN and confirm, e. g. MSN1: Anna. MSN1: Select and confirm. Forward. dest. either ... To set an external destination: Select and confirm. External Enter the external destination phone number. Í...
- Page 66 Time functions Entering the start and end time for night service By default, the Start time is pre-set to 20:00 or 8:00 pm, and 08:00 or 8:00 am for the End time. ¢ ¢ ¢ Ð Base Night service Select the MSN and confirm, e. g. MSN1: Anna. MSN1: either ...
-
Page 67: System Settings
System settings System settings The abbreviations in brackets after the titles indicate the ISDN service concerned. Some services may only be used if they have been authorised by the network provider (there may be an extra charge). Changing the names for internal subscribers By factory default, all internal numbers are given the names Int.11, Int.12, etc., accord- ing to their numbering. -
Page 68: Assigning A Phone Number (Msn)
System settings Skip to the <Number> line and enter the number without access code. Í Open the submenu. Select and confirm. Save entry Cancelling ISDN phone numbers (MSN) ¢ ¢ ¢ ¢ ¢ Ð Base Settings ISDN settings Set up MSN Select MSN, e. -
Page 69: Setting Up The List Of Send Msns For The Next Call
System settings Assigning a send MSN You can define one outgoing MSN for each internal subscriber. This MSN is shown to the person you call and the call is also charged to this MSN. ¢ ¢ ¢ ¢ ¢ Ð Base Settings Setup user... -
Page 70: Assigning A Ringer Melody To An Msn
System settings Assigning a ringer melody to an MSN Each receive MSN is assigned a ringer melody during the setup process. You can change this assignment for each receive MSN individually. You can choose one of the available ringtone melodies for a receive MSN. This means that all handsets will use this ringer melody to indicate an incoming call to a receive MSN. - Page 71 System settings Activating/deactivating internal call diversion Requirement: Internal call diversion can only be activated if a destination has been set ¢ ¢ ¢ Ð Base Forward. base either ... To activate: Confirm. Activate? or ... To deactivate: Select and confirm. Deactivate? Specifying the number of ringing cycles Ring delay can be used to specify the number of ring cycles after which a call is to be...
- Page 72 System settings Setting the location for call diversion ¢ ¢ ¢ ¢ Ð Base Settings ISDN settings either ... Select and confirm (‰ = set). Forward. base or ... Select and confirm (‰ = set). Forward. netw. Setting up a destination ¢...
-
Page 73: Pre-Assigning The Call Diversion Destination - Cd (Call Deflection)
System settings Deleting external call diversion ¢ ¢ ¢ Ð Base Ext. call forw. Select call diversion, e. g. MSN1 to 22222. Open the submenu. Select and confirm. Delete entry Pre-assigning the call diversion destination – CD (Call Deflection) This function pre-assigns the call diversion destination for incoming calls. This destina- tion number is offered as a preset when setting up call diversion manually (page 28). -
Page 74: Setting Up An Internal Group Call Group
System settings Setting up an internal group call group You can make a group call from any handset to all other registered internal subscribers (page 18). By default, all registered subscribers with the device type "telephone" or "neutral" are set up in the group call group. -
Page 75: Activating/Deactivating Cw (Call Waiting)
System settings Activating/deactivating CW (call waiting) This function can be set up separately for each subscriber. When call waiting is activated the caller will hear the ringing tone if you are already making a call. This call is announced both acoustically, and visually on your handset screen. If call waiting is deactivated, the caller will hear the ringing tone if you are already mak- ing a call and other devices are assigned to the same MSN. -
Page 76: Setting Up The Waiting Melody
System settings Setting up the waiting melody An external subscriber hears the set waiting melody when the connection is on hold in the base station (internal) (page 74). An external subscriber whose connection is on hold in the telephone exchange (external), and an internal subscriber who is on hold, will not hear a waiting melody. -
Page 77: Changing The Access Code
System settings Changing the access code Access codes are the first few digits required when dialling another city (national) or another country (international). The default settings for Germany are as follows: For connections to other towns (national) For connections abroad (international) In other countries, different access codes could be used. -
Page 78: Calling An Answering Machine In The Network
System settings Calling an answering machine in the network On base station: CX203isdn SX205isdn SX303isdn Press 1 and hold. You are connected directly to the answering machine in the network. If you then press the handsfree key d, you can listen to the answering machine announcement in the network and operate the answering machine via the network. -
Page 79: Checking The Status
System settings Checking the status ¢ ¢ ¢ Ð Base Status You can check the status of the following settings: Callback ◆ Anonymous call ◆ Call diversion ◆ Ext. assignments ◆ AM1, AM2, AM3 ◆ Checking the software version You can check the version of the software for the base station: ¢... -
Page 80: Operation In A Pabx
Operation in a PABX Operation in a PABX Pay attention to the special features for SMS in a PABX (page 47). Access code Requirement: If your telephone is connected to a PABX, depending on the PABX, you must enter an access code (outside line code) for external calls when the phone is first installed. - Page 81 Operation in a PABX Dialling options The KEYPAD function allows you to control certain features by entering sequences of characters and digits. The KEYPAD function should be set when connecting your telephone to an ISDN PABX or to an exchange (e. g. Centrex), which is controlled by the KEYPAD protocol. The dig- its/characters 0–9, *, # are sent as keypad information elements.
- Page 82 Operation in a PABX Activating/deactivating the keypad during a call In addition to the permanent settings described above, you can also switch temporarily to the keypad. The setting only applies to the current external call and is automatically deactivated after the call is ended. During a call: Open menu.
-
Page 83: Operation With Other Devices
Operation with other devices Operation with other devices Specifying the device type On base station: SX205isdn SX255isdn SX303isdn SX353isdn If your base station has the option of connecting an analogue terminal, you must set the device type (see user guide for base station). ¢... -
Page 84: Activating/Deactivating Repeater Mode
Operation with other devices Activating/deactivating repeater mode You can increase the range of your handsets with the Gigaset Repeater. You can operate up to six repeaters on your base station. To ensure the repeater is installed correctly, repeater mode must be activated on the base station. You can use this function to activate and deactivate repeater mode. -
Page 85: Direct Answering Machine Operation
Direct answering machine operation Direct answering machine operation On base station: CX253isdn SX255isdn SX353isdn Your ISDN telephone has three answering machines (AM1, AM2, AM3), each of which you can operate and set independently. You can operate the answering machines either directly via a registered handset (using the menu) or by remote control (internal or external call to the answering machine, see user guide for base station). -
Page 86: Selecting An Answering Machine
Direct answering machine operation Selecting an answering machine ¢ ¢ Ð Voice Mail If necessary, select answering machine and confirm, e. g. AM1. If AM lock is set (page 55): Enter answering machine PIN and confirm. The list of answering machines AM1, etc., is also opened if you press and hold the number key 1. -
Page 87: Selecting Announcement And Am Mode
Direct answering machine operation Selecting announcement and AM mode You can activate Announcement 1, Announcement 2 or Announcem. only for each answering machine. By default, the three options already contain standard announce- ments. When you select an announcement you also determine the AM mode in which the answering machine is to run (page 84). -
Page 88: Playing Back/Deleting Announcements
Direct answering machine operation The announcement will not be stored if you press the End call key during recording or repeat playback. Playing back/deleting announcements Only recorded announcements can be deleted. You cannot delete the default announcement. ¢ ¢ (hold) Select answering machine (e. -
Page 89: Two-Way Recording
Direct answering machine operation Two-way recording You can make a two-way recording of a call. The two-way recording can then be played back or deleted like a message. During a call: ¢ Record Select an answering machine and confirm, e. g. AM1. The two-way recording starts immedi- ately. -
Page 90: Playing Back Messages
Direct answering machine operation Playing back messages New messages are indicated on the handset by the flashing message key f. Pressing the message key f gives you direct access to the new messages. You can also open the lists of new and old messages using the menu. ¢... -
Page 91: Returning A Call During Playback
Direct answering machine operation Returning a call during playback You can call back a caller immediately while a message is being played. Requirement: The caller's number has been identified (page 19). During playback: Í Press the display key to open the submenu. either ... -
Page 92: Playing Back Memos
Direct answering machine operation Playing back memos ¢ ¢ ¢ (hold) Select answering machine (e. g. AM1) Memos Play memo Skip to next or previous memo. Setting the playback speed You can set the playback speed for messages/memos to four levels Slow, Normal speed, Fast or Very fast. -
Page 93: Marking An Old Message Or Memo As "New
Direct answering machine operation Deleting all old messages/memos ¢ (hold) Select answering machine (e. g. AM1) either ... To delete all old messages: Confirm. Message playback begins. Messages Í Press the display key to open the submenu. Select and confirm. Del.old messages Confirm. -
Page 94: Operation With Door Intercom
Operation with door intercom Operation with door intercom On base station: SX205isdn SX255isdn SX303isdn SX353isdn Assigning internal subscribers to the door intercom call group If you have set up a door intercom (page 14), all internal subscribers registered on the base station are automatically assigned to the door intercom call group. - Page 95 Operation with door intercom Door intercom call waiting Accepting call waiting Press the display key. You accept the waiting call. ACCEPT If the interrupted call is an internal call, this connection is broken when you accept the waiting call. If the interrupted call is an external call, this call is put on hold when you accept the wait- ing call.
- Page 96 Operation with door intercom Deleting destination numbers for external call diversion ¢ ¢ ¢ ¢ ¢ Ð Base Settings Setup user Setup device Select internal subscriber, e. g. INT21: Int.21. INT21: Int.21 Í Press the display key to open the submenu. Select and confirm.
-
Page 97: Appendix
When it has fully dried out, you will normally be able to use itagain. Questions and answers If you have any queries about the use of your telephone, you can contact us at any time at www.siemens.com/gigasetcustomercare. The table below contains a list of common problems and possible solutions. The display is blank. - Page 98 Appendix Handset does not ring. The ringtone is switched off. Activate the ringtone. ◆ Call diversion set to All Calls. Switch off call diversion. ◆ MSN is not assigned to internal subscriber or is incorrect. Specify receive MSN (page 67). ◆...
-
Page 99: Customer Service (Customer Care)
For personal advice on our range of products, call Premium Hotline United Kingdom: 0906 9597555 (0.75 £/minute) You can talk to qualified Siemens technicians who will guide you expertly through prod- uct information and installation. For fast and dependable assistance with any repairs or guarantee/warranty claims, contact our Service Centres. -
Page 100: Specifications
Appendix Specifications Recommended batteries S45 (Valid at the time of going to press) Nickel-metal-hydride (NiMH): Sanyo Twicell 650 ◆ Sanyo Twicell 700 ◆ Panasonic 700mAh "for DECT" ◆ GP 700mAh ◆ Yuasa Technology AAA Phone 700 ◆ Varta Phone Power AAA 700mAh ◆... -
Page 101: Guarantee Certificate United Kingdom
In the case of new devices and their components exhibiting defects resulting from ◆ manufacturing and/or material faults within 24 months of purchase, Siemens shall, at its own option and free of charge, either replace the device with another device reflecting the current state of the art, or repair the said device. -
Page 102: Guarantee Certificate Ireland
This Guarantee shall apply to new devices purchased in the European Union. For ◆ Products sold in the United Kingdom the Guarantee is issued by: Siemens Home and Office Communication Devices GmbH & Co. KG, Schlavenhorst 66, D-46395 Bocholt, Germany. -
Page 103: Pc Interface
This Guarantee shall apply to new devices purchased in the European Union. For ◆ Products sold in the Republic of Ireland the Guarantee is issued by Siemens Home and Office Communication Devices GmbH & Co. KG, Schlavenhorst 66, D-46395 Bocholt, Germany. -
Page 104: Writing And Editing A Text Message
Appendix Writing and editing a text message The following rules apply when writing a text message: Control the cursor with qr / qr. ◆ Characters are added to the left of the cursor. ◆ Press the star key * to display the table of special characters. ◆... - Page 105 Appendix Deactivating/activating predictive text Requirement: You are writing a text message. Press the display key to open the menu. Options Select and press (‰ = on). §OK§ Predictive Text Press the 'End call' key briefly to return to the text area.
-
Page 106: Menu Overview
Menu overview Menu overview Main menu E45 and S45 With the telephone in idle status, press (open main menu): î You have activated an SMS mailbox with a PIN or 2-3 mailboxes Mailbox Write Message Incoming 0 Outgoing 0 Mailbox 1 Write Message Mailbox 2 Mailbox 3... - Page 107 Menu overview í Add. Features Room Monitor Call Charges Last Call All Calls Settings Per Handset Ð Settings Date/Time Audio Settings Ringer Settings Advisory Tones Display Screen Picture Colour Scheme Contrast Backlight Handset Language Auto Answer Register H/Set Select Base Reset Handset Base (page 109)
- Page 108 Menu overview Main menu SL55 With the telephone in idle status, press w (open main menu): î You have activated an SMS mailbox with a PIN or 2-3 mailboxes Mailbox Write Message Incoming 0 Outgoing 0 Mailbox 1 Write Message Mailbox 2 Mailbox 3 Incoming 0...
- Page 109 Menu overview Settings Per Handset Missed Dates ì Alarm Clock ç Calendar Ï Resource Dir. Screensavers Caller Pictures Sounds Capacity Ð Settings Date/Time Audio Settings Ringer Settings Advisory Tones Silent Alert Display Screen Saver Colour Scheme Contrast Backlight Handset Language Auto Answer Add.
- Page 110 Menu overview ¢ Ð Submenu " Base" Entry: In handset idle status press v w Ð Base Status Callback Withhold no. Call forwarding Ext.occupations ‰ = On AM1 on AM2 on AM3 on Missed calls (phone number list) -> Caller list menu (page 31) Accepted calls (phone number list) ->...
- Page 111 Menu overview Night service Activate? Deactivate? MSN list if night service activated Forward. dest. External Number editor Internal List of handsets Answering mach. List of handsets Start time End time Sat/Sun all day Settings Security Change PIN (Enter PIN) Authorisation Unrestricted Internal subscriber list...
- Page 112 Menu overview ISDN settings Set up MSN Edit entry List of all set up MSNs Ringer melody Delete entry Display entry Withhold no. Forward. dest. (Enter phone number) Lg.-dist. code National : 0 Change number Delete number Internat.: %V 00 Change number Delete number Code: 49...
- Page 113 Menu overview ¢ Ð Submenu " Voice Mail" Entry: With the handset in idle status press v w Ð Voice Mail , select an answering machine, e. g. AM1, and confirm with Messages List of all Continue messages for AMx Delete message Call back Call-by-Call...
- Page 114 Menu overview Settings Message/Memo Message length 1 minute 2 minutes 3 minutes Maximum Time stamp Time control Activate? Deactivate? – if time control is activated Mon - Fri Select ann. Announce- List of four ment 1 adjustable Announce- time periods ment 2 Announcem.
- Page 115 Menu overview Directory key and call-by-call list key Press the directory key s s or the call-by-call list key C, select an entry with s s and press v v to open the corresponding list. The following menu functions are available: Display Number Edit Entry Delete Entry...
-
Page 116: Index
Index Index listen to announcement ..listen to memos ....Access code, see Area code listen to messages . - Page 117 Index divert ..... . Check hold ..... . . software version .
- Page 118 Index copy phone number from SMS ..send MSN ......... . . start .
- Page 119 Index call-by-call key ... . . Messages, see Answering machine call-by-call list key ... . Microphone ....control key .
- Page 120 Index Put call on hold ....Set date ....Set divert destination .
- Page 121 Index receive ....receive error ....save .