Table of Contents
Advertisement
Quick Links
Advertisement
Table of Contents

Related Manuals for Elation SHOW DESIGNER 1


Summary of Contents for Elation SHOW DESIGNER 1
- Page 1 SHOW DESIGNER 1™ user manual...
- Page 2 Elation Professional USA | 6122 S. Eastern Ave. | Los Angeles, CA. 90040 323-582-3322 | 323-832-9142 fax | www.elationlighting.com | info@elationlighting.com Elation Professional B.V.
-
Page 3: Table Of Contents
SHOW DESIGNER 1™ User Manual... - Page 4 SHOW DESIGNER 1™ User Manual...
-
Page 5: General Information
SHOW DESIGNER 1™ User Manual... - Page 6 You may also visit us on the web at www.elationlighting.com any comments or suggestions. For service related issue please contact Elation Professional®. ELATION SERVICE USA - Monday - Friday 8:00am to 5:00pm PST...
- Page 7 No accessories should be shipped with the product. If any accessories are shipped with the product, Elation Professional® shall have no liability what so ever for loss and/or or damage to any such accessories, nor for the safe return thereof.
-
Page 8: Safety Instructions
SHOW DESIGNER 1™ User Manual... -
Page 9: Overview
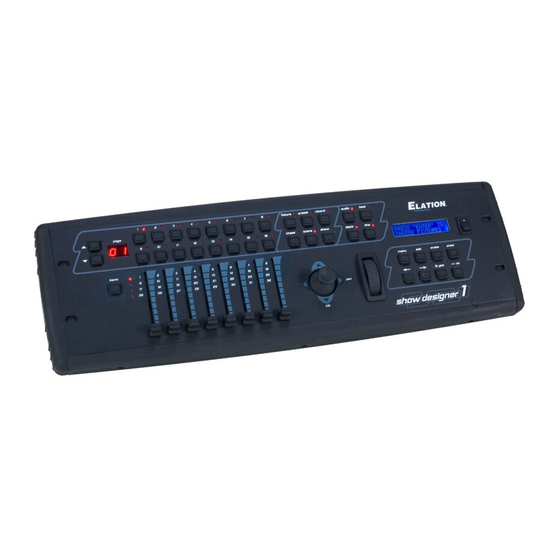
. e l a t i o n l i g h t i n g . c o m O V E R V I E W The Show Designer 1 is a stage lighting controller for DMX 512 lighting fixtures. It’s designed to simplify the programming process as much as possible while still offering lots of power at a low cost. -
Page 10: Menu
. e l a t i o n l i g h t i n g . c o m M E N U The menu switch is used to configure the Show Designer 1 for your particular lighting setup. The left and right cursor switches, the + and - switches, and the data wheel allow you to select settings for the various menus that appear on the display. -
Page 11: Choose Fixtures
SHOW DESIGNER 1™ User Manual... -
Page 12: Multi Fixture
M E N U [ c o n t i n u e d ] MULTI FIXTURE Show Designer 1 can support lighting fixtures that use as many as 32 DMX channels. Since most fixtures use fewer than 32 channels, Show Designer 1 lets you configure a group of smaller fixtures that are of the same type, under a single fixture number. -
Page 13: Modify Fixture
SHOW DESIGNER 1™ User Manual... - Page 14 SHOW DESIGNER 1™ User Manual...
-
Page 15: Copy Fixture
SHOW DESIGNER 1™ User Manual... -
Page 16: Pan And Tilt Invert
SET MIDI CHANNEL This allows you to select the MIDI channel that Show Designer 1 will use when sending and receiving MIDI messages. Select a value from 1-16 and press enter. On the bottom line of the display you can also enable extra MIDI channels by selecting a value from 0 - 9. -
Page 17: View Memory Size
RS-232 port. The message “DOWNLOAD NEW PROGRAM” will appear when you press “enter”. Show Designer 1 will wait for the proper file to be sent from a PC to the RS-232 port. The message “RECEIVING NEW PROGRAM” will appear as it receives the new software file. -
Page 18: Lock/Unlock Memory
This is the other hidden menu item that can only be selected while holding the “ADD switch when cycling through the menu selections. This allows you to erase the entire memory of the Show Designer 1. This does not erase the software that runs the system but erases all the scene, preset, chase and show data as well as the system parameters such as fixture assignments. -
Page 19: Switch And Control Descriptions
SHOW DESIGNER 1™ User Manual... -
Page 20: Bank Switch
It is plugged into the 9-pin RS-232 connector on the rear panel of the Show Designer 1. As with the joystick, only fixtures that are currently enabled will be affected. The left switch on the trackball or mouse will shift the current fixture selection to the left and the right switch will shift it to the right. -
Page 21: Black Switch
SHOW DESIGNER 1™ User Manual... -
Page 22: Scenes
S C E N E S RECORDING SCENES A “scene” is a recording of the state of the entire stage. Show Designer 1 keeps track of all the actions you take to make the stage appear as it does. Anything... -
Page 23: Recalling Scenes (Default Solo Mode)
SHOW DESIGNER 1™ User Manual... -
Page 24: Recalling Scenes (Add Mode)
SHOW DESIGNER 1™ User Manual... -
Page 25: Presets
This will use less memory. Show Designer 1 lets you record up to 32 pages of 16 presets for a total of 512. Unlike scenes, which record the look of the entire stage, presets are used to record only several channels worth of information. -
Page 26: Recording Presets -26
SHOW DESIGNER 1™ User Manual... -
Page 27: Recalling Presets
SHOW DESIGNER 1™ User Manual... -
Page 28: Editing Presets
SHOW DESIGNER 1™ User Manual... -
Page 29: Chases
. e l a t i o n l i g h t i n g . c o m C H A S E S Show Designer 1 lets you to record up to 256 chases and also provides 48 pre-recorded chases referred to as factory chases. A chase is a sequence of steps, creating motion or quick repetitive changes. -
Page 30: Recording Chases
SHOW DESIGNER 1™ User Manual... - Page 31 SHOW DESIGNER 1™ User Manual...
-
Page 32: Recalling Chases
SHOW DESIGNER 1™ User Manual... -
Page 33: Editing Chases
SHOW DESIGNER 1™ User Manual... -
Page 34: Shows
A show is a list of scenes that runs on a timer. This is sometimes referred to as a stack or cue list by other controllers. Show Designer 1 lets you record up to 16 pages of 16 shows for a total of 256. - Page 35 NOTE: It can take several seconds to overwrite or erase a show depending on how much memory is currently in use. After you have saved the show, Show Designer 1 remains in record mode allowing you to continue to edit the show. To exit record mode, press “RECORD”, the LEDs will stop flashing.
-
Page 36: Recalling Shows
SHOW DESIGNER 1™ User Manual... -
Page 37: Editing Shows
SHOW DESIGNER 1™ User Manual... -
Page 38: Midi
Show Designer 1 will also send MIDI note messages whenever a scene or show is called using the front panel switches. This allows you to use the Show Designer 1 as the source when recording a MIDI performance. Rather than trying to calculate which note number to use for a scene, simply record the output from the Show Designer 1 while calling scenes. -
Page 39: Memory Backup With Midi
Once the recorder is set to record, go to the menu selection in Show Designer 1 labeled “Send Memory File”. From there, use the + switch to select “Send Memory File to MIDI Port”. Next press “ENTER”... -
Page 40: Using The Com Port
U S I N G T H E C O M P O R T The RS-232 port on the Show Designer 1 can be used to connect to a Windows PC to backup memory and update firmware. This requires a USB to null modem cable. -
Page 41: Updating The Firmware
Show Designer 1 page. New firmware will include new features as well as updates to the fixture library. To copy the new firmware file from your PC to Show Designer 1, go to the Show Designer 1 menu “update software”. Press “enter” and the display will read, “Download new program”. -
Page 42: Fixture List
SHOW DESIGNER 1™ User Manual... - Page 43 SHOW DESIGNER 1™ User Manual...
- Page 44 SHOW DESIGNER 1™ User Manual...
- Page 45 SHOW DESIGNER 1™ User Manual...
- Page 46 SHOW DESIGNER 1™ User Manual...
-
Page 47: Factory Color Presets
SHOW DESIGNER 1™ User Manual... -
Page 48: Technical Specifications
SHOW DESIGNER 1™ User Manual... -
Page 49: Optional Accessories
SHOW DESIGNER 1™ User Manual...
Need help?
Do you have a question about the SHOW DESIGNER 1 and is the answer not in the manual?
Questions and answers