Table of Contents
Advertisement
Advertisement
Table of Contents

Related Manuals for Mars FLAVIA Barista

Summary of Contents for Mars FLAVIA Barista
- Page 1 The FLAVIA® barista User Guide www.marsdrinks.com...
-
Page 3: Table Of Contents
CONTENTS Page Safety & Installation Guidelines........... 1 Brewer Layout ................. 4 The FLAVIA barista Beverage Range ........ 5 Setting up your Brewer ............6 Selecting Cups to Use............9 Preparing an Espresso ............10 Preparing Cappuccinos, Lattes, Mochas ......11 Preparing Coffee, Tea, Chocolate ........ -
Page 4: Safety & Installation Guidelines
SAFETY AND INSTALLATION GUIDELINES GENERAL USE Note: The original instructions in this document were written in English. Any language other than English used is a translation of the original document. In order to prevent harm or injury to those using the appliance or to any other persons and/or property, please be sure to read and save the following safety instructions. - Page 5 SAFETY AND INSTALLATION GUIDELINES Plumbed Systems If you are connecting your appliance to the mains water supply, the following requirements must be met: A brass stopcock to BS1010 standard with a 15mm compression outlet or a brass stopcock with 3/4 inch BSP male outlet. Water pressure must be between a maximum of 6.8 bar (100 psi) and a minimum of 1 bar (14.5 psi) Flow rate of at least 250ml/minute.
- Page 6 SAFETY AND INSTALLATION GUIDELINES UK SPECIFIC REQUIREMENTS Your system is supplied with a moulded 13 Ampere fused plug. If the fuse needs replacing only use an ASTA approved BS1362 13 Ampere cartridge fuse. Always re-fit the fuse cover. If the fuse cover is lost or damaged a replacement can be obtained by contacting customer service or your local FLAVIA®...
-
Page 7: Brewer Layout
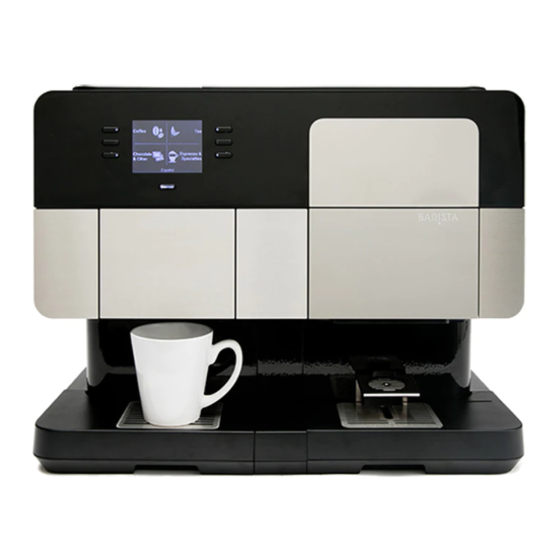
BREWER LAYOUT EXTERIOR Filler Lid (Unplumbed Only) Instruction Screen Drink Selection Buttons Filterpack Door Filterpack Bin / Espresso Filterpack Funnel Door Espresso Bin Espresso Cup Stand Drip Trays... -
Page 8: The Flavia Barista Beverage Range
Froth freshpacks. The right hand side of the brewer is used for preparing and dispensing espresso shots. IMPORTANT Only special FLAVIA barista Espresso packs can be used in the espresso side. FLAVIA barista Espresso packs have distinctive winged nozzles and will also state “For use with FLAVIA barista”. - Page 9 SETTING UP YOUR BREWER Before you can use your brewer you must first configure your brewer and prime the hot water system. SWITCHING ON Plug your FLAVIA® barista in 2. Switch on using ON/OFF switch at back to Position “I” ENTERING OPERATOR MENU Push the bottom left and right buttons simultaneously and hold them for 2 seconds.
-
Page 10: Setting Up Your Brewer
SETTING UP YOUR BREWER JUG FILLED – MANUAL FILLING WITH WATER Select the “Jug Filled” option if water will be added to the brewer manually. To manually fill with water; Lift the filler lid 2. Fill with water 3. Maximum fill level reached when the red float cap pops up 4. - Page 11 SETTING UP YOUR BREWER 4. When the espresso door opens, de-latch the door fully by pressing the de-latch lever down and in towards the brewer (Ref D). This allows the espresso door to be flipped down to its fully open ‘cleaning and servicing’...
-
Page 12: Selecting Cups To Use
SELECTING CUPS TO USE 1. The use of FLAVIA® paper cups is recommended. Alternative cups may be used providing they are of similar proportions to Ref. H and weigh a minimum of 5g for a filter cup. 3g for espresso cups. 2. -
Page 13: Preparing An Espresso
2. Place cup on espresso cup stand (see previous section) 3. Select the “Coffee” menu 4. Select the “Espresso” option 5. Insert a FLAVIA barista Espresso pack and close the espresso pack door. Note: Only use FLAVIA barista Espresso packs with nozzles in the espresso side. -
Page 14: Preparing Cappuccinos, Lattes, Mochas
PREPARING CAPPUCCINOS, LATTES, MOCHAS 2-PACK DRINKS Cappuccinos, Lattes and Mochas are created using 2 packs. The first pack is a Froth or Chocolate pack creating the foam and froth for the drink, the second pack adds the coffee or tea to the frothed drink. - Page 15 7. When your Froth has been created the Espresso Pack Door will automatically open. 8. Insert a FLAVIA barista Espresso pack and close the Espresso Pack Door. Note: Only use FLAVIA barista Espresso packs with nozzles in the espresso side.
- Page 16 PREPARING CAPPUCCINOS, LATTES, MOCHAS 3. Select the “Latte/Cappuccino” menu Latte / Cappuccino Latte Latte (espresso) Cappuccino Cappuccino (espresso) 4. Select the “Latte”, “Cappuccino” Mocha Mocha (espresso) or “Mocha” option of your choice 5. Insert the Froth pack of your choice (or Chocolate pack for Mocha) and close the Filter Pack Door.
-
Page 17: Preparing Coffee, Tea, Chocolate
PREPARING FILTER COFFEE, TEA, CHOCOLATE 1. Insert coins (pay option only) Notice No change is given. “Insert coins” will stop flashing once money is sufficient. 2. Place cup on Filter Pack Cup Stand and push all the way back to the back stop. 3. -
Page 18: Daily Care
DAILY CARE EMPTYING THE DRIP TRAYS 1. Lift out and empty drip tray. CAUTION – CONTENTS MAY BE HOT. 2. Remove grill and separate top and bottom parts. 3. Clean them in warm soapy water, wipe area left by drip tray. 4. - Page 19 WEEKLY CARE GENERAL CLEANING Use a damp cloth to wipe the outside surfaces and the areas that are exposed inside. Notice Do not use strong detergents and take care not to get soapy water into the water tank as this will affect the drink taste CLEANING THE WATER FILLER FUNNEL 1.
-
Page 20: Weekly Care
WEEKLY CARE CLEANING THE CUP DETECT AND AIR DUCT Notice Remove filterpack door to access air duct. Clean both cup Ensure air duct is sensors to ensure clean and free of correct operation debris CLEANING THE ESPRESSO (RIGHT) DOOR 1. The Espresso door is not removable and can only be cleaned in position. - Page 21 AUDITING YOUR BREWER COLLECTING AUDITS Enter operator menu (push and hold bottom left and right buttons) (Ref. A – page 6) 2. Enter password (default password press top right button 4 times) (Ref. B – page 6) 3. Display will show ‘Total Cups’, this is the total number of drinks dispensed 4.
-
Page 22: Auditing Your Brewer
AUDITING YOUR BREWER CONFIGURING ENERGY SAVING MODE In order to conserve energy the brewer can be configured to switch to standby mode after a specified time of inactivity. To configure the energy saving mode: Enter Operator menu (push and hold bottom left and right buttons) (Ref. A, page 6) 2. - Page 23 TROUBLE SHOOTING The sophisticated design of your FLAVIA® brewer makes it very unlikely that anything will go wrong. However, if faults do develop, you can resolve many of them yourself PROBLEM REASON SOLUTION “Please empty pack bin” Filterpack bin is full Pull out and empty the filterpack bin.
-
Page 24: Troubleshooting
TROUBLE SHOOTING PROBLEM REASON SOLUTION “Prime the hot water system” The hot water system needs to Priming is part of “Setting Up message displayed be primed Your Brewer”. Ref. page 6 Remove, empty and replace drip Spillage around the brewer A drip tray may have tray Ref. - Page 25 TROUBLE SHOOTING PROBLEM REASON SOLUTION Manually open the filterpack door “PACK INJECT TIMEOUT” and check if a filterpack pack is stuck in the pack guide rail. “PACK EJECT TIMEOUT” CAUTION - PACK MAY BE HOT Check if an Espresso pack is “GUARD FLAP DIDN’T SHUT”...
- Page 28 ® FLAVIA ©/™/® & designs Mars Drinks 2015 70-41-3152 Issue A...
Need help?
Do you have a question about the FLAVIA Barista and is the answer not in the manual?
Questions and answers
If the water is too hot hot to change the temperature .