Table of Contents
Advertisement
Challenge Xtreme
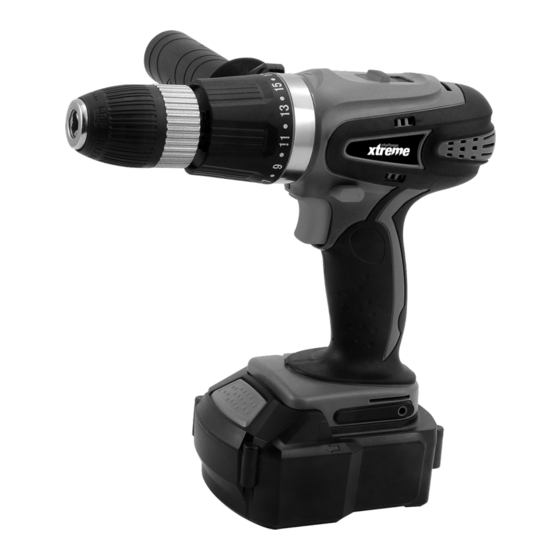
18V CORDLESS HAMMER DRILL
Assembly Manual-Original Instructions
Important
- Please read these instructions fully before starting assembly
These instructions contain important information that will help you get the
best from your cordless hammer drill, ensuring it is assembled correctly and
safely. If you need help or have damaged or missing parts, call the Customer
Helpline on 0345 640 0800.
After Sales Support
UK/Ireland
Web
WWW.ARGOS.CO.UK
0345 640 0800
Advertisement
Table of Contents

Related Manuals for Challenge Xtreme 18V CORDLESS HAMMER DRILL


Summary of Contents for Challenge Xtreme 18V CORDLESS HAMMER DRILL
- Page 1 Challenge Xtreme 18V CORDLESS HAMMER DRILL Assembly Manual-Original Instructions After Sales Support UK/Ireland 0345 640 0800 WWW.ARGOS.CO.UK Important - Please read these instructions fully before starting assembly These instructions contain important information that will help you get the best from your cordless hammer drill, ensuring it is assembled correctly and safely.
-
Page 2: Table Of Contents
Contents Safety Information....................Warnings Symbols....................General Safety Warnings..................Drill safety warnings ................... Safety warnings for battery pack................. General safety warnings for your battery charger..........Additional safety instructions for your battery charger........In The Box....................... Parts........................Intended Use......................Recharging batteries....................Charging your battery pack................. Before using your cordless drill................ -
Page 3: Safety Information
Safety Information Important - Please read these instructions fully before starting assembly Warnings Symbols The following warning symbols appear throughout this assembly manual and indicate the appropriate safety measures you should take when assembly and operating the cordless multi tool. This symbol indicates there is a danger of serious personal injury or death if you do not observe the warning. - Page 4 Safety Information Important - Please read these instructions fully before starting assembly Warnings Symbols Do not dispose of batteries. Return exhausted batteries to your local collection or recycling point. Waste electrical products should not be disposed of with household waste. Please recycle where facilities exist.
-
Page 5: General Safety Warnings
Safety Information Important - Please read these instructions fully before starting assembly Genera l Safety Warnings WARNING! Read all safety warnings and all instructions. Failure to follow the warnings and instructions may result in electric shock, fire and/or serious injury. Save all warnings and instructions for future reference. - Page 6 Safety Information Important - Please read these instructions fully before starting assembly Genera l Safety Warnings (continued) • Prevent unintentional starting. Ensure the switch is in the off-position before connecting to power source and/or battery pack, picking up or carrying the tool. Carrying power tools with your finger on the switch or energising power tools that have the switch on invites accidents.
-
Page 7: Drill Safety Warnings
Safety Information Important - Please read these instructions fully before starting assembly Genera l Safety Warnings (continued) 5) Battery tool use and care a) Ensure the switch is in the off position before inserting battery pack. Inserting the battery pack into power tools that have the switch on invites accidents. -
Page 8: Safety Warnings For Battery Pack
Safety Information Important - Please read these instructions fully before starting assembly Safety Warnings for battery pack a) Do not dismantle, open or shred cells or battery pack. b) Do not short-circuit a battery pack. Do not store battery packs haphazardly in a box or drawer where they may short circuit each other or be short-circuited by conductive materials. -
Page 9: General Safety Warnings For Your Battery Charger
Safety Information Important - Please read these instructions fully before starting assembly General Safety Warnings for your Battery Charger WARNING Read all safety warnings and all instructions. Failure to follow the warnings and instructions may result in electric shock, fire and/or serious injury. Save all warnings and instructions for future reference. -
Page 10: In The Box
In the Box Parts Forward/reverse control Variable speed trigger switch Two –speed gear control Battery pack release button Torque adjustment /drill selection collar Battery pack Keyless chuck Charger Slight light Charger base Auxiliary handle Customer Helpline 0345 640 0800... -
Page 11: Intended Use
Intended Use The machine is intended for drilling in wood, metal,masonry,ceramic,plastic, as well as for screwdriving purposes. This tool is intended for consumer use only. Recharging Batteries Note Before using the tool , read the instruction book carefully. Charging your batt ery pack Warning: The charger and battery pack are specifically designed to work together so do not attempt to use any other devices. -
Page 12: To Remove Or Install Battery Pack
Recharging Batteries To charge the battery(See Fig. A1) Fig.A1 Fig.A1 To remove or install battery pack(See Fig. B1&B2) Lock switch trigger on your tool by setting the forward/reverse control in the centre position. To remove the battery pack from the tool, firmly press and hold in the battery pack release button and slide the battery pack out of the tool. -
Page 13: Operation Instructions
Operation Instructions On/Off switch Depress to start and release to stop your drill. It is also a variable speed switch that delivers higher speed and torque with increased trigger pressure. Speed is controlled by the amount of switch trigger depression. Warning: Do not operate for long periods at low speed because excess heat will be produced internally. -
Page 14: Chuck Adjustment
Operation Instructions Chuck adjustment (See Fig. D) To open the chuck jaws rotate the front section of the chuck. Insert the drill bit between the chuck jaws and rotate the front section in the opposite direction. Ensure the drill bit is in the center of the chuck jaws. Finally, firmly rotate the front chuck section in the opposite directions. -
Page 15: Torque Adjustment
Operation Instructions Torque adjustment(See Fig. F) (Screw driving force of your drill driver) The torque is adjusted by rotating the torque adjustment ring. The torque is greater when the torque adjustment ring is set on a higher setting. The torque is less when the torque adjustment ring is set on a lower setting. Make the setting as follows: 1 –... -
Page 16: Drilling
Operation Instructions Two-speed gear control(See Fig. G) Fig.G1 Fig.G2 Auxiliary Handle (see Fig.H) Slide the handle into the drill, rotate the handle clockwise to release the metal circle if the circle is not big enough. Turn the handle to the desired angle. Rotate the handle anti-clockwise to tighten the handle. -
Page 17: Using The Sight Light
Operation Instructions Using the sight light (See Fig. H) The sight light allows you to keep a clear view under less illuminated circumstances. To turn on the light simply press the on/off switch. When you release the on/off switch, the light will be off. The sight light Fig.H Disposal of an exhausted battery... -
Page 18: Maintenance
Maintenance • Before any work on the machine itself remove the mains plug from the mains socket . • For safe and proper working operation, always keep the machine and ventilation slots clean. • Regularly check to see if any dust or foreign matter has entered the grills near the motor and around the on/off switch. -
Page 19: Technical Data
Technical Data Charger voltage 230-240V~,50Hz Battery voltage 18Vd.c Rated no load speed 0~350/0~1250 rpm Max torque 20Nm Number of clutch position 22+2 Chuck capacity 13mm Max. drilling capacity 2-13mm steel 8 mm wood 16 mm Masonry 13mm Machine Weight 1.68Kg Noise Information A weighted sound pressure level 73.59dB(A) - Page 20 Vibration Information Vibration total values (triax vector sum) determined according to EN 60745: Vibration emission value 1.18 m/s² Drilling into metal Uncertainty K =1.5m/s² The declared vibration total value has been measured in accordance with a standard test method and may be used for comparing one tool with another. The declared vibration total value may also be used in a preliminary assessment of exposure.
-
Page 21: Accessories
Accessories Carefully remove the machine from its packaging and check as the following parts are complete: 2 x 1.2 Ah Ni-Cd battery back -1 x 3-5h charger -3 x masonry drill bits 6 mm, 7 mm, 8 mm If any parts are missing or damaged, please contact your dealer. Disposal To preserve natural resources, please recycle or dispose of the battery pack properly.
Need help?
Do you have a question about the 18V CORDLESS HAMMER DRILL and is the answer not in the manual?
Questions and answers