Sorelle Berkley Assembly Instruction Manual
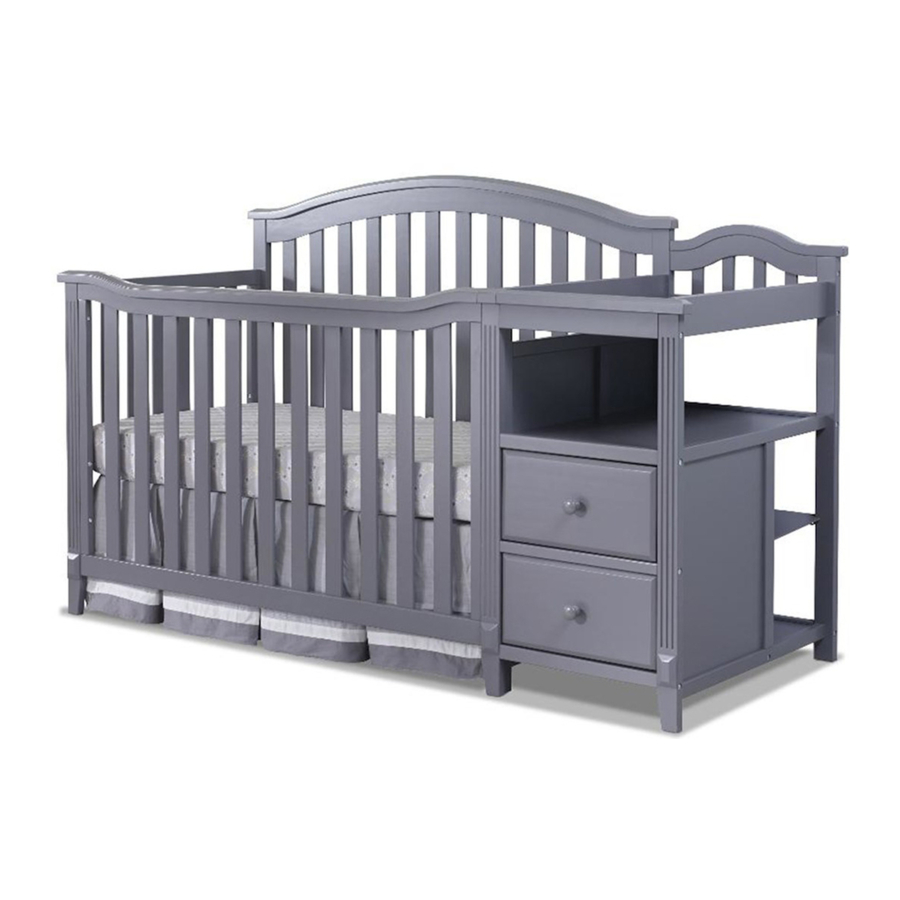
Crib and changer
Hide thumbs
Also See for Berkley:
- Assembly instruction manual (7 pages) ,
- Assembly instruction manual (19 pages) ,
- Assembly instruction manual (7 pages)

Related Manuals for Sorelle Berkley


Summary of Contents for Sorelle Berkley
- Page 1 Website: www.sorellefurniture.com Berkley crib and changer Assembly Instruction Important Information: Read all instructions BEFORE assembling crib. KEEP INSTRUTIONS FOR FUTURE USE. Made in QHY, China...
- Page 2 C&T International / Sorelle for replacement parts and instructional literature if needed. Do not substitute parts. *Follow warnings on all products in a crib. *If refinishing, use a non-toxic finish specified for children's products.
- Page 3 The maximum recommended weight of the child is 30lbs for the changing table. Use only the pad provided by C&T International / Sorelle or Manufacturer’s Always secure the pad to the changing surface by inserting the strap through the hole in the middle of the pad.
- Page 4 - Do not scratch or chip the finish. - Inspect the product periodically, contact C&T International / Sorelle for replacement parts or questions. - Do not store the product or any parts in extreme temperatures and conditions such as a hot attic or a damp, cold basement.
- Page 5 SORELLE Assembly Parts (C) Footboard (x1) (A) Left End (x1) (A1) Middle Panel (x1) (A2) Right End (x1) (B) Headboard (x1) (D) Left -Front Post (x1) (D1) Middle - Front Post (x1) (D2) Left - Back Post (x1) (E) Middle - Rear Post (x1)
- Page 6 SORELLE Assembly Parts Hardware list (a) M6 x 85mm Allen bolt (4 pcs) (e) M6 x 35mm Allen bolt (3 pcs) (b) M6 x 60mm Allen bolt (16 pcs) (f) M6 x 17mm Allen bolt (4 pcs) ( g ) M4 x 26mm Allen bolt (2 pcs)
- Page 7 SORELLE Crib Assembly Attach Left End (A) to left front and back posts (D&D2) by using 6 Bolts ( c ) as Figure 1. Attach Middle End (A1) to Middle front and back postd (D1&E) by using 6 Bolts ( c ) &1 bolts( e ) and 1 wood dowels( i ) as Figure 1.
- Page 8 SORELLE Attach the Front-Up Bar ( J ) ,Front- Bottom Bar (L), Front Middle Bar(K), and Middle Bar (G) to the Front Middle Post (D1) using 4 Bolts( b ) and 3 Wood Dowels( j ). Attach Middle - Bottom Bar(M) to the Middle Panel (A1) using 1 Bolt ( e ) and 1 wood dowel ( j ) as seen below in Figure 3.
- Page 9 SORELLE Insert Changer Top Shelf with Support Bar (N) & Changer Middle MDF Panel (Q) & Back - Bottom Shelf (P) & Middle shelf panel ( T ) to Grooves as seen below in Figure 5. Fig.5 Attach the Right End ( A2) to the end of the crib using 8 Bolts ( b ), 1 Bolt ( e ), and 7 Wood Dowels ( j ) as seen below in Figure 6.
- Page 10 SORELLE Attach Mattress Base ( o ) to crib by using 4 Bolts( f ) as Figure 7. NOTE: For infants, set mattress support assembly in an upper position for greater accessibility. As child grows and can stand, mattress support assembly must be lowered.
- Page 11 SORELLE Drawer Assembly (R3) 1. Working on a padded fl at surface, attach Drawer (R2) Sides (R1&R2) to Drawer Back (R3) with Philips Head (R1) Grooves Screw. Figure 1 2. Slide Drawer Bottom (R4) into drawer (R4) assembly. Figure 2.
- Page 12 SORELLE Insert 4 Metal Shelf Support ( k ) into holes. Then put Back Shelf (O) on 4 Metal Shelf Support ( k ) as Figure 10 (4x) Fig.10 Insert two (2) drawers into changer. Fig.11 Page 12...
- Page 13 SORELLE Add changing pad to top of organizer. Fig.12 Important : Tighten all bolts before use your Crib. Changing Pad Assembly Important : If changing pad and safety belt are assembled, make sure warnings are facing up and visible. If not, reassemble by following the steps below.
- Page 14 Follow all instructions supplied with the 148# Toddler Rail System. NOTE:148# Toddler Rail System is not included. Please see your crib retailer, visit WWW.Sorellefurniture.com or contact C&T International / Sorelle for more information. ( 148# Toddler Rail System Not included, sold separately) M6* 50mm Bolt (4pcs)...
- Page 15 Fullsize Bed and Changer Table Conversion (Optional) Follow all instructions supplied with the 224# Adult Rail System. NOTE: 224# Adult Rail System is not included. Please see your crib retailer, visit WWW.Sorellefurniture.com or contact C&T International / Sorelle for more information. Page 15...
Need help?
Do you have a question about the Berkley and is the answer not in the manual?
Questions and answers