Rimage Allegro 20 User Manual
Inkjet disc publisher
Hide thumbs
Also See for Allegro 20:
- Setup and installation manual (2 pages) ,
- Service manual (45 pages)
Table of Contents
Advertisement
Quick Links
Advertisement
Table of Contents

Related Manuals for Rimage Allegro 20


Summary of Contents for Rimage Allegro 20
- Page 1 Rimage Allegro 20™ User Guide...
- Page 2 Rimage Corporation reserves the right to make improvements to the equipment and software described in this document at any time without any prior notice. Rimage Corporation reserves the right to revise this publication and to make changes from time to time in the content hereof without obligation of Rimage Corporation to notify any person or organization of such revisions or changes.
-
Page 3: Table Of Contents
Troubleshooting the Allegro 20 ........ -
Page 4: Introduction
Rimage Allegro 20 disc completion of a task. You can disregard information in a Note or Tip and publishing system. To set up and install your Rimage Allegro 20, refer to still complete a task, but do not disregard an Important note. -
Page 5: Important Information
Technical Support Rimage Taiwan 2F-7, No. 508, Sec. 5 Rimage offers a variety of service and support options for the Allegro Zhongxiao East Rd. 20 including Rapid Exchange as well as Software Subscriptions and Taipei City 110, TAIWAN Support. Please contact your Rimage Value Added Reseller or Rimage for +886.2.2726.0100... -
Page 6: Optical Disc Recording Software Disclaimer
• Use only the supplied AC power cord. For more information or to To ensure safety, read these precautions and familiarize yourself with their order a new power cord, contact Rimage Customer Service. meaning before using the equipment. • This product is designed for an office environment. -
Page 7: Compliance Information
Compliance Information Product Name Rimage Allegro 20 Model RAS33 Notice for USA NOTE: This equipment has been tested and found to comply with the limits for a Class A digital device, pursuant to part 15 of the FCC Rules. These limits are designed to provide reasonable protection against harmful interference when this equipment is operated in a commercial environment. -
Page 8: Printer Requirements
All labels created and saved through CD Designer are in the correct file which is installed on your PC during a typical installation of Rimage software. format (.btw) for printing with the Rimage Allegro 20. If you are creating You can use CD Designer to design your disc labels. -
Page 9: Identifying The Parts Of The Allegro 20
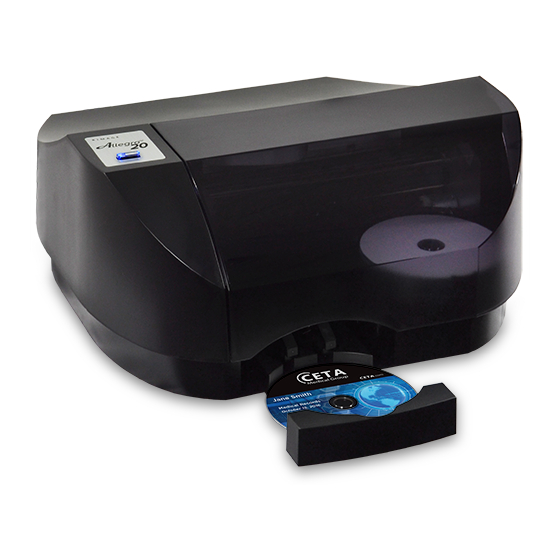
Identifying the Parts of the Allegro 20 This illustration shows the Rimage Allegro 20 system and its components. Front Panel and Top The Robotic Arm moves discs from the Input Bin, to the CD/DVD Recorder, Cover Cover to the Printer, and finally to the Output Bin. -
Page 10: Rear Panel
Identifying the Parts of the Allegro 20 This illustration shows the input ports found on the rear panel of the Allegro 20. Rear Panel Power Input Port USB 3.0 Port The USB 3.0 Port is connected to an open USB 3.0 port on your PC with a Power Input Port USB 3.0 Port... -
Page 11: Overview Of Operation
Overview of Operation Your new Allegro 20 system is an automated, precision device intended 9. Print time varies according to which print mode has been selected (See for light-duty disc publishing. The process of duplicating and printing a CD/ “Color Matching” on page 12). In most cases, print time takes no more DVD job on your system happens automatically for you. -
Page 12: Hardware Setup
Robotic Arm to allow for easy access to the Input Bin. This section will describe the step-by-step process of setting up your Allegro 20 system. This includes information on how to load the supplies (ink and disc media) necessary to start producing discs. -
Page 13: Install The All-In-One Ink Cartridge
4. Insert the All-in-One Ink Cartridge into the Ink Cartridge Carrier, copper end first and snap the cartridge cover in place. The Allegro 20 uses a single ink cartridge to print on your media, supporting monochrome, spot color and full-color images. -
Page 14: Advanced Printer Driver Functions (Pc)
As you lower this value, the Allegro 20 will print closer to the outer edge of the CD. Please note that with most media, the printable surface does not extend all the way to the edge of the disc. -
Page 15: Disc Surface Quality
Input Bin and repeat Step 2 using the same disc. This value changes the size of the non-printed center. Larger numbers cause the non-printed center to be larger, and smaller numbers make 2003750_B For more information visit rimage.com/support... -
Page 16: Details
5 4 3 2 1 0 -1 -2 -3 4 -5 Details Select the Details button for information on the drivers, firmware, alignment and number of discs printed with your Allegro 20 system. Click Reset Factory Default to set all print centering and cartridge alignment settings back to factory defaults. -
Page 17: Using Other Graphics Programs
While CD Designer will handle most labeling needs, other graphics programs can be used if you prefer. When printing and burning using other Rimage software than CD Designer, your system will support the following additional standard label image file formats: BMP, TIF, JPG, GIF, PNG, PRN, and PDF. These formats can be exported from most standard graphics software, such as Adobe Photoshop or Illustrator. -
Page 18: Maintenance And Troubleshooting
Rimage System Manager software. If needed, additional assistance It may be necessary to clean the ink cartridge nozzles if you notice with the software can be found in the Help section of the Rimage System reduced print quality, or if you suspect a cartridge nozzle has become Manager software or on the Rimage website at: slightly dried out or clogged. -
Page 19: Technical Support
Technical Support If you have difficulties in operating your Allegro 20, the procedures in this manual and the software User’s Guide should, in most cases, solve the problem. If you still have difficulty, contact Rimage Technical Support through www.rimage.com/support, or call or e-mail Rimage Technical Support for your region. -
Page 20: Technical Specifications
FCC Class B, CE Safety UL, UL-C, CE, RoHS Warranty 12 months Minimum PC Specifications Please visit the Rimage web site for minimum PC specifications. * Allow space (3.5 in or 9 cm) in rear of machine for cabling. 2003750_B For more information visit rimage.com/support...
Need help?
Do you have a question about the Allegro 20 and is the answer not in the manual?
Questions and answers