Nikon COOLPIX B500 Quick Start Quide
1 / 2.3 in. sensor
Hide thumbs
Also See for COOLPIX B500:
- Reference manual (193 pages) ,
- Quick start manual (49 pages) ,
- Quick start manual
Table of Contents
Advertisement
• Read this manual thoroughly before using the camera.
• To ensure proper use of the camera, be sure to read "For
Your Safety" (page viii).
• After reading this manual, keep it in a readily accessible
place for future reference.
Quick Start Guide
DIGITAL CAMERA
12
17
22
ii
iv
1
2
Advertisement
Table of Contents

Related Manuals for Nikon COOLPIX B500


Summary of Contents for Nikon COOLPIX B500
-
Page 1: Table Of Contents
DIGITAL CAMERA Quick Start Guide For Smart Device Users Introduction Parts of the Camera Getting Started Basic Shooting and Playback Operations Other Functions Technical Notes • Read this manual thoroughly before using the camera. • To ensure proper use of the camera, be sure to read “For Your Safety”... -
Page 2: For Smart Device Users
For Smart Device Users Your images. The world. Connected Welcome to SnapBridge — Nikon’s new family of services to enrich your image experience. SnapBridge eliminates the barrier between your camera and compatible smart device, through a combination of Bluetooth® low energy (BLE) technology and a dedicated app. The stories you capture with your Nikon camera and lenses are automatically transferred to the device as they are taken. - Page 3 — making online photo sharing easier than ever Upload of photos and thumbnail images to the NIKON IMAGE SPACE cloud service A range of services that enriches your imaging life, including: Camera remote control Imprinting up to two pieces of credit information (e.g.
-
Page 4: Introduction
Introduction Read This First Thank you for purchasing the Nikon COOLPIX B500 digital camera. Downloading the “Reference Manual” The Reference Manual (PDF format) provides more details in various languages on how to use this camera. Use your smart device or computer to refer to it along with this manual. -
Page 5: Confirming The Package Contents
Nikon User Support Should you need technical support, we offer a number of options. Internet For customers in the United States: www.nikonusa.com For customers in Canada: www.nikon.ca (English), fr.nikon.ca (Français) For customers in Mexico: www.nikon.com.mx For customers in Brazil: www.nikon.com.br Telephone... -
Page 6: Information And Precautions
Before taking pictures on important occasions (such as at weddings or before taking the camera on a trip), take a test shot to ensure that the camera is functioning normally. Nikon will not be held liable for damages or lost profits that may result from product malfunction. -
Page 7: Conformity Marking
Nikon will not be held liable for any damages resulting from the use of this product. While every effort was made to ensure that the information in these manuals is accurate and complete, we would appreciate it were you to bring any errors or omissions to the attention of the Nikon representative in your area (address provided separately). -
Page 8: For Your Safety
For Your Safety To prevent damage to property or injury to yourself or to others, read “For Your Safety” in its entirety before using this product. Keep these safety instructions where all those who use this product will read them. Failure to observe the precautions marked DANGER with this icon carries a high risk of death or... - Page 9 Keep this product out of reach of children. Failure to observe this precaution could result in injury or product malfunction. In addition, note that small parts constitute a choking hazard. Should a child swallow any part of this product, seek immediate medical attention.
- Page 10 DANGER for Batteries Do not mishandle batteries. Failure to observe the following precautions could result in the batteries leaking, overheating, rupturing, or catching fire: - Do not attempt to recharge non-rechargeable batteries. - Do not expose batteries to flame or excessive heat. - Do not disassemble.
- Page 11 If battery liquid comes into contact with a person’s skin or clothing, immediately rinse the affected area with plenty of clean water. Failure to observe this precaution could result in skin irritation. Introduction...
- Page 12 Introduction...
-
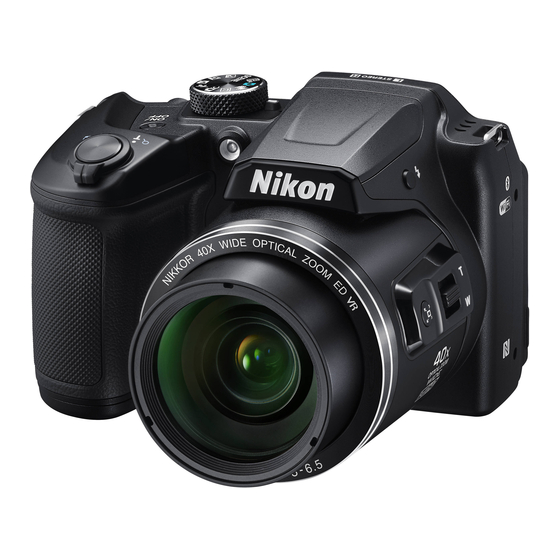
Page 13: Parts Of The Camera
Parts of the Camera The Camera Body Zoom control 10 Monitor f : Wide-angle 11 s (display) button g : Telephoto 12 Flash lamp h : Thumbnail playback i : Playback zoom 13 b (e movie-record) button Shutter-release button 14 c (playback) button Power switch/power-on lamp 15 Multi selector Mode dial... -
Page 14: Getting Started
Getting Started How to Attach the Camera Strap and Lens Cap Attach the lens cap to the camera strap, and then attach the strap to the camera. Attach the strap at two places. Lens Cap When the camera is not in use, attach the lens cap to the lens to protect it. If you turn on the camera without removing the lens cap, the message “Turn the camera off and then on again.”... -
Page 15: Inserting The Batteries And Memory Card
Inserting the Batteries and Memory Card Memory card slot Hold the camera upside down to prevent the batteries from falling out, confirm that the positive (+) and negative (–) terminals of the batteries are oriented correctly, and insert the batteries. Slide the memory card in until it clicks into place (5). -
Page 16: Memory Cards And Internal Memory
Notes About the Batteries Do not combine old and new batteries or batteries of different makes or types. Batteries with the following defects cannot be used: Batteries with peeling Batteries with insulation Batteries with a flat that does not cover the negative terminal area around the negative terminal... -
Page 17: Changing The Angle Of The Monitor
Changing the Angle of the Monitor The angle of the monitor can be lowered down to approx. 85° or raised upward to approx. 90°. Notes About the Monitor Do not apply excessive force when changing the angle of the monitor. The monitor cannot be moved to the left or right. -
Page 18: Camera Setup
Camera Setup Remove the lens cap before turning on the camera. Setup from a Smartphone or Tablet Before proceeding, install the SnapBridge app (Aii) and enable Bluetooth and Wi-Fi on your smartphone or tablet (below, “smart device”). The camera and smart device screens shown in this manual may differ from those of the actual products. - Page 19 Pair (i.e., establish a Bluetooth link between) the camera and the smart device. Android Devices with NFC Support After checking that NFC is enabled on the smart device, touch the camera Y (N-Mark) to the NFC antenna on the smart device to launch the SnapBridge app.
- Page 20 Press k when the dialog at right is displayed. When a constant connection between the camera and smart device is established, the dialog at right Your camera and smart device are connected! is displayed. SnapBridge will send your photos to If the camera displays Could not connect., press your smart device as they are taken.
- Page 21 Press d when the dialog at right is displayed. Use SnapBridge to send photos to your Select Yes when prompted to set smart device and share them online. the camera clock. To skip this screen and set SnapBridge later from the Network menu, press MENU.
- Page 22 What SnapBridge Can Do for You The SnapBridge app can be used for a variety of tasks once the camera has been paired with your smart device. Auto Upload At default settings, pictures will automatically be uploaded to the smart device as they are taken.
- Page 23 Wireless Networks Option Description Select Connect to smart device in the camera network Pairing after camera setup menu, and follow the instructions in “Setup from a Smartphone or Tablet” from Step 2 (A6). In the SnapBridge app, tap z in y Connect, and then Unpairing tap End pairing on the screen that is displayed.
-
Page 24: Basic Shooting And Playback Operations
Basic Shooting and Playback Operations Shooting Images A (auto) mode is used here as an example. A (auto) mode enables you to perform general shooting in a variety of shooting conditions. Rotate the mode dial to A. Battery level indicator b: The battery level is high. - Page 25 Frame the picture. Move the zoom control or the side zoom control to change the zoom lens position. If you lose sight of the subject while shooting with the lens in telephoto position, press the q (snap-back zoom) button to temporarily widen the visible area so that you can frame the subject more easily.
-
Page 26: Using The Flash
The Auto Off Function When no operations are performed for about one minute, the screen turns off, the camera enters standby mode, and then the power-on lamp flashes. The camera turns off after remaining in standby mode for about three minutes. To turn the screen back on while the camera is in standby mode, perform an operation such as pressing the power switch or shutter-release button. -
Page 27: Playing Back Images
Playing Back Images Press the c (playback) button to enter playback mode. If you press and hold down the c button while the camera is turned off, the camera turns on in playback mode. Use the multi selector to select an Display the previous image image to display. -
Page 28: Deleting Images
Deleting Images Press the l (delete) button to delete the image currently displayed on the screen. Use the multi selector HI to select the desired deletion method and press the Delete k button. Current image To exit without deleting, press the d button. Erase selected images All images Select Yes and press the k button. -
Page 29: Other Functions
Other Functions Selecting a Shooting Mode You can rotate the mode dial to align the desired shooting mode with the indicator mark on the camera body. A (Auto) mode Select this mode to perform general shooting in a variety of shooting conditions. y, o, j, e, o, d (Scene) modes Select any one of scene modes based on the shooting conditions, and you can take pictures with the appropriate settings for those conditions. - Page 30 Help Display The descriptions of functions are displayed while changing the shooting mode or while the setting screen is displayed. Press the shutter-release button halfway to quickly switch to shooting mode. You can show or hide the descriptions using Help display in Monitor settings in the setup menu. Other Functions...
- Page 31 Setting Shooting Functions with the Multi Selector When the shooting screen is displayed, you can press the multi selector H (m) J (n) I (p) K (o) to set the functions described below. m Flash mode When the flash is raised, the flash mode can be set according to shooting conditions.
-
Page 32: Menu Operations
Menu Operations You can set the menus listed below by pressing the d (menu) button. 1, 2 A Shooting menu D Movie menu G Playback menu J Network menu z Setup menu Press the d button when the shooting screen is displayed. Menu icons and available setting options vary depending on the shooting mode. - Page 33 Select a menu option and press the k button. Time zone and date Monitor settings Certain menu options cannot be set Date stamp depending on the current shooting Photo VR mode or the state of the camera. AF assist Digital zoom Select a setting and press the Date stamp k button.
-
Page 34: Technical Notes
CAUTIONS Modifications The FCC requires the user to be notified that any changes or modifications made to this device that are not expressly approved by Nikon Corporation may void the user’s authority to operate the equipment. Interface Cables Use the interface cables sold or provided by Nikon for your equipment. Using other interface cables may exceed the limits of Class B Part 15 of the FCC rules. - Page 35 Handling the cord on this product will expose you to lead, a chemical known to the State of California to cause birth defects or other reproductive harm. Wash hands after handling. Nikon Inc., 1300 Walt Whitman Road, Melville, New York 11747-3064, U.S.A. Tel: 631-547-4200...
- Page 36 (products purchased in the EU or EFTA can be used anywhere within the EU and EFTA). Nikon does not accept liability for use in other countries. Users who are unsure as to the original country of sale should consult with their local Nikon service center or Nikon-authorized service representative.
- Page 37 Some studies have suggested that some biological effects might occur, but such findings have not been confirmed by additional research. COOLPIX B500, which is equipped with a LBEE5ZZ1GV-893 (FCC ID:2AAD3JA0M0P0 / IC ID:4634A-6152EC) Wireless LAN Module, has been tested and found to comply with...
-
Page 38: Caring For The Product
Caring for the Product Observe the precautions described below in addition to the warnings in “For Your Safety” (Aviii–xi) when using or storing the device. The Camera Do Not Apply Strong Impact to the Camera The product may malfunction if subjected to strong shock or vibration. In addition, do not touch or apply force to the lens. - Page 39 Batteries Precautions for Use Note that the batteries may become hot after use. Do not use batteries beyond their recommended expiration date. Do not turn the camera on and off repeatedly if discharged batteries are inserted in the camera. Carrying Spare Batteries We recommend carrying spare batteries depending on where you are shooting.
- Page 40 Recycling Used Batteries Replace the batteries when they no longer hold a charge. Used batteries are a valuable resource. Please recycle used batteries in accordance with local regulations. Technical Notes...
-
Page 41: Cleaning And Storage
Cleaning and Storage Cleaning Do not use alcohol, thinner, or other volatile chemicals. Avoid touching glass parts with your fingers. Remove dust or lint with a blower (typically a small device with a rubber bulb attached to one end that is pumped to produce a stream of air out the other end). -
Page 42: Troubleshooting
Troubleshooting If the camera fails to function as expected, check the list of common problems below before consulting your retailer or Nikon-authorized service representative. Also, refer to the Reference Manual (PDF format) for further details on how to use this camera (Aiv). -
Page 43: Memory Cards That Can Be Used
United States and/or other countries. ® word mark and logos are registered trademarks owned by Bluetooth SIG, Inc. and any use of such marks by Nikon Corporation is under license. Apple®, App Store®, the Apple logos, Mac, OS X, iPhone®, iPad®, iPod touch® and iBooks are trademarks or registered trademarks of Apple Inc., in the U.S. - Page 44 “Made for iPod,” “Made for iPhone,” and “Made for iPad” mean that an electronic accessory has been designed to connect specifically to iPod, iPhone, or iPad, respectively, and has been certified by the developer to meet Apple performance standards. Apple is not responsible for the operation of this device or its compliance with safety and regulatory standards.
- Page 45 Technical Notes...
- Page 46 Technical Notes...
- Page 47 Technical Notes...
- Page 48 No reproduction in any form of this manual, in whole or in part (except for brief quotation in critical articles or reviews), may be made without written authorization from NIKON CORPORATION. CT6J05(11) 6MN66611-05...
Need help?
Do you have a question about the COOLPIX B500 and is the answer not in the manual?
Questions and answers