
Related Manuals for Leica CM 1850


Summary of Contents for Leica CM 1850
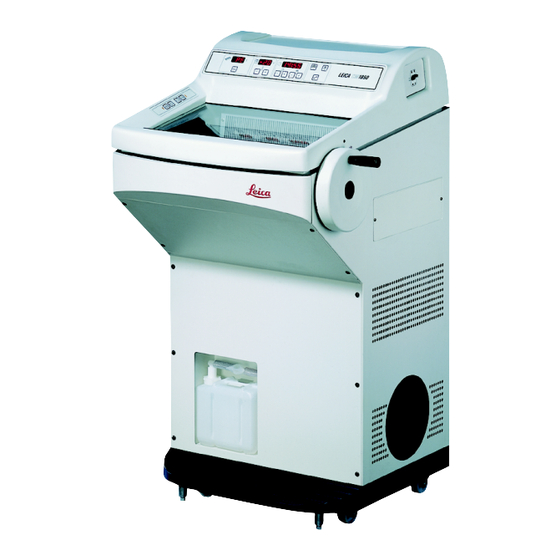
- Page 1 Leica CM 1850 Cryostat Instruction Manual Leica CM 1850 V2.0 English – 03/2001 Always keep this manual near the instrument! Read carefully prior to operating the instrument!
- Page 3 These are determined only by the con- tract provisions agreed between ourselves and Leica Microsystems Nussloch GmbH our customers. Leica reserves the right to change technical Heidelberger Str. 17 - 19 specifications as well as manufacturing pro- D-69226 Nussloch cesses without prior notice.
-
Page 4: Table Of Contents
Handwheel assembly ....................18 Setup ............................ Connection to mains power ..................19 Prior to operation ......................19 Leica CM 1850 - Overview .................... 20 Mains switch and automatic mains fuse ..............22 Turning the instrument on .................... 22 Control panel operation ....................23 Control panel 1........................ - Page 5 Temperature control button ..................35 Possible causes and remedies ..................36 Cleaning, disinfection, maintenance................ 41 Cleaning ........................... 41 Spray disinfection with Leica Cryofect ..............42 Maintenance ........................43 9.3.1 General maintenance ....................43 9.3.2 Removal of the microtome ................... 44 9.3.3 Removal of the microtome cover ................
- Page 6 Table of contents 9.3.5 Replacement of the fuses ..................... 48 9.3.6 Replacement of the lamp ....................48 Ordering information, optional accessories ............50 10.1 Ordering information ..................... 50 10.2 Optional accessories..................... 51 10.2.1 Mobile heat extractor....................51 10.2.2 Thermal block ......................... 51 Appendix ........................
-
Page 7: Important Information
1. Important Information 1.1 Symbols used in this manual and The chapters of the Leica CM 1850 cryostat instruction manual: their meaning Chapter 1 Structure of the manual: • Table of contents Warnings • Important information on this appear in a grey box and are marked... -
Page 8: Designated Use
Leica prod- ucts. 1.2 Designated use The Leica CM1850 is a powerful cryostat for routine as well as research applications in biology, medicine and industry. The instrument has been designed for rapid freezing and sectioning of tis- sue samples. -
Page 9: Safety
CE the glass plate of the anti-roll guide constitutes the knife guard (please refer to the separate instruction manual for your knife holder). Prior to manipulating the knife and specimen, or changing the specimen or knife, and during breaks, always lock the handwheel! Leica CM1850 – Cryostat... -
Page 10: General Information On Instrument Design And Safe Handling
2. Safety 2.2 General information on instrument design and safe handling This instrument has been built and tested in accordance with the following safety regulations on electrical measuring, control, regulating and labora- tory devices: • DIN EN 292, • DIN EN 61010-1, •... - Page 11 (2, Fig. 31.1) is open when operating the instrument. Only shut the tap when draining the waste container! Leica CM1850 – Cryostat...
-
Page 12: Cleaning And Disinfection
• It is not necessary to remove the microtome for routinely disinfecting the cryochamber. The instrument is appropriate for spray disinfection with Leica Cryofect! • Do not use organic solvents or any other aggressive substances for clean- ing and disinfection! -
Page 13: Maintenance
• Turn the instrument off with the automatic mains fuse and pull the mains plug, before replacing the lamp. • If the lamp is broken, it must be replaced by the technical service, as the replacement involves a high risk of injury. Leica CM1850 – Cryostat... -
Page 14: Technical Data
Operating temperature range (ambient temperature): 18 °C to 40 °C. All specifications related to temperature are valid only up to an ambient temperature of 22 °C and an air humidity lower than 60 %! Type CM 1850-11 CM 1850-03 CM 1850-07 CM 1850-08... - Page 15 All CM 1850 types require the following fuses: F1: T0,25 A Fa. Schurter, Typ FST; 6,3x32 mm oder T0,25 A Fa. Wickmann, Typ 19343; 6,3x32 mm F2: T0,6 A Fa. Schurter, Typ FST; 6,3x32 mm oder T0,6 A Fa. Wickmann, Typ 19343; 6,3x32 mm F3: T1,6 A Fa.
-
Page 16: Unpacking And Installation
Unpacking and installation Site requirements Do not operate in rooms with explosion hazard!To ensure an ad- equate cooling capacity, the instrument must be set up with at least 10 cm distance from walls and furniture. • The place of installation must meet the following requirements: –... -
Page 17: Standard Delivery
The alignment of the adjustable feet is necessary to ensure an un- obstructed drain of the quick freeze shelf defrosting water. Standard delivery The CM 1850 basic instrument includes the following: - 1 orienting specimen head, - 3 specimen discs, 25 mm ø, - 1 bottle cryocompound, 125 ml, - 1 bottle cryostat oil No. -
Page 18: Handwheel Assembly
Compare the delivered components with the parts list and your order. Should you find any discrepancies, please contact your Leica sales office without delay. A choice of different knife holders is available for the CM 1850. The knife holder is accompanied by its own separate instruction manual. -
Page 19: Setup
Open the knife box with the knife and place it in the cryochamber for precooling. • Place all tools needed for specimen preparation in the cryochamber. • Close the sliding window. • Connect the mains plug to the mains power outlet at the wall. Leica CM1850 – Cryostat... -
Page 20: Leica Cm 1850 - Overview
Setup Leica CM 1850 - Overview Instruction Manual V2.0 – 03/2001... - Page 21 17 Orientable specimen head 18 Knife holder base (accessory) 19 Knife holder CE (accessory) 20 Knife holder CN (accessory) 21 Knife holder CS (accessory) *) included in the standard delivery range of models with Peltier element Leica CM1850 – Cryostat...
-
Page 22: Mains Switch And Automatic Mains Fuse
Setup Mains switch and automatic mains fuse The automatic mains fuse is used as mains switch. To turn the automatic mains fuse on, the switch must be set in the upper position (pos. 1). To turn the automatic mains fuse off, the switch must be set in the lower position (pos. -
Page 23: Control Panel Operation
6.2.1 Setting the time The actual time is set on the panel marked with the clock symbol using the keys. When pushing the button for more than 1 second, the time value increases or decreases continuously (autorepeat function). Leica CM1850 – Cryostat... -
Page 24: Setting The Automatic Defrost Time (Cryochamber)
Control panel operation 6.2.2 Setting the automatic defrost time (cryochamber) The automatic defrost cycle takes place once within 24 hours. Touch the button for indication of the beginning of the defrost cycle which has actually been set. At the same time, the LEDs between the indi- cation of hours and minutes are flashing. -
Page 25: Activation Of The Peltier Element (Option)
To turn off the manual defrosting cycle of the quick freeze shelf prior to the automatic deactivation, press again Quick freeze shelf and cryochamber defrosting can be run inde- pendently. However, it is not possible to defrost both systems si- multaneously. Leica CM1850 – Cryostat... -
Page 26: Manual Defrosting Of The Cryochamber
Control panel operation 6.2.6 Manual defrosting of the cryochamber The manual defrosting of the cryochamber is activated by subsequently pressing the button (audible signal turns on) and the button on the panel for the cryochamber temperature (audible signal turns off). During the defrost cycle, the indication is flashing. -
Page 27: Control Panel 2 - Electric Coarse Feed
The advance movement operates as long as the button is pressed. This is a safety feature to protect both the specimen and knife from damage! slow On reaching the front limit, the LED (2) of the button starts illuminating. rapid Leica CM1850 – Cryostat... -
Page 28: Daily Use Of The Instrument
Daily use of the instrument Specimen freezing • Select the appropriate sectioning temperature (cryochamber tempera- ture) for the sample material (please refer to 7.4 Temperature selection chart‘). 7.1.1 Quick freeze shelf The cryochamber has a quick freeze shelf (5, Fig. 28) for up to 10 specimen discs. The temperature of the quick freeze shelf is always lower than the cryochamber temperature. -
Page 29: Specimen Discs
The entire rear surface of the prism must have a good contact with the specimen head. • Retighten screw (1). 7.2.2 Specimen orientation • To release, loosen screw (4). • Orient the specimen surface with lever (5). • Retighten screw (4). Leica CM 1850 – Cryostat... -
Page 30: Sectioning
Daily use of the instrument Sectioning All necessary adjustments on the knife holder and anti-roll guide are described in the separate instruction manual for your knife holder in detail. 7.3.1 Trimming the specimen Take care when handling microtome knives and disposable blades. -
Page 31: Temperaturew Selection Chart (In Minus °C)
Spleenal or bloody tissue ❄ ❄ Testicular ❄ Thyroid ❄ Tongue ❄ Uterus curettage The temperature values given above are based on long-term experience, however, these are only approximate values, as any tissue may require particular adjustments. Leica CM1850 – Cryostat... -
Page 32: Defrosting
Daily use of the instrument Defrosting Defrosting the cryochamber actually means defrosting the evaporator to prevent excessive frost buildup. The evaporator is flushed with hot gas dur- ing defrosting. The cryochamber virtually is frostfree and does not need to be defrosted. The condensation water that is produced during defrosting is collected in a container, which is located at the front of the cryostat cabinet. -
Page 33: Manual Defrosting Of The Quick Freeze Shelf
• Close the sliding window. • Turn out the cryochamber illumination. • Lock control panel 1 (Fig. 23) with the KEY button. • Do not turn the instrument off with the automatic mains fuse as there would be no cooling. Leica CM1850 – Cryostat... -
Page 34: Shutdown For A Longer Period
Troubleshooting 7.6.2 Shutdown for a longer period If you do not intend to use the instrument for several weeks you may turn it off. Please note, however, that it may take up to several hours to cool the cryochamber down to very low temperatures after turning the instrument on again. -
Page 35: Error Messages In The Display
--> Clean the ventilation slits (see 9.3.1). Fig. 35 After eliminating the possible source of error, push the temperature control button (1) to turn the in- strument back on. If the instrument fails to turn on, make a service call. Leica CM 1850 – Cryostat... -
Page 36: Possible Causes And Remedies
Troubleshooting Possible causes and remedies Problem Cause Remedy Frost on chamber walls and mi- - Cryostat is exposed to air cur- - Change place of installation for crotome rents (open windows and the cryostat. doors, air conditioning). - Sliding window was open and exposed to air currents too long. - Page 37 - Very hard, inhomogeneous - Increase section thickness; specimen. reduce specimen surface area if necessary. - Blunt knife/blade. - Use different part of the cutting edge or replace the knife/ blade. Leica CM1850 – Cryostat...
- Page 38 8. Troubleshooting Problem Cause Remedy - Knife profile inappropriate for - Use knife with different profile. the specimen to be cut. - Incorrect clearance angle. - Set correct angle. Condensation on anti-roll plate - Brush, forceps and/or cloth are - Store all tools on shelf in the and knife during cleaning too warm.
- Page 39 - Check the mains plug is prop- nected. erly connected. - Defective fuses. - Replace the fuses. - Temperature control switch - Check site conditions as de- activated. scribed in section 5.2, and reset the temperature control switch. Leica CM1850 – Cryostat...
- Page 40 8. Troubleshooting Problem Cause Remedy No or insufficient refrigeration - Compressor defective. - Call technical service. - Leak in the cooling system. - Call technical service. - Inappropriate site conditions. - Check site conditions as de- scribed in section 5.2. - Ventilation slits of the liquefier - Clean the ventilation slits as dirty.
-
Page 41: Cleaning, Disinfection, Maintenance
Do not use organic solvents or any other aggressive substances for cleaning and disinfecting! Only use the cleaning agents specified in this instruction manual such as Leica Cryofect (alcohol or com- mon disinfectants based on alcohol)! • Drain the cleaning liquid through the hose after the prescribed reagent time is over and collect it in the waste container (1). -
Page 42: Spray Disinfection With Leica Cryofect
Cleaning, disinfection, maintenance Spray disinfection with Leica Cryofect For easy-to-use spray disinfection we recommend Leica Cryofect. The cryostat has to be disinfected after each daily use. Comply with the instructions for use! The glass anti-roll plate can remain in place during disinfection. -
Page 43: Maintenance
To do so, turn the handwheel to place the specimen head to the uppermost position and apply some drops of cryostat oil on to the slot cover; after that place the specimen head to Fig. 43.2 Leica CM 1850 – Cryostat... -
Page 44: Removal Of The Microtome
• Do not carry out any repairs on your own as this will invalidate the war- ranty. Repairs may only be carried out by qualified service engineers autho- rized by Leica. The microtome can be removed for thorough cleaning and disin- fecting, or for extensive drying after a long power failure! 9.3.2 Removal of the microtome... - Page 45 • Disconnect the temperature sensor (2) from the microtome. Fig. 45.1 • Slightly lift the microtome and pull it to the left to disengage the plastic coupling (5) connecting the axes. • Take the microtome out of the cryochamber. Fig. 45.2 Leica CM 1850 – Cryostat...
-
Page 46: Removal Of The Microtome Cover
9. Cleaning, disinfection, maintenance 9.3.3 Removal of the microtome cover The microtome cover may be removed to expeditethorough drying of the mi- crotome in an oven. Note: Place the microtome in an oven at 40 °C to 50 °C for several hours. After repeatedly drying the microtome in this manner, it may become neces- sary to relubricate the cross roller... - Page 47 Replace the storage shelves, heat extractor, brush shelf and knife holder in the cryochamber. • Replace the sliding window. Fig. 47.2 Ensure that all components removed from the cold environment are com- pletely dry before placing them back Fig. 47.1 into the cryochamber. Leica CM 1850 – Cryostat...
-
Page 48: Replacement Of The Fuses
9. Cleaning, disinfection, maintenance 9.3.5 Replacement of the fuses Turn the instrument off with the automatic mains fuse and pull the mains plug, before replacing the fuses! Only use fuses of the same specification! For the required values, please refer Chapter 3 ‘Technical Data‘. The use of fuses other than specified by the manufacturer may cause severe damage to the in- strument! On the back of the instrument there is a fuse box... - Page 49 • Lightly push the fluorescent tube upward to engage in the clip. • Replace the sliding window. Fig. 49.3 • Reconnect the instrument to the mains power and turn it on. Leica CM 1850 – Cryostat...
-
Page 50: Ordering Information, Optional Accessories
Consumables OCT cryocompound, bottle of 125 ml 0201 08926 Cryostat oil No. 407, bottle of 100 ml 0336 06099 Leica Cryofect Spray disinfectant 0387 30795 * included in standard delivery on models with Peltier element Instruction Manual V2.0 – 03/2001... -
Page 51: Optional Accessories
If the cap is too loose, readjust it with the small screw (10). Do not over- tighten the screw. • Once the specimen is removed, take the thermal block out of the cold cryochamber. Fig. 51.2 Leica CM1850 – Cryostat... -
Page 52: Appendix
Leica Microsystems Nussloch GmbH guarantees that the contractual prod- uct delivered has been subjected to a comprehensive quality control proce- dure based on the Leica in-house testing standards, and that the product is faultless and complies with all technical specifications and/or characteris- tics warranted. - Page 53 Microsystems Nussloch GmbH (Germany) cannot accept goods returned without official authorization. If an instrument or any part of it is to be returned to Leica, please note the following: a. If the instrument or any part of it has been exposed to or been in contact with potentially pathogenic or radioactive materials, it is essential to de- contaminate the instrument or part.
- Page 54 Notes Instruction Manual V2.0 – 03/2001...
Need help?
Do you have a question about the CM 1850 and is the answer not in the manual?
Questions and answers