Table of Contents
Advertisement
Advertisement
Table of Contents

Related Manuals for Meade ECLIPSE VIEW 60


Summary of Contents for Meade ECLIPSE VIEW 60
- Page 1 Instruction Manual...
-
Page 2: Sun Warning
Sun Warning WARNING! o Always use the EclipseView Solar Filter when viewing at or near the Sun. When viewing a solar eclipse, always use this solar filter during ALL phases of the eclipse. o Before use always check both sides of the solar filter for damage. Do not use if scratches, pin-holes, or the filter is separated from its holder. -
Page 3: Quick Start - Viewing The Sun
• Insert Slow-Motion control rod into • Only view the Sun with the proper holder. Meade solar filtering or permanent eye • Place Optical tube into mount. damage can occur! • Reattach yellow ota mounting knobs. Always use the EclipseView Solar Filter when viewing at or near the Sun or irreversible eye damage may occur. -
Page 4: Quick Start - Viewing At Night
Quick Start - Viewing at Night In order to get started observing nighttime objects, you will need to do the following: 1) Read the Instructions! 5) Attach Accessories • Knowing how the telescope oper- • EclipseView60: Attach 90 ° diago- ates and what you will see is critical to nal &... -
Page 5: Table Of Contents
Table Of Contents Sun Warning.............1 Quick Start – Viewing at Night......28 Quick Start – Viewing the Sun........2 Attaching The Accessories........29 Quick Start – Viewing at Night........3 Installing The Red-Dot Finder........29 Introduction...............5 Inserting The Eyepiece..........30 Telescope Features – 60mm........6 Aligning The Red-dot Viewfinder......31 Telescope Features –... -
Page 6: Introduction
Introduction Congratulations on getting a Meade EclipseView Telescope! Now you can setup and share the stargazing & solar viewing experience in seconds. Whether you are camping in the outdoors or relaxing in your back- yard, grab your EclipseView Telescope and take it wherever life takes you. Your telescope is already par-... -
Page 7: Telescope Features - 60Mm
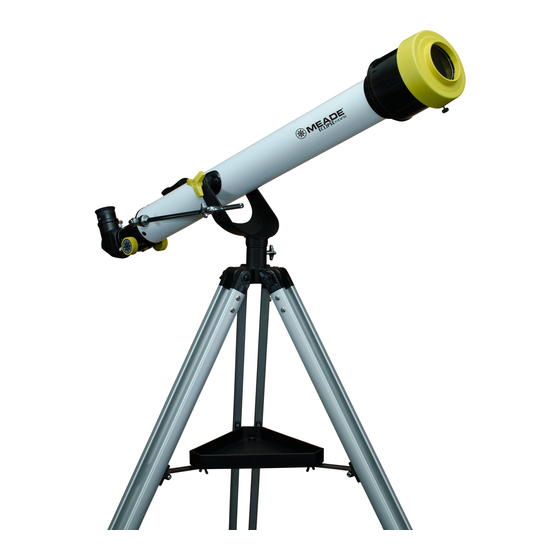
Telescope Features Image A Image B EclipseView 60 19 21 FIGURE 1A Image C Tripod leg lock Focuser Leg brace supports Focus knobs Accessory tray Focuser thumbscrews Alt-Az mount Slow-motion control rod Azimuth lock knob Slow-motion lock knob Altitude lock knobs OTA mounting knobs(2) Optical tube assembly Front dust cap (not visible) -
Page 8: Telescope Features - 76Mm
Telescope Features Image A Image B EclipseView 76 FIGURE 1B 15 16 17 Image C Tripod leg lock Focuser 19 20 Leg brace supports Focus knobs Accessory tray Focuser thumbscrews Alt-Az mount Slow-motion control rod Azimuth motion lock knob Slow-motion lock knob Altitude lock knobs OTA mounting knobs(2) Optical tube assembly... -
Page 9: Specifications
Specifications EclipseView 60 EclipseView 76 Optical tube design Reflector Refractor 800mm 700mm Optical tube focal length 60mm (2.4 in.) 76mm (3 in.) Lens/Mirror diameter f/13.3 f/9.2 Focal ratio SunFinder for Daytime SunFinder for Daytime Viewfinder Red-dot for Nighttime Red-dot for Nighttime Two1.25”... -
Page 10: About Your Telescope
About The Telescope The EclipseView Telescopes are Alt-Az mounted telescopes. The word “Alt-Az” comes from the way the telescope mount moves. This mount style allows you to move the telescope both up/down (altitude) and left/right (azimuth), or Altitude-Azimuth directions. Hence, it’s called an Alt-Az telescope for short. This is the simplist type of mount sold. The EclispeView60 optical tubes are called refractors because they use lenses to refract, or bend, the incoming light to the focal point. -
Page 11: Assembling The Telescope
Assembling The Telescope Step 1 Tripod Assembly: The tripod is the basic support for your telescope and comes pre-assembled from the factory; except for the accessory tray. In order to use the scope a small amount of assembly is required. Follow the below steps to assemble the telescope. STEP 1: To setup the tripod, spread the legs out evenly and place on solid ground. -
Page 12: Attaching The Optical Tube Assembly(Ota)
Attaching The Optical Tube Assembly (OTA): The optical tube gathers distant light which is focused in the eyepiece. STEP 1: Remove the two lock knobs from the optical tube mount. STEP 2: Slide the Slow-motion control rod into the slow-motion control lock knob hole. STEP 3: Place the optical tube between the forks of the mount, oriented as shown. -
Page 13: Remove The Dust Covers
Remove The Dust Covers: The dust covers located at the front and rear of the telesocpe protect the telescope STEP 1: Remove dust covers(6) at the front of the scope by pulling the cover away from the telescope. Set aside so you can re-install it after use. -
Page 14: Insert The Eyepiece
Insert The Eyepiece: Step 1 STEP 1: EclipseView60 Models: Slide the MA 26mm eyepiece into diagonal prism. EclipseView76 Models: Slide the MA 26mm eyepiece directly into the focuser drawtube. EclipseView60 STEP 2: EclipseView60 Models:Tighten the diagonal prism thumbscrew to hold the eyepiece securely. -
Page 15: Attaching The Finder
Attaching The Finder: An eyepiece has a narrow field of view. A viewfinder, or finder, has a wider field of view, which makes it easier to locate objects. SunFinder The EclipseView telescopes comes with two different viewfinders. Each finder has a Projection of Sun different use and should only be used as intended. - Page 16 The telescope is now completely setup and ready for NIGHTTIME observing. Follow the instructions under the section “NightTime Use of the EclipseView Telescope” for more information. If using the telescope for DAYTIME use, such as viewing the Sun, proceed to the section “DayTime Use of the EclipseView Telescope”...
-
Page 17: Daytime Use Of The Telescope
DAY TIME USE OF THE ECLIPSEVIEW TELESCOPE... -
Page 18: Quick Start - Viewing The Sun
• Insert Slow-Motion control rod into • Only view the Sun with the proper holder. Meade solar filtering or permanent eye • Place Optical tube into mount. damage can occur! • Reattach yellow ota mounting knobs. Always use the EclipseView Solar Filter when viewing at or near the Sun or irreversible eye damage may occur. -
Page 19: Using The Solar Filter
Using The Solar Filter CAUTION: NEVER look through your telescope at or near the Sun until the solar filter is securely installed at the front of the telescope. Please read the following instructions fully and keep them in mind when observing the Sun. Always use caution when viewing at or near the Sun. - Page 20 install the filter, do the following. Step 2. STEP 1: Point the telescope upwards away from the Sun. STEP 2: Carefully slide the filter fully over the front end of the telescope. Never force the filter onto the optical tube or damage can occur. STEP 3: Tighten the thumb screw located on side the filter until firm.
-
Page 21: Installing The Sunfinder
Installing the SunFinder: Step 1. The SunFinder is a pointing device that will allow you to easily locate the Sun. Follow the below instructions to install and use the SunFinder. STEP 1: Remove the two viewfinder mounting thumb screws from the optical tube. -
Page 22: Using The Sunfinder
Using The SunFinder: STEP 1: To use the SunFinder point the telescope toward the Sun. The small pinhole in the front of the SunFinder will act as a projector. As the telescope moves closer to the Sun, a projection of the Sun will be displayed on the back plate of the SunFinder. -
Page 23: Observing The Sun
Observing The Sun: What makes our Sun so enjoyable to observe is that it’s an active star that’s always changing. When viewing the Sun through the EclipseView solar filter, Sunspots the Sun will show up as a yellow-orange disk with possible Sunspots on its surface. - Page 24 you see each day? Partial Solar Eclipse Planetary transits are another exciting feature to see when observing the Sun. Although this event happens infrequently, it occurs when the planet Mercury or Venus passes in front of the Sun. From your EclipseView telescope this would look like a small black dot travelling very slowly across the face of the Sun.
-
Page 25: How To Observe A Solar Eclipse
type of eclipse, the Moon is a smaller apparent size than the Sun and cannot completely block the Sun. As a result, the Sun’s entire edge, or annular region, is still visible around the Moon. Total Solar Eclipse A Total Solar Eclipse occurs when the Moon passes directly in front of the Sun, blocking the entire solar disk. - Page 26 Check the weather! Nothing can spoil a solar eclipse like clouds or rain. You can also observe the Sun with special Mylar solar glasses, which you can purchase from Meade or at online retailers. The filters on these solar glasses are made of solar safe material, similar to that found on the EclipseView solar filter.
-
Page 27: Solar Filter Maintenance
Solar Filter Maintenance: The solar filter can be cleaned by using a soft micro-fiber cloth, soft brush, or soft blower. First, gently blow off any dust that may accumulate on the filter from outside use. If the filter is still dirty than you may use a soft brush or micro-fiber cloth to remove the debris by gently wiping away the dust or debris. -
Page 28: Nighttime Use Of The Telescope
NIGHTTIME USE OF THE ECLIPSEVIEW TELESCOPE... -
Page 29: Quick Start - Viewing At Night
Quick Start - Viewing at Night In order to get started observing nighttime objects, you will need to do the following: 1) Read the Instructions! 5) Attach Accessories • Knowing how the telescope oper- • EclipseView60: Attach 90 ° diago- ates and what you will see is critical to nal &... -
Page 30: Attaching The Accessories
Attaching Your Accessories Installing the Red-dot Finder Step 1. An eyepiece has a narrow field of view. A red-dot viewfinder has a wider field of view, which makes it easier to locate objects. Once the red-dot viewfinder is aligned to the optical tube, the red-dot can be used to locate and place objects more easily in the telescope’s eyepiece. -
Page 31: Inserting The Eyepiece
Attaching Your Accessories Inserting An Eyepiece Magnification, or power is based on eyepiece focal length. The higher power will present a larger, dimmer image, with smaller field of view. The lower the power, the brighter and smaller the image will be, with a wider field of view. -
Page 32: Aligning The Red-Dot Viewfinder
Aligning The Red-Dot Viewfinder Aligning the red-dot viewfinder allows you to accurately point at the same location as the telescope. It is recommended that you perform steps 1 and 2 during the day and step 3 during nighttime. Step 2. NOTE: THE RED-DOT FINDER IS ONLY FOR NIGHTTIME USE AND SHOULD NEVER BE USED AT OR NEAR THE SUN. - Page 33 Aligning The Red-Dot Viewfinder Step 4. STEP 4: Look through the red-dot viewfinder. Turn one or both of the viewfinder’s alignment screws until the red-dot is precisely over the same object as you centered in the eyepiece. The side alignment screw controls the horizontal, while the rear alignment screw controls the vertical.
-
Page 34: Moving The Telescope
Moving The Telescope Step 1. Your telescope is alt-azimuth mounted. Alt-azimuth is just a complicated altitude lock knob way of saying that your telescope moves up and down and from side to slow-motion side. Other telescopes may be mounted in different ways. lock knob STEP 1: Slightly loosen both of the star-shaped altitude lock knobs... -
Page 35: How To Use Your Telescope
How To Use Your Telescope Step 1 Pick an object in the sky that you want to view, and make sure you are using the 26mm eyepiece. If viewing the Sun, make sure to install the Solar Filter & SunFinder. Step 2 Turn the red-dot finder on (if installed). -
Page 36: Observing At Night
Observing At Night We have one very important rule that you should always follow when using your telescope: Have Fun! Have a good time when you’re observing. You may not know everything that there is to know about a telescope or what all the sights in the universe are, but that’s OK. Just point and observe at first. You will enjoy your telescope the you practice and learn more about it. -
Page 37: Observing The Moon
Observing The Moon The Moon is the best object to observe the first time you go out at night. Pick a night when the Moon is a crescent. No shadows are seen during a full Moon, making it appear flat and uninteresting. - Page 38 Observing The Solar System Venus is seen before dawn or after sunset, because it is close to the Sun. You can observe Venus going through crescent phases. But you cannot see any surface detail on Venus because it has a very thick atmosphere of gas. When Mars is close to the Earth, you can see some details on Mars, and sometimes even Mars’...
- Page 39 Observing The Beyond Once you have observed our own system of planets, it’s time to really travel far from home and look at stars and other objects. You can observe thousands of stars with your telescope. At first, you may think stars are just pinpoints of light and aren’t very interesting.
-
Page 40: Resources
• Astronomy: magazines, on the internet, apps and http://www.astronomy.com CD Roms. Meade offers AutoStar SuiteTM software • Astronomy Picture of the Day: (contact your local dealer or visit Meade.com). http://antwrp.gsfc.nasa.goc/apod • Photographic Atlas of the Moon: Astronomy and Sky and Telescope magazines print http://www.lpi.ursa.edu/research/lunar_orbiter... - Page 41 Tips And Tricks If viewing at night, let your eyes “dark-adapt”: Allow five or ten minutes for your eyes to become “dark adapted” before observing. Use a red filtered flashlight to protect your night vision when reading star maps, or inspecting the telescope. Stay away from bright lights too. Do not use a regular flash-light or turn on other lights when observing with a group of other astronomers.
-
Page 42: Tip And Tricks
Tips And Tricks THINGS THAT AFFECT VIEWING VIBRATIONS: Avoid touching the eyepiece while observing through the telescope. Vibrations resulting from such contact will cause the image to move. Avoid observing sites where vibrations cause image movement. LIGHT POLLUTION: Light pollution is excessive, misdirected, or artificial outdoor light. Too much light pollution has consequences: it washes out starlight in the night sky, interferes with astronomical research, disrupts ecosystems, has adverse health effects and wastes energy. -
Page 43: Calculating Magnification
Calculating Magnification The power of a telescope is how much it magnifies objects. Each telescope has its own set of focal lengths and, therefore, different magnifications when used with various eyepieces. For example, the EclipseView 60mm used with the 26mm eyepiece magnifies an object 31times. -
Page 44: Collimation
EclipseView76 Models Only Figure 3 What is collimation? All Meade EclipseView Reflecting telescopes are optically aligned at the factory prior to shipment. It is unlikely that you will need to align, or collimate, the optics after receipt of the instrument. However, if the telescope received unusually rough handling in shipment, it is possible that the optics must be re-aligned for best optical performance. - Page 45 CORRECT COLLIMATION: The properly collimated (aligned) mirror system in the Figure 5 Meade EclipseView telescope assures the sharpest images possible. This occurs when the primary mirror and secondary mirror are tilted so that the focused image falls directly through the center of the focuser draw tube.
- Page 46 Collimation EclipseView76 Models Only SECONDARY MIRROR HOLDER ADJUSTMENTS: If the secondary mirror (fig. 6, #1) is centered in the draw Figure 6 tube (fig. 6, #2), but the primary mirror is only partially visible in the reflection (fig. 6, #3), one or more of the 3 secondary mirror collimation screws need adjusting.
-
Page 47: Primary Mirror Adjustments
Collimation EclipseView76 Models Only PRIMARY MIRROR ADJUSTMENTS If the secondary mirror (fig. 7 , #1) and the reflection of the Figure 7 primary mirror (fig. 7 , #2) appear centered within the draw tube (fig. 7 , #3), but the reflection of your eye and the reflection of the secondary mirror (fig. - Page 48 Collimation Figure 8 EclipseView76 Models Only With the collimation performed, you will want to test the accuracy of the alignment on a star. Use the 26mm eyepiece and point the telescope at a moderately bright (second or third magnitude) star, then center the star image in the telescope’s field-of-view.
- Page 49 • With the star testing of the collimation complete, tighten the 3 slotted-head primary mirror locking screws (fig. 3, #2) Meade also sells a Laser Collimator accessory that will simplify collimation of the optics. This device works by shining a red laser onto the optics and viewing the reflected light. If the reflected light beam is not centered on the device, it can be easily adjusted using the telescope adjustments until the beam is centered.
-
Page 50: Viewfinder Battery Replacement
Viewfinder Battery Figure 11 If the viewfinder red-dot does not illuminate, verify the viewfinder is on by rotating the power switch (fig 1, #15) below the viewfinder lens clockwise. If the red-dot does not illuminate, the battery may need replacing. To replace the battery, press the left side of the viewfinder housing labeled “push”. -
Page 51: Care And Maintenance
Care And Maintenence Your telescope is a precision optical instrument designed for a lifetime of rewarding viewing. It will rarely, if ever, require factory servicing or maintenance. Follow these guidelines to keep your telescope in the best condition: As with any quality instrument, lens or mirror surfaces should be cleaned as infrequently as possible. -
Page 52: Accessories
Accessories For an up-to-date list of compatible Meade accessories, contact your Meade Dealer or see the Meade online catalog for more information. Visit us on the web at www. meade.com. ADDITIONAL EYEPIECES: (1.25” barrel diameter only): For higher or lower viewing magnifications, Meade’s eyepieces are available in a wide... -
Page 53: Recycling
Recycling CORRECT DISPOSAL OF THIS PRODUCT (Waste Electrical & Electronic Equiptment) This marking shown on the product or its literature indicates that it must not be disposed of in unsorted municipal waste at the end of its working life. To prevent possible harm to the environment or human health from uncontrolled waste disposal, please separate this from other types of wastes and recycle it as required by law. -
Page 54: Customer Service And Warranty
ONE YEAR from the date of original purchase in the U.S.A. Meade will repair or replace a product, or part thereof, found by Meade to be defective, provided the defective part is returned to Meade, freight-prepaid, with proof of purchase. - Page 55 Meade specifically disclaims special, indirect, or consequential damages or lost profit which may result from a breach of this warranty. Any implied warranties which cannot be disclaimed are hereby limited to a term of one year from the date of original retail purchase.
- Page 56 OBSERVATION LOG OBSERVER: OBJECT NAME: DATE & TIME OBSERVED: CONSTELLATION: EYEPIECE SIZE: SEEING CONDITIONS: EXCELLENT GOOD POOR NOTES: DRAWING OF IMAGE...
- Page 57 OBSERVATION LOG OBSERVER: OBJECT NAME: DATE & TIME OBSERVED: CONSTELLATION: EYEPIECE SIZE: SEEING CONDITIONS: EXCELLENT GOOD POOR NOTES: DRAWING OF IMAGE...
- Page 58 OBSERVATION LOG OBSERVER: OBJECT NAME: DATE & TIME OBSERVED: CONSTELLATION: EYEPIECE SIZE: SEEING CONDITIONS: EXCELLENT GOOD POOR NOTES: DRAWING OF IMAGE...
- Page 59 We appreciate your business. Keep in touch! Let’s Get Social: @MeadeInstruments @Meadetelescopes @MeadeInstrument Share your photos with us: #MeadePhotos Social@meade.com For special offers and other products, visit our website: www. meade.com...
- Page 60 1-800-626-3233 Meade Instruments 27 Hubble Irvine, CA 92618 20170120 REV1...
Need help?
Do you have a question about the ECLIPSE VIEW 60 and is the answer not in the manual?
Questions and answers