Yealink SIP-T46G User Manual
Gigabit color ip phone
Hide thumbs
Also See for SIP-T46G:
- Quick start manual ,
- Administrator's manual (434 pages) ,
- User manual (243 pages)
Table of Contents
Advertisement
Quick Links
Advertisement
Table of Contents

Related Manuals for Yealink SIP-T46G


Summary of Contents for Yealink SIP-T46G
-
Page 2: Declaration Of Conformity
Copyright Copyright © 2016 YEALINK(XIAMEN) NETWORK TECHNOLOGY CO., LTD. Copyright © 2016 Yealink(Xiamen) Network Technology CO., LTD. All rights reserved. No parts of this publication may be reproduced or transmitted in any form or by any means, electronic or mechanical, photocopying, recording, or otherwise, for any purpose, without the express written permission of Yealink(Xiamen) Network Technology CO., LTD. -
Page 3: Class B Digital Device Or Peripheral
Do not dispose of WEEE as unsorted municipal waste and have to collect such WEEE separately. Customer Feedback We are striving to improve our documentation quality and we appreciate your feedback. Email your opinions and comments to DocsFeedback@yealink.com. -
Page 4: Gnu Gpl Information
GPL. Please refer to the GPL for the exact terms and conditions of the license. The original GPL license, source code of components licensed under GPL and used in Yealink products can be downloaded online:... -
Page 5: About This Guide
About This Guide About This Guide Thank you for choosing the SIP-T46G IP phone, an ultra-elegant Gigabit IP phone which is exquisitely designed to provide business telephony features, such as Call Hold, Call Transfer and Conference over an IP network. - Page 6 User Guide for the SIP-T46G IP Phone...
-
Page 7: Table Of Contents
Table of Contents Table of Contents About This Guide ................v In This Guide ................................ v Table of Contents................vii Overview ................... 1 Hardware Component Instructio ns ......................1 Icon Instructions ..............................3 Feature Sta tus Icons ............................3 Line Key Ico ns ..............................3 Other Icons ...............................4 LED Instr uctio ns ..............................5 Phone User Interface ............................6... - Page 8 User Guide for the SIP-T46G IP Phone Key Tone................................. 27 Contact Management ............................ 27 Local Directory ............................. 27 Network Directory............................34 Call History Management ..........................34 Viewing History Records ........................... 35 Placing a Call from History Records ...................... 35 Adding a Contact to the Local Directory ..................... 35 Deleting History Records ..........................
-
Page 9: Table Of Contents
Table of Contents Safety Instructions ............................67 Appendix A – Time Zones ............. 69 Index ....................71... -
Page 11: Overview
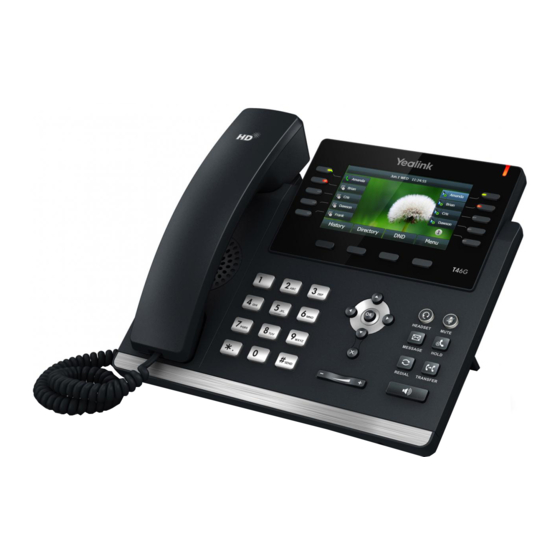
LED Instructions Phone User Interface If you require additional information or assistance with your new phone, contact your system administrator. Hardware Component Instructions The main hardware components of the SIP-T46G IP phone are the LCD screen and the keypad. - Page 12 User Guide for the SIP-T46G IP Phone Hardware component instructions of the SIP-T46G IP phone are: Item Description Shows information about calls, messages, soft keys, time, date and other relevant data: • Default account • Call information—caller ID, call duration ①...
-
Page 13: Icon Instructions
Overview Item Description Picking up the handset from the handset cradle, the hookswitch bounces and the phone connects to the line, ⑬ Hookswitch laying the handset down on the handset cradle, the phone disconnects from the line. Icon Instructions Feature Status Icons Icons appearing on the status bar are described in the following table: Icons Description... -
Page 14: Other Icons
User Guide for the SIP-T46G IP Phone Icons Description Speed Dial Voice Mail Transfer Forward Conference Hold ReCall Group Listening Icon indicator (associated with line) Icons Description The private line registers successfully The shared/bridged line registers successfully Registering Register failed... -
Page 15: Led Instructions
Overview Icon Description The default caller photo LED Instructions Power Indicator LED LED Status Description Solid red The phone is initializing. Fast flashing red (300ms) The phone is ringing. The phone is powered off. The phone is idle. The phone is busy. The call is placed on hold or is held. -
Page 16: Phone User Interface
User Guide for the SIP-T46G IP Phone Phone User Interface The hardware components keypad and LCD screen constitute the phone user interface, which allows the user to execute all call operation tasks and basic configuration changes directly on the phone. -
Page 17: Getting Started
Idle Screen Entering Data and Editing Fields If you require additional information or assistance with your new phone, contact your system administrator. Packaging Contents The following components are included in your SIP-T46G IP phone package: SIP-T46G IP Phone ... - Page 18 User Guide for the SIP-T46G IP Phone Phone Stand Handset & Handset Cord Ethernet Cable (2m CAT5E FTP cable) Quick Start Guide Power Adapter Check the list before installation. If you find anything missing, contact your system...
-
Page 19: Optional Accessories
Getting Started Optional Accessories The following items are optional accessories for your SIP-T46G IP phone. You need to purchase them separately if required. Wall Mount Bracket Headset Wireless Headset Adapter EHS36 Bluetooth USB Dongle BT40 Note We recommend that you use the accessories provided or approved by Yealink. -
Page 20: Phone Installation
User Guide for the SIP-T46G IP Phone Phone Installation If your phone is already installed, proceed to Setup Wizard on page 12. This section introduces how to install the phone: Attach the stand or the optional wall mount bracket Connect the handset and optional headset... -
Page 21: Power Over Ethernet
The IP phone should be used with Yealink original power adapter (5V/2A) only. The use of the Note third-party power adapter may cause the damage to the phone. Power over Ethernet With the included or a regular Ethernet cable, the SIP-T46G IP phone can be powered from a... -
Page 22: Setup Wizard
User Guide for the SIP-T46G IP Phone PoE-compliant switch or hub. To connect the PoE: Connect the Ethernet cable between the Internet port on the phone and an available port on the in-line power switch/hub. If in-line power is provided, you don’t need to connect the phone to the power adapter. Make Note sure the switch/hub is PoE-compliant. -
Page 23: Phone Status
Generally, your phone will be deployed with multiple other phones. Your system administrator will configure the phone parameters beforehand, so that after you start up your phone, the phone will be registered and ready for use. The SIP-T46G IP phone supports up to 16 accounts. -
Page 24: Idle Screen
User Guide for the SIP-T46G IP Phone Idle Screen If the phone has successfully started up, the idle LCD screen will be displayed as below. Idle screen description: Name Description This area shows the phone’s default account, icons and the time and Status Bar date. - Page 25 Getting Started ABC or 123 input mode. You can change the following input modes to enter data and edit fields on your phone. When your phone keypad matches the input mode, you can press the keypad repeatedly to view the character (or number) options and stop to select. When the character (or number) you want to enter displays in the field, wait one second, and enter the next character (or number).
- Page 26 User Guide for the SIP-T46G IP Phone To enter or edit data: Do one of the following: If you want to Then you can Press a keypad key one or more times (depending what input mode you’re in) to enter the characters that is displayed on the keypad key.
- Page 27 Getting Started If you want to Then you can *.,?!\-()@/:_;+&%=<>£$¥¤[]{}~^¡¿§#"|. If it is in the numeric (123 soft key) input mode, it will provide the following special characters: .*:/@[]. Press to position the cursor to the right of the text you want to delete, and then press Delete text you entered.
- Page 28 User Guide for the SIP-T46G IP Phone...
-
Page 29: Customizing Your Phone
Customizing Your Phone Customizing Your Phone You can customize your SIP-T46G IP phone by personally configuring certain settings, for example, contrast, time & date and ring tones. You can add contacts to the phone’s local directory manually or from call history. You can also personalize different ring tones for different callers. -
Page 30: Screen Saver
User Guide for the SIP-T46G IP Phone Screen Saver The screen saver will automatically start when the IP phone is idle for the preset waiting time. The screen saver is used to blank the screen or fill it with moving images or patterns. -
Page 31: Backlight
Customizing Your Phone Press , or the Switch soft key to select the desired wait time from the Wait Time field. Press the Save soft key to accept the change or the Back soft key to cancel. Backlight Backlight has three options: Backlight Active Level: The intensity of the LCD screen when the phone is active. -
Page 32: Contrast
User Guide for the SIP-T46G IP Phone Press , or the Switch soft key to select the desired time from the Backlight Time field. Press the Save soft key to accept the change or the Back soft key to cancel. -
Page 33: Time & Date
Customizing Your Phone To change the language: Press Menu->Settings->Language. Press to select the desired language. Press the Save soft key to accept the change. Text displayed on the phone user interface will change to the selected language. Time & Date The time and date are displayed on the LCD screen when the phone is idle. -
Page 34: Audio Settings
User Guide for the SIP-T46G IP Phone The date formats available: Example (2016-09-02) Date Format WWW MMM DD Fri, Sep 02 DD-MMM-YY 02-Sep-16 YYYY-MM-DD 2016-09-02 DD/MM/YYYY 02/09/2016 MM/DD/YY 09/02/16 DD MMM YYYY 02 Sep, 2016 WWW DD MMM Fri, 02 Sep... -
Page 35: Ring Tones
Customizing Your Phone When the phone is ringing: Press to adjust the ringer volume. You can also press to adjust the ringer volume when selecting a ring tone. For more information, refer to Ring Tones on page 25. Note If ringer volume is adjusted to minimum, the icon will appear on the LCD screen. - Page 36 User Guide for the SIP-T46G IP Phone (Optional.) Press to adjust the ringer volume. Press the Save soft key to accept the change or the Back soft key to cancel. To select a ring tone for the account: Press Menu->Settings ->Sound->Ring Tones.
-
Page 37: Key Tone
Customizing Your Phone Key Tone If you enable key tone, the phone will produce a sound when you press the keypad. To configure key tone: Press Menu->Settings->Sound->Key Tone. Press , or the Switch soft key to select Enabled or Disabled from the Key Tone field. -
Page 38: Editing Groups
User Guide for the SIP-T46G IP Phone Press the AddGroup soft key. Enter the desired group name in the Name field. Press , or the Switch soft key to select the desired group ring tone from the Ring field. If Auto is selected, this group will use the ring tone according to the priority: Contact ring... - Page 39 Customizing Your Phone Press the Option soft key, and then select Detail from the prompt list. Press to highlight the group information and then edit. Press the Save soft key to accept the change or the Back soft key to cancel. Deleting Groups To delete a group from the local directory: Press Menu->Contacts->Local Contacts.
-
Page 40: Adding Contacts
User Guide for the SIP-T46G IP Phone Adding Contacts You can add contacts to the local directory in one of the following ways: Manually From call history Adding Contacts Manually To add a contact to the local directory manually: Press Menu->Contacts->Local Contacts. -
Page 41: Editing Contacts
Customizing Your Phone (refer to Ring Tones). Press , or the Switch soft key to select the desired group from the Group field. Press to select Photo field and then press the Enter soft key. Press , or the Switch soft key to select the desired photo from the Photo field. 10. -
Page 42: Deleting Contacts
User Guide for the SIP-T46G IP Phone Select the desired contact group and then press the Enter soft key. If the contact is not in any group, select All Contacts and then press the Enter soft key Press to highlight the desired contact. -
Page 43: Placing Calls To Contacts
Customizing Your Phone The LCD screen prompts the following warning: Press the OK soft key to confirm the deletion or the Cancel soft key to cancel. You can also delete all contacts by pressing the Option soft key, and then select Delete All. Placing Calls to Contacts To place a call to a contact from the local directory: Press Menu->Contacts->Local Contacts. -
Page 44: Network Directory
Network Directory is available only for My KMU Office Customers. This directory can be edited in Customer Center www.swisscom.com/login under “My phone numbers” Call History Management The SIP-T46G IP phone maintains call history lists of Missed Calls, Placed Calls, Received Calls... -
Page 45: Viewing History Records
Customizing Your Phone and Forwarded Calls. Each call history list supports up to 100 entries. You can view call history, place a call, add a contact or delete an entry from the call history list. Viewing History Records To view call history: Press the History soft key. -
Page 46: System Customizations
User Guide for the SIP-T46G IP Phone Press to select the desired entry. Press the Delete soft key. To delete all entries from the call history list: Press the History soft key. Press to switch among All, Missed, Placed, Received and Forwarded. -
Page 47: Bluetooth Headset
Customizing Your Phone Bluetooth Headset The SIP-T46G IP phone supports Bluetooth. Bluetooth enables low-bandwidth wireless connections within a range of 10 meters (32 feet). The best performance is in the 1 to 2 meter (3 to 6 feet) range. You can activate/deactivate the Bluetooth mode on the phone, and then pair and connect the Bluetooth headset with your phone. - Page 48 User Guide for the SIP-T46G IP Phone The LCD screen displays the Bluetooth icon Pairing and Connecting the Bluetooth Headset Before you pair a Bluetooth headset, check the indicator on the Bluetooth headset to make sure that the Bluetooth headset is discoverable. For more information, refer to the documentation from the Bluetooth headset manufacturer.
- Page 49 Customizing Your Phone Enter the desired PIN in the Password field. The default PIN is “0000”. Press the OK soft key. The Bluetooth headset is then automatically connected to your IP phone. The Bluetooth icon appears on the LCD screen. With the Bluetooth headset paired and connected, you can use the Bluetooth headset to place and answer calls.
- Page 50 User Guide for the SIP-T46G IP Phone Press the Option soft key, and then select Detail from the prompt list to view the Bluetooth headset information: Device Name: the name of the Bluetooth headset. MAC: the MAC address of the Bluetooth headset.
- Page 51 Customizing Your Phone Select the connected Bluetooth headset. Press the Disconnect soft key. The Bluetooth headset is disconnected. To connect it to your IP phone again, press the Connect soft key. Deleting the Paired Bluetooth Headset You can delete your Bluetooth headset from your phone. When you delete the Bluetooth headset, it disappears from the Paired Bluetooth Device list.
-
Page 52: Dss Keys
DSS Keys There are two types of DSS keys: Line Keys and Ext Keys. Details will be introduced in the following. The SIP-T46G IP phone supports 27 line keys. Line Keys You can assign predefined functionalities to line keys. You can also define a label for a line key feature which will appear on the LCD screen. - Page 53 Customizing Your Phone the third page. The line key in the right bottom is used to switch pages. The following figure shows an example: The following table lists the page icons: Icons Description Indicates the current page of line keys. Indicates the non-current page of line keys.
- Page 54 User Guide for the SIP-T46G IP Phone Type (Line) Dependencies: Account ID (the account this feature will be applied to) Label (key label displayed on the LCD screen) Value (Default/Lock) Usage: When the phone receives an incoming call, the Line key LED flashes green: Press the Line key to accept the incoming call.
- Page 55 Customizing Your Phone Usage: Press the Local Group key to access the contact group specified in the Local Group field. Conference You can use this key feature to set up a conference call. For more information, refer to Network Conference on page 62.
- Page 56 User Guide for the SIP-T46G IP Phone Usage: Press the Transfer key to dial out the number specified in the Value field, and then perform the attended or semi-attended transfer. Note If the Value field is left blank, the Transfer key performs the same as the TRANSFER key or the Transfer soft key during a call.
- Page 57 Customizing Your Phone Usage: During a call, press the Group Listening key to activate the group listening mode. You can then speak and listen through the handset/headset, while other people at your side can only listen through the speaker at the same time. Press the Group Listening key again to deactivate the group listening mode.
- Page 58 User Guide for the SIP-T46G IP Phone...
-
Page 59: Basic Call Features
Basic Call Features Basic Call Features The SIP-T46G IP phone is designed to be easily used like a regular phone on a public switched telephone network (PSTN). You can place calls, answer calls, transfer a call to someone else, or conduct a conference call. - Page 60 User Guide for the SIP-T46G IP Phone The call duration of the active call and far-site’s information (name or phone number) are visible on the LCD screen. In the figure below, the call to “Tom” (the phone number: 1040) has lasted 19 seconds.
-
Page 61: Answering Calls
The SIP-T46G IP phone can handle a maximum of 50 calls at one time. To place multiple calls: You can have more than one call on your SIP-T46G IP phone. To place a new call during an active call, do one of the following: Press the line key. -
Page 62: Ending Calls
User Guide for the SIP-T46G IP Phone Answering When Not in Another Call Call duration and destination will always appear on the LCD screen for the active call. To answer a call using the handset: Pick up the handset. To answer a call using the hands-free speakerphone mode:... -
Page 63: Redialing Numbers
Basic Call Features Redialing Numbers To redial the last dialed number from your phone: Press twice. A call to your last dialed number is attempted. To redial a previously dialed number from your phone: Press when the phone is idle. Press to select the desired entry from the placed calls list, and then press or the Send soft key. -
Page 64: Call Hold/Resume
User Guide for the SIP-T46G IP Phone when the call is muted. To un-mute a call: Press again to un-mute the call. Call Hold/Resume You can place an active call on hold. Only one active call can be in progress at any time. Other calls can be made and received while placing the original call on hold. -
Page 65: Do Not Disturb (Dnd)
Basic Call Features Multiple Calls on Hold: If multiple calls are placed on hold, do one of the following: Press to switch between the calls, and then press the Resume soft key to retrieve the desired call. Press the corresponding line key to retrieve the call. If more than two calls are on hold, a numbered prompt appears on the LCD screen, for example “2/4”, indicating that this is the second call out of four calls. - Page 66 User Guide for the SIP-T46G IP Phone Incoming calls on the specific line will be rejected automatically, and the LCD screen will prompt “n New Missed Call(s)” (“n” indicates the number of missed calls. e.g., 1 New Missed Call(s)). When D ND and busy forward are both ena bled for a specific account, calls to the specific account Note will be sent to the configured destination number.
-
Page 67: Call Forward
Basic Call Features Incoming calls will be rejected automatically, and the LCD screen will prompt “n New Missed Call(s)” (“n” indicates the number of missed calls. e.g., 1 New Missed Call(s)). Call Forward You can configure your phone to forward incoming calls to another party (static forwarding). You can also forward calls while your phone is ringing (dynamic forwarding). - Page 68 User Guide for the SIP-T46G IP Phone Press to select the desired forwarding type, and then press the Enter soft key. Depending on your selection: If you select Always Forward, you can enable it for a specific account. Press , or the Switch soft key to select Enabled from the Always Forward field.
- Page 69 Basic Call Features Enter the destination number you want to forward incoming calls to when the phone is busy in the Forward to field. You can also enable busy forward for all accounts. After busy forward was enabled for a specific account, do the following: Press to highlight the Busy Forward field.
-
Page 70: Dynamic Forwarding
User Guide for the SIP-T46G IP Phone The default ring time is 8 seconds. You can also enable no answer forward for all accounts. After no answer forward was enabled for a specific account, do the following: Press to highlight the No Answer Forward field. -
Page 71: Call Transfer
Basic Call Features Enter the number you want to forward the incoming call to. Press , or the Send soft key. The LCD screen prompts a call forward message. Call Transfer You can transfer a call to another party during a call in one of two ways: Semi-Attended Transfer: Transfer a call when the target phone is ringing. -
Page 72: Network Conference
You can cancel the transfer before the call is connected by pressing the Cancel soft key. Network Conference You can use network conference feature on the SIP-T46G IP phone to conduct a conference with multiple participants. To set up a network conference call: Place a call to the first party. -
Page 73: Troubleshooting
Troubleshooting Troubleshooting This chapter provides general troubleshooting information to help you solve the problems you might encounter when using your SIP-T46G IP phone. If you require additional information or assistance with your new phone, contact your system administrator. General Issues... -
Page 74: Call Issues
User Guide for the SIP-T46G IP Phone Why does the phone display "Network unavailable"? Ensure that the Ethernet cable is plugged into the Internet port on the phone and the Ethernet cable is not loose. Ensure that the switch or hub in your network is operational. -
Page 75: Reboot & Upgrade & Reset Issues
Troubleshooting Why doesn’t the phone ring? Check the ringer volume on the phone. To adjust the ringer volume setting, press the Volume key when the phone is on-hook and idle. For more information, refer to Volume on page 24. Why does the phone play a tone when there is a call on hold? When there is a call on hold, the phone will play a hold tone every 30 seconds. - Page 76 User Guide for the SIP-T46G IP Phone field. Press the Save soft key. The LCD screen prompts the following warning: Press the OK soft key. The phone will be reset to factory settings sucessfully after startup. Note Reset of your phone may take a few minutes. Do not power off until the phone has started up...
-
Page 77: Regulatory Notices
Without prior written consent, no organization or individual is permitted to make any change to the structure or the safety design of the device. Yealink is under no circumstances liable to consequences or legal issues caused by such changes. - Page 78 User Guide for the SIP-T46G IP Phone Please do not place heavy objects on the device in case of damageand deformation caused by the heavy load. Keep at least 10 cm between the device and the closest object for heat dissipation.
-
Page 79: Appendix A – Time Zones
Appendix Appendix A – Time Zones Time Zone Time Zone Name Samoa United States-Hawaii-Aleutian, United States-Alaska-Aleutian -9:30 French Polynesia United States-Alaska Time Canada(Vancouver,Whitehorse), Mexico(Tijuana,Mexicali), United States-Pacific Time Canada(Edmonton,Calgary), Mexico(Mazatlan,Chihuahua), United States-MST no DST, United States-Mountain Time Canada-Manitoba(Winnipeg), Chile(Easter Islands), Mexico(Mexico City,Acapulco), United States-Central Time Bahamas(Nassau), Canada(Montreal,Ottawa,Quebec), Cuba(Havana), United States-Eastern Time... - Page 80 User Guide for the SIP-T46G IP Phone Time Zone Time Zone Name Australia(Sydney,Melboume,Canberra), Russia(Vladivostok) +10:30 Australia(Lord Howe Islands) New Caledonia(Noumea), Russia(Srednekolymsk Time) +11:30 Norfolk Island New Zealand(Wellington,Auckland), Russia(Kamchatka Time) +12:45 New Zealand(Chatham Islands) Tonga(Nukualofa) +13:30 Chatham Islands Kiribati...
-
Page 81: Index
Index Index About This Guide General Settings Activating the Bluetooth Mode Getting Started Adding a Contact to the Local Directory Adding Contacts Adding Groups Answering Calls Hardware Component Instructions Appendix A – Time Zones Headset Mode Attended Transfer Audio Settings Icon Instructions Idle Screen Backlight... - Page 82 User Guide for the SIP-T46G IP Phone Safety Instructions Searching for Contacts Semi-attended Transfer Service Agreements Screen Saver Static Forwarding System Customizations Table of Contents Time & Date Viewing History Records Viewing the Bluetooth Headset Information Volume Warranty Wallpaper WEEE Warning...
Need help?
Do you have a question about the SIP-T46G and is the answer not in the manual?
Questions and answers