
Related Manuals for Electromotive xdi


Summary of Contents for Electromotive xdi
- Page 1 Product Installation Manual & User’s Guide V1.8 Electromotive, Inc. 703-331-0100 9131 Centreville Road 703-331-0161 fax Manassas, VA 20110 support@electromotive.com...
-
Page 2: Table Of Contents
Table of Contents Terms and Conditions .................... 4 Electromotive, Inc. Limited Product Warranty ....................4 New Product Limited Warranty ..............Error! Bookmark not defined. If You Need Warranty Service ........................4 Out-of-Warranty Product Repair ........................4 Third Party Products and Parts ........................4 Warranty Exclusions ............................ - Page 3 5.5.a Backup Sensor ............................. 27 5.6 Tachometer Output ..........................27 5.7 Primary and Auxiliary Rev Limiter ......................28 6.0 Diagnostics ....................... 29 Appendix A ......................29 Appendix B ......................31 XDI Manual Version 1.8 Page 3 2017 Electromotive, Inc.
-
Page 4: Terms And Conditions
New Product Warranty: Electromotive offers a 1 year warranty on all new XDi and TEC units, for the original purchaser only, from the original purchase date. We warrant our products to free of defects in materials and workmanship during the warranty period. -
Page 5: Determinations
This exclusion of damages shall apply to the maximum extent permitted by applicable law and shall continue in effect regardless of whether Electromotive has been advised or should have known of the possibility of any particular damages, regardless of whether any exclusive remedy provided in this Agreement is deemed to have failed of its essential purpose, and regardless of whether the customer is deemed to have been left without an effective remedy. -
Page 6: Xdi Overview
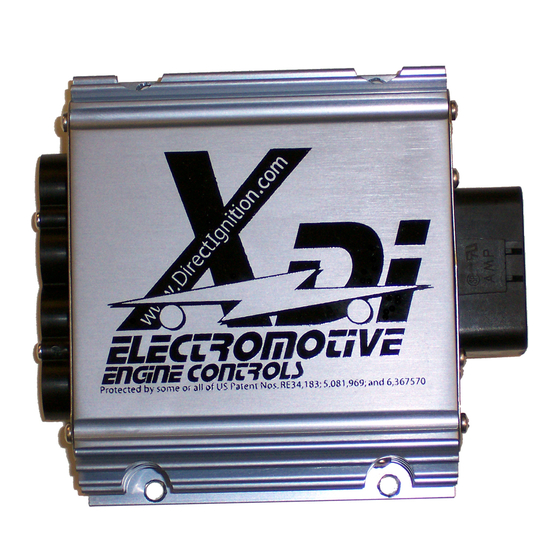
The XDI is the latest ignition system from Electromotive. This new, configurable ignition system uses a controller with one or two Direct Fire Units (DFU) to power up to 14 different engine configurations. The XDI uses Electromotive’s direct fire ignition and it’s high-resolution crank position sensing to produce the most accurate and most powerful ignition available in the aftermarket. -
Page 7: Choosing Spark Plugs And Wires
The load at which a spark plug fails is different for all spark plugs. With the XDI’s charging circuit, the more load you put on an engine, the more voltage will be applied to the plug. This is a beneficial situation: for ... -
Page 8: Engine Configuration Guide
Use of resistor plugs is highly recommended for optimum noise suppression. If using anything other than a resistor spark plug wire, a resistor plug MUST be used. The bottom line is this: the XDI system uses an inductive (long duration charge at battery voltage) charging method for the coils, which is completely different than the capacitive (short duration charge at higher-than-battery voltage) charging method used by several other aftermarket manufacturers. -
Page 9: Engine Configuration Settings
2.1 Engine Configuration Settings To select between various engine configurations, 8-dip switches must be adjusted. To access the dipswitches, remove the four screws on the cover plate on the end of the XDI with the knobs. This is shown in Figure 1. -
Page 10: Hardware Installation
3.2 Cautions and Warnings 1. DANGER! The XDI generates high voltages that can be lethal. Do not ever touch a coil tower or spark plug wire when there is a chance of a spark. Without the spark plug wires on the coils and spark plugs, the system will generate dangerous levels of voltage that can damage the XDI. -
Page 11: Installing The Xdi
A good location is in the kick panel of a vehicle originally equipped with a factory ECU. If the XDI must be mounted in an area that is partially exposed to the elements, there should not be a problem;... -
Page 12: Trigger Wheel And Sensor Installation
3.5 Trigger Wheel and Sensor Installation The foundation of the XDI ultra-high resolution ignition is the 60(-2) tooth trigger wheel. The trigger wheel is designed to give uncompromising timing accuracy at the highest engine acceleration rates. As such, Electromotive does not support other triggering systems, particularly those of the “flying magnet”... -
Page 13: Magnetic Crank Sensor Installation
See Table 3 for the appropriate magnetic sensor/trigger wheel combinations. Once a magnetic sensor and trigger wheel are installed, they must be aligned such that the XDI knows where to locate Top Dead Center of the #1 cylinder (referred to as TDC #1). -
Page 14: Wiring
If this is your first experience with the XDI it is strongly recommended that you read this entire manual. Once you are familiar with the details contained in this manual, simply use the Quick Reference Sheets provided in Appendix B. - Page 15 C as described in Section 4.3. B: DFU cable. This cable connects the XDI to the DFU. If you are using 2 DFU’s, you will need to request a second cable with the purchase of the XDI. The pinned end of this cable is inserted into the 23-pin Amp connector as described in Appendix A.
-
Page 16: Wiring The Dfu's
D: Additional DFU Cable. This cable is only used for configurations that use a second DFU. This cable is not included with the XDI. This cable is provided at no additional cost, but it must be requested with the purchase of the XDI. -
Page 17: Dfu To Spark Plugs
XDI. It will consist of a 3 conductor shielded cable plus a red with white stripe wire connected to Terminal D. This is shown in Figure 6 as item B. The red with white stripe wire should be connected to a fused 12V source. -
Page 18: Common Engine Setups
Most GM, Chrysler, & AMC V8’s: 1-8-4-3-6-5-7-2 1&6 8&5 4&7 3&2 Chevrolet LS1 V8: 1-8-7-2-6-5-4-3 1&6 8&5 7&4 2&3 Ford 5.0L, 351W/M/C, & 400 V8’s: 1-3-7-2-6-5-4-8 1&6 3&5 7&4 2&8 XDI Manual Version 1.8 Page 18 2017 Electromotive, Inc. -
Page 19: Odd-Fire Engines
+ 30 = 120 With the XDI, this type of firing scheme is done quite easily. Coils A1, B1, and C1 fire 120 apart from each other when a 6-cylinder Odd-Fire Engine is configured in the software. Similarly, coils A2, B2, and C2 will fire 120 apart, but not at the same time as coils A1, B1, and C1. -
Page 20: To Find The Tdc Event Order
This timing split option is only available to XDI-2 users. Under full load, the engines generally make best power with closer to zero degrees of split. A rotary will run on just the leading or trailing ignition, but a power loss will occur. Keep this in mind when trying to diagnose ignition wiring problems. -
Page 21: Crank Sensor
The crank sensor uses the two-conductor with shield cable that is inserted into pins 3, 10, and 11 of the 23-pin connector on the XDI. The pins for the sensor side of the harness are crimped to the wire, but the pins must be inserted into the 3-pin connector (item C ). -
Page 22: Power And Ground
4.4 Power and Ground The requirements for power are shown in Table 6. The black with white stripe wire, Pin 7 on the 23-pin XDI connector, must be grounded. The DFU chassis must also be grounded. Peak Current – Table 6... -
Page 23: Functional Description
Crank trigger wheel alignment (if the sensor is aligned with the 11 tooth if 12-cylinder - then there is no “mechanical advance”) and the three knobs on the end of the XDI determine the timing. Table 7 details how the timing is determined for the entire RPM range. -
Page 24: Initial Knob
3000 knob = 21 degrees (added to initial knob) 8000 knob = -2 degrees (subtracted from 3000 knob and initial knob) The timing curve for this example is shown in Figure 14. XDI Manual Version 1.8 Page 24 2017 Electromotive, Inc. -
Page 25: Measuring Timing
To measure the voltage from the unit, place your voltmeter’s positive probe in the ADV+ hole and place the negative probe in the GND- hole on the XDI’s cover plate. Set your voltmeter to its lowest voltage setting. The scenario shown in Figure 14 has the XDI advancing the timing 24 degrees BTDC. -
Page 26: External Advance Control
The Manifold Absolute Pressure (MAP) Sensor hooks up directly to the XDI's +5V, GND and External Advance Control wire, giving 15 of advance when the engine makes 30" of vacuum. This advance is in addition to the knob selected timing. -
Page 27: Backup Sensor
5.6 Tachometer Output The tachometer output on pin 18 (brown wire) of the XDI is a +12 Volt square wave. The tachometer output signal will rise from ground to +12V at each cylinder’s TDC event. The pulse will remain at 12V for 30... -
Page 28: Primary And Auxiliary Rev Limiter
Most RPM limiters feel like hitting a brick wall. The engine cuts off violently and recovers slowly. The XDI's RPM limiter feels gentler and generates less sudden power changes in the engine, reducing stress. You may even hit the first or second stage without realizing it, only noticing that the car stops accelerating and the engine feels "soft". -
Page 29: Diagnostics
A simple timing light will let you verify if the XDI is generating spark. The XDI has a status light located next to the knobs. - Page 30 ¼ inch and is loose. Once the red section of the connector is loose, simply pull the wire you wish to remove. Once the wire is removed, push the red section back into the connector. XDI Manual Version 1.8 Page 30 2017 Electromotive, Inc.
-
Page 31: Appendix B
Appendix B Quick Reference Sheets XDI Manual Version 1.8 Page 31 2017 Electromotive, Inc. - Page 32 XDI Manual Version 1.8 Page 32 2017 Electromotive, Inc.
- Page 33 XDI Manual Version 1.8 Page 33 2017 Electromotive, Inc.
- Page 34 XDI Manual Version 1.8 Page 34 2017 Electromotive, Inc.
- Page 35 XDI Manual Version 1.8 Page 35 2017 Electromotive, Inc.
- Page 36 XDI Manual Version 1.8 Page 36 2017 Electromotive, Inc.
Need help?
Do you have a question about the xdi and is the answer not in the manual?
Questions and answers