Table of Contents
Advertisement
Advertisement
Table of Contents

Related Manuals for digico S21


Summary of Contents for digico S21
- Page 1 DiGiCo S21 DiGiCo S21 Getting Started Version B for Software Version 1.0...
- Page 2 DiGiCo S21...
- Page 3 Your license agreement with Digico UK Ltd, which is included with the S21 console product, specifies the permitted and prohibited uses of the product. Any unauthorised duplication or use of Digico UK Ltd software, in whole or in part, in print or in any other storage and retrieval system is prohibited.
-
Page 4: Table Of Contents
DiGiCo S21 Contents 1.1 The Console ..................1-1 1.2 Before You Start ................1-2 1.2.1 Worksurface Layout .............1-2 1.2.2 Layers and Banks ..............1-3 1.2.3 Using the Control Surface ...........1-3 1.2.4 The Selected Channel ............1-4 1.2.5 The Under Screen Controls ..........1-4 1.3 The Expanded Views .................1-5 1.3.1 Display Expanded Views .............1-5... -
Page 5: The Console
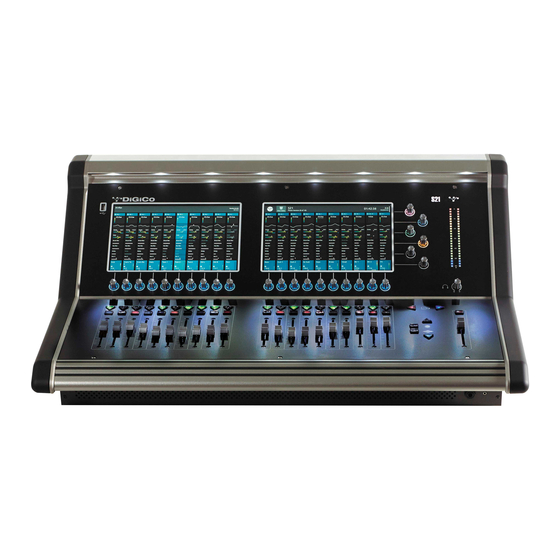
1.1 The Console The Digico S21 consists of a worksurface, an audio engine and a range of onboard inputs and outputs. It can be connected using op- tional DiGiCo DMI Cards to a variety of DiGiCo racks and other audio input/output devices. -
Page 6: Before You Start
The console power switch is situated on the rear panel. Please ensure that any required DiGiCo I/O racks are connected to the console DMI cards and powered on before start- ing the console itself to enable automatic discovery of the racks. -
Page 7: Layers And Banks
1.2.2 Layers and Banks ..............The S21's worksurface is divided into Layers and Banks. Each Layer contains 2 Banks of 10 channels, and the layer which is currently active on the control surface is selected using the layer up and down buttons next to the Master fader. -
Page 8: The Selected Channel
DiGiCo S21 1.2.4 The Selected Channel ............One of the channels in the Channel view is displayed with a highlighted background, indicating that it is currently the Selected Channel. This means that it has been assigned to the worksurface controls to the right of the screen as shown in the image below. To assign a channel, touch in the Output Block at the bottom of the on screen Channel view NOTE: All of the master and under screen rotaries are encoders and switches in one unit. -
Page 9: The Expanded Views
DiGiCo S21 These controls give access to the channel pans in standard operation and the surrounding coloured LED rings are blue. Touching and holding on the rows of controls on screen assign these encoders to different parameters, the screen row changes colour and the LED rings change to a similar colour. -
Page 10: Channel Setup View
DiGiCo S21 1.3.2 Channel Setup View ............... Channel Mono/Stereo switch Gain Tracking On/Off Add To Set Open Safes View Select Solo Assignment Channel Name Column Title Label Switch to EQ View Select input source Master Rotary Assignment Filters Insert B... -
Page 11: Group And Aux Setup View
Group Buss to an Aux Buss or vice versa The S21 has a fixed number of output busses but they can be changed at any time to be either Auxes or Groups. In the example below, touching the Mode button on the Group Setup view will change the Group to an Aux but there is warning that all channel assignments will be reset in the process. -
Page 12: Eq View
DiGiCo S21 1.3.5 EQ View ................... Touching the EQ area on either the Channel view or the Channel Setup will open the EQ expanded view. The EQ band can be selected by touching the band icons on the left of the screen or by touching the bands on the EQ graph itself. -
Page 13: Dynamics 1 View
DiGiCo S21 1.3.6 Dynamics 1 View ..............Touching the Dynamics 1 area on either the Channel view or the Channel Setup will open the Dynamics 1 expanded view. Dynamics 1 can be a Single Band or Multiband Compressor (on 4 channels). Touch the Mode button in the top bar to switch modes. -
Page 14: Dynamics 2 View
DiGiCo S21 1.3.7 Dynamics 2 View ..............Touching the Dynamics 2 area on either the Channel view or the Channel Setup will open the Dynamics 2 expanded view. Dynamics 2 can be a Keyed Gate, a Ducker or Single Band Compressor with Side Chain. -
Page 15: Control Group Setup
DiGiCo S21 1.3.8 Control Group Setup .............. To create a Control Group, touch the top of a Control Group Channel to open the CG Setup view Touch the Edit button in the top bar Select the required CG members by touching them in the Channel Picker and touch the OK button... -
Page 16: Solo Channel Setup
DiGiCo S21 1.3.9 Solo Channel Setup..............The S21 has 2 Solo busses which have their own control channels in the console layout normally located on the 4th layer next to the Matrix Output channels. Note: Both Solo busses 1&2 are both sent permanently to the console headphone socket. -
Page 17: Customising The Layout
DiGiCo S21 1.4 Customising the Layout 1.4.1 The Console Overview ............Pressing the white Overview button, located near the layer up and down buttons displays an on screen representation of all console channels. This view can be used to change the layout of the console channels and banks. -
Page 18: Swap Banks
DiGiCo S21 1.4.3 Swap Banks ................In Edit mode, touching the Swap Banks button in the top bar allows complete banks to be moved from one position to another either from left to right or from one layer to another. -
Page 19: The Main Menu
1.5 The Main Menu The right hand Master Screen has a DiGiCo logo icon at the top which is used to open the Main Menu The Main Menu contains a number of buttons which are used to access various console functions 1.5.1 Session Management ............. -
Page 20: Snapshots
DiGiCo S21 1.5.2 Snapshots ................The S21 always has at least one Snapshot in its list and more can be added using the Insert New button in the bottom right corner of the screen. The Current Snapshot is highlighted in red. - Page 21 DiGiCo S21 Snapshot Recall Safes To prevent parameters from being recalled by Snapshots, use the Safe functions on each channel which are accessed through the Channel Setup view Safes button in the top bar. If a parameter is Safe, it cannot be affected by any Snapshot Recall.
-
Page 22: Preferences
Note: In V1.0 software, when a New Session is created, the console will always default to a 96KHz sample rate In normal operation the console should be set to Internal Sync and it will automatically provide sync to connected DiGiCo I/O racks via the DMI interface cards. -
Page 23: Macros
DiGiCo S21 1.5.5 Macros ..................Touching the Main Menu > Macros button displays a list of factory provided Macros that can be assigned to the Macro bar at the top of the left hand screen. The Macro bar is visible in all console views. -
Page 24: Graphic Eqs
DiGiCo S21 1.5.7 Graphic EQs ................Touching the Main Menu > Graphic EQs button will display and allow the setting of the Graphic EQs When this view is opened, the console's channel faders are immediately assigned to the selected Graphic EQ. Use these faders to change the levels. -
Page 25: System
The UBMADI interface can be reprogrammed with new firmware if required - please do not do this unless advised to do so by DiGiCo Support The console name can be reset and the console's IP address set or renewed via DHCP - please do not do this unless advised to do so by DiGiCo Support 1-21... -
Page 26: Diagnostics
1.5.12 Upgrading Software ............. S21 Software can be upgraded by downloading a file as advised by support@digiconsoles.com, copying this to a USB key and proceed- ing as follows: 1. Copy the downloaded file to the root folder of a USB key – ensure that it is called update.dcu 2. - Page 27 DiGiCo S21 1-23...
Need help?
Do you have a question about the S21 and is the answer not in the manual?
Questions and answers