Table of Contents
Advertisement
Available languages
Available languages
Operator's Manual
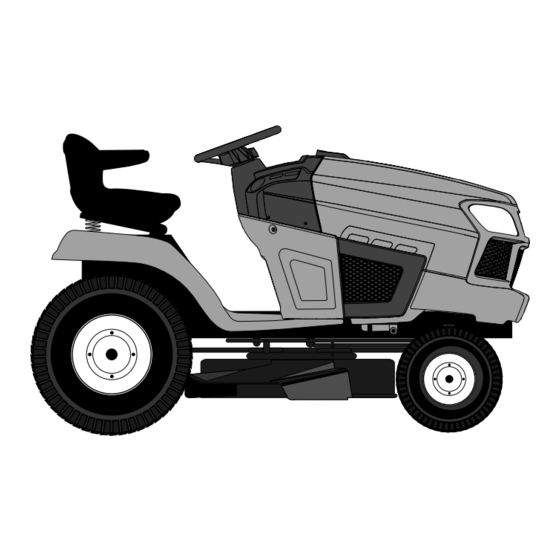
GARDEN TRACTOR
24.0 HP ,
*
Electric Start
Automatic Transmission
Model No.
917.20408
• Español, p. 37
This product has a low emission engine which operates
differently from previously built engines. Before you start the
engine, read and understand this manual.
IMPORTANT:
Read and follow all Safety
Rules and Instructions before
operating this equipment.
Sears Brands Management Corporation, Hoffman Estates, IL 60179 U.S.A.
Visit our Craftsman website: www.craftsman.com
* The power rating as declared by the engine manufacturer is the
average gross power output at the specified RPM of a typical
production engine for the engine model measured using SAE
Standards for engine gross power. Please refer to the engine
manufacturer for details.
115793426 Rev. 2
54" Mower
For answers to your questions
about this product, call:
1-888-331-4569
Craftsman Customer Help Line
* La potencia nominal declarada por el fabricante del motor es la
salida media de potencia bruta a las RPM especificadas de un
motor de serie típico para el modelo de motor, medida según
las normas SAE sobre potencia bruta de motor. Para más
información, consulte al fabricante del motor.
Advertisement
Table of Contents

Related Manuals for Craftsman 917.20408


Summary of Contents for Craftsman 917.20408
- Page 1 Sears Brands Management Corporation, Hoffman Estates, IL 60179 U.S.A. Visit our Craftsman website: www.craftsman.com * The power rating as declared by the engine manufacturer is the * La potencia nominal declarada por el fabricante del motor es la...
-
Page 2: Maintenance Schedule
(if equipped) of this riding equipment is warranted against any defects in material or workmanship. With proof of purchase, you will receive a new cast iron front axle at no charge. WARRANTY SERVICE For warranty coverage details to obtain free repair or replacement, visit the web page: www.craftsman.com/ warranty Product Replacement If part repair or replacement is impossible, you will receive a new riding equipment unit of the same or equivalent model. - Page 3 SAFETY RULES DANGER: This cutting machine is capable of amputating hands and feet and throwing objects. Failure to observe the following safety instructions could result in serious injury or death. • Keep children out of the mowing area WARNING: In order to prevent acciden- and in the watchful care of a responsible tal starting when setting up, transporting, adult other than the operator.
- Page 4 SAFETY RULES • Slow down before turning. • Watch for holes, ruts, bumps, rocks, or • Never leave a running machine unat- other hidden objects. Uneven terrain tended. Always turn off blades, set could overturn the machine. Tall grass parking brake, stop engine, and remove can hide obstacles.
- Page 5 SAFETY RULES GENERAL SERVICE V. SERVICE • Never operate machine in a closed area. SAFE HANDLING OF GASOLINE • Keep all nuts and bolts tight to ensure the To avoid personal injury or property dam- equipment is in safe working condition. age, use extreme care in handling gasoline.
- Page 6 Champion RC12YC (Gap: .030"/0,76 mm) Congratulations on making a smart pur- Charging System: 16 Amps @ 3600 RPM chase. Your new Craftsman® product is designed and manufactured for years of Battery: Amp/Hr: Min. CCA: dependable operation. But like all products, Case size: it may require repair from time to time.
- Page 7 UNASSEMBLED PARTS Mower Mower Front Wheel (2) Rear Lift Link (1) Shoulder Bolt Assemblies (1) 1-1/4 O.D. Washer (1) Small Retainer Springs (1) Front Lift Link (1) 3/8-16 Assembly (1) Wheel Locknut (5) Large Retainer Springs Quick Connect (1) Oil Drain Tube If Equipped Keys Slope Sheet...
- Page 8 BEFORE REMOVING TRACTOR FROM SKID CONNECT BATTERY WARNING: Do not short battery ter- minals by allowing a wrench or any other object to contact both terminals at the same time. Before connecting battery, remove metal bracelets, wristwatch bands, rings, etc. Positive terminal must be connected first to prevent sparking from accidental grounding.
- Page 9 3. TURN STEERING WHEEL LEFT AND CAUTION: Lift lever is spring loaded. POSITION MOWER Have a tight grip on lift lever, lower it slowly • Turn steering wheel to the left as far as it and engage in lowest position. Lift lever is will go and position mower on right side of located on left side of fender.
- Page 10 • Pivot the integrated washer end of anti- sway bar (S) towards mower deck bracket on right side of mower. Insert integrated washer end of bar into hole in rear mower bracket (D). Move mower as needed to insert integrated washer end of bar into rear mower bracket (D).
- Page 11 9. INSTALL BELT ON ENGINE CLUTCH PULLEY (M) • Disengage belt tension rod (K) from locking bracket (L). • Install belt onto engine clutch pulley (M). M. Engine C. Rear Lift Link(s) Clutch Pulley D. Right Side Rear Mower Bracket U.
- Page 12 CHECK TIRE PRESSURE CHECKLIST The tires on your tractor were overinflated at the factory for shipping purposes. Correct Before you operate your new tractor, we tire pressure is important for best cutting wish to assure that you receive the best performance.
- Page 13 OPERATION These symbols may appear on your tractor or in literature supplied with the product. Learn and understand their meaning. COLD WEATHER REVERSE NEUTRAL HIGH FAST SLOW IGNITION STARTING POSITION SWITCH ENGINE ENGINE ENGINE DIFFERENTIAL CLUTCH/ PARKING MOWER MOWER START LOCK BRAKE PEDAL BRAKE...
- Page 14 KNOW YOUR TRACTOR READ THIS OPERATOR'S MANUAL AND SAFETY RULES BEFORE OPERATING YOUR TRACTOR Compare the illustrations with your tractor to familiarize yourself with the locations of various controls and adjustments. Save this manual for future reference. Our tractors conform to the applicable safety standards of the American National Standards Institute.
- Page 15 The operation of any tractor can result in foreign objects thrown into the eyes, which can result in severe eye damage. Always wear safety glasses or eye shields while operating your tractor or performing any adjustments or repairs. We recommend standard safety glasses or a wide vision safety mask worn over spectacles.
- Page 16 The cutting height range is approximately 1 TO MOVE FORWARD AND BACKWARD to 4" (25,4 to 101,6 mm). The heights are The direction and speed of movement is measured from the ground to the blade tip controlled by the forward and reverse drive with the engine not running.
- Page 17 1. Select desired height of cut with attach- TO OPERATE ON HILLS ment lift lever. WARNING: Do not drive up or down hills 2. Start mower blades by engaging attach- with slopes greater than 15° and do not ment clutch control. drive across any slope.
- Page 18 ADD GASOLINE TOWING CARTS AND OTHER ATTACH- MENTS • Fill fuel tank to bottom of filler neck. Do Tow only the attachments that are recom- not overfill. Use fresh, clean, regular mended by and comply with specifications gasoline with a minimum of 87 octane. of the manufacturer of your tractor.
- Page 19 RESERVE FUEL VALVE OPERATION COLD WEATHER STARTING (32°F/0°C AND BELOW) 1. Raise seat to access reserve fuel valve. 2. In normal operation, valve should be set 8. Move throttle control beyond fast position to primary (as shown in view) into the cold weather starting position 3.
-
Page 20: Mowing Tips
PURGE TRANSMISSION MOWING TIPS CAUTION: Never engage or disengage • DO NOT use tire chains when the mower freewheel lever while the engine is running. housing is attached to tractor. • Mower should be properly leveled for best To ensure proper operation and perfor- mowing performance. -
Page 21: General Recommendations
MAINTENANCE BEFORE EVERY EVERY EVERY EVERY EVERY BEFORE MAINTENANCE SCHEDULE EACH SEASON STORAGE HOURS HOURS HOURS HOURS Check Brake Operation Check Tire Pressure Check Operator Presence and ROS Systems Check for Loose Fasteners Check/Replace Mower Blades Lubrication Chart Check Battery Level Clean Battery and Terminals Clean Debris off Steering Plate Check Transaxle Cooling... - Page 22 TRACTOR Always observe safety rules when perform- ing any maintenance. BRAKE OPERATION If tractor requires more than 5 feet (1,5 m) Ros "On" Engine "On" Position to stop at highest speed in highest gear on Position (Normal Operating) a level, dry concrete or paved surface, then brake must be serviced.
- Page 23 TO CLEAN BATTERY AND TERMINALS NOTE: Although multi-viscosity oils (5W30, 10W30 etc.) improve starting in cold weather, Corrosion and dirt on the battery and termi- they will result in increased oil consumption nals can cause the battery to “leak” power. when used above 32°F/0°C.
- Page 24 6. Unlock drain valve by pushing inward Knobs and turning counterclockwise. 7. To open, pull out on the drain valve. 8. After oil has drained completely, close and lock the drain valve by pushing inward and turning clockwise until the pin is in the locked position as shown.
- Page 25 Make sure the attachment clutch control MUFFLER is in the “DISENGAGED” position, set Inspect and replace corroded muffler and the parking brake, and stop the engine. spark arrester (if equipped) as it could create a fire hazard and/or damage. Thread the nozzle adapter (packaged with your tractor’s Operator’s Manual) SPARK PLUG(S) onto the end of your garden hose.
- Page 26 SERVICE AND ADJUSTMENTS WARNING: TO AVOID SERIOUS INJURY, BEFORE PERFORMING ANY SERVICE OR ADJUSTMENTS: 1. Depress clutch/brake pedal fully and set parking brake. 3. Place attachment clutch in “DISENGAGED” position. 4. Turn ignition key to “STOP” and remove key. 5. Ensure the blades and all moving parts have completely stopped. 6.
- Page 27 TO LEVEL MOWER 5. Recheck measurements; adjust if neces- Ensure tires are properly inflated to the PSI sary until both sides are equal. shown on tires. If tires are over or under FRONT-TO-BACK ADJUSTMENT inflated, it may affect the appearance of your IMPORTANT: Deck must be level side- lawn and lead you to think the mower is not to-side.
- Page 28 TO CHECK BRAKE TO REPLACE MOWER BLADE DRIVE If tractor requires more than five (5) feet (1,5 BELT m) to stop at highest speed in highest gear MOWER DRIVE BELT REMOVAL on a level, dry concrete or paved surface, 1. Park tractor on a level surface. Engage then brake must be serviced.
- Page 29 5. Install belt through stationary idler (C) FRONT WHEEL TOE-IN/CAMBER and clutching idler (D). Your new tractor front wheel toe-in and 6. Reinstall anti-rotation link (B) on right camber is set at the factory and is normal. side of tractor. Tighten securely. The front wheel toe-in and camber are not 7.
- Page 30 REPLACING BATTERY TO REMOVE HOOD & GRILL ASSEMBLY 1. Raise hood. WARNING: Do not short battery termi- 2. Unsnap headlight wire connector. nals by allowing a wrench or any other object 3. Remove retainer clip and washer from to contact both terminals at the same time. right hand pivot pin.
- Page 31 STORAGE ENGINE Immediately prepare your tractor for storage at the end of the season or if the tractor will FUEL SYSTEM not be used for 30 days or more. IMPORTANT: It is important to prevent gum deposits from forming in essential fuel WARNING: Never store the tractor with system parts such as carburetor, fuel hose, gasoline in the tank inside a building where...
- Page 32 TROUBLESHOOTING CHART: See appropriate section in manual unless directed to Sears service center PROBLEM CAUSE CORRECTION Will not start Out of fuel. 1 Fill fuel tank. Engine flooded. 2 Wait several minutes before attempting to start. Bad spark plug. 3 Replace spark plug. Dirty air filter.
-
Page 33: Attachment Clutch
TROUBLESHOOTING CHART: See appropriate section in manual unless directed to Sears service center PROBLEM CAUSE CORRECTION Loss of power Cutting too much grass/too fast. 1 Raise cutting height/reduce speed. Throttle in cold weather starting 2 Move throttle control to fast position ( position ( Build-up of grass, leaves and... - Page 34 TROUBLESHOOTING CHART: See appropriate section in manual unless directed to Sears service center CAUSE CORRECTION PROBLEM Mower blades will Obstruction in clutch mechanism. 1 Remove obstruction. not rotate Worn/damaged mower drive belt. 2 Replace mower drive belt. Frozen idler pulley. 3 Replace idler pulley.
- Page 35 TROUBLESHOOTING CHART: See appropriate section in manual unless directed to Sears service center CAUSE CORRECTION PROBLEM Engine “backfires” Engine throttle control not set 1 Move throttle control between when turning between half and full speed (fast) half and full speed (fast) position engine “OFF”...
- Page 37 Mantenimiento ..........56 GARANTÍA GARANTÍA LIMITADA DE CRAFTSMAN DURANTEDOSAÑOS a partir de la fecha de compra, todas las piezas no fungibles de este equipo están garantizadas contra defectos en los materiales o la mano de obra. Con el comprobante de compra, una pieza no fungible con defectos se reparará...
- Page 38 REGLAS DE SEGURIDAD PELIGRO: Esta Maquina cortadora es capaz de amputar las manosy los pies y de lanzar objetos. si no se observan las instrucciones de seguridad siguientes se pueden producir lesiones graves o la muerte. • Mantener los niños fuera del área de corte y ADVERTENCIA: Siempre desconecte el alam- vigilados por un adulto responsable que no bre de la bujía y póngalo donde no pueda entrar...
- Page 39 REGLAS DE SEGURIDAD • Nunca dejar una máquina encendida sin vigi- • Poner atenciones a los hoyos, las raíces, los lancia. Apagar siempre las cuchillas, poner el bultos, las piedras u otros objetos escondidos. freno de estacionamiento, parar el motor, y El terreno irregular puede volcar la máquina.
- Page 40 REGLAS DE SEGURIDAD OPERACIONES DE SERVICIO GENERALES V. SERVICIO • Nunca hacer funcionar la máquina en un área MANIPULACIÓN SEGURA DE LA GASOLINA cerrada. Para evitar heridas personales o daños a las • Mantener todas las tuercas y pernos apretados cosas, poner el máximo cuidado a la hora de para asegurarse de que trabaja en condiciones manipular la gasolina.
- Page 41 (Abertura: .030"/0,76 mm) LA REPARACIÓN Sistema de 16 Amps @ 3600 RPM Congratulaciones por su buena compra. Su Carga: nuevo producto Craftsman está diseñado y ® fabricado para funcionar de modo fiable por Batería: Amp/Hr: muchos años. Pero como todos los productos, Min.
- Page 42 PIEZAS SIN MONTAR Segadora Rueda Delantera De La Segadora (2) Conjunto de eslabones (1) Perno de levantamiento (5) 1-3/16” (1) 1-1/4” traseros Arandela Arandela (1) Abrazadera pequeño de retención (1) 3/8-16” (1) Eslabones (1) Rueda de levantamiento Tuerca delanteros (5) Abrazadera Accesorio grande de retención del conexión...
- Page 43 ANTES DE REMOVER EL TRACTOR DE LA CORREDERA CONEXIÓN DE LA BATERÍA ADVERTENCIA: No haga cortocircuito con los terminales de la batería al permitir que una llave de tuerca o cualquier otro objeto entre en contacto con ambos terminales a la misma vez.
- Page 44 • Interruptor de levantamiento del accesorio - se 3. GIRE EL VOLANTE HACIA LA IZQUIERDA usa para levantar y bajar el conjunto segador o Y UBIQUE LA CORTADORA DE CÉSPED los demás ac ce so rios montados en su tractor. EN SU LUGAR Interruptor de ignición debe ser en la posición •...
- Page 45 • Haga oscilar el extremo con la arandela integrada de la barra antibalanceo (S) hacia la escuadra de la plataforma de la cortadora de césped en el lado derecho de la cortadora. Inserte el extremo con la arandela integrada de la barra en el agujero de la escuadra trasera de la cortadora de césped (D).
- Page 46 • Levante la esquina trasera de la cortadora de • Muévase hasta el lado izquierdo de la corta- césped y ubique la ranura en el conjunto de dora e inserte un resorte de retención grande eslabones sobre la chaveta en la escuadra (G) a través del agujero del eslabón delantero trasera de la cortadora (D);...
- Page 47 REVISIÓN DE LA PRESIÓN DE LAS LLANTAS LISTA DE REVISIÓN Las llantas en su unidad fueron infladas de- Antes de operar y de disfrutar de su tractor nuevo, masiado en la fábrica por razones de envío. La le deseamos que reciba el mejor rendimiento y la presión de las llantas correctas es importante mayor satisfaccion de este producto de calidad.
- Page 48 OPERACIÓN Estos símbolos pueden aparecer sobre su tractor o en la literatura proporcionada con el producto. Aprenda y comprenda sus significados. MARCHA NEUTRO ALTO BAJO POSICIÓN DE ARRANQUE RÁPIDO LENTO INTERRUPTOR ATRÁS EN CLIMA FRÍO DE IGNICIÓN MOTOR MOTOR MOTOR EL CIERRE PEDAL DE FRENO DE...
- Page 49 FAMILIARICESE CON SU TRACTOR LEA ESTE MANUAL DEL Y LAS REGLAS DE SEGURIDAD ANTES DE OPERAR SU TRACTOR Compare las ilustraciones con su tractor para familiarizarse con las ubicaciones de los diversos controles y ajustes. Guarde este manual para referencia en el futuro. Nuestros tractores cumplen con los estándares de seguridad del American National Standard Institute.
- Page 50 La operación de cualquier tractor puede hacer que salten objetos extraños dentro de sus ojos, lo que puede producir daños graves en éstos. Siempre use anteojos de seguridad o pro tec cio nes para los ojos mientras opere su tractor o cuando haga ajustes o reparaciones.
- Page 51 MOVERSE HACIA ADELANTE Y HACIA ATRÁS • Deslice el puntero de señalización (T) hasta esa altura, de modo de recordarla la próxima La dirección y la velocidad de movimientos están vez que corte el césped. controlados por los pedales de marcha adelante y atrás.
- Page 52 PARA OPERAR LA SEGADORA 4. Mover despacio la palanca de mando del movimiento hacia la posición atrás (R) para Su tractor viene equipada con un interruptor empezar el movimiento. sensor que exige la presencia del operador. Si 5. Cuando el uso del ROS es más necesario, dé el motor está...
- Page 53 AVISO: Para proteger el capó contra el daño AGREGUE GASOLINA cuando transporte su tractor en un camión o • Llene el tanque de combustible hasta la parte remolcador, asegúrese que el capó esté cerrado inferior del cuello de relleno. No lo llene de y asegurado al tractor.
- Page 54 PARA OPERAR DE LA VALVULA DE ARRANQUE EN CLIMA FRÍO (0°C / 32°F e inferiores) GASOLINA DE RESERVA 8. Desplace el control del acelerador superando 1. Levantan el asiento por acceso a valvula de la posición rápida y sitúelo en la posición de gasolina de reserva.
- Page 55 PURGAR LA TRANSMISIÓN CONSEJOS PARA SEGAR PRECAUCIÓN: Nunca enganche o desen- • NO use cadenas de llanta cuando la carcasa ganche la palanca del control de rue da libre de la cortadora de césped esté colocada en cuando el motor esta fun cio nan do. el tractor.
-
Page 56: Programa De Mantenimiento
MANTENIMENTO ANTES CADA CADA CADA CADA CADA ALMACEN- PROGRAMA DE MANTENIMIENTO DE CADA TEMP- AMIENTO HORAS HORAS HORAS HORAS ORADA Revisar la operación del freno Revisar la presión de las llantas Verificar la sistemas presencia del operador y sistemas "ROS" Revisar si hay sujetadores sueltos Afilar/cambiar las cuchillas de la segadora Tabla de lubricación... - Page 57 TRACTOR VÉRIFIÉZ SISTEMA FUNCIONAMIENTO ATRÁS (ROS) Siempre observe las reglas de seguridad cuando dé man te ni mien to. • Cuando el motor está en marcha con el inte- rruptor de llave en posición de motor “ON” y el OPERACIÓN DEL FRENO embrague del accesorio conectado, cualquier Si el tractor necesita más de cinco (5) pies (1,5 m) tentativa del operador de viajar marcha atrás,...
- Page 58 PARA LIMPIAR LA BATERÍA Y LOS TERMI- AVISO: A pesar de que los aceites de multivisco- sidad (5W30, 10W30, etc.) mejoran el arranque NALES en clima frío, estos aceites de multiviscosidad van La corrosión y la mugre de la batería y de los a aumentar el consumo de aceite cuando se usan terminales pueden producir “escapes”...
- Page 59 Válvula de desagüe del aceite AVISO: Los solventes de petróleo, tales como el kerosene, no se deben usar para limpiar el cartucho. Pueden producir el deterioro de este. Posición cerrada y No aceite el cartucho. No use aire de presión bloqueada para limpiarlo o secarlo.
- Page 60 SILENCIADOR 2. Mueva el control del embrague del accesorio Inspeccione y cambie el silenciador corroído y el a la posición “DESENGANCHADO”, ponga el amortiguador de chispas (si viene equipado) pues freno de estacionamiento y apague el motor. pueden crear un peligro de incendio y/o daños. 3.
- Page 61 SERVICIO Y AJUSTES ADVERTENCIA:PARA EVITAR LESIÓNES SERIAS, ANTES DE DAR CUALQUIER SER- VICIO O DE HACER AJUSTES: 1. Presione el pedal de freno completamente y aplique el freno de estacionamiento. 2. Ponga el embrague del accesorio en la posición desenganchado (DISENGAGED). 3.
- Page 62 PARA NIVELAR LA SEGADORA 5. Vuelva a verificar las medidas y ajuste nueva- mente, en caso necesario, hasta que ambos Asegúrese de que los neumáticos estén inflados lados queden iguales. a la PSI que se indica en estos. Si están de- masiado inflados o poco inflados, el césped no AJUSTE DE DELANTE A ATRÁS le quedará...
- Page 63 PARA REEMPLAZAR LA CORREA DE TRANS- VERIFIQUE EL FRENO MISIÓN DE LA CUCHILLA DE LA SEGADORA Si el tractor exige más 1,5 m (cinco (5) pies) para DESMONTAJE DE LA CORREA DE TRANSMIS- pararse a una velocidad más alta en el cambio IÓN DE LA SEGADORA más alto en una superficie nivelada de hormigón seco o pavimentada, entonces se debe controlar...
- Page 64 4. Coloque la correa sobre el piñón central (C). IMPRESIÓN / INCLINACIÓN DE LAS RUEDAS DELANTERAS 5. Pase la correa a través del piñón estacionario La impresión e inclinación de las ruedas del- (A) y del piñón del embrague (B). anteras de su nuevo tractor vienen así...
- Page 65 1. Levantamos la capota a la posición levantada. EXTRACCIÓN DE CAPOTA Y REJILLA 2. Remueve la protección de los terminales. 1. Eleve la capota. 2. Retire el conector del cable del faro. 3. Desconecte el cable de la batería NEGRO 3.
- Page 66 ALMACENAMIENTO Inmediatamente prepare su tractor para el alma- MOTOR cenamiento al final de la temporada o si el tractor SISTEMA DE COMBUSTIBLE no se va a usar por 30 días o más. IMPORTANTE: Es important evitar que se forman depositos de goma en partes funda- ADVERTENCIA: Nunca almacene el tractor mentales del sistema de combus-tible tales con gasolina en el estanque dentro de un edificio...
- Page 67 IDENTIFICACIÓN DE PROBLEMAS: Vea la sección apropiada en el manual a menos que esté dirigido a un centro de servicio Sears. PROBLEMA CAUSA CORRECCIÓN No arranca Sin combustible. Llene el estanque de combustible. Motor ahogado. Espere varios minutos antes detratar de arrancar.
- Page 68 IDENTIFICACIÓN DE PROBLEMAS: Vea la sección apropiada en el manual a menos que esté dirigido a un centro de servicio Sears. PROBLEMA CAUSA CORRECCIÓN Pérdida de Agua en el combustible. Vaciar el estanque de combustible y el carbu- fuerza rador, vuelva a llenar el estanque con gaso- (sigue) lina nueva y cambie el filtro de combustible.
- Page 69 IDENTIFICACIÓN DE PROBLEMAS: Vea la sección apropiada en el manual a menos que esté dirigido a un centro de servicio Sears. PROBLEMA CAUSA CORRECCIÓN Las luz El interruptor está “APAGADO”(OFF). “ENCIENDA” (ON) el interruptor. (ces) de Bombilla(s) o lámpara(s) quemada(s). Cambie la bombilla(s) o lámpara(s).
- Page 70 NOTES/AVISO...
- Page 72 Para respuestas a preguntas o problemas, y ordenar piezas o pedir servicio para la reparación de su equipo. To help us help you, register your product at www.craftsman.com/registration Para poderte ayudar mejor, registra tu producto en www.craftsman.com/registration Join the Craftsman Club today!