Advertisement
4
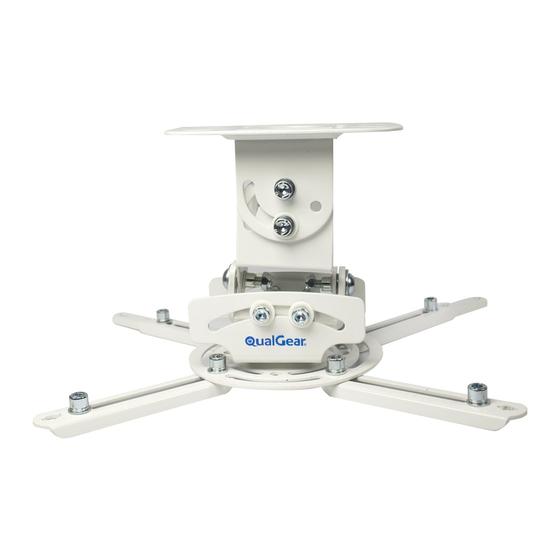
Adjusting the Projector (Part 2 of 2)
Roll Adjustment
F
To make Roll adjustment, first ensure that weight of the projector is supported.
Then loosen both M6x70mm bolts with the supplied Allen Key (E) and Wrench (F),
and adjust to your desired position. Re-tighten both screws firmly.
Rotation/Shift Adjustment
To make Rotation / Shift adjustment(s), first ensure that weight of the projector is
supported. Then loosen the center M6x16mm screw slightly with the supplied
Wrench (F), and adjust to your desired position. Re-tighten the screw firmly.
If you have any questions regarding any of the instructions or warnings, please contact your
local distributor directly (OR) contact QualGear technical support via email at
support@qualgear.com.
11
E
Roll +/-20°
F
13.6kg
(30lbs)
RATED
2 Year Limited Warranty
2 Year Limited Warranty
Version: January 2016
Version: January 2016
PRB-717-WHT
Advertisement
Table of Contents

Related Manuals for QualGear PRB-717-WHT


Summary of Contents for QualGear PRB-717-WHT
- Page 1 If you have any questions regarding any of the instructions or warnings, please contact your 2 Year Limited Warranty 2 Year Limited Warranty local distributor directly (OR) contact QualGear technical support via email at support@qualgear.com. Version: January 2016 Version: January 2016...
-
Page 2: Parts Checklist
Before starting installation, please check that all parts shown in this checklist are included. If any parts are missing or damaged, contact your local distributor or support@qualgear.com for replacement parts and do not start assembly and installation WARNING until you receive all the parts. - Page 3 Installing the Ceiling Mount (Wood Joist Surfaces) For installation to concrete surfaces, skip to Step 1B. Attach ceiling mount with two screws (H) as shown in the figure on the left. Using a socket wrench tighten each screw until the ceiling mount is firmly attached.
- Page 4 Installing the Ceiling Mount (Concrete Surfaces) For installation to wood surfaces, refer to Step 1A. Hold the marking template provided against the ceiling where you want to install your projector, mark four holes for drilling using a marking pen or pencil. Attach ceiling mount with four concrete WARNING anchors (G) and four screws (H) as...
- Page 5 Attaching the Projector Bracket to the Projector Place the Projector Bracket Assembly over the Projector and align the center of WARNING the Mount with the Center of Gravity of the Projector. If you projector model has three mounting holes only, please remove the fourth Align the shift adjustment opening (at the center of the projector bracket) ...
-
Page 6: Pitch Adjustment
Attaching the Projector Assembly to the Ceiling Mount Adjusting the Projector (Part 1 of 2) Pitch Adjustment Clearance in the M6x30mm screws to allow for proper fitting with the hook as shown in Loosen the diagram on the left. Tighten Pitch +/-30°...
Need help?
Do you have a question about the PRB-717-WHT and is the answer not in the manual?
Questions and answers