Table of Contents
Advertisement
Advertisement
Table of Contents

Related Manuals for Viavito ROKAI


Summary of Contents for Viavito ROKAI
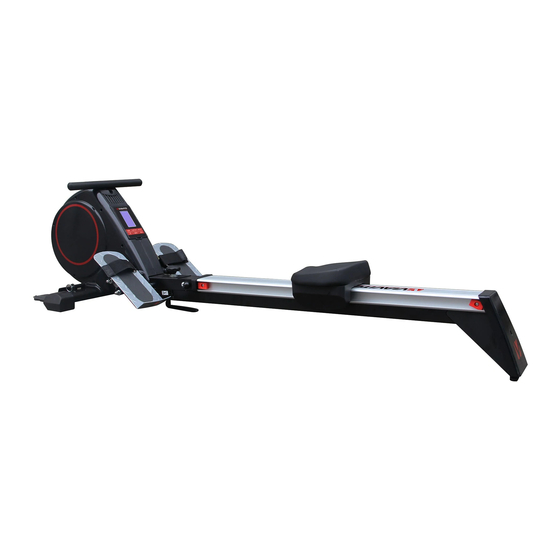
- Page 1 Owner’s Manual. ROKAI Folding Rowing Machine www.viavito.com...
-
Page 2: Table Of Contents
Manual Contents. Congratulations on purchasing your Safety Information 03/04 very own ROKAI Machine Assembly 05/17 Folding Rowing Contents Checklist Machine Hardware Pack Assembly Diagram Assembly Instructions 08/15 You have chosen a high quality, safe and Folding & Unfolding your Rower... -
Page 3: Safety Information
06 Before beginning training, remove or death. If you experience dizziness, all objects within a 2-metre radius nausea, chest pain, or any other of the machine. abnormal symptoms STOP EXERCISING IMMEDIATELY AND CONSULT A PHYSICIAN WITHOUT DELAY. www.viavito.com... - Page 4 Read all instructions before (68lbs). Safety standards: EN957 1 using this elliptical cross trainer. & 5 – Class HA viavito assumes no responsibility 19 WARNING: the safety level of the for personal injury or property, machine can be maintained only if it...
-
Page 5: Machine Assembly
Machine Assembly. Contents Checklist Make sure you have the following parts: www.viavito.com... -
Page 6: Hardware Pack
Hardware Pack IMPORTANT: The parts in the hardware pack are labelled for your convenience. Do not remove the parts from the hardware pack until they are needed ROKAI www.viavito.com... -
Page 7: Assembly Diagram
Assembly Diagram www.viavito.com... -
Page 8: Assembly Instructions
Assembly Instructions Step One. Fit the front stabiliser (67) to the main frame (3) and lock with Allen bolts (107), and flat washers (108). Make sure they are securely tightened. www.viavito.com... - Page 9 Step Two. Assemble two front foot grips (118) onto front stabiliser (67) and lock with locking pins (113). www.viavito.com...
- Page 10 04 Attach the rear foot (72) to aluminium 02 Insert the aluminium rail (71) to main rail (71) with screws (90) and frame (3), and align the holes then fix washers (92). in position with the screw, washers and nut you've just removed. www.viavito.com...
- Page 11 (top of 04 Ensure the elastic cord (63) runs diagram). Then Pull the elastic cord parallel to the aluminium rail. (63) and hook the carabiner through the hole on the aluminium rail as shown (bottom of diagram). www.viavito.com...
- Page 12 06 Insert the lock knob (109) with the main frame. Hold the rail securely in washer (110) into the hole on the the upright position. main frame as shown. 03 Place the rail cover (85) onto the aluminium rail. www.viavito.com...
- Page 13 (72) then place the end cover (80) on the of the rower as shown in diagram. rear foot (72) and fix in placeusing the bolt (74) to secure it in position. www.viavito.com...
- Page 14 (117), lock washer (116) and the pedals are secure and pivot on washer (115). the bar. 03 Insert the spacer sleeve (114) to both ends of the pedal rod (119) nearest the front of the rower as shown. www.viavito.com...
- Page 15 Plug the terminal into the DC hole on cut the bungee cord! the main fame as shown, then connect • After the cable tie has been removed, to a suitable mains supply. inspect the bungee cord to ensure that it www.viavito.com...
-
Page 16: Folding & Unfolding Your Rower
• When unfolding the machine, follow • When unfolding the machine, proceed steps 1 to 3 in reverse. Always make in the reverse assembly sequence and sure that your rowing machine is always make sure that your rowing stored safely. machine is stored safely. www.viavito.com... -
Page 17: Moving The Machine
Moving the machine Take the rear foot and tilt the machine forward until it can be pushed easily. www.viavito.com... -
Page 18: Console Instructions
4 minutes, the console LCD will switch OFF. The system will stop and all exercise settings and data will be saved. When powered up again it will continue based on the last recorded data. www.viavito.com... -
Page 19: Button Functions
1 short beep = valid setting confirmed / 2 short beeps =invalid settings reminder 2 short beeps per minute=PULSE exceed setting value / 3 short beeps per minute=WATT limit is over spec / 4 short beeps per minute=any function count down to 0 or system alarm 6 short beeps= force system stop www.viavito.com... -
Page 20: Training Data
- Manual Training (training without programs) - Training with Programs (there are 12 programs preset, P01~P12) - Training with the Heart Rate program (H.R.C). - Training with competition program (RACE). - Training with your own program (User defined program). www.viavito.com... - Page 21 • TIME (or DISTANCE) (Time and Distance can’t be set at the same time.) • CALORIES • PULSE - Use UP & DOWN keys to set values then confirm your selection by pressing the ENTER button. - Press START/STOP to start workout (Drawing 3). www.viavito.com...
-
Page 22: Training Data
- You can adjust the level of resistance from - Press RESET to revert to workout 1-16 while rowing by pressing the UP/ selection menu. DOWN keys. The newly set level of resist- ance will be shown on the screen’). www.viavito.com... - Page 23 HRC90 - The anaerobic target rate of 90% - Set the desired session TIME with UP & of the maximum pulse rate is only suitable DOWN buttons (Drawing 9) and press for competitive athletes and short sprint ENTER button to confirm. exercises. www.viavito.com...
- Page 24 30 seconds the system will stop program automatically. • If you are rowing and go above your target pulse rate, the resistance will automatically decrease by one level every 15 seconds till reaching your target pulse rate or min resistance www.viavito.com...
- Page 25 - Press UP and DOWN to select desired All workout data will remain. rowing DISTANCE and confirm by pressing ENTER (default=500±100) (Drawing 11). - Press RESET to revert to workout selection menu. - Press START/STOP to start the race. Console will display USER & PC workout www.viavito.com...
- Page 26 16. To save your setting, press selection menu. and hold the ENTER button for 2s. - Set the desired TIME of the overall workout using the UP & DOWN buttons and press ENTER to confirm (Drawing 15). www.viavito.com...
- Page 27 Then TIME will worn in order to enable the console be displayed down from 00:60 to 0:00 to measure heart rate. (Drawing 16), no other functions will be available during the countdown. www.viavito.com...
-
Page 28: Customer Support
• Precise description of the issue or defect. IMPORTANT!! - Please retain your sales receipt, viavito Customer Care may request proof of purchase to validate eligibility for warranty service. Warranty cover starts from the date shown on the proof of purchase. -
Page 29: Manufacturers Warranty
Repairs not provided by viavito ltd conditions, for a period of 12 months from the date of the original purchase. e) Accidents, lightning, water, fire,... -
Page 30: Space Required
Space Required 33.5 Kg Product weight: Max user weight: 120 Kg Safety standards: EN ISO 20957-1 & EN 957-7 – Class HC Site area 1890x576x530mm Trainig area 1990x716x1030mm Free area 3080x1916x1630mm www.viavito.com... -
Page 31: Replacement Parts
Sensor Holder Sensor Wire Screw M4x10L Hex screw M10xP1.5x50L Flat washer φ10xφ20x2t Nylon nut M10 Handlebar End cap Foam grip Elastic cord holder Top cover Foot cover Frame bottom cover Upper cable Screw 1/2-13*100L Nylon nut 1/2-13 Flat washer φ13xφ20x2t www.viavito.com... - Page 32 EVA foam Magnetic brake set Hex screw M6xP1.0*16L Spring washer Flat washer Curve washer Flywheel complete set (49~59) Flywheel Nut M8 Washer C-type Flywheel axle Bearing 6001RS One-way bearing Bearing 61904 Mounting for cord guide Cord guide Screw M8 www.viavito.com...
- Page 33 Roller 42 mm Hex bolt M10x30L Guide bush Guide bush Nut M10 End cover Connector Fixing plate for rear foot Joint plate End cap, rail Rail clad cover Screw M5x10L Stopper Stopper axle Screw M6x10 Scvrew M8x16 Spring washer www.viavito.com...
- Page 34 Screw Screw Washer Lock knob Washer Locking pin Nut cover Pin for front grips Spacer sleeve for pedal Washer Lock washer M8 Nut M8 Front foot grip Pedal crank Switching power Rubber sleeve (φ17*φ13*182L) Wireless heartrate receiver Screw M4x8L www.viavito.com...
-
Page 35: Exploded Diagram
Exploded Diagram www.viavito.com... - Page 36 www.viavito.com...
Need help?
Do you have a question about the ROKAI and is the answer not in the manual?
Questions and answers