Rointe KYROS Instruction Manual
Digital
electronic radiator
Hide thumbs
Also See for KYROS:
- Instruction manual (72 pages) ,
- Instruction manuals (32 pages) ,
- Installation and user manual (32 pages)

Related Manuals for Rointe KYROS


Summary of Contents for Rointe KYROS
- Page 1 KYROS INSTRUCTION MANUAL KYROS DIGITAL ELECTRONIC RADIATOR Mounting, installation, starting and operation...
-
Page 2: Thank You
Thank you. Thank you very much for choosing Rointe heating. Before using the low consumption KYROS digital electric radiators, we recommend you to read this instruction manual in order to ensure correct operation. -
Page 3: Table Of Contents
TABLE OF CONTENTS 1. DESCRIPTION OF THE “KYROS” RADIATOR ......4 1.1. Front panel description ............4 1.2. Switching On & Off (stand-by) ..........7 1.3. Temperature selection ............8 1.4. Locking the control panel ............8 1.5. Setting the day and time .............9 1.6. Main menu ................10 1.7. -
Page 4: Description Of The "Kyros" Radiator
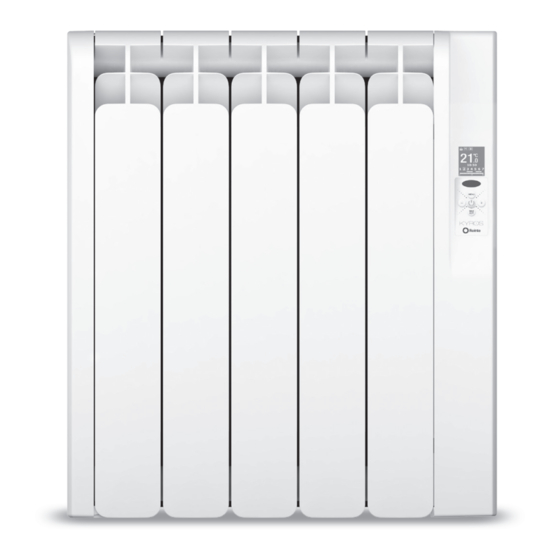
1. DESCRIPTION OF THE “KYROS ” RADIATOR 1.1. Front panel description. ICON INDICATION On / Off - Accept Decrease temperature - Move left Increase temperature - Move right Access/Back to menu - Move up Manual / Automatic - Move down... - Page 5 SEGMENT INDICATION Programming Days Of The Week Time Of Day Temperature Selected Locking The Control Panel Manual / Automatic Function / Pilot wire Comfort / Economy / Anti-Frost Mode Fuzzy Logic Energy Control Funct. Heater Element On Consumption indicator Open windows function...
- Page 6 ICON INDICATION Open windows function - enabled mode Open windows function - active mode Energy consumption indicator - green - yellow - red Heating element on Fuzzy Logic Energy Control working Comfort mode on. Eco mode on. Anti-frost mode on. Automatic function on.
-
Page 7: Switching On & Off (Stand-By)
After 5 seconds, the temperature, time and days of the week will be displayed on the main screen. By pushing the button again the radiator will go into standby mode with the word ‘standby’ displayed. After 5 seconds the Rointe logo will appear. -
Page 8: Temperature Selection
1.3. Temperature selection By pressing you can change the temperature. When the room temperature is lower than the set temperature the radiator will come on with the symbol appearing. When the Fuzzy Logic Enery control technology is functioning this symbol will appear instead 1.4. -
Page 9: Setting The Day And Time
When the radiator is locked from the AIR Control remote, the remote keypad lock will appear on the screen. If any button is pressed, the image on the right will be displayed. When the keypad has been locked remotely, it can only be unlocked remotely via the AIR Control remote. -
Page 10: Main Menu
To leave the time and date adjust feature, wait 30 seconds or press after the day of the week selection. 1.6. Main menu The main menu of your Kyros radiator is accessed by pressing the menu button. Pressing the buttons , we can move across the different options on the menu. - Page 11 1.6.1. Settings submenu The submenu settings configure technical parameters. To access, select the icon displayed in the main menu screen. Pressing the buttons , we can move Clear Memory across the different options on the submenu. The screen shown on the right appears. The icons represent the following options: Clear Memory...
- Page 12 • Clear memory Clear Memory This allows you to clear any information saved MEMORIA in your radiator. BORRADA When you press this function, this image will appear and the language will change to default. • Language This sets the language you wish to use to communicate with the product.
- Page 13 1.6.2. Energy submenu The Energy submenu provides access to functions related with the energy management. Access by selecting the icon from the main menu to enter the screen shown on the right. The icons represent the following options: Open windows Consumption Effective power Information...
- Page 14 • Consumption status This function displays a status consumption screen to alert the user if the product works properly or there is an issue that makes the product having a overconsumption. When the key is pressed , appears one of the following screens according to the state of consumption of the product.
- Page 15 The effective power is the actual value of its nominal power that our product consumes during periods of operation. • Information Displays the software version, the date of this release and the rated power of the product. To access, select the Information option using the keys and confirm pressing the...
- Page 16 1.6.4. Program submenu This section, explains the operational aspects of the radiator in its various functions and modes. What are the functions of Manual, Automatic and Pilot Wire Control? Manual function This function, allows you to change between Comfort, Eco and Anti-frost modes, and to change the temperature as described in point 1.3.
- Page 17 The submenu provides access to options related to programming the radiator. Select the from the main menu using the keys and press the key to enter. The icons represent the following: Pilot wire Manual / mode Start Automatic User function programming (only upon functions...
- Page 18 • Start programming To start programming select the icon using the keys and then press the key. We must be in AUTOMATIC MODE. A screen for selecting one of the four initial programming or self programming With keys is exchanged between presets and programming custom home.
- Page 19 Select ECO temperature Press and proceed to the selection of the Eco temperature between 7.5ºC and 18.5ºC. The symbol and the temperature will flash. Select DAY After pressing the button once again, the days of the week will start flashing and show as DAY 1, DAY 2, DAY 3,...
- Page 20 To finish the programming press or leave it for 30 seconds without pressing any buttons. To change the programming, go back to point 1, and proceed as described before. • User function To enter the User function, select the icon using the buttons and confirm by pressing...
- Page 21 To access this feature enter the PIN code, the default PIN code is 0000. Enter the numbers using the buttons and confirm by pressing . If the PIN is entered incorrectly the INCORRECT PIN screen will show. Once the PIN number has been entered correctly, the main control screen will be shown.
- Page 22 • Enable function Enable or disable the User function. With the Keys select ON to enable and OFF to disable. Once the desired option is highlighted press to confirm and exit. On the main screen you will see the icon in automatic function, the icon in Manual function when in Pilot Wire control function.
- Page 23 • Upper temperature limit This sets the upper limit working temperature of the radiator. Using the buttons scroll through until you reach your desired upper maximum working temperature. Press to confirm and exit. • Lower temperature limit This sets the lower limit of the working temperature of the radiator.
-
Page 24: Open Windows Function
Allows you to enable or disable the Pilot wire control mode. With the keys , select ON to activate or OFF to disable. Once the desired option is selected press the to confirm and exit. In the main screen the symbol will appear. -
Page 25: Fuzzy Logic Energy Control Function
2.1. Mounting The KYROS radiator works by means of natural air convection (Figure 1). In order to achieve optimal functioning and an even distribution of heat, the lower part of the radiator, once mounted on the wall, must be at least 10 to 12 cm. - Page 26 As for the sides and above, a minimum distance of between 10-12 cm. must be left from any wall or brickwork in order for it to function correctly (Figure 2). M i n i m u m 1 0 c m M i n i m 1 0 c m M i n i m...
-
Page 27: Fixing The Supports
2.2. Fixing the supports Inside the packaging you will find a fixing kit. Choose the right part of the wall. Place the mounting stencil on the wall, marking the places for the holes. Remove the stencil and make the holes in the wall. Fix the supports using the plugs and screws provided, or others suitable for the wall type. -
Page 28: Maintenance & Cleaning
Installing template measurements depending on the model: 80 mm 241 mm 402 mm 161 mm 80 mm Floor Floor Floor KRN0550RAD2 KRN0770RAD2 KRN0330RAD2 886 mm 725 mm 563 mm 241 mm 323 mm 404 mm Floor Floor Floor KRN1430RAD2 / KRN1600RAD2 KRN1210RAD2 KRN0990RAD2 3. -
Page 29: Installation Precautions
Any repairs requiring the opening of the oil tank must only be done by ROINTE or its after-sales service personnel, who should also be notified should an oil leak be noticed. The regulations on discarding oil when the heater is being disposed of must be observed. -
Page 30: Guarantee
The symbol of the container crossed out over a horizontal line is marked on all of ROINTE’s products to remind the consumer of the obligation to separate them on disposal. - Page 31 5.3. If during the guarantee period, the product does not work correctly under normal use, and any design, material or manufacturing defect is found, ROINTE will repair or substitute the radiator as it may see fit, in accordance with the terms and conditions as follows: 5.3.1.
- Page 32 Incorrect use of the product, i.e. used for other purposes that are not construed as its normal use or for not respecting the instructions of use and maintenance given by Rointe as well as incorrect installation or use of the product that may not comply with the current technical standards of safety.
- Page 33 Rointe. 5.4. The technical service of Rointe will advise you if you need to buy any parts not covered under the guarantee or out of guarantee. 5.5. This guarantee does not affect the buyer’s legal rights stipulated...
- Page 40 ROINTE ESPAÑA Y PORTUGAL ROINTE UK P.I. Vicente Antolinos Catalyst House C/ E, parc. 43, 30140 Santomera 720 Centennial Court, Centennial Park Murcia, España Elstree, Herts, WD6 3SY T. 902 158 049 T. 01432 598 019 F. 968 277 125 F.
Need help?
Do you have a question about the KYROS and is the answer not in the manual?
Questions and answers