
Related Manuals for oticon INTIGA


Summary of Contents for oticon INTIGA
- Page 1 The Oticon Intiga Success Manual The Complete Guide to Fitting Oticon Intiga using Genie 2011.2...
- Page 2 Table of Contents Reading this manual Fitting Oticon Intiga instruments is easy and full of possibilities Introducing the Oticon Intiga Family The “Quick Fit” programming is a fast track taking you Genie 2011.2 or a later version must be used to program Oticon Intiga instruments.
-
Page 3: Table Of Contents
Contents Introducing the Oticon Intiga family RITE Intiga Micro Moulds for the Standard Fitting Step Receiver FAQ’s Alternative Custom Moulds for Overview of Oticon Intiga End Fitting Standard Receivers Short Vents The Oticon Intiga fitting Range ConnectLine Concept Long Vents... -
Page 4: Introducing The Oticon Intiga Family
‒ housing. Fundamental features and full connectivity Fitting Options (Genie 2011.2) Oticon Intiga 10 – is the full featured premium solution for through ConnectLine makes Intiga 6 a good affordable Streamer and ConnectLine enabled clients seeking better understanding in difficult listening choice. -
Page 5: Overview Of Oticon Intiga
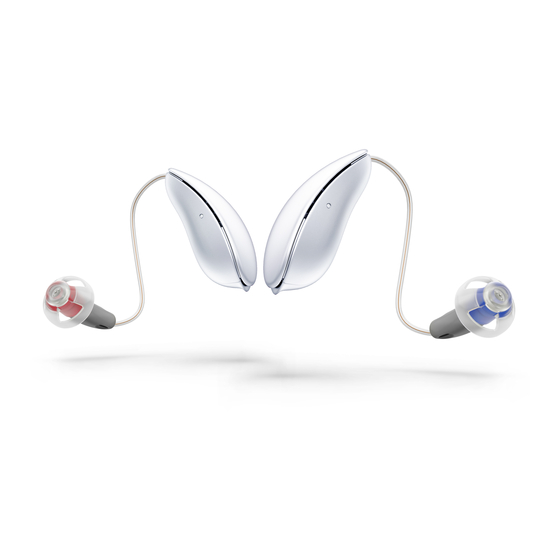
Terracotta Chestnut Brown (95) (97) (90) (94) (93) Pure White Silver Silver Grey Steel Grey Diamond Black (98) (44) (91) (92) (63) Open Dome – Plus Dome 250 500 1k Intiga Micro Mould – Power Dome OTICOn InTIGA FITTInG GUIDE... -
Page 6: Customising Oticon Intiga
The Top Shell Attaching Top Shell 1. Attach the top shell by inserting the front hooks into the The Oticon Intiga device has a top shell with clean lines contributing to the discreet appearance. Oticon Intiga is base shell. delivered with the top shell separate from the base shell and components. - Page 7 Service Tool into the slot in the top of the the Oticon Intiga instrument. Receiver plug (a). Tilt the tool until the ball is seated in the programming socket (b).
-
Page 8: Selecting And Fitting Receiver Units
The lengths most commonly used are size 2 and 3. for left ear. using the Oticon measuring tool. The measurement is ear. Insert the ear grip in the slot in the Receiver. the same for all domes and custom earpieces. -
Page 9: Removing The Ear Grip
Receiver wire sticking out. 3. If necessary add the ear grip for extra retention. Pull the ear grip until its top is positioned in the slot. During insertion, the top should point away from the dome as illustrated. OTICOn InTIGA FITTInG GUIDE... -
Page 10: Shaping The Receiver Unit
If the wire is still not flush, you can change the curve of the Receiver wire by straightening it a little or changing the insertion depth. This is not a difficult procedure and the following steps are important to avoid damaging the Receiver unit: Bend into the canal OTICOn InTIGA FITTInG GUIDE... -
Page 11: Earpieces
Earpieces Dome and Intiga Micro Mould selection for Standard Receiver Selecting Dome The Open Dome is available in three different sizes: 6 mm, 8 mm and 10 mm. The most commonly used is the medium sized 8 mm Dome. The Open Dome is suitable for hearing losses up to 70 dB in the high frequencies and is the best option for most users. -
Page 12: Rite Intiga Micro Moulds For The Standard Receiver
RITE Intiga Micro Moulds for the Standard Receiver Alternative Custom Moulds for Standard Receivers The Intiga Micro Mould is an acrylic custom solution that These custom moulds are produced from a traditional, can be used instead of a dome for a RITE fitting. -
Page 13: Short Vents
Micro Moulds. Consequently, the effect of the canal vent is Micro Moulds follow the instructions below: Intiga Micro Mould vent effect is much larger compared to a larger than a traditional vent with the same diameter. Mould in the ear, turn the Mould until the up indicator traditional vent with the same diameter. -
Page 14: Removing The Intiga Micro Mould
The Mould cannot be detached from the Receiver without 1. Remove the WaxStop. 2. Place the tool in the Intiga Micro Mould as illustrated the Intiga Micro Mould tool. When detaching the Intiga Micro Mould follow the instructions to the right: making sure that the cross in the Adaptor is aligned with the tip of the tool. -
Page 15: Connecting Oticon Intiga To Genie
Connecting Oticon Intiga to Genie Oticon Intiga is programmed using the Genie fitting software compatible with NOAH 3.0 and Oticon programming cable #3 (right and left) OTICOn InTIGA FITTInG GUIDE... -
Page 16: Programming Oticon Intiga For The First Time
“HI Power State” is On. Important Note Do nOT insert a battery into the Intiga when using the #3 programming cable. The power to Intiga will be provided by the programming cable. Use of the Programming Top Shell is vital for accurate programming of 1. -
Page 17: Follow Up Programming Oticon Intiga
Follow up programming Oticon Intiga 4. After programming, remove the cable and then the Do not remove the programming shell by forcing it side 1. Remove the top shell with the Service Tool. 2. Attach the Programming Top Shell. Programming Top Shell by holding the unit as shown ways! and lifting the tail up. -
Page 18: Nearcom
Instruments which have never been programmed must be To identify the instruments place them in the middle of the for a cable-free fitting of Oticon Intiga instruments. that the TM#1 module (870-10-030-00) is installed in an assigned to the correct side – left and right – in Genie. -
Page 19: Programming Oticon Intiga
Click Continue to go to the selection screen. Note: You can simulate a fitting by selecting ‘Oticon Intiga’ from the Family circle. Select Oticon Intiga 10, Oticon Intiga 8 or Oticon Intiga 6 from the second level screen that opens. The Organizer – Horizontal Navigation Task Pane –... -
Page 20: Selection Step
By selecting “All”, all gain controls will be selected, the colours of the control values are blue (left) and red (right) Oticon Intiga is available as a RITE with a dome or custom The Connection Bar indicates the connection status of the when the device is at prescribed settings. - Page 21 Program Manager Adjusting the fitting controls Reserve Gain If you are fitting ConnectLine to your Oticon Intiga instru- By clicking the <> each or all of the three regions (LF, MF The VC Reserve Gain displays the volume range between...
- Page 22 Binaural Broadband will ensure that Verify the prescribed setting, for example by using the the information in Oticon Intiga 10 and 8 is synchronized various built-in sounds and sound environments in Genie. between right and left hearing instruments to ensure best possible speech understanding in any environment.
- Page 23 Use the Acoustics tool to change vent size or dome type. Feedback Manager: The greater the hearing loss, the higher the risk of feedback. Therefore, Genie sets the Dynamic Feedback Manager at a suitable level to prevent feedback when you enter the Fitting step. OTICOn InTIGA FITTInG GUIDE...
- Page 24 The Amplification tab shows the actual aided response Noise Management shows how much noise is reduced by Oticon Intiga evaluates the listening environments in (output) vs. the unaided input, as well as both (input and the noise Management system in each fitting channel and several dimensions.
- Page 25 The instruments will register the preferred volume setting in specific situations dependent on level (Soft, Moderate Oticon Intiga does not log information while connected to and Loud) and content (Speech, Speech in noise and Genie.
- Page 26 Click the Talk-Over button to switch on micro- The Fitting Assistant can be used individually for each With Oticon Intiga instruments, Genie supports in-situ phones and talk to the client; click again to switch off. program in the instrument.
-
Page 27: End Fitting
The Save and Exit screen contains information about the match the purpose of the measurement. Oticon Intiga instruments. It also gives you the possibility to link one or two Streamers to the instruments. To compare your measurement to target and simulated curves in Genie, make sure that the Genie curves are based To link a Streamer to the instruments, click “Read serial... - Page 28 Audio where you can adjust several controls in order to fine tune the sound experience according to your client’s preferences. For each application, you can also set the preferred level and the relationship between Streamer and microphone signals. OTICOn InTIGA FITTInG GUIDE...
- Page 29 (more LF) according to client preferences. Power Bass Provides the client enhanced bass dynamics and gives much better LF response with open fittings. The Power Bass is adjusted in 3 steps (High, Medium, Low) or can be set to ‘off’. OTICOn InTIGA FITTInG GUIDE...
- Page 30 ConnectLine microphone. General Perception M relative to Phone: normally, the level for the hearing instrument microphone should be lower (softer) than the phone in order to focus on the phone conversation. OTICOn InTIGA FITTInG GUIDE...
- Page 31 The Audio Tab enables fine tuning of wired audio input and This tool indicates how the programs are configured on the wireless applications, e.g. music players. Oticon Intiga instruments. Use this tool to instruct the client about the programs. Changing the program is General Perception accomplished with the Streamer.
-
Page 32: Connectline Concept
ConnectLine Concept OTICOn InTIGA FITTInG GUIDE... - Page 33 • Sound and music from TV, radio, music players, computers, ConnectLine microphone and other devices • Operate the volume control and program change on the Oticon Intiga instruments Streamer wirelessly transmits sound from phones, TV, ConnectLine microphone and other devices to both hearing instruments thereby improving the overall sound quality and speech understanding.
- Page 34 To mute the microphones e.g Music Connection e.g. MP3 breaks it must be replaced. to pay full attention to a phone conversation press and hold Power the Volume button for 2 seconds (up or down). OTICOn InTIGA FITTInG GUIDE...
-
Page 35: Streamer And Mobile Phones
‘Streamer x.y’ will appear in the display. automatically go into sleep mode (slowly fading on/off 5. Go to ‘Streamer x.y’ in the mobile phone display and every 5 seconds) to prolong battery lifetime. press select. OTICOn InTIGA FITTInG GUIDE... -
Page 36: Streamer And The Tv Adapter
— All orange lights turn off and the hearing instruments instruments return to the previous program. return to the standard program (P1). OTICOn InTIGA FITTInG GUIDE... -
Page 37: Streamer And The Phone Adapter
6 seconds and then shows slow answers the call and the green rim light will switch to fading light. constant light. Pairing is done only once and will normally not have to be repeated. OTICOn InTIGA FITTInG GUIDE... -
Page 38: Streamer And Connectline Microphone
The green rim light is constantly lit in Pairing only needs to be carried out once and will normally • The hearing instruments will receive the sound from Streamer’s Phone button. not have to be repeated. the ConnectLine Microphone. OTICOn InTIGA FITTInG GUIDE... -
Page 39: Audio Streaming
Audio streaming can always be started from Streamer with return to the General program (P1). a long push on the Audio button. If no TV Adapter has been OTICOn InTIGA FITTInG GUIDE... - Page 40 Streamer is rarely used. Do not shorten or modify the neck strap in any way, Note: The green light disappears when Streamer is for example, do not tie a knot in it to shorten it. disconnected from the charger. OTICOn InTIGA FITTInG GUIDE...
-
Page 41: Streamer Firmware Upgrade Tool
• no existing pairings will be lost. Selecting “Streamer Firmware upgrade” in the tools menu in Genie gives access to upgrade a Streamer to the latest available version, without losing existing pairings. OTICOn InTIGA FITTInG GUIDE... -
Page 42: Service And Maintenance
Receiver. Give it a push to secure it safely. Make sure that clients have extra domes when relevant. Serial number The serial number is located under the top shell above the battery compartment. OTICOn InTIGA FITTInG GUIDE... - Page 43 NoWax WaxStop At the end of the Oticon Intiga Receiver is a noWax, wax At the end of the Intiga Micro Mould is a WaxStop, wax protection system. Replace the wax filter if it is clogged or protection system. Replace the wax filter if it is clogged or there is no sound from the instrument.
-
Page 44: Faq's
Oticon Intiga? most users this will be once a month. If the client no, Oticon Intiga comes with a new Receiver concept complains that there is no sound, replace the WaxStop with a curved shape and flexible wire to improve a first. - Page 45 People First People First is our promise to empower people to communicate freely, interact naturally and participate actively www.oticon.com...
Need help?
Do you have a question about the INTIGA and is the answer not in the manual?
Questions and answers