
Related Manuals for Best Friend Mobility SitGo


Summary of Contents for Best Friend Mobility SitGo
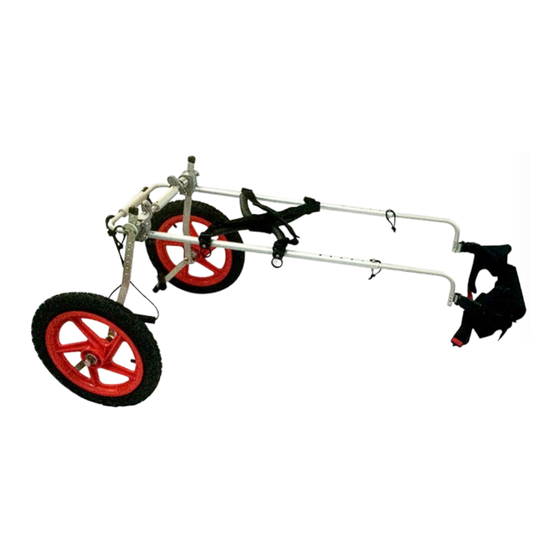
- Page 1 USER’S MANUAL SitGo™ Collapsible Rear Leg Support Dog Wheelchair (Large adjustable to XL)
-
Page 2: Table Of Contents
INTRODUCTION ....................MEASURE YOUR PET ....................ASSEMBLY ......................Breakdown of Pre-assembled Parts ..............Assembling the Wheelchair ................FITTING YOUR DOG TO THE WHEELCHAIR ............... ADDITIONAL MEASUREMENTS ................CARE AND MAINTENANCE ..................PRODUCT INFORMATION ..................The SitGo Motion ..................CONTACT US ...................... -
Page 3: Introduction
This process may take from days to months, so please don’t lose hope, persistence will pay off. Contact us for any help or questions. Thank you for purchasing a Best Friend Mobility dog wheelchair. Again, we love receiving feedback, stories, photos, and videos of how your pets are doing in their wheelchairs. - Page 4 It is important to acclimatize your pet to the wheelchair. It is recommended that you do not allow your pet to use the collapse or SitGo function for the first few weeks of use. You can set your pet’s wheelchair to non-collapsible manually. The instructions on how to set the wheelchair from collapsible to non-collapsible is in section 6.2 under the section...
-
Page 5: Measure Your Pet
MEASURE YOUR PET Measure your pet to confirm that you have the correct size Best Friend Mobility SitGo Rear Support wheelchair for your pet. The only information you truly need to get the right size is the measurement from the floor to your pet’s back—at its hindquarters. -
Page 6: Assembly
ASSEMBLY Let us begin with the assembly by checking out all the pre-assembled parts and tools. BREAKDOWN OF PRE-ASSEMBLED PARTS AND TOOLS Wheel Bar Thumb Screw Large Left Sidearm Socket Set Screw Pivot Assembly Socket Set Screw Large Right Sidearm Wheel Bar Thumb Screw A. - Page 7 Socket Set Screws Rear Harness Supports Pivot Shaft Connector Size Adjusting Pin Holes Rear Harness Bars B. Large Rear Harness Assembly Front Harness Rings C. Left and Right Front Harness Rod (x2) Left and Right Wheel Arms Air Intake Valves Rubber Stops D.
- Page 8 ASSEMBLY E. Size Adjusting Pin (x4) F. Front Harness Plastic Clamps G. Basic Rear Harness – gives better support for your dog’s body while harnessed to the wheelchair.
- Page 9 Plastic Clamps H. Sports Rear Harness – gives better mobility for your pet while harnessed to the wheelchair. I. Rear Leg Straps J-1. Big Wrench J-2. Small Hex Wrench J-3. Wheel Actuator Allignment Tool...
-
Page 10: Assembling The Wheelchair
ASSEMBLY Assembling the Wheelchair 1. Connecting the lower rear crossbar (B) to the left and right side arm assembly (A) 1.1. Insert rear harness bars (B) into the holes on the left and right side arms which are near the pivot assembly of the cart frame assembly (A). 1.2. - Page 11 1.3. If the rear harness bars (B) do not align with the holes on the left and right side arms (A), adjust the width of the rear harness bars (see section 5 on adjusting the width). 1.4. Insert a size adjusting pin (E) thru the holes on the right side arm (A). Make sure the curved side and not the cornered side is facing up.
- Page 12 2. To install the left and right front harness rods 2.1. Insert the right front harness rod (C) into the hole of the large right side arm (A). 2.2. Make sure the front harness ring is facing downward when the right front harness rod is installed.
- Page 13 2.5. Repeat 2.1. to 2.4. to left front harness rod (C) into the hole of the large left side arm (A). Make sure the left and right front harness rods (C) are of equal distance when adjusting their length. 3. To attach left and right wheels 3.1.
- Page 14 3.4. Make sure the wheel arm and rubber stop on the right wheel assembly (D) are facing the same direction as the large rear harness assembly (B). 3.5. Adjust to desired height. Line up top of round wheelbar assembly to scored line like so to ensure that thumbscrew lines up into corresponding divot.
- Page 15 3.9. Tighten or loosen the wheel bolts with the big wrench (J-1) if necessary to ensure free-wheeling movement of the wheels. 4. To adjust the width 4.1. Loosen the socket set screws on the pivot shaft connector with the small hex wrench (J-2). 4.2.
- Page 16 SitGo large. 5.1. Slightly loosen the nut between the L-bracket and the Rubber Stopper bar. The L-bracket should be loose enough to be moved but not loose enough slide on its own.
- Page 17 6. To switch the SitGo function to different settings 6.1. The SitGo’s collapsible setting is locked when shipped from the factory. Once you have adjusted it to your pet’s size and once your pet has acclimated to using a wheelchair, you can adjust or completely remove the bolt shown above to activate the SitGo’s...
- Page 18 6.2. To release the SitGo function from its non-collapsible setting to the collapsible setting, loosen the number 3 screw indicated in the picture above until you are able to collapse the wheelchair all the way down. 6.3. To return the SitGo function from the collapsible to the non-collapsible setting, while the wheelchair is fully upright fully tighten the number 3 screw indicated in the picture above then fully tighten the jam nut.
- Page 19 7.1.1 Use the pictured wrench as needed to increase leverage on the spring adjuster so that it will be easier to tighten the spring to desired tension for your dog. Socket Screw Spring Adjuster Rotate backward and downward 7.2. Loosen the set screw on the Spring Adjuster.
- Page 20 7.3. Rotate the Spring Adjuster going backward and downward. The two arms work in the same way. Their weight bearing capacity is additive. Meaning that each spring carries half the weight of the back side of the dog. 7.4. Adjust the tension on the Spring Adjuster until there is sufficient tension to support your pet when standing and also when moving from sitting or lying down position to standing position.
-
Page 21: Fitting Your Dog To The Wheelchair
FITTING YOUR DOG TO THE WHEELCHAIR 1. To put on the front harness (F) on your pet 1.1. Unclip the front leg strap (red strap). Your pet’s head thru 1.2. Guide your pet’s head thru the two black straps until middle black strap reaches your pet’s upper chest below the neck and the upper black strap is across your pets back shoulder area. - Page 22 Front legs here 1.3. Place the front leg strap (red strap) behind the front leg, across the bottom chest, behind the other front leg until it reaches the partner of the side release buckle on the other side. 1.4. Lock the side release buckle. 1.5.
- Page 23 NOTE: It is strongly recommended to use the sports harness first and not the basic harness. Most dogs have more support with the sports harness. 2. If you will be using the Basic Rear Harness (G). Pet facing this way Hind legs go thru here 2.1.
- Page 24 The Sitgo function should remain locked for new users. 2.6. Keep the SitGo function in the locked position when fitting your dog. Pull the chair up behind the dog, tilt it forward, lift one leg, then the other to the rear harness, then lift...
- Page 25 NOTE: Advanced users can load their pet into and out of the chair with the chair in the collapsed position, but this is not recommended for new users. The Sitgo function should remain locked for new users. Rear Harness Bolts 2.7.
- Page 26 2.10. Lock plastic clamp by pushing plastic clamp upward. 2.11. Repeat steps 2.8. to 2.10. to attach remaining 3 plastic clamps. 2.12. Adjust the straps attached to the plastic clamps of the rear harness to a comfortable weight-bearing position for your pet.
- Page 27 3. If you will be using the sports rear harness (H) 3.1. You must install the sports rear harness to the main assembly before placing your pet in to the harness. 3.2. Place the sports rear harness so that each plastic clamp is level with and near a side arm bolt.
- Page 28 3.5. Lock plastic clamp by pushing plastic clamp upward. 3.6. Repeat steps 3.3. to 3.5. to attach remaining 3 plastic clamps. 3.7. Adjust the straps attached to the plastic clamps of the rear harness to a comfortable weight-bearing position for your pet. 3.8.
- Page 29 3.9. Move the wheelchair forward until your pet fits in the middle of the wheelchair. 3.10. Move the arm assembly backwards. The wheelchair will move downwards simulating the SitGo motion. Pet facing this way Hind legs go thru here 3.11. Lift each hind leg of your pet and insert in the corresponding hole of the attached rear sports harness.
- Page 30 4. To fasten the front harness (F) 4.1. Fasten the left side release buckle of the front harness (F) to the its partner located on the left front harness rod (C). 4.2. Repeat on other side to fasten right side release buckle of the front harness (H) to its partner located on the right front harness rod (C).
- Page 31 5.2. Loosen the straps by pressing on the cord locks. Insert each paw to corresponding rear leg strap. Adjust to a comfortable tightness. 5.3. Make sure that legs can rest at a relaxed angle. CONGRATULATIONS! Your pet is now ready to take the first steps towards mobility.
-
Page 32: Additional Measurements
ADDITIONAL MEASUREMENTS FOR A PROPER FIT Once you have assembled your pet’s new Best Friend Mobility wheelchair, you can use the measuring guide below to give it a customized fit. We always strive to keep things simple. The following are the key measurements you need to take to ensure a comfortable ride for your pet. - Page 33 • The front strap must not rest below the center of the chest. Because Best Friend Mobility wheelchairs are adjustable, it is important to get your pet fitted properly. Setting the height, length, width, and spring tension (for SitGo wheelchairs) will be your task.
-
Page 34: Care And Maintenance
Still made of the same durable, lightweight materials as our rear leg and quad support wheelchairs, the SitGo is the first of its kind to allow for voluntary sitting and lying down. And, because the rear can be lowered, getting your dog in the wheelchair— especially if he... -
Page 35: The Sitgo Motion
The springs that balance the weight of the dog will assist in making it a smooth transition to a sitting position. Step 5: The SitGo will continue to lower until your pet is lying on the floor—with front legs in resting position—unless the rubber stoppers are adjusted to restrict the downward movement... - Page 36 Step 4: As the rubber stoppers pass under the wheels, the wheelchair’s rear will begin to rise with the assistance of the springs. Step 5: The SitGo will continue to rise to full standing position. Specifications: • Self-actuating assisted sit/stand assembly •...
-
Page 37: Contact Us
• Thoracic or Lumbar disc injury • Any other condition that results in rear leg pain or weakness CONTACT US If you find that you have further questions regarding the use of the Best Friend Mobility wheelchair, please contact us at: Best Friend Mobility... - Page 38 Best Friend Mobility 279 Hwy 57 S STE4 Little River, SC 29566 (843) 492-5283 support@dogwheelchairscenter.com...
Need help?
Do you have a question about the SitGo and is the answer not in the manual?
Questions and answers