3M c960 Service Information
Headset intercom system
Hide thumbs
Also See for c960:
- Service information (18 pages) ,
- Installation instructions manual (29 pages) ,
- Parts and service (10 pages)
Chapters
Table of Contents
Troubleshooting

Related Manuals for 3M c960


Summary of Contents for 3M c960
- Page 1 Model C960 Headset Intercom System Service Information Food Services Trade Department Printed in U.S.A. 3M Center Copyright E 3M IPC. All Rights Reserved. St. Paul, MN 55144-1000 78-6912-0673-0 Rev C...
- Page 2 Revision History Model C960 Headset Intercom System This manual was published in September, 1997 at revision level A. Some portions of this manual are also published separately. The publishing dates for the front matter, individual sections, and separately-published documents are as follows:...
- Page 3 Revision History Model C960 Headset Intercom System (Blank Page) E 3M 2000...
-
Page 4: Table Of Contents
Table of Contents Model C960 Headset Intercom System Section 1. Operation and Diagrams Introduction .............. - Page 5 Table of Contents Model C960 Headset Intercom System Base Station Configuration Jumpers and Switches ........
- Page 6 Headset Storage Rack Installation Instructions, 78- - 6912- - 0508-8 Duplex Menu Cable Installation Instructions, 78- - 6912- - 0509-6 3M Communications Bar Installation Instructions, 78- - 6912- - 0581-5 Five Inch Speaker and Mic Assembly Installation Instructions, 78- - 8050- - 8497-3 3.5-Inch Duplex Microphone Installation Instructions, 78- - 6912- - 0596-3...
- Page 7 Table of Contents Model C960 Headset Intercom System (Blank Page) E 3M 2000...
-
Page 8: Introduction
Model C960 Headset Intercom System OperationandDiagrams Introduction Transformer Assembly The 3M Model C960 Headset Intercom System is a Speaker and Microphone Assemblies wireless intercom system designed for highreliability, Standard Systems compactness, and ease of service. It is designed to provide two-way, radio-frequency audio... -
Page 9: Single-Lane Standard Communication System
Single-Lane Duplex Communication System Processing Vehicle Alert Signals This system provides duplex communication The Model C960 is compatible with all 3M vehicle (simultaneous talk/listen) for facilities that have one detectors and those of most other manufacturers. The menu sign. It consists of one base station and one or vehicle alert system provides a signal to the base more headsets and battery chargers. - Page 10 Model C960 Headset Intercom System OperationandDiagrams The headset receives microphone audio signals from Personnel wearing headsets that are operating in the base station on frequency B and transmits both the talk/listen mode. audio signals and control tones on frequency A. The People near the optional monitor speaker.
-
Page 11: Talk Lock Mode
Any The receiver/transmitter and logic circuitry audio detected by the headset microphone is contained in the C960 headset housing is both transmitted to the base station where it is proprietary and non-field repairable. -
Page 12: Rechargeable Battery
Model C960 Headset Intercom System OperationandDiagrams Rechargeable Battery Microphone Boom Assembly Headband The boom/earpiece assembly includes an electret microphone and a speaker-driven earpiece. It is Microphone Boom Assembly replaceable as a separate unit. Speaker Assembly Speaker Assembly Rechargeable Battery The speaker assembly is housed between the inner The nickel metal hydride battery provides DC power and outer cases and is replaceable as a separate unit. -
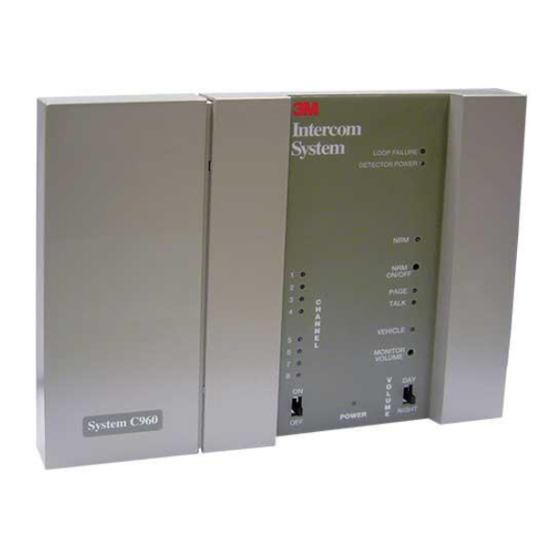
Page 13: Base Station
Receiver/transmitter and logic circuitry contained Received page communications are routed by the in the C960 headset intercom base station is both RCVR & RCVR LOGIC as follows: proprietary and non-field repairable. For this reason, the accompanying base station diagram To the monitor speaker amplifier via the MON provides no circuit component detail. -
Page 14: Menu Mic Input
MENU SIGN SPEAKER) or a separate dynamic headsets, depending on system configuration. microphone (the MENU MIC). The MIC/SPKR Refer to the C960 Installation Instructions for more jumpers J1 and J2 must be set accordingly; both must information. be set to the MIC position if a separate outside mic is... - Page 15 Note When jumper J5 is changed, you must also reprogram the system headsets. Refer to the C960 Installation Instructions for more information. Configuration Switches RESET SWITCH: Very briefly, actuation of the...
- Page 18 With relay K302 de-energized, themenu the primary intercom needs service. speaker is connected to the auxiliary intercom. The auxiliary intercom may be a conventional, hard-wired intercom or it may be a second C960 base Monitor Speaker Audio Control station. RelaycontactsK303-B controldistribution ofmonitor External system components (speakers, microphone, speaker audio.
- Page 19 Operation and Diagrams Model C960 Headset Intercom System (Blank Page) 1-12 E 3M 2000...
- Page 22 Headset Intercom Systems Model C960/C860 Installation Instructions...
- Page 24 Table of Contents Typical Single Lane Installation......................Battery Charger ........................... Speaker and Microphone Assemblies ....................Standard Systems........................... Duplex Systems..........................Face–to–Face Type Duplex Systems ....................Base Station ............................Interconnect Module (Optional) ......................Connecting the Base Station Directly to Components ................Connecting the Base Station to Components Using the Optional Interconnect Module......Connecting the Auxiliary Intercom (Optional) ..................
- Page 25 Illustrations Figure 1. Typical Installation....................... Figure 2. Battery Chargers (3–Slot and 6–Slot Versions)............... Figure 3. Base Station Mounting Holes ....................Figure 4. Interconnect Module......................Figure 5. Direct Base Station–to–Component Connections ..............Figure 6. Base Station – Interconnect Module Connections..............Figure 7. Connecting Components to the Interconnect Module .............. Figure 8.
-
Page 26: Typical Single Lane Installation
The twisted–pair of wires for the microphone connection must be shielded for proper operation. In duplex systems, microphone and speaker cannot be in the same jacket unless specially designed for duplex such as 3M 78–8095–0180–8. • sufficient twisted–pair sets of audio cable to connect other components such as monitor speaker, vehicle... -
Page 27: Battery Charger
Battery Charger Install the battery charger and begin charging the batteries before you install any other components. Install the battery charger in a clean, dry environment. An office location is best. The battery charger may be placed on a flat surface such as a table, desk, etc., or it can be fastened to a wall using the optional wall–mount kit. -
Page 28: Speaker And Microphone Assemblies
6 and the 5–Inch Metal Speaker Assembly, Part Number 78–6911–4411–3. Refer to the installation instructions packaged with the assemblies. Face–to–Face Type Duplex Systems The 3M Communications Bar, Part Number 78–6911–4451–9 contains the Duplex Speaker and Microphone listed above. Refer to the installation instructions that are packaged with the assembly. Base Station 1. -
Page 29: Interconnect Module (Optional)
Interconnect Module (Optional) 1. Install the interconnect module in an “out of the way” location, near the wiring for the auxiliary intercom, vehicle detector, etc. (Under a counter is desirable.) 2. To fasten the interconnect module in position: a. Remove the backing from the adhesive hook and loop fastener material on the rear of the module. b. -
Page 30: Connecting The Base Station Directly To Components
The twisted–pair of wires for the microphone connection must be shielded for proper operation. In duplex systems, microphone and speaker cannot be in the same jacket unless specially designed for duplex such as 3M 78–8095–0180–8. Figure 5. Direct Base Station–to–Component Connections... -
Page 31: Connecting The Base Station To Components Using The Optional Interconnect Module
Connecting the Base Station to Components Using the Optional Interconnect Module Connect the base station to the interconnect module as shown in Figure 6. Note that the connections are made to the “TO CONTROL MODULE” terminals on the interconnect module. Figure 6. -
Page 32: Figure 7. Connecting Components To The Interconnect Module
Brown Yellow Figure 7. Connecting Components to the Interconnect Module... -
Page 33: Connecting The Auxiliary Intercom (Optional)
Figure 8 through Figure 10 (depending on the model of intercom used). The presence alert shown is wired to operate only when the Model C960/C860 is turned off. If a separate outside microphone is used, the auxiliary intercom must be configured for OUTSIDE MIC. -
Page 34: Dual Lane System Installation
Important If you use a D–30 as the auxiliary intercom, a separate monitor speaker must be provided for the Model C960/C860. (Both the Model C960/C860 and D– 30 intercoms require separate monitor speakers.) Figure 10. D–30 Connections Dual Lane System Installation A dual lane system consists of two separate single lane systems that operate independently of each other. -
Page 35: Cross Lane System Installation
Refer to the installation instructions included with the Cross Lane Module (78–6911–4396–6). These instructions are also located in the C960 Service Manual. A Cross-Lane Module can be useful if the manager wishes to operate each lane with a separate crew during periods of peak activity. -
Page 36: Figure 11. Cross-Lane Wiring Diagram
Programming the Headsets for Cross-Lane Operation Follow the steps below to program the C960 headsets for Cross-Lane operation, and disable the Talk-Lock function. It does not matter which base station is used to program the headsets. By pressing T1, the headset will always communicate with the lane 1 base station;... - Page 37 2. Program the Headsets for Cross-Lane Operation • With the headset OFF, press and hold T1 and T2 while pressing ON for 5 seconds. You will hear an acknowledging beep. • Verify that the headsets are properly programmed for Cross-Lane operation: Press T1 and verify that the Talk LED lights on the lane 1 base station and does not light on the lane 2 base station.
- Page 38 2. Listening and Paging in a Cross Lane system With the AUDIO IN and AUDIO OUT wires disconnected, the T1 and T2 buttons control which menu sign to talk or listen to. They also control which headsets to PAGE to. Disconnecting the AUDIO IN and AUDIO OUT wires presents some issues if a cook or cashier needs to monitor both lanes: •...
-
Page 39: System Configurations And Function Jumper Settings
System Configurations and Function Jumper Settings Important Whenever a jumper setting is changed, the RESET SWITCH on the base station circuit board must be pressed to program the new jumper setting into the microprocessor. Also, each of the headsets in the system must be reprogrammed when a jumper setting is changed (see Channel Selection on page 14 for the headset programming procedure). -
Page 40: Duplex Operation - Single Lane System (One Base Station)
Duplex Operation – Single Lane System (One Base Station) Function Jumper Settings Menu Sign with Separate Speaker and Jumper pins 2 and 3 on jumpers J1 and J2. Microphone Lane 1 System Jumper pins 1 and 2 of jumper J3. Air Switch (Pulse) Detector Jumper pins 1 and 2 of jumper J4. -
Page 41: Channel Selection
Channel Selection The Model C960/C860 Headset Intercom System can operate on any one of eight different channels.* Select a channel that neither receives or causes interference and then program the headsets to that channel using the following procedure: 1. Pull slightly outward on the lower right side of the base station half–cover and then lift and remove the cover as shown in Figure 12. -
Page 42: Setting Audio Levels
If interference is still present and the system is a single lane system, try changing the J3 lane designation jumper from lane 1 to lane 2. If this fails and none of the channels are interference free, contact your 3M representative. Setting Audio Levels To set the audio levels, refer to the related audio level procedure below and to the illustration of the base station circuit board (Figure 14). -
Page 43: Duplex Systems Only
Duplex Systems Only The following procedure sets system audio levels for duplex systems so that headset/belt pack volume controls have enough “range” to allow operators to adjust headset volume to their preference. *Note The microphone at the menu sign must be located within four feet of the vehicle for duplex operation. -
Page 44: Monitor Speaker Volume Levels
3. Adjust the HEADSET ALERT LEVEL control to provide a comfortable alert tone level in the headset (clockwise to increase; counterclockwise to decrease). Monitor Speaker Volume Levels The monitor speaker volume levels are the levels for the various functions heard through the optional monitor speaker. -
Page 45: Menu Sign Talk Volume Level
Menu Sign Talk Volume Level The menu sign talk volume level is the volume of the headset/belt pack audio heard at the menu sign. To set the menu sign talk volume level: 1. Move the DAY/NIGHT switch on the base station to the DAY position. 2. -
Page 46: Circuit Board Jumpers, Adjustment Controls, Indicators And Switches
Circuit Board Jumpers, Adjustment Controls, Indicators and Switches Figure 14. Base Station Circuit Board Jumpers J1 and J2 Set for the type of menu sign in the system. Jumper pins 1 and 2 on both jumpers for menu signs having a speaker only. Jumper pins 2 and 3 on both jumpers for menu signs having a speaker and a microphone. -
Page 47: Adjustment Controls
Important After changing any jumper setting(s), be sure to press the RESET SWITCH on the base station circuit board to “read” the change into the microprocessor. Adjustment Controls Controls the volume of the menu sign audio heard in the headset. MENU MIC SENS Controls the volume of the alert tone heard in the headset. -
Page 48: Finishing Up
• Is speaker audio being reflected back to the microphone from nearby surfaces? Technical Assistance For technical assistance, call 1–800–328–0033 or write to 3M Communication Products at the following address: Food Services Trade Department 3M Center, Building 551–1E–02 St. Paul, MN 55144–1000... - Page 49 Printed on 50% recycled Printed in U.S.A. Food Services Trade Department © 3M 1999 May waste paper, including 10% 3M Center post-consumer waste paper. 78-6912-0672-2 Rev. F St. Paul, MN 55144-1000...
- Page 50 Model C960 Headset Intercom System Replacement Parts and Service Ordering Replacement Parts Technical Service For technical assistance, call: The following pages show replacement parts for the Model C960AA Headset Intercom. 1-800-328-0033, Order parts by the model number, part number, part name, and quantity required.
- Page 51 Replacement Parts and Service Model C960 Headset Intercom System Section 1 - Base Station Assembly and Interconnect Module E 3M 2000...
- Page 52 Model C960 Headset Intercom System Replacement Parts and Service Item No. Part Number Description Qty..78-9236-6330-2 ..BASE STATION ASSEMBLY, Model C921AA (w/o Power Supply) ..
- Page 53 Replacement Parts and Service Model C960 Headset Intercom System Section 2 - Headset Assembly E 3M 2000...
- Page 54 Model C960 Headset Intercom System Replacement Parts and Service Item No. Part Number Description Qty..78-6911-4492-3 ..HEADSET ASSEMBLY, Model C920AC ......
- Page 55 Replacement Parts and Service Model C960 Headset Intercom System Section 3 - 3-Slot Battery Charger Assembly Item No. Part Number Description Qty..78-8095-0580-9 ..3-SLOT BATTERY CHARGER ASSEMBLY, Model C923AA .
- Page 56 Model C960 Headset Intercom System Replacement Parts and Service Section 4 - 6-Slot Battery Charger Assembly Item No. Part Number Description Qty..78-8095-0581-7 ..6-SLOT BATTERY CHARGER ASSEMBLY, Model C926AA .
- Page 57 Replacement Parts and Service Model C960 Headset Intercom System Replacing the Headset Speaker 2. Remove the headband and the battery. See Figure 3-2. Tools Required: 3. Remove the outer case and and the two keypads Phillips screwdriver and set them aside. See Figure 3-2.
- Page 58 Model C960 Headset Intercom System Replacement Parts and Service Figure 3-2. 4. Carefully unplug the microphone and speaker 5. Remove the connector terminals from the speaker connectors from the headset PWA and set the connector housing as shown in Figure 3-4.
- Page 59 Replacement Parts and Service Model C960 Headset Intercom System Figure 3-3. Figure 3-4. 6. Remove the ear cup cover from the ear cup: 8. Carefully withdraw the speaker leads from the hole in the inner case. a. If the cover is sealed to the cup, carefully cut through the epoxy seal using a sharp razor 9.
- Page 60 Model C960 Headset Intercom System Replacement Parts and Service Figure 3-5. Replacing the Mic Boom Assembly 4. Carefully unplug the microphone and speaker connectors from the headset PWA, and set the Tools Required: PWA aside. See Figure 3-3. Phillips screwdriver 5.
- Page 61 Replacement Parts and Service Model C960 Headset Intercom System Figure 3-6. Replacing the Battery Release Button 3. Carefully unplug the microphone and speaker connectors from the headset PWA, and set the Spring PWA aside. See Figure 3-3. Tools Required: 4. Lift the battery release button spring out of the retainers in the housing.
- Page 62 Model C960 Headset Intercom System Replacement Parts and Service Figure 3-7. 3-13 E 3M 2000...
- Page 63 Replacement Parts and Service Model C960 Headset Intercom System (Blank Page) 3-14 E 3M 2000...
-
Page 64: Troubleshooting Guide
Troubleshooting Guide 3Mt Headset Intercom System, Model C960 System Troubleshooting To use this troubleshooting guide, locate the problem in the left column and look for the problem’s possible causes and corrections in the middle and right columns. Possible causes are listed in the order in which they are most likely to happen. - Page 65 Problem Possible Cause Solution 2. Vehicle detectoris “lockedup.” 2. Remove power to vehicle detector for a few seconds to reset the detector. 3. The base station alert tone 3. Adjust alert tone volume. volume is set too low. 6. All headsets will not go into 1.
- Page 66 2. Turn the backup intercom on or backup wired intercom. The intercom. plug in its power transformer. C960 system works OK. 3. The volume controls are set too 3. Turn the volume controls up. low on the backup intercom. 4. Defective backup intercom or 4.
- Page 67 1. Defective battery. 1. Replace the battery. never comes on. Food Services Trade Department Printed in U.S.A. 3M Center Printed on 50% recycled St. Paul, MN 55144-1000 waste paper, including 10% ã3M 1999 May post-consumer waste paper. 78-6912-0680-5 Rev. C...
- Page 68 Model C960 Headset Intercom System Troubleshooting Analyzing Batteries n Note When CYCLE 1 test is selected again for the same The battery analyzer is used in conjunction with the battery, the test skips the first phase. battery charger to test the condition of headset batteries.
- Page 69 Troubleshooting Model C960 Headset Intercom System Setup Procedures 1. Connect the analyzer to the battery charger. See Figure 4-1. Figure 4-2. Figure 4-1. 3. When the test is complete, the word READY will flash on the LCD. 2. Turn the battery charger ON. The analyzer will...
- Page 70 Headset Intercom System Model C960 Operating Instructions...
- Page 72 Model C960 Table of Contents Intended Use............................. iii FCC Information ..........................iii System Description .......................... 1 Introduction........................... 1 System Configurations ........................1 Single–Lane Standard Communication System ................1 Single–Lane Duplex Communication System ................1 Dual–Lane Standard Communication System ................1 Dual–Lane Duplex Communication System................
- Page 73 Charging Batteries ........................17 Disposing of Batteries......................18 Making Sure Batteries are Ready for Use .................. 18 Important Information about C960 Rechargeable Batteries............18 Special Instructions for System Manager ..................20 Programming the Headset for Cross–Lane Operation ..............20 Reprogramming........................20 Enabling/Disabling the Talk Lock Feature..................
-
Page 74: Model C960
Model C960 Important Information Intended Use The 3M Headset Intercom System, Model C960, is designed to provide 2–way radio–frequency audio communication in quick service drive–through restaurants and convenience stores. Misuse of the Model C960 could result in poor performance and/or undesired operation. - Page 75 Important Information Model C960 (Blank Page) © 3M 1999...
-
Page 76: System Description
Model C960 System Description Introduction The 3M Model C960 Headset Intercom System is a wireless intercom system designed for high reliability, compactness, and ease of service. The system can be programmed to operate on any one of 16 different channels to provide high–quality audio performance and reduce the possibility of... -
Page 77: System Components
System Description Model C960 Systems The number of system components and the procedures necessary to operate them vary depending on the system configuration. However, three components Components are common to all system configurations. The base station is the interface between the customer at the menu sign and the Base Station headset worn by the operator. -
Page 78: Controls And Indicator
2 POWER ü Note Indicator If for some reason the C960 headset system does not operate and the system includes an optional wired backup system, turn off the C960 Base Station to enable the backup system. With the switch in the DAY position, the volume of the menu sign speaker is 3 VOLUME increased for daytime operation. -
Page 79: Headset
Controls and Indicators Model C960 Headset The headset controls are shown below. Figure 5. Headset Controls 1 ON Switch Press the ON switch to turn on the headset. 2 OFF Switch Press the OFF switch to turn off the headset. - Page 80 Model C960 Controls and Indicators For dual–lane systems, press and hold the T2 (Talk Lane 2) switch to talk to the 6 T2 (Talk Lane 2) customer at the menu sign in lane 2. Release the switch to listen. Switch For single–lane systems, T2 can also be used to talk to lane 1.
-
Page 81: Battery Chargers
Controls and Indicators Model C960 Battery Chargers The 3–slot and 6–slot battery charger controls are shown below. (Rear View) (Rear View) The charging slots hold batteries during the recharging cycle. 1 Charging Slots This dual–function slot holds a battery during conditioning and recharging 2 Conditioning cycles. -
Page 82: Headset Preparation
Model C960 Headset Preparation To prepare the headset for use, you will need to check the headset for proper fit Introduction and install the cap clip (if desired). Checking the To ensure effective operation and comfort: Headset for Proper •... -
Page 83: Adjusting Headband Size
Headset Preparation Model C960 Adjust the size of the 2–piece headband until the ear pad rests against one ear Adjusting Headband and the headband pads rest just above each ear. Size • Slide the headband apart to make it larger. -
Page 84: Installing The Cap Clip
Model C960 Headset Preparation To install the cap clip: Installing the Cap Clip 1. Remove the side headband pad (from above the ear pad). Insert a dime in the slot on the headband pad housing and twist the dime to release the tab. - Page 85 Headset Preparation Model C960 4. Slide the cap clip onto the cap band just above the ear. Band Clip Figure 11. 5. Slide the cap clip over the inside half of the adjustable headband until it snaps into position over the headband pad mount. See Figure 12.
-
Page 86: Operation
Model C960 Operation System startup includes turning on the base station and each headset that will be System Startup used. To turn on the base station: Turning On the Base Station 1. Slide the power ON/OFF switch to the ON position. Check to see that the POWER indicator lights. -
Page 87: Talk Lock Mode ("Hands Free")
Operation Model C960 Communication During Off–Peak Hours During off–peak hours, the cross–lane module is turned on to enable a single operator to communicate with customers in either lane (1 or 2). 1. An alert tone sounds in the headset when the system detects a customer (vehicle) at the menu sign: •... -
Page 88: Page Mode
Model C960 Operation Use this mode to talk to other operators who are wearing headsets without being Page Mode heard by the customer at the menu sign. This mode is available with all system configurations. To page another operator, press and hold the page switch. Release the page switch to listen. -
Page 89: Special Considerations
Operation Model C960 ...then press ON Press and hold page switch... Figure 14. Page Switch and OFF Switch To respond to a page, press P (page switch). To return to normal headset operation: 1. Turn the headset OFF. 2. Turn the headset ON. -
Page 90: Maintenance
When installing a battery, make sure it is fully charged. It is important to remember that an unused C960 battery loses five percent of its charge per week. If a batteries has not been used for several weeks, make sure to charge prior to use. -
Page 91: Replacing The Side Headband Pads
Maintenance Model C960 Replacing the Side To replace the side headband pads: Headband Pads 1. Insert the edge of a dime into the slot on the headband pad housing. See Figure 16. 2. Twist the dime to release the tab. -
Page 92: Replacing The Ear Pad
Model C960 Maintenance Replacing the Ear Pad To replace the ear pad, remove the worn/damaged ear pad from the ear cup and replace it with a new pad. Battery Charger Location The battery charger should be placed on a flat surface such as a desktop or table in a clean, dry environment. -
Page 93: Disposing Of Batteries
Conditioning Status Indicator Conditioning Button Figure 19. To help protect the environment, C960 rechargeable batteries which have Disposing of Batteries reached the end of their useful life should be disposed of in accordance with local requirements. Making Sure Batteries Follow these tips to make sure batteries are always ready for use: are Ready for Use •... - Page 94 Batteries perform best at moderate temperatures. Extremes of heat and cold reduce their performance. • An unused C960 battery loses five percent of its charge per week. Batteries that have not been used for several weeks should be recharged before use. © 3M 2000...
-
Page 95: Special Instructions For System Manager
Special Instructions for System Manager Model C960 Programming the The headsets are factory programmed for single–lane operation to enable the Headset for Cross- operator to press either T1 or T2 to communicate with lane 1. Lane Operation For cross–lane systems, the headsets must also be programmed to enable communication with either lane 1 or lane 2. -
Page 96: Enabling/Disabling The Talk Lock Feature
In cases where a cellular phone tower is nearby, certain combinations of cell frequencies may cause interference. In some cases, changing channels may have no effect. Please call you local 3M Dealer, or 3M F.S.T. Communications Products Technical Service (800–328-0033) in these cases. - Page 97 Special Instructions for System Manager Model C960 The C960 system is capable of operating on any one of eight different channels. You can correct these types of interference by changing the base station operating channel. To do this: 1. Pull outward on the right side of the base station half–cover and then lift and remove the cover.
-
Page 98: Changing The Day/Night Switch Setting
Model C960 Special Instructions for System Manager ü Note When two systems are used in a cross–lane application, both base stations must be set to the same channel. 4. With the headset turned OFF, plug one end of the programming cable into the headset programming jack. -
Page 99: Adjusting The Monitor Speaker Volume
Special Instructions for System Manager Model C960 However, if local ordinances require quieter nighttime operation of the menu sign, move the VOLUME DAY/NIGHT switch to the NIGHT position. If the system has an optional monitor speaker, adjust its volume using the... -
Page 100: Troubleshooting
Model C960 Troubleshooting Introduction To use the following troubleshooting guide, locate the problem in the left column and look for the problem’s possible causes and corrections in the middle and right columns. Possible causes are listed in the order in which they are most likely to happen. - Page 101 Troubleshooting Model C960 6. All headsets will not go into 1. This is normal when a pulse 1. Press the Page switch to Standby (silence) when the (air switch) type of vehicle silence the menu microphone. vehicle leaves the menu sign.
- Page 102 2. Turn the backup intercom on or backup wired intercom. The intercom. plug in its power transformer. C960 system works OK. 3. The volume controls are set too 3. Turn the volume controls up. low on the backup intercom. 4. Defective backup intercom or 4.
-
Page 103: Battery And Battery Charger Troubleshooting
Troubleshooting Model C960 Battery and Battery Charger Troubleshooting Problem Possible Cause Solution 1. No lights come on when a 1. Dirty contacts on battery or 1. Clean contacts on battery and battery is inserted into charger. charger. charger with an alcohol moistened swab. -
Page 104: Service
Model C960 Troubleshooting Service Most, if not all, C960 system service needs can be fulfilled by your local 3M dealer. If special service assistance is needed, however, or for information on how to properly dispose of your non–functional C960 rechargeable batteries, please call 1–800–328–0033. - Page 105 Food Services Trade Department Printed in U.S.A. Printed on 50% recycled 3M Center © 3M 1999 May waste paper, including 10% St. Paul, MN 55144-1000 post-consumer waste paper. 78-6912-0671-4 Rev. G...
- Page 106 System Requirements The 3M Noise Reduction Module requires a system with a separate outside microphone and speaker. The A121 will not function with an intercom system configured to use a single speaker as both the microphone and speaker.
- Page 107 Status Indication Table The condition of the red LED on the 3m Noise Reduction Module indicates the current status of the unit. The LED can be off, blink at defined intervals, or be constantly lit. Table 3 illustrates the status indicated by the LED.
-
Page 108: Wiring Diagrams
MIC OUT MENU MIC IN MIC OUT AUDIO OUT SHLD SHLD ALT ALERT MENU MENU VEH DET SPKR SPKR MENU MENU MENU SPKR ALERT OUT SPKR SPKR 12V UNREG A121 Noise Reduction Module Figure 1. Wiring for 3M C760/C960 Base Station... - Page 109 Figure 2. Wiring for 3M C760/C960 Base Station with Interconnect Module...
- Page 110 MENU ALERT OUT MIC IN AUDIO IN 12V UNREG 3M Audio-Level Control To Vehicle Detector Figure 3. Wiring for 3M C760/C960 Base Station with 3M Audio-Level Control Module 3M D15/D30 Intercom SHIELD A121 Noise Reduction Module MENU INTERCOM MIC IN...
- Page 111 M E N U M E N U M I C MENU MENU SPKR SPKR V E H I C L E D E T E C T O R Figure 5. Wiring for 3M C760/C960 Base Station with A300 Audio Greeter...
- Page 112 Panasonic WX-C510/WX-C1010 Base Station A121 Noise Reduction Module Menu Post MENU INTERCOM MIC IN MIC OUT MENU MIC MIC IN MIC OUT SHLD SHLD MENU MENU SPKR SPKR MENU SPKR MENU MENU SPKR SPKR Figure 6. Wiring for Panasonic WX-C510/WX-C1010 Base Station HME SYS2500/DS/DSL Base Station MIC/SPKR...
- Page 113 MIC IN MIC OUT MENU SPKR MENU SPKR SHLD SHLD MENU MENU SPKR SPKR MIC OUT MENU MENU MIC MENU MENU SPKR SPKR SPKR MIC OUT MENU MIC Figure 8. Wiring for HME SYS2500D/DS/DSL Base Station with 3M A300 Audio Greeter...
- Page 114 INTERCOM MIC IN MIC OUT MENU MIC IN MIC OUT SHLD SHLD MENU MENU SPKR SPKR MENU MENU MENU SPKR SPKR SPKR 3M A121 Noise Reduction Module Figure 9. Wiring for HME SYS2500D/DS/DSL Base Station with HME MR100A Message Repeater...
- Page 115 Printed on 50% recycled Printed in U.S.A. Food Services Trade Department © 3M 2000 May waste paper, including 10% 3M Center, Building 551-1E-02 post-consumer waste paper. 78-6912-0699-5 Rev. C St. Paul, MN 55144-1000...
- Page 116 Installation Instructions Noise Reduction Module Model A125 Description The 3M A125 Noise Reduction board (3M part number 78-9236-6453-2) improves the inbound intelligibility of an intercom system by reducing environmental background noise from vehicles, airplanes, noisy intersections, wind, etc. System Requirements The 3M A125 Noise Reduction Module requires a C921BA Base Station.
- Page 117 * Separate microphone & OSM (speaker used as both a JMP1 speaker at menu sign/post speaker and a microphone at the menu sign/post) * C960 Intercom C5000 Intercom JMP2 Note: * Indicates factory default settings Table 1. A125 Jumper Settings Mode Configuration The A125 Noise Reduction board can be configured in several different modes by using DIP switch, SW1.
-
Page 118: Status Indication
Status Indication The condition of the red LED on the 3M C960 base station indicates the current status of the unit. The LED can be off, blink at defined intervals, or be constantly lit. Table 3 illustrates the status indicated by the LEDs. - Page 119 Printed in U.S.A. Printed on 50% recycled Food Services Trade Department © 3M 2000 May waste paper, including 10% 3M Center, Building 551-1E-02 post-consumer waste paper. 78-6912-0723-3 Rev. A St. Paul, MN 55144-1000...
- Page 120 78-9236-6498-7 Introduction These instructions explain how to install and configure the 3M Models A200 and A201 Loop Detectors as part of a Drive-thru Vehicle Detection System. With the exception of mounting, both circuit boards are the same. The Model A200 Loop Detector comes with a 12VDC plug-in power supply and is designed as a stand-alone loop detector.
- Page 121 ü Note The Model A201 Loop Detector is designed specifically as an optional accessory for the 3M C921BA or later Base Station only. 1. Remove the right-hand and loosen the left-hand top covers from the C921BA base station. Be careful that the C921BA circuit board does not fall out of the plastic base.
- Page 122 Sensitivity and Operating Modes The sensitivity and operating modes are set with DIP switch S1 located on the circuit board. Four levels of sensitivity can be set with S1-1 and S1-2. The delay time is set with S1-3. The operating mode is set with S1-4.
- Page 123 Installation Diagram Outside Connections Inside Connections WIRELESS or WIRED MENU SIGN INTERCOM A200 LOOP DETECTOR OUTSIDE SPEAKER/MIC IMPORTANT! SOLDER & INSULATE LOOP CONNECTIONS 120VAC 60 Hz ELECTRICAL OUTLET ELECTRICAL CURB MAGNETIC LOOP FLOOR DRIVEWAY 3/4" UNDERGROUND CONDUIT Figure 4. Typical A200 Installation...
-
Page 124: Wiring Diagram
1 - LOOP Figure 5. A200/A201 Terminals Printed in U.S.A. Printed on 50% recycled Food Services Trade Department © 3M 2000 May waste paper, including 10% 3M Center, Building 551-1E-02 post-consumer waste paper. 78-6912-0712-6 Rev. B St. Paul, MN 55144-1000... - Page 125 Introduction The 3M™ Audio Greeter, Model A300, is designed for use with intercom systems. A typical application is use in a quick service drive-thru restaurant to play digitally stored messages through a menu speaker.
- Page 126 Figure 1. “Installing the A300 Audio Greeter with the 3M D-15 Intercom” Figure 2. “Installing the A300 Audio Greeter with the 3M Interconnect Module” Figure 3. “Installing the A300 Audio Greeter with the 3M C762AA/BA/C921AA Base Station” Figure 4. “Installing the A300 Audio Greeter with the 3M C921BA Base Station”...
- Page 127 When a vehicle triggers the A300, the music will be interrupted while the greeter plays its message(s). The music will resume playing at the menu speaker 2 minutes after the vehicle detect signal is disengaged. Note: Use this feature only with the 3M C921BA Base Station.
- Page 128 A300 plays message(s) to the Menu Speaker. The message(s) can only be heard if the A300 AUDIO OUT line is connected to the C760/C960 AUDIO IN line (use AUDIO OUT potentiometer on A300 to adjust message volume). When SW2 number 8 is OFF, the A300 message will be heard through the menu microphone while the message is being played through the menu speaker.
- Page 129 Also press the DAY/NIGHT button while playing a message to verify the night-time menu sign message volume. 11. For 3M C760/C960 Systems only. Adjust potentiometer AUDIO OUT to set the message volume in the headset/intercom. Note: Potentiometer AUDIO OUT is only used to set the message volume for the convenience of the headset/intercom operator.
- Page 130 16 MUSIC IN BLK/ORG Menu Post INTERCOM MIC 17 SPEAKER GREEN/ORG INTERCOM MIC 18 SPEAKER RED/GRN MENU SPKR MENU SPKR MENU SPKR MENU MIC MENU MIC MENU MIC VEHICLE DETECTOR Figure 1. Installing the A300 Audio Greeter with the 3M D-15 Intercom...
-
Page 131: Figure 4. Interconnect Module
TALK AUDIO OUT OUTSIDE INTERCOM SPKR SHLD INTERCOM SPKR TO OUTSIDE INTERCOM MIC Menu Post INTERCOM MIC MENU SPKR MENU SPKR MENU SPKR MENU MIC MENU MENU MIC Figure 2. Installing the A300 Audio Greeter with the 3M Interconnect Module... - Page 132 MENU SPKR INTERCOM SPKR 12V UNREG SHIELD Menu Post INTERCOM MIC INTERCOM MIC MENU SPKR MENU SPKR MENU SPKR MENU MIC MENU MIC MENU MIC VEHICLE DETECTOR Figure 3. Installing the A300 Audio Greeter with the 3M C762AA/BA/C921AA Base Station...
- Page 133 _____ Menu Post INTERCOM MIC TALK _____ INTERCOM MIC PAGE ________ MENU SPKR VEH DET MENU SPKR MENU SPKR MENU MIC MENU MIC MENU MIC VEHICLE DETECTOR Figure 4. Installing the A300 Audio Greeter with the 3M C921BA Base Station...
- Page 134 VEHICLE DETECTOR * Note: 3M A300 HME SYS2500D/DS/DSL Set SW2 number 3 OFF, set Audio Greeter jumper JMP1 to Position B. Base Station OUTPUT Terminals 6 and 9 may also TIMER TRIG be used for a contact-closure connection (see Figure 7 for reference).
- Page 135 * Note: 3M A300 Set SW2 number 3 OFF, set VEHICLE jumper JMP1 to Position B. Audio Greeter DETECTOR Terminals 6 and 9 may also TIMER TRIG be used for a contact-closure Panasonic connection (see Figure 7 for reference). WX-C510/WX-C1010...
- Page 136 Below is an example of the A300 connected to a typical intercom using an Outside Speaker/Microphone (OSM): Use the appropriate vehicle detector connections to complete the installation. Intercom SHIELD MENU SPKR Menu Post MENU SPKR MON SPKR MENU SPKR/MIC Intercom A300 Audio Greeter MENU SPKR INTERCOM SPKR...
- Page 137 714BA SODAR Note: If 714BA contains optional relay, use terminals 9 and 10. VEH DET- VEH DET+ Figure 9. Installing the A300 Audio Greeter with the 3M Sodar Vehicle Detector A300 Audio Greeter Troubleshooting Guide Problem Possible Cause Solution 1. Low outbound volume to 1.
- Page 138 Printed in U.S.A. Printed on 50% recycled Food Services Trade Department © 3M 2000 May waste paper, including 10% 3M Center, Building 551-1E-02 post-consumer waste paper. 78-6912-0717-5 Rev. C St. Paul, MN 55144-1000...
- Page 139 Installation Instructions Cross-Lane Module 78-6911-4396-6 Description: The Cross-Lane Module allows two base stations in a dual-lane configuration to be operated by a single headset, using the dual-lane remote switch. A headset with a Dual-Lane Remote Switch can communicate with either base station in a cross-lane installation via the lane select switch. The Cross-Lane Module allows the headset to receive the vehicle alert tone and audio from a base station that the lane select switch is not set to.
- Page 140 5. Connect the cables from the module to the base stations as shown in Figure 1. Figure 1...
- Page 141 6. With the base stations turned off, check jumper J3 on each base station (see Figure 2). One base station must be jumpered (pins 1 and 2) for lane 1 operation; the other base station must be jumpered (pins 2 and 3) for lane 2 operation.
- Page 142 Module allows the vehicle alerts to “cross over” from one base station to the other.) Food Services Trade Department Printed in U.S.A. Printed on 50% recycled 3M Center waste paper, including 10% E3M 1995 March St. Paul, Minnesota 55144- -1000 post-consumer waste paper.
- Page 143 2. Slide the movable hooks into the track and then snap the end caps in place. 3. Space the hooks as shown below, and hang the headsets on the hooks as shown - - without the battery packs. 3M Food Services Trade Department Printed in U.S.A.
- Page 144 Foil Jacket — Connect to Speaker Shield Drain SP-110A Food Services Trade Department Printed in U.S.A. Printed on 50% recycled 3M Center E3M 1995 March waste paper, including 10% St. Paul, MN 55144-1000 post-consumer waste paper. 78-6912-0509-6 Rev. A...
- Page 145 3M Communications Bar 78-6911-4451-9 Purpose The 3M Communications Bar provides audio communication between the customer and store personnel in standard intercom applications and in wireless intercom face-to-face installations. The communication bar can be mounted in one of two locations: On the outside wall of the building next to the face-to-face window.
- Page 146 2. Determine the mounting location (speaker post or face-to-face window). 3. Position the housing, and mark the mounting holes: For speaker post mounting, position the housing with the microphone as near to the top of the post as possible. See Figure 2. For face-to-face window mounting, position the housing with the microphone at the bottom.
- Page 147 Figure 3. Face-to-Face Window 4. Mark the wiring hole equidistant from each mounting hole. 5. Drill the wiring and mounting holes. 6. Install the appropriate mounting anchors. 7. Route the speaker and mic cables through the wiring hole. Note The wire exit hole in the housing is sized to accept a 1-inch conduit fitting. 8.
- Page 148 Determine the type of intercom system, and adjust the speaker and microphone according to the related installation instructions. Food Services Trade Department Printed in U.S.A. Printed on 50% recycled 3M Center waste paper, including 10% E3M 1996 July St. Paul, MN 55144-1000 78-6912-0581-5 Rev. B...
-
Page 149: Specifications
Installation Instructions Five-inch Speaker and Mic Assembly 78-6911-1545-1 Introduction The Speaker and Mic Assembly consists of a five-inch, water-resistant, eight-ohm cone speaker, a special weather-resistant dynamic microphone and a mounting bracket for easy mounting in menu signs, speaker posts and other applications. Use this product where a separate microphone may provide better voice quality than that of a combined speaker/mic. -
Page 150: Mounting Procedure
“separate outside microphone” option. Figure 1. Speaker and Mic Connections and Mounting Printed in U.S.A. Food Services Trade Department Printed on 50% recycled E3M 1996 April waste paper, including 10% 3M Center post-consumer waste paper. 78-8050-8497-3 Rev. D St. Paul, MN 55144-1000... - Page 151 Installation Instructions Model C760AA/C960AA Headset Intercom System 3.5-Inch Duplex Microphone (78-6911-4476-6) Microphone Installation Instructions Determine the type of speaker post and Clean the inside of the microphone grill. cut the microphone shield to the Remove any existing foam from the inside of the required size.
- Page 152 Connect the attenuators to the microphone Check the system for correct operation. line. Determine the type of intercom system, and ad- just the speaker and microphone according to the Using wire nuts, connect the attenuators to the related installation instructions. microphone line at the base station end of the mic cable.
- Page 153 Figure 2. Attenuator Connections...
- Page 154 Food Services Trade Department Printed in U.S.A. Printed on 50% recycled 3M Center waste paper, including 10% E 3M 1996 June St. Paul, MN 55144-1000 post-consumer waste paper. 78-6912-0596-3 Rev. C...
- Page 155 Installation Instructions 5-Inch Duplex Speaker Assembly 78-6911-4411-3 Introduction: These instructions describe the installation of a 5-inch duplex speaker assembly in an existing menu sign or speaker post. Please review these instructions before you begin the installation. The instructions provided are general in nature, describing complete installation in a “typical”...
- Page 156 Figure 1. Typical Installation on a Speaker Post...
- Page 157 Figure 2. Speaker Mounting Template...
- Page 158 Bevel Centered Under Microphone Grille Figure 3. Typical Installation on a Menu Sign Food Services Trade Department Printed in U.S.A. Printed on 50% recycled 3M Center E3M 1999 April waste paper, including 10% St. Paul, MN 55144-1000 78-6912-0530-2/Rev . C...
Need help?
Do you have a question about the c960 and is the answer not in the manual?
Questions and answers