
Related Manuals for KYORITSU 1009


Summary of Contents for KYORITSU 1009
- Page 1 取扱説明書 INSTRUCTION MANUAL オートレンジ デジタル マルチメータ・AUTO RANGE DIGITAL MULTIMETER MODEL 1009 KYORITSU ELECTRICAL INSTRUMENTS WORKS,LTD.,...
-
Page 2: Safety Warnings
● Never attempt to make any measurement if any abnormal conditions are noted, such as broken case, cracked test leads and exposed metal parts. ● Do not turn the function selector switch with test leads connected to the instrument. Return the instrument to Kyoritsu or your distributor for repair or recalibration. - Page 3 CAUTION ● Always make sure to check Function switch is setting to the appropriate range before starting measurement. ● Do not expose the instrument to the direct sun, high temperature and humidity or dewfall. ● When the instrument will note be in use for a long period, place it in storage after removing the batteries. ●...
-
Page 4: Specification
2. Features This instrument, 1009, is a Digital Multimeter which designed for making measurement of the low-voltage equipment. (1) Designed to international safety standards. (6) Auto-ranging function IEC 61010-1, IEC61010-2-033 Measurement CAT. Ⅲ 300V Pollution degree 2 (7) Frequency measurement function ... - Page 5 4A 0〜10A ± 1.6%rdg ± 4dgt (2 Autoranging) DCA 10 A Allowable measurement time : 10A(15seconds max) 400 uA 0〜4000uA ± 2.6%rdg ± 4dgt (50 / 60Hz) (2 Autoranging) ± 3.0%rdg ± 4dgt (〜400Hz) 4000 uA 40 mA 0〜400mA (2 Autoranging) ACA...
-
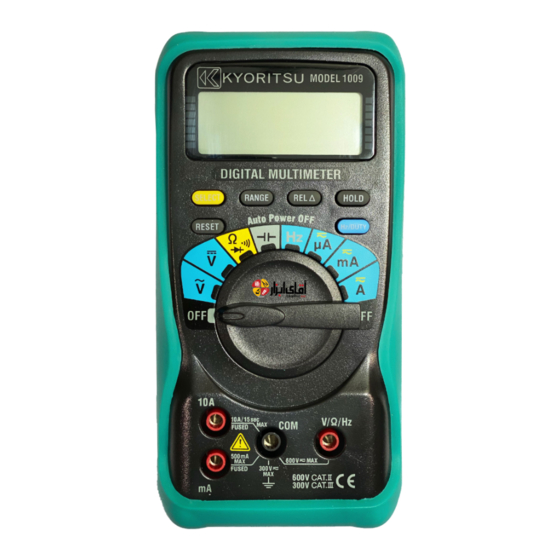
Page 6: Instrument Layout
● Operating Environmental − indoor use conditions − altitude up to 2000m ● Temperature & Humidity range (guaranteed accuracy) 23℃ ±5℃ Relative humidity: less than 75% ● Operating Temperature & Humidity range 0℃〜+40℃ Relative humidity: less than 80% ●... - Page 7 5. Preparation 5-1 Checking Battery Voltage Set the Function Selector Switch to other positions except the OFF position. Battery Voltage is enough if indication is clear and symbol is not indicated in this bout. −+ If symbol is indicated or no indication on the display, follow to the Battery −+...
- Page 8 (2) Set the Function Selector Switch to the appropriate "uA" or "mA" position. In case that the measurement current is 3999uA or less, set the Function Selector Switch to "uA" position, and it is 399.9mA or less, set the Function Selector Switch to "mA"...
- Page 9 (4) Power off the circuit under test. (5) Connect the test leads to the circuit under test so the instrument is in the series. (6) Power on the circuit under test. (7) Measured value is indicated on the display. 6-3 Resistance Measurement (Ω/ Diode check/ Continuity Check) DANGER ●...
-
Page 10: How To Use Function Switches
6-4 Capacitance Measurement DANGER ● To avoid the danger of getting electrical shock, never make measurement of the circuit in which electric potential exists. ● Do not make measurement when opening the battery cover and the instrument case. ● Make sure to discharge the capacitor before making measurement. (1) Insert the black test lead plug into the COM terminal and the red test lead plug into the VΩHz terminal. -
Page 11: Reset Key
● Current function (uA, mA, A) When setting the instrument to any function of the "uA", "mA", and "A", DC Current Measuring mode has been selected in the initial condition. By pressing "SELECT" Key, measuring mode changes. "DC" →... -
Page 12: Auto Power Off
8. Auto Power Off Auto power off function operates when about 30minutes passed after power on this instrument. When Auto power off function operates and the instrument powered off, the power-off statue returns to normal by pressing any key. And it is possible to release the Auto power off function. Turn the function switch from OFF position to the function you want with pressing SELECT key, and power on the instrument. - Page 13 ていただきます。本書を添付の上ご依頼ください。 お名前 ご住所 〒 TEL ◎ 本保証書に製造番号、ご購入日、およびお名前、ご連絡先をご記入 の上、大切に保管してください。 ◎ 本保証書の再発行はいたしません。 Kyoritsu reserves the rights to change specifications or Designs described ◎ 本保証書は日本国内でのみ有効です。This warranty is valid only in Japan. in this manual without notice and without obligations. 保証規定 保証期間内に生じました故障は無償で修理いたします。 但し、下記事項に該当する場合は対象から除外させていただきます。 1. 取扱説明書と異なる不適切な取扱い、または使用方法が原因で発...
Need help?
Do you have a question about the 1009 and is the answer not in the manual?
Questions and answers