Table of Contents
Advertisement
Advertisement
Table of Contents

Summary of Contents for BC Northern Lights BloomBox
- Page 1 BloomBox™ Technical Manual...
-
Page 2: Table Of Contents
Table Of Contents Packing List Assembly, Unpacking, Electrical Golden Grow Power Cloner Assembly Golden Grow Power Cloner: Filling & Draining Flowering Chamber Assembly Bulb Installation T-5 Bulb Installation Internal Fan Mounting Instructions CO2 System Assembly Machine Operation Overview Setting Time and Date (GroSmart Timer) Flowering Chamber Using CO2 Maintaining your machine... -
Page 3: Packing List
THANK YOU FOR CHOOSING THE BCNL BLOOMBOX Although this innovative product is very straight-forward to use, the following manual contains a few guidelines to make your growing experience easier. BLOOMBOX Packing & Checklist Warranty Card & Envelope - Please fill... - Page 4 BLOOMBOX Packing & Checklist Cont’d 8” Hydro Bucket - Coco Brick - 1/2 Slab 1” Rock Wool - 48 - Used to hold your Located inside 1 Gallon pot. Growing Mother plant. Fits in the front of the Used as medium to maintain your mother medium used for starting seeds or clones.
- Page 5 Golden Grow Power Cloner Checklist 1 10-Gallon Reservoir 1 Submersible Pump 1 Sprinkler Manifold with Sprinkler Heads 1 48-Site Cloning Lid 1 12-site Vegetation Lid 60 1” Neoprene Inserts 1 Small Green Closed Grommet 1 Small Green Open Grommet 1 Drain Hose with Valve...
-
Page 6: Assembly, Unpacking, Electrical
BloomBox™ Assembly Do not plug the machine into the wall outlet until the machine is fully assembled and you have read the instructions. The pumps should not be plugged into the top of the machine unless there is water in the tubs. -
Page 7: Golden Grow Power Cloner Assembly
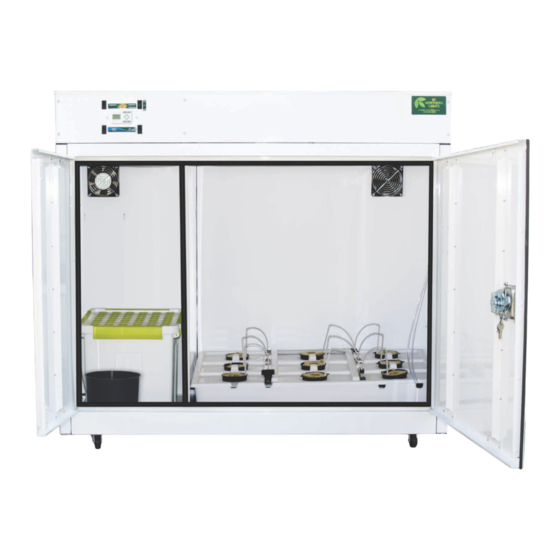
Do not use air stones when using unit as a cloner. • Place the unit in the Veg chamber of the BloomBox. You will need the lid removed to fit it in, then replace the lid when inside the veg growing chamber. (fig 1.4) •... -
Page 8: Golden Grow Power Cloner: Filling & Draining
Golden Grow Power Cloner: Filling & Draining Filling • To fill the unit, connect the drain hose that came with the Rubbermaid mixing tub to the mixing tub. Make sure the valve is closed. Add the appropriate amount of water and nutrients and mix. -
Page 9: Flowering Chamber Assembly
• Insert the pump cord in the plastic white channel located in the front of the chamber (fig 2.8). It opens from one side. • Remove the BloomBox flowering chamber cover (fig 3.0). • Clean glass and install the 400-watt HPS bulb. Turn clockwise and do not over tighten (fig 3.1). -
Page 10: Bulb Installation
Bulb Installation Fig 2.7b Fig 2.8 Fig 3.0 Fig 3.1 HELPFUL HINT Wipe finger prints off of the bulb with a clean dry cloth to ensure the full life of the bulb Fig 3.2 Fig 3.3 Fig 3.4 Fig 3.5a Fig 3.5c Fig 3.5b Fig 3.5d... -
Page 11: Bulb Installation
T-5 Bulb Installation (optional) Installing Your T-5 Bulbs • Mount both T-5 ballasts to the 9 site irrigation lid by pressing them into the metal clips. Make sure you have the male ends of the T-5 facing the right side of the machine. (fig 3.7) •... -
Page 12: Co2 System Assembly
CO2 System Assembly 5psi Gauges Hose • Attach the regulator provided to the CO2 tank (not provided). Ensure the gasket is (round, white plastic piece) placed between the fitting and tank (fig 3.7). Tighten the regulator fitting with the wrench provided (fig 3.8). •... -
Page 13: Machine Operation Overview
Contact your BC Northern Lights Rep for more info on this. The GroSmart is the heart and soul of your BloomBox. Please make sure that all rocker switches are in the OFF position before you plug in your machine. -
Page 14: Setting Time And Date (Grosmart Timer)
7:00 p.m. - 19:00 12:00 p.m. - 00:00 10:00 a.m. - 10:00 3:00 p.m. - 15:00 8:00 p.m. - 20:00 To SET CLOCK from the main display: BLOOMBOX / 00:00 SYSTEM OFF 1. press the OK key From the sub menu: PROGRAM... -
Page 15: Flowering Chamber
Flowering Chamber This chamber allows you to continue to veg or flower nine healthy plants under a high output 400-watt bulb. The light box that houses the bulb has its own independent exhaust system to remove all heat created from the bulb. When you are ready to use this chamber turn the flower rocker switch either to the (up) position for a vegetative cycle using a 400 MH bulb or (down) for a flowering cycle using a 400 HPS bulb (12/12). -
Page 16: Using Co2
The CO2 rocker switch override should only be used when initially setting your CO2 regulator, or when instructed by BC Northern Lights technical support. If the CO2 switch has been left in the override (up) position by accident, it will automatically shut off after 15 minutes as a safety feature so your plants don’t suffocate. -
Page 17: Maintaining Your Machine
Maintaining Your Machine It is extremely important to keep your machine clean and sterile in order to prevent mold, fungus, insects and dis- ease from invading and damaging your crop. We recommend that the following precautions be taken to minimize the chance of problems: •... -
Page 18: Contacts And Warranty Procedure
At BC Northern Lights we offer a 3 year warranty on all components of the BloomBox except bulbs. Please call your BC Northern Lights rep to explain the problem as there might be an easy fix without having to replace a part. If part...


Need help?
Do you have a question about the BloomBox and is the answer not in the manual?
Questions and answers