
Summary of Contents for ARCAIR K4000
- Page 1 K4000 ® K3000 ™ AIR CARBON-ARC MANUAL GOUGING TORCHES Operating Manual Art# A-13068 English Revision: AC Issue Date: June 15, 2016 Manual No.: 89250012...
- Page 2 We know you take pride in your work and we feel privileged to provide you with this high performance product that will help you get the job done. For more than 60 years Arcair has provided quality products you can trust, when your reputation is on the line.
- Page 3 While the information contained in this Manual represents the Manufac- turer's best judgement, the Manufacturer assumes no liability for its use. Arcair K3000™ & K4000 Air Carbon-Arc Manual Gouging Torches ® ®...
-
Page 4: Table Of Contents
Lock Power Connection and Air Hose to the Torch Swivel Cable Assembly ..............4-4 4.03 Connecting to DC or AC Welding Power Supplies ......4-5 SECTION 5: TROUBLESHOOTING ..........5-1 SECTION 6: REPLACEMENT PARTS ........6-1 K3000™ & K4000 Torch Replacement Parts ......6-1 ® STATEMENT OF WARRANTY ........INSIDE BACK COVER... -
Page 5: Section 1: Introduction
In 1948, Myron Stepath introduced the first air carbon-arc torch to the welding indus- try. In 1949, Stepath and two associates founded the Arcair Company. Two operators were no longer needed. The compressed air now passed through the torch and exited beneath the electrode. -
Page 6: Applications
1.04 The "BEST" Just Got Better... Arcair is changing the game when it comes to the power and air connection design on their K-Series torch cable assemblies. Since the invention of the air carbon-arc process in 1949, the torch and cable have always used a molded rubber "boot"... - Page 7 This Page Intentionally Blank...
- Page 8 This Page Intentionally Blank...
-
Page 9: Section 2: Safety And Health
SECTION 2: SAFETY AND HEALTH Safe practices in welding and cutting processes, such as air carbon-arc, are covered in ANSl Z49.1, “Safety in Welding and Cutting”, and ANSl 249.2, “Fire Prevention in Use of Welding and Cutting Processes.” Air carbon-arc operators and their supervisors should adhere to the safe practices discussed in these documents. -
Page 10: Ventilation Hazards
Do not touch electrically live parts. Do not touch an electrode with bare skin and electrical ground at the same time. Always wear dry welding gloves that are in good condition. Aluminized protective clothing can become part of the electrical path. Keep oxygen cylinders, chains, wire ropes, cranes, hoists, and elevators away from any part of the electrical circuit. -
Page 11: Personal Protective Equipment And Clothing
2.04 Personal Protective Equipment and Clothing WARNING NOISE CAN DAMAGE HEARING Noise from the air carbon-arc process can damage your hearing. Operators and sur- rounding personnel must wear adequate protective hearing devices to ensure personal protection against noise when noise levels exceed OSHA standards. Duration Per Day (hours) Sound Level (dBA*) Slow Response 1-1/2... -
Page 12: Shielding Booths
Skin should also be protected from arc rays, heat and molten metal. Always wear protective gloves and clothing that will not allow skin to become exposed. Close all pockets and sew shut all cuffs. Wear leather aprons, sleeves, leggings, etc. for out-of- position gouging/cutting, or for heavy metal-removal operations using large elec- trodes. -
Page 13: Safety And Operating References
Table 2-1 - Recommended Minimum Air Requirements Recommended Compressor Rating ASME Intermittent Continuous Type of Torch Pressure¹ Consumption Receiver psi (kPA) cfm (L/min.) Size hp (kW) hp (kW) gal (lit) Light Duty² 40 (280) 8 (227) 0.5 (0.4) 1.5 (1.1) 60 (227) General Duty²... - Page 14 This Page Intentionally Blank...
-
Page 15: Section 3: How To Use This Manual
SECTION 3: HOW TO USE THIS MANUAL To ensure safe operation, read the entire manual, including the chapters on safety instructions and warnings. Throughout this manual, the words WARNING, CAUTION, and NOTE may appear. Pay particular attention to the information provided under these headings. These special annotations are easily recognized as follows: WARNING A WARNING GIVES INFORMATION REGARDING POSSIBLE PERSONAL... - Page 16 This Page Intentionally Blank...
-
Page 17: Section 4: Installation
SECTION 4: INSTALLATION 4.01 Installing the DC Welding Power Cable and Air Hose to the Power and Air Connector Models Part No. 61-065-006, 61-065-007, 61-082-008 and 61-082-009 Follow these instructions to connect the DC Welding Power Cable and Compressed Air Line directly to the Power and Air Connector on the Torch Swivel Cable Assembly. - Page 18 4. Using a ½”-13 x 1” hex head bolt, position the bolt down so that its threads run through the crimped lug of the DC Welding Power Cable and through the Power and Air Connector on the Swivel Cable Assembly. The head of the bolt should be against the flat side of the crimped lug as shown in Figure 4-4.
- Page 19 8. Lift the assembly away from the bottom half of the boot to securely fasten. Do not allow the crimped lug to move while doing this final tightening step. Figure 4-7 9. Thread the incoming Compressed Air Line with a 3/8” pipe threaded fitting into the Power and Air Connector.
-
Page 20: Installing The Dc Welding Power Cable With Twist Lock Power Connection And Air Hose To The Torch Swivel Cable Assembly
10. Reposition the top half of the boot in place and secure with the four (4) screws that were removed in step 3. Figure 4-10 11. The assembly is now ready to be used in your metal removal application. 4.02 Installing the DC Welding Power Cable with Twist Lock Power Connection and Air Hose to the Torch Swivel Cable Assembly Models Part No. -
Page 21: Connecting To Dc Or Ac Welding Power Supplies
4.03 Connecting to DC or AC Welding Power Supplies Gouging applications normally use three-phase welding power supplies with an open circuit voltage higher than 60 volts, to allow for any voltage drop in the circuit. 1. Connect the Welding Power Cable that is connected to the Torch Swivel Cable to the positive terminal on the power supply (DCEP or AC). - Page 22 TORCH ELECTRODE STICKOUT 7" MAX TORCH HEADS (+) COPPER PEEL BACK 3/4" to 2" AIR 80PSI ALWAYS UNDER THE ELECTRODE TRAVEL Art# A-13070 WORKPIECE (-) Figure 4-12 6. Hold the electrode as shown in Figure 4-12, so that a maximum of 7” (178 mm) extends from the torch.
- Page 23 9. Lightly touch the electrode to the workpiece to establish the arc. Do not draw back the electrode once the arc is ignited. When the correct arc voltage is being maintained, the sound of the arc and the compressed air is loud. When the sound is muffled, the arc voltage is below the recommended operating conditions.
- Page 24 This Page Intentionally Blank...
-
Page 25: Section 5: Troubleshooting
SECTION 5: TROUBLESHOOTING Problem Cause Solution 1. The operator either ne- 1. Turn on air before strik- glected to turn on the ing the arc and air should air jet before striking flow between the elec- the arc or the torch was trode and the workpiece. - Page 26 Problem Cause Solution 1. A shorted electrode 1. Use an electrode-to-work on the workpiece. In angle of 15° to 70°. A manual gouging, this smaller angle increases is a result of excessive the arcing area,reducing travel speed for the the current density; this amperage used and for reduction in arc-current the depth of the groove...
-
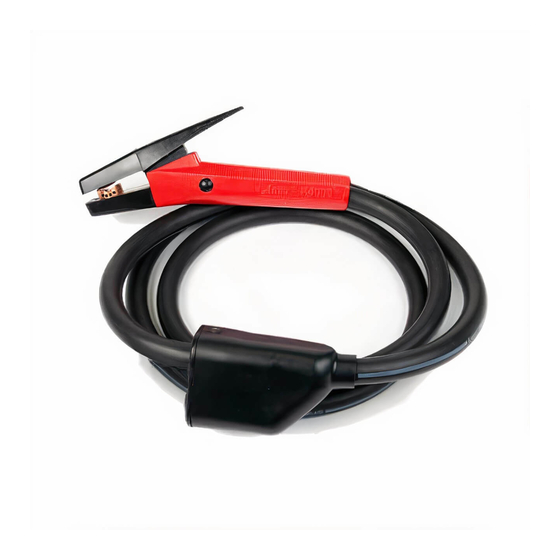
Page 27: Section 6: Replacement Parts
SECTION 6: REPLACEMENT PARTS K3000™ & K4000 TORCH REPLACEMENT PARTS ® K3000 and K4000 Torch K4000 Shown Art# A-13071 TORCH REPLACEMENT PARTS LIST Item Description K3000™ K4000 ® Insulators & Screws 94-433-193 94-433-183 Lever & Screw 94-476-080 94-476-066 Valve Bonnet... - Page 28 K3000™ & K4000 SWIVEL CABLE REPLACEMENT PARTS ® CABLE REPLACEMENT PARTS LIST Item Description K3000™ K4000 ® 7ft. (2.1M) Swivel Cable 70-088-107 70-084-207 10ft. (3M) Swivel Cable 70-088-110 70-084-210 Retainer Screw 94-695-054 O-Ring 94-710-027 94-170-182 * Connector 94-170-178 Spring Washer...
- Page 29 POWER & AIR HOOK-UP KIT HOOK-UP KIT & PARTS LIST Item Description Cat No. Complete Hook-Up Kit 94-463-046 Male Connector 94-170-184 Molded Hard Boot with Screws 94-105-031 4-WPC-R Connector 4WPC-R Pigtail Air Supply Hose 94-396-205...
- Page 30 This Page Intentionally Blank...
-
Page 31: Statement Of Warranty
STATEMENT OF WARRANTY LIMITED WARRANTY: ESAB warrants that its products will be free of defects in workmanship or material. Should any failure to conform to this warranty appear within the time period ap- plicable to the ESAB products as stated below, ESAB shall, upon written notification thereof and substantiation that the product has been stored, installed, operated, and maintained in accordance with ESAB’s specifications, instructions, recommendations and recognized standard industry practice, and not been subject to misuse, repair, neglect, alteration, or accident, correct... - Page 32 ESAB subsidiaries and representative offices North and South America Europe NORWAY SOUTH KOREA AS ESAB ESAB SeAH Corporation AUSTRIA ARGENTINA Larvik Kyungnam ESAB Ges.m.b.H CONARCO Tel: +47 33 12 10 00 Tel: +82 55 269 8170 Vienna-Liesing Fax: +47 33 11 52 03 Buenos Aires Fax: +82 55 289 8864 Tel: +43 1 888 25 11...
Need help?
Do you have a question about the K4000 and is the answer not in the manual?
Questions and answers