Table of Contents
Advertisement
Advertisement
Table of Contents

Related Manuals for GigaBlue hd quad plus


Summary of Contents for GigaBlue hd quad plus
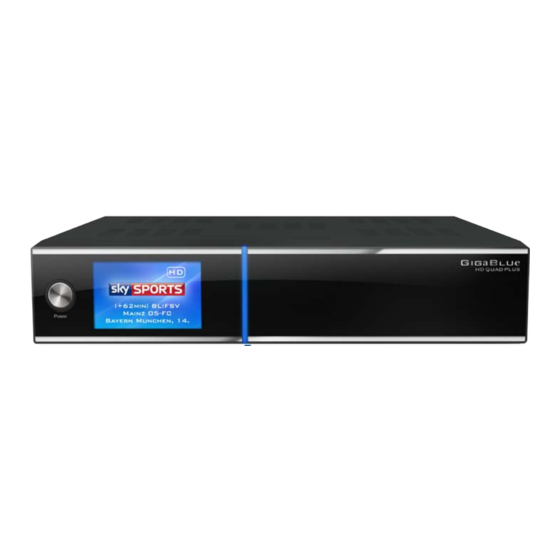
- Page 1 Manual G DIGITAL MULTIMEDIA RECEIVER HD QUAD PLUS www.gigablue.de...
- Page 2 This manual should help you to connect your GigaBlue box properly and to get to know the numerous functions better. The GigaBlue HD Quad Plus is a world first with a fast 2 x 1.3 GHz processor, 1GB of memory, adapters and a color LCD screen; the possibilities of this multimedia box are very extensive. They are reached by fast Gigabyte LAN in your private and external network the highest performance.
-
Page 3: Table Of Contents
Operation of GigaBlue Box _______________ 43 Webbrowser navigate _________________ 81 Sleep-Timer ____________________________ 43 Web interface __________________________ 82 Language selection _____________________ 44 GigaBlue Player for Mobile devices ________ 82 User mode _____________________________ 44 Problem-solving ________________________ 83 User mode __________________________ 45 Technical Specifications _________________ 84... -
Page 4: Key Features
You can view the GigaBlue Box numerous HD and SD programs, are sent via satellite optional DVB-C / T. In this manual the installation of GigaBlue box and the procedure for implementation will explains various functions. In addition, special functions are explained in details which are available only at the box GigaBlue. -
Page 5: Safety Instructions
Use aerosol cleaners. Clean the appliance only with a damp cloth • Ventilation the ventilation slots on the top of GigaBlue Box may not be covered, so that proper ventilation of GigaBlue box is ensured. Direct Sunlight and installation in addition to a heating add to the GigaBlue box damage. -
Page 6: Notes: Disposal
Perform these exclusively that for you in your state, appropriate system. The GigaBlue Box may at end of life not be disposed of with normal household waste but must be brought to a collection point for the recycling of electrical and electronic equipment. -
Page 7: Delivery Content
General Information Delivery content Please verify that you have received the GigaBlue box complete with all accessories. • GigaBlue HD Quad Plus • Power supply and cord • GigaBlue Remote Control • User Manual • Batteries GigaBlue HD Quad Plus... -
Page 8: Remote Controls Functions
General Information Remote Controls Functions... -
Page 9: Remote Controls Functions
OK Button Program ▲+ ▼- Recorded Broadcast Teletext Blue Panel call or 2 x press PiP Timeshift start Numeric keypad ► Go back to the previous channel0 Caution: if GigaBlue remote GigaBlue Box not operated, please press the button GIGA... -
Page 10: Front View
General Information Front View Power on/off Turns GigaBlue box to standby Menu Opens the menu Exit Exits the menu / channel list ◄ A channel back / Navigate menu ► A channel forward / Navigate menu ▲ Channel list Open / Navigating the Menu ▼... -
Page 11: Rearpannel / Quad Plus
General Information Rearpannel / Quad Plus Tuner D and C Power Plug & Play Tuner DVB-C/T On/Off and DVBS-2 (Tuner optional) Power Supply Connector USB 2.0 for connection of external USB devices, for Twin Tuner B example, HDD, DVB-S/S2 integrity DVD, WiFi, etc. - Page 12 Installation Antenna and TV Equipment This chapter describes the installation of GigaBlue Box is explained. For information about installing external devices as, see below. As the satellite dish, LNB, refer to the corresponding manuals of the manufacturer. When installing a new appliance, the corresponding installation chapter in the manual must be observed.
-
Page 13: Installation
Installation TV Devices RCA / Component If the GigaBlue box on Audio / Video (also called RCA) want to connect or the Component connection follow the graph shown below. The individual connectors are color-coded on both TV and the GigaBlue box. Note that if you use Component for connecting an additional opportunity for the audio connection must be used. -
Page 14: Dolby Digital Amplifier
Installation Dolby Digital Amplifier The GigaBlue box has an optical output (AC3). This allows you to connect the Dolby Digital amplifier via an optical (fiber) cable. For Dolby Digital AC3 amplifier... -
Page 15: The First Start
The first start Start wizard 1 Using the Startup Wizard, you can set up your GigaBlue box in a few minutes . When you first start the GigaBlue you get the following Fig.1. Set the video output on. You have the ability to determine the outcome of the arrow keys ▲... -
Page 16: Start Wizard 2
Der first Start Start wizard 2 The start wizard is now started in your selected Fig.1, language. Press OK to move to the next point. You will be asked if you want to make the basic settings (recommended) or want to quit the start wizard. -
Page 17: Start Wizard 3
The first Start Start wizard 3 Then, if you have not completed the Startup Wizard, takes place the tuner configuration. Use the arrow keys ◄► you can adjust the tuner to your satellite antenna or DiSEqC. Fig.1 In the mode setting you has several choices. -
Page 18: Start Wizard 4
The first Start Start wizard 4 If you have opted for the standard channel list, press OK. Fig.1. Would you rather start an automatic channel search, select with the arrow keys ▼ ▲ No and you move to the next menu Fig.2. You can also install channel list later Plugin Server Fig. -
Page 19: Start Wizard 5
The first Start Start wizard 5 Confirm your selection with OK Fig.1. The channel search will start. This process takes some time to Fig.2. After the scan with OK Fig. 1 Fig. 2 To activate youth protection YES with arrow keys ▼ ▲ Confirm your selection with If no NO with the arrow keys ▼... -
Page 20: Start Wizard 6
If you have chosen a wireless LAN, press the OK button WLAN configuration see page 52 and 53 Now your GigaBlue box for the first start is configured Fig.3. Click OK to close the installation. Fig. 2... -
Page 21: Channel List Install
Channel list install If you have decided not scan during Installation. You can install the channel list of the GigaBlue Server. Channel list has been programmed by our team for you 2x Green button with arrow buttons ▼ ▲ Settings and confirm your choice with OK Fig.1. -
Page 22: Operation Of Gigablue Box
The GigaBlue box, you can turn on or off with the power button. Please press briefly the power button to the GigaBlue box into standby mode to set, either on the remote control or at the Box GigaBlue directly. The display then the time is displayed. -
Page 23: Program Selection
Operation of GigaBlue Box Program selection Press the arrow buttons ▲ ▼ on the remote control GigaBlue Box it opens the channel list. Now navigate the arrow keys ▲ ▼ to the desired channel and press OK, it will be switched to that channel. -
Page 24: Volume / Audio Selection
Operation of GigaBlue Box Volume / Audio selection Use the arrow keys ▲ ▼ to adjust the volume with VOL ▲ ▼ to increase and to decrease the volume. When you press the MUTE button, the sound is muted and an icon appears on the TV. Pressing... -
Page 25: Sub Channels
Operation of GigaBlue Box Sub channels If you are on a channel which broadcasts sub channels, such as Sky, you may select this with the GREEN button. When pressing the OPT (option) in TV Mode, you see a list of Sub channels. -
Page 26: Teletext
Operation of GigaBlue Box Teletext With the TXT button to enter the teletext display this you can leave with EXIT button. Select the corresponding your page. The assignment of the below Keys can be different, as the Teletext is transmitted. The display of the function is displayed on the bottom of the screen. -
Page 27: Program Information's
Program Information`s Program Information’s When a program changes you receive the following information in the lower part. This is on the OK button repeatedly accessed. PAY TV HBBTV DOLBY TUNER WEATHER Tele Clock Subtitle 16/19 Recording TEXT time Program Program Number Name Signallevel... -
Page 28: Program Information's
Program Information`s Program Information’s By pressing the INFO button can From the running TV program Information about the film / consignment learn. By pressing the arrow keys ◄► you get information about the next shipment. By pressing the YELLOW, BLUE key to access the simple EPG of the transmitter or Multi EPG. -
Page 29: Epg
EPG of GigaBlue Box Here you get an overview of the subsequent broadcasts. You can add entries up to a week to see (transmitter dependent). Furthermore, you can use the timer function here. Press the GREEN button Fig.1 You can set the timer and the Timer Menu. -
Page 30: Create Bouquet
Operation of GigaBlue Box Create Bouquet What is a bouquet and what can that mean? When you open your browser, you will definitely have websites that are visited by you, they have you determined your favorites stored under a folder to start it later quickly. The principle at the bouquet is exactly the same. -
Page 31: Add Channels
Operation of GigaBlue Box Add channels You can add from the All-, Satellite- and Providers view list the channels to your favorites list. By using the GREEN YELLOW button, go to the respective menu. We explain the add reference to the previously created test bouquet and by all views of multiple channels. -
Page 32: Add Channels
Operation of GigaBlue Box Add channels Use the arrow keys ▼ ▲ to select channels and press the OK button, the channels are highlighted Fig.1. Proceed in this way until all the channels to add to your bouquet, and press the Menu button. -
Page 33: Delete Channels From The Favorites List
Operation Network Settings Delete channels from the favorites list Use the arrow keys ▼ ▲ to enter the BLUE channel list. Press the button to display in your favorites list, and then select the bouquet of where the channel is to be deleted. Select the desired channel for deletion Fig.1. -
Page 34: Move Channels From The Favorites List
Operation of GigaBlue Box Move channels from the favorites list Use the arrow keys ▼ ▲ to enter the BLUE channel list. Press the button to display in your favorites list, and then select the bouquet of where the channel is you want to move. -
Page 35: Insert Marker
Operation of GigaBlue Box Insert Marker Use the arrow keys ▼ ▲ to enter the channel BLUE list. Press the button to display in your favorites list, then select the bouquet from where you want to insert a marker. Navigate to the location where the marker is to be placed. -
Page 36: Parental Control
Operation of GigaBlue Box Parental control Setting the protection of minors This describes how the protection of minors will be activated and set at the GigaBlue box. Go into the Settings menu and select parental protection from Fig.1. You can now choose positive or negative list. -
Page 37: Lock Channels
Operation of GigaBlue Box Parental Protection Lock Channels Go into the Setup menu and select parental protection / protect services and change to YES use the arrow keys ◄► Fig.1. You can now choose positive or negative list. The positive list means that any non- parental control list added channels will be blocked. -
Page 38: Lock Channels
Bedienung der GigaBlue Box Parental Protection Lock Channels Now go to Channel List Press Menu button and go to add to parental protection to lock channels and press OK. Fig.1 Press the OK button and the station will be provided with a lock Fig.1. If you want to lock multiple transmitters proceed as described. -
Page 39: Lock Bouquets
Bedienung der GigaBlue Box Parental Protection Lock Bouquets Now go to Channel List / Bouquets (Blue button) Press Menu button and go to add bouquet to parental protection to lock bouquets and press OK. Fig.1 Abb. 1 Fig. 1 Protect settings Youth Protection... -
Page 40: Hdd Operation
Operation of GigaBlue Box HDD Operation You have the option at the box GigaBlue an external hard drive to the USB port or to connect to the internal e-SATA. It is automatically detected. You can record programs, take pictures, music and the media player (must be installed optionally) play. -
Page 41: Commissioning Of The Hdd
Operation of GigaBlue Box HDD Operation Commissioning of the HDD You can adjust the behavior of the HDD in standby mode. Abb1. The following settings are available: No standby 10,20,30 minutes 1,2,3,4 hours Select your setting and this with the GREEN Button from Abb1. -
Page 42: Commissioning Of The Hdd
Operation of GigaBlue Box HDD Operation Commissioning of the HDD If you ever have the feeling that your hard drive me something should not be in order, so they can use the File system check test Fig.1. Confirm with OK and start the program with the button Fig.2. -
Page 43: Operation Of Gigablue Box
Operation of GigaBlue Box Sleep-Timer Press the Power button on the remote for 3 seconds Abb1 and click OK. Here you have the following options by pressing the keys mentioned Fig.2: button Enable / Disable GREEN button switch of / Standby... -
Page 44: Language Selection
Operation Language selection Language selection Go to the menu Setup / System / User interface / language There will be different languages to choose from shown Fig.1. Abb. 1 User mode Go to the menu Setup / System / Basic settings. Here you can use the modes Easy Advenced... -
Page 45: User Mode
If this option is set to Yes, automatically at the end of the bouquet changed to the next bouquet. Alternative radio mode: If this option is set to Yes, the GigaBlue Box behaves just as in TV mode. Action on long press on Power: When long press the power button the following options are given: Show shutdown or immediate shutdown. -
Page 46: Time Zone
Operation Time zone Time zone To set the time zone change to the menu Setup / System / Basic settings / time zone with the arrow keys ◄► to adjust the time zone with the GREEN button to accept or discard the button Fig.1. -
Page 47: Audio Settings
Operation Audio/Video Settings Audio settings Here you can make settings on the audio and video settings. To make settings on the Audio / Video switch to the menu, Setup / Audio / Basic Settings Video output Video output: This determines where the video signal to be output. The options are: HDMI YPbPr Use the arrow keys to select ◄►die desired output. -
Page 48: Aspect Ratios
Operating Audio / Video Settings Aspect ratios Modus 16:9 4:3 View content as: Pillarbox: Here the program will be on a 16: 9 TV display device, however, arise the left and right black bars over its full height. Just Scale: The show will be on a 16: 9 TV equipment in the whole amount but shown slightly distorted width. -
Page 49: Network Settings
Operation Network Settings Network settings Go to the menu Setup / System / Network / Basic Settings to configure your network to Fig.1. If a DHCP server on your network, you can change the settings to take Fig.2. Use the arrow keys ◄► to a Static address assigned Fig.3. -
Page 50: Network Settings
Operation Network Settings Network Settings The following options are available: Enable Network Adapter: You can disable or enable the adapter for a wired network. Address automatically (DHCP): Determine whether the network address is automatically obtained from a DHCP server. IP Address manually assigned. Do you want to assign the IP Address manually to set the DHCP server on No. -
Page 51: Network Settings
RED. To exit, press the button. Restart Network: With this option, you can restart the network configuration of your GigaBlue box. Network Assistant: The network wizard will assist you in the settings of your network. -
Page 52: Wlan Setting
Operation Network Settings WLAN setting Go to Menu / Setup / System / Network Abb1. Now go to wireless connection and click OK to confirm Fig.2 Fig.1 Now activate the Wi-Fi adapter, Fig.3, Use the arrow keys ◄► confirm with OK. Now, the wireless network is enabled. -
Page 53: Wlan Setting
Virtual Keyboard Fig.6 After entering confirm with the GREEN Button Fig.5 Now you press the OK button to save Wlan This may take a few seconds. and start GigaBlue new. Now the wireless network should be available to Fig.6... -
Page 54: Factory Reset
Factory reset: Menu / Setup / System / factory reset Here is the GigaBlue Box to their original initial values. Here lose all the settings you have made. Click OK to confirm that GigaBlue Box leads after restart Channel search... -
Page 55: Channel Automatic Scan
Operation of GigaBlue Box Channel automatic scan Menu (Setup / Tuner / Automatic scan) Important !! Tuner must be configured, see page 17. Fig.1. The following options are available: Fig.2 This can be reached with the arrow keys ◄►. Network scan: Yes / No... -
Page 56: Channel Search Dvb-C
Operation of GigaBlue Box Channel search DVB-C If you have a GigaBlue C / T Tuner have installed, please following Make settings. First, select the tuner C / T in Fig.1. The following options are available: You can also DVB-C or DVB-T tuner with the arrow keys ◄►... -
Page 57: Channel Search Dvb-T/T2
Operation of GigaBlue Box Channel search DVB-T/T2 If you have a GigaBlue C / T Tuner have installed Please following Make settings. First, select the tuner C / T in Fig.1. The following options are available: You can also DVB-C or DVB-T tuner with the arrow keys ◄►... -
Page 58: Rotor With Usals
Enter here the geographic data of your location longitude and latitude, this, see, for example, http://www.heavens-above.com. The GigaBlue Box does the rest for you when you select a satellite or change the channel. The system developed by the company staff calculation module USALS, turns your satellite system with an accuracy of 0.1 degrees on... -
Page 59: Manual Scan
Operation of GigaBlue Box Manual Scan Menu (Setup/Tuner/Manual scan Go with the arrow keys ▲ ▼ ◄► and Manual Scan. Use the arrow keys ▲ ▼ ◄►, select and enter information via satellite, frequency, symbol rate, etc. Please start the search with OK. -
Page 60: Unicable Configuration
Unicable GigaBlue Box Unicable Configuration Unicable LNB Menu -> Setup -> Tuner -> Basic setting -> Choose Tuner Configuration mode -> Advanced Satellit -> Select a satellite (for example,Astra 19.2°E) LNB -> LNB1 Priority -> Auto LOF -> Unicable Unicable Configuration -> Unicable LNB Manufacturer ->... -
Page 61: Unicable Configuration
Unicable GigaBlue Box Unicable Configuration Unicable house wiring with Unicable multi-switch on two satellites (Astra / Hotbird) Menu -> Setup -> Tuner -> Basic setting -> Choose Tuner Configuration mode -> Advanced Satellit -> Select a satellite (for example,Astra 19.2°E) LNB ->... -
Page 62: Unicable Gigablue Box
Unicable GigaBlue Box INVERTO Unicable-Twin and Unicable-Quad LNB + ETRONIX Unicable-Quad LNB (+ other identical): ID1 / IF-Channel 1 (SCR0): 1680 MHz ID2 / IF-Channel 2 (SCR1): 1420 MHz ID3 / IF-Channel 3 (SCR2): 2040 MHz (only Quad´s) ID4 / IF-Channel 4 (SCR3): 1210 MHz (only Quad´s) -
Page 63: Unicable Gigablue Box
Unicable GigaBlue Box FTE / ANKARO Unicable-Unicablesysteme: ID1 (SCR0): 1400 MHz ID2 (SCR1): 1632 MHz ID3 (SCR2): 1284 MHz ID4 (SCR3): 1516 MHz ID5 (SCR4): 1864 MHz ID6 (SCR5): 2096 MHz ID7 (SCR6): 1748 MHz ID8 (SCR7): 1980 MHz SPAUN Unicable-Unicablesysteme (e.g. SUS 5581/33 NF) (Entropic-Unicable-Chip):... -
Page 64: Sat Finder
Satfinder GigaBlue Box SAT Finder By Satfinder you can easily adjust your antenna. Menu (Setup / Tuner / satellite finder with OK. Abb1 Fig.1 You can change the arrow keys to satellites and transponders. Fig.2 Fig.2... -
Page 65: Immediately Recording
Operation of GigaBlue Box Immediately Recording Prerequisite here is an internal e-Sata HDD or external HDD to the USB port is connected and set up, see page 40 An instant recording is started by pressing Record button, it opens to see the menu as shown in Fig.1. -
Page 66: Epg Recording
Operation of GigaBlue Box Immediately Recording To determine which transmitter is available to open the channel list with the arrow keys ▲ ▼ here is displayed which channel can be recorded or viewed Fig.1. Fig.1 EPG Recording Please press INFO button long. -
Page 67: Timer
Operation of GigaBlue Box Timer Menu / Timer Here you have several options Auto Timers Record Sleep Timer Open the main Menu, use the arrow buttons ▲ ▼ in Timer (timer) and press the OK button Fig.1 Fig.1 Autotimer Fig.2... -
Page 68: Front Panel
Operation of GigaBlue Box Front panel Basic Settings Open the main Menu, use the arrow keys ▲ ▼ to Setup / System / Front Panel / Basic Settings and press the OK button Fig.1. You can adjust LCD brightness, mini TV in the LCD and activate PiP activate the LCD. -
Page 69: Lcd Clock
▼ <> the OK button to confirm the save. Fig.1 Fig.1 Information Open the main menu, use the arrow keys ▲ ▼ to / Information and press the OK button. You have information About (GigaBlue SW and HW) Network Service... - Page 70 Operation of GigaBlue Box Information About About. There will be information on the firmware, HDD and Tuner is displayed Select channel. There you information of the current channel will be displayed. Network Select Network. There will be information on the Network,...
-
Page 71: Software Update Gigablue Box
Backup system Settings To back up settings, you need USB flash drive or USB HDD if you have a USB flash drive or USB HDD connected to GigaBlue. Go to the Menu Setup /System / Software Management / Backup system Settings and press the OK button. -
Page 72: Software Update Via Internet
Software Update Software Update via Internet Go to in Menu / Setup Software update and press the OK button. Fig. 1 Fig.1 Now go to Software update and press OK button. Fig. 2 Fig.2... -
Page 73: Software Update Via Internet
Software Update GigaBlue Box Software Update via Internet It is now looking for the latest software. Fig. 3 Fig.3 After successful search, you press the OK button. The latest software is now installed on your GigaBlue box. Fig.4 Fig.4... -
Page 74: Software Update Via Internet
Software Update GigaBlue Software Update via Internet After completion of the update, you will be asked whether the GigaBlue box to restart. Confirm with the OK button. Fig.5. Fig.5 If you look like in Fig.6 message shown currently no update is on the server. -
Page 75: Install Firmware
Update GigaBlue Box Install Firmware Perform firmware update at the GigaBlue box, please go to the site http://gigablue-support.com. There is described in each step. As an update is performed, this forum is always up to date. To make a software update via the Internet, follow the steps described on pages 68 and 69. -
Page 76: Pip Picture In Picture
PiP GigaBlue Box PiP Picture in Picture You can enable PiP when pressing 2x BLUE button . PiP Picture in Picture If you press 1x BLUE button. Fig.1 The following options are available Button: Put focus on the main screen... -
Page 77: Extensions
Update GigaBlue Box Extensions Open the main menu, use the arrow keys ▲ ▼ to extensions and confirm with the OK button or 1x GREEN Button Installing Extensions Please go to Menu / Plugin and press the GREEN Button. Fig.1. -
Page 78: User Interface / Basic Settings
OK button. This will open as shown in the displayed menu. By pressing the blue button (Add) opens. There you have the option of either a function of GigaBlue box or a plugin inflict added. -
Page 79: User Interface / Skin
Operation of GigaBlue Box User Interface / Skin Skin Go to the menu and use the arrow keys ▲ ▼ ◄► Setup / System / User Interface / Skin and confirm with OK Use the arrow keys ▲ ▼ ◄► to... -
Page 80: Webbrowser Gigablue Box
2 Start the download with the OK button and confirm the next window with Yes. Fig.3. The download will start. Please wait until installation is finished. After installing please GigaBlue Box start new. Fig.1 You can find the browser Under the Plugin Browser Opera Webbrowser Fig.3. -
Page 81: Webbrowser Navigate
Webbrowser GigaBlue Box Webbrowser navigate Please connect via the USB port, a cordless keyboard and mouse or GB RCU with the keyboard. You can use the Web browser to the GigaBlue Remote Control. Please press Menu button Fig.2 Fig.1 Fig.2... -
Page 82: Web Interface
You can also Gigablue Player app for mobile devices free download and install, for android, iOS from Google Player and from ITunes Store You can operate your GigaBlue box with the app, as well as TV shows, schedule recordings, check the box and much more... -
Page 83: Problem-Solving
The display on the front panel does not light up. is connected, and connected to the Socket. Check the antenna cable i fit is GigaBlue Box receives no No Signal. properly connected Signal. Check antenna configuration Go to the Tuner Menu and check Wrong Tuner configuration. -
Page 84: Technical Specifications
Technical Specifications Technical Specifications General Information: • Operating System Linux • Processor 1,3 GHz Mipsel Dual Core • Kernel 3.x.x.x • Ram: DDR3 1024 MB • Flash: 512 MB • MPEG-2 / MPEG-4 Part 10 / H.264 • 2 x DVB-S/S2 integrated and 2 x Tuner DVB-C/T (optional) •... -
Page 85: Technical Specifications
Technical Specifications Technical Specifications Supplementary Infos: Output Digital: Output level 0,5 V an 75 Ohm Abtastfrequenz 32 kHz, 44.1 kHz, 48 kHz SPDIF Output optisch Output Video: Output level FBAS 1 V +/- 0.3 dB an 75 Ohm Video-Parameter: Input level FBAS 1 V +/- 0.3 dB an 75 Ohm Teletext filtering corresponding ETS 300 472 Standard TV-Scart: Output: FBAS, RGB selectable via OSD... -
Page 86: Technical Specification
• Expandable based functions via plugins • Using the web interface be passed on streams of which is connected via network with the GigaBlue Box TV / radio stations to any PC • Web Browser • UFScontrol - Plugin for iPhone and Android smartphones •... -
Page 87: Universal Remote Control
Universal Remote Control HD QUAD PLUS Universal RCU User Manual 1) Mode Selection ① STB Mode: Press to [GIGA] button (Basic Mode) ② Mode Selection : Press to device mode [TV]/ [AUX]/[DVD] button 2) Setup by manual search ① Switch on theTV set. -
Page 88: Installing The Hdd
Installing the HDD Installing the HDD in the GigaBlue Quad Plus For the installation you need a Commercially 2.5 "HDD. • Do not Open the first cautious • Cover the GigaBlue Quad. • Build now, the designated • from the context. Fig. 1 •... -
Page 89: Notes
Your own Notes Notes:... - Page 90 WARRANTY CARD In case of warranty, please contact the specified customer service. Should a problem with your GigaBlue HD Quad Plus occur. Please download under http://www.gigablue.de the service request form down and fill it out completely. Please send the service request form and the original purchase receipt with the defective device.
- Page 92 www.gigablue.de...
Need help?
Do you have a question about the hd quad plus and is the answer not in the manual?
Questions and answers