Table of Contents
Advertisement
Advertisement
Table of Contents

Summary of Contents for Applied Biosystems SimpliAmp Thermal Cycler
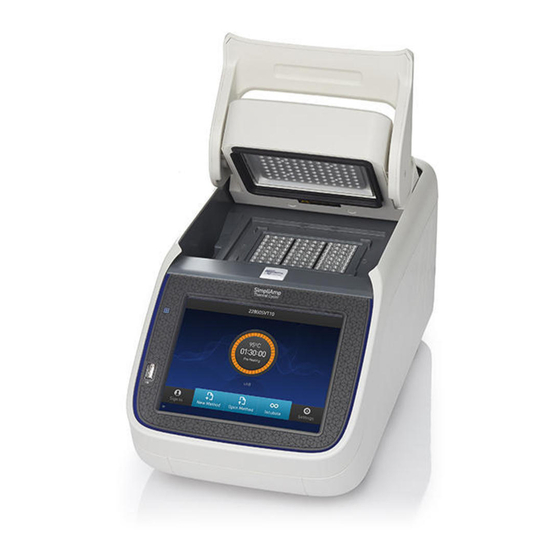
- Page 1 ™ SimpliAmp Thermal Cycler USER GUIDE Installation, Use, and Maintenance for use with: ™ ™ Invitrogen and Applied Biosystems PCR reagents Catalog Number A24811 Publication Number MAN0009889 Revision C.0 For Research Use Only. Not for use in diagnostic procedures.
- Page 2 The information in this guide is subject to change without notice. DISCLAIMER TO THE EXTENT ALLOWED BY LAW, LIFE TECHNOLOGIES AND/OR ITS AFFILIATE(S) WILL NOT BE LIABLE FOR SPECIAL, INCIDENTAL, INDIRECT, PUNITIVE, MULTIPLE, OR CONSEQUENTIAL DAMAGES IN CONNECTION WITH OR ARISING FROM THIS DOCUMENT, INCLUDING YOUR USE OF IT. Revision history: Pub.
-
Page 3: Table Of Contents
Contents ■ CHAPTER 1 Product information ........6 Instrument overview . - Page 4 Contents ■ APPENDIX A Install and connect to a network ..... . . 38 Package contents ............. . 38 Materials .
- Page 5 Contents ■ APPENDIX E Predefined run methods ....... . 67 ■...
-
Page 6: Chapter 1 Product Information
Product information The SimpliAmp Thermal Cycler is an end-point thermal cycler, specifically designed ™ for the amplification of nucleic acids using the Polymerase Chain Reaction (PCR) process. The user interface includes a touchscreen with a graphical display that shows the time, status, and temperature for each run. A touchscreen keypad allows you to enter information into fields on the display screen. -
Page 7: Chapter 2 Start, Sign On, And Configure The Instrument
Start, sign on, and configure the instrument Touchscreen menu overview On powering on the instrument, you will first see the following Splash screen. Figure 2 SimpliAmp Thermal Cycler Splash screen ™ After the Splash screen, the Home screen appears. Figure 3 Home screen SimpliAmp Thermal Cycler User Guide ™... - Page 8 Chapter 2 Start, sign on, and configure the instrument Touchscreen menu overview The Home screen includes the following features: 1. Status dial: The Status dial appearing on the Home screen displays the current temperature of the block, the time elapsed for a run, and the run status while the instrument is in use.
- Page 9 Chapter 2 Start, sign on, and configure the instrument Touchscreen menu overview • To sign-in to an existing account: a. Enter your user name and password. Note: To sign-in to an existing account as an administrator, enter your user name as "Administrator" and password as "password". b.
-
Page 10: Use The Touchscreen
Chapter 2 Start, sign on, and configure the instrument Use the Touchscreen Use the Touchscreen You interact with the instrument using a touchscreen. Table 2 describes the several ™ buttons common to many of the screens in the SimpliAmp Thermal Cycler. Table 2 Buttons in the touchscreen Button Function... -
Page 11: Enter Text
Chapter 2 Start, sign on, and configure the instrument Use the Touchscreen Enter text When you touch a field that requires the input of text, the text editor, as seen in the following figure, opens. Table 3 displays the buttons to touch to enter different information types. -
Page 12: Enter Numerals
Chapter 2 Start, sign on, and configure the instrument Use the Touchscreen Enter numerals When you touch a field that requires a numerical input, the numeric editor, as seen in the following figure, opens. Table 4 displays the buttons to touch to perform different functions while entering numbers. -
Page 13: Chapter 3 Create And Run Experiments On The Instrument
Create and run experiments on the instrument Workflow Start the instrument Create a new run method Edit a run method Load the plate in the instrument Perform a run Perform a run on multiple instruments (Optional) Monitor the run View and export the run report Unload the plate from the instrument SimpliAmp Thermal Cycler User Guide... -
Page 14: Create A New Run Method
Chapter 3 Create and run experiments on the instrument Create a new run method (Optional) Manage methods and folders Create a new run method 1. In the Home screen, touch New Method. Figure 4 Touchscreen Home The Setup Run screen opens up. SimpliAmp Thermal Cycler User Guide ™... - Page 15 Chapter 3 Create and run experiments on the instrument Create a new run method 2. In the Setup Run screen, touch Open Template, Open Method, or Incubate. Figure 5 Setup Run screen a. Touch Open Template to create a new method using an existing template. Select from the categories listed in the Select Method Template screen.
-
Page 16: Edit A Run Method
Chapter 3 Create and run experiments on the instrument Edit a run method 3. Irrespective of the source for creating a new run method, once you select one of the methods, you will come to the Method Edit screen. Figure 8 Preview of Run Method See “Edit a run method“... - Page 17 AutoDelta, Ramp Rates, ™ and Simulation Mode parameters. Figure 11 Advanced Options screen • Touch Simulation Mode to set the simulation mode. The simulation modes include the following: – No Simulation – Applied Biosystems 2720 ™ – Bio-Rad T100 ™ ™...
- Page 18 Chapter 3 Create and run experiments on the instrument Edit a run method – TaKaRa Dice PCR Thermal Cycler ® – BIOER XP Cycler ™ Note: Simulation modes make SimpliAmp Thermal Cycler perform like ™ another instrument. This is done by simulating the ramp rate of another instrument.
- Page 19 Chapter 3 Create and run experiments on the instrument Edit a run method a. Touch the icon to choose the steps you want to apply VeriFlex ™ Figure 14 Advanced Options — VeriFlex ™ b. In the Edit VeriFlex screen, adjust the temperature range across the ™...
- Page 20 Chapter 3 Create and run experiments on the instrument Edit a run method c. Touch Done to return to the Edit Method screen. d. Use the button in the top right corner of the screen to return to the Advanced Options screen. •...
- Page 21 Chapter 3 Create and run experiments on the instrument Edit a run method 4. Touch Save As to save the edited run method. Figure 18 SimpliAmp Thermal Cycler Run Method preview screen ™ a. In the Save As screen, enter a name of the edited run method. Note: Names can be up to 100 characters.
-
Page 22: Load Samples Into The Instrument
Chapter 3 Create and run experiments on the instrument Load samples into the instrument Load samples into the instrument Note: Refer to How to Use MicroAmp Reaction Plates, Tube Strips, and Tubes (Pub. no. ™ 100033471) for instructions on filling, sealing, and loading MicroAmp reaction ™... -
Page 23: Perform A Run On Multiple Instruments
Chapter 3 Create and run experiments on the instrument Perform a run 3. Touch Next. The Run Parameters screen is displayed: Figure 20 Run Parameters screen 4. Touch the field under Run ID, then enter the applicable information in the Enter the Run ID screen. - Page 24 Chapter 3 Create and run experiments on the instrument Perform a run 4. In the Start Run screen, touch Scan Devices instead of the Start Run button. Note: The Scan Devices button appears in the Start Run screen when you enable the multi-instrument run.
-
Page 25: Monitor A Run
Chapter 3 Create and run experiments on the instrument Monitor a run Monitor a run Monitor via the After a run has started, the Home screen appears again with the dials updated with current information on the run. The dials display the following run information: Home screen •... -
Page 26: Monitor Via The Run Monitor Screen
Chapter 3 Create and run experiments on the instrument Monitor a run Monitor via the You can follow the status of a run using the Run Monitoring screen as shown in the following figure: run monitor screen ™ Figure 22 SimpliAmp Thermal Cycler Run Monitoring screen The screen shows the run method profile and additional information that does not appear in the Dial on the Home screen. - Page 27 Chapter 3 Create and run experiments on the instrument Monitor a run Element Description Provides more details about the run. Touching Details brings up the Progress Details screen with the following run information: • Run ID • Run User • Simulation Mode •...
-
Page 28: If The Power Fails
Chapter 3 Create and run experiments on the instrument View and export the run report If the power fails If a power failure occurs during a run, the instrument attempts to continue the run when the power returns. The run begins at the first step of the stage where the power failed. -
Page 29: Manage Methods And Folders
Chapter 3 Create and run experiments on the instrument Manage methods and folders Manage methods and folders Use this feature to copy a run method from one folder to another, rename a particular method name, or delete a method. Note: If your instrument has been connected to the Thermo Fisher Connect, you will automatically see Cloud as one of your folder options. - Page 30 Chapter 3 Create and run experiments on the instrument Manage methods and folders 3. Touch New Folder, and in the New Folder dialog box, enter a name for the new folder you want to create. Touch Enter. 4. In the Manage Folders screen, a.
- Page 31 Chapter 3 Create and run experiments on the instrument Manage methods and folders b. In the Copy Method screen, select the folder you would like to copy the method to, or touch New Folder. Touch Paste Method. c. Touch Rename to rename a particular method/ folder name. d.
-
Page 32: Chapter 4 Maintain The Instrument
Maintain the instrument As-needed maintenance Clean the Preparation instrument Before cleaning the instrument: 1. Power off the instrument by disconnecting the power. 2. Allow the instrument to cool until the heated cover and sample block(s) reach room temperature. Clean the touchscreen Clean the touchscreen with any commercially available LCD cleaning product. - Page 33 Chapter 4 Maintain the instrument As-needed maintenance Decontaminate the sample wells If the sample wells become contaminated with any biological agents, clean the wells thoroughly with a cotton swab soaked in 1:10 v/v dilution of 5.25% sodium hypochlorite (Clorox bleach). ®...
-
Page 34: Replace The Fuses
Chapter 4 Maintain the instrument As-needed maintenance Clean the heated platen once a month or as needed. Decontaminate the heated cover If the heated cover become contaminated with amplified DNA, raise the heated cover to the cleaning position and wipe the cover with a cloth or cotton swab soaked in 1:10 ®... - Page 35 Chapter 4 Maintain the instrument As-needed maintenance Upgrade the firmware 1. Open the About Instrument screen to determine the version number of the existing firmware. To open the About Instrument screen, in the Home screen, touch Settings. In the Settings screen, touch About Instrument. 2.
-
Page 36: Self Verification Test
Chapter 4 Maintain the instrument As-needed maintenance 4. In the Maintenance & Services screen, touch Software Update. The Software Update screen opens: Figure 25 Software Update screen 5. Touch the name of the file with the new firmware, then touch Update. 6. -
Page 37: Order Kits And Replacement Parts
Chapter 4 Maintain the instrument Order kits and replacement parts Procedure To carry out the Self Verification test: 1. In the Home screen, touch Settings. 2. In the Settings screen, touch Maintenance & Services. 3. In the Maintenance & Settings screen, touch Self Verification Test. 4. -
Page 38: Appendix A Install And Connect To A Network
Install and connect to a network This chapter includes the procedures for installing the SimpliAmp Thermal Cycler. ™ Package contents ™ Ensure that the SimpliAmp Thermal Cycler package you receive includes one box containing the following: ™ • One SimpliAmp Thermal Cycler instrument •... -
Page 39: Set Up The System
Appendix A Install and connect to a network Set up the system d. Lift and remove the cover from the instrument crate. e. Remove the packing material from the SimpliAmp Thermal Cycler, then ™ inspect the instrument for shipping damage. IMPORTANT! If the SimpliAmp Thermal Cycler is damaged, note the ™... - Page 40 Appendix A Install and connect to a network Set up the system 6. (Optional) Connect the instrument to the network by inserting the ethernet cable into the ethernet port at the back of the SimpliAmp Thermal Cycler. For ™ instructions on setting up the wired connection, see “Set up the wired connection“...
-
Page 41: Set Up The Wired Connection
Appendix A Install and connect to a network Set up the system ™ Set up the wired See “Set up the system“ on page 39 for instructions on connecting the SimpliAmp Thermal Cycler to the network. To set up the wired connection: connection 1. - Page 42 Appendix A Install and connect to a network Set up the system 4. In the Network Connection screen, touch Wired. The Network Configuration screen opens up. Figure 33 SimpliAmp Thermal Cycler Network Configuration screen ™ In the Network Configuration screen, you can choose to connect to the network by obtaining the IP address either automatically (using DHCP) or manually.
-
Page 43: Set Up The Wireless Connection
Appendix A Install and connect to a network Set up the system Set up the See “Set up the system“ on page 39 on connecting the USB-enabled Wi-Fi Card into ™ the SimpliAmp Thermal Cycler. To set up the wireless connection: wireless connection 1. -
Page 44: Use Instrument Without Signing In
Appendix A Install and connect to a network Set up the system • WPA Enterprise • WPA2 Enterprise Note: The above options are available only if you selected Join Other Network in step 3. You cannot change the security type if you selected an existing network. 6. -
Page 45: Sign Out
Appendix A Install and connect to a network Set up the system Sign out In the home screen: 1. Touch My Profile. 2. Touch Sign Out. Set up mobile and cloud connectivity Create an account on Thermo Fisher Connect ™ to SimpliAmp 1. -
Page 46: Link Instrument Profile To Your Thermo Fisher Connect Account
Appendix A Install and connect to a network Set up the system 9. Upon successful authentication, the Administrator is linked to Thermo Fisher Connect. Subsequently, any user can log in and proceed to perform linking the instrument to their Thermo Fisher Connect account. Note: The administrator account must be activated first to connect the instrument to the Cloud. - Page 47 Appendix A Install and connect to a network Set up the system Set up mobile connectivity on a mobile device Download the "Instrument Connect Mobile Application" on your mobile device. 1. For an iPad or an iPhone , download the application from the iTunes music ™...
-
Page 48: Recommended Instrument Settings
Appendix A Install and connect to a network Set up the system Recommended You can configure the following instrument settings by touching Settings on the Home screen: instrument settings Note: The Manage Users button is visible only when you sign in as an administrator. ·... - Page 49 Appendix A Install and connect to a network Set up the system · Date/ Time: Touch Date/ Time to set the date and time for a run. a. Enter the date and time in the Date/Time field using the numerical editor that comes up when you place the cursor in the respective fields.
- Page 50 Appendix A Install and connect to a network Set up the system · Heated Cover: Use the On and Off toggle button in the Heated Cover screen to enable and disable, respectively, editing the heated cover idling temperature. a. To edit the idling temperature, touch On b.
- Page 51 Appendix A Install and connect to a network Set up the system In the absence of a valid network connection, the system will fail to connect to the Remote Server, and the Remote Server Connection screen displays the following message: ™...
- Page 52 Appendix A Install and connect to a network Set up the system · Multi-Instrument Setup: Use this feature to allow multi-instrument runs on visible instruments. In the Multi-Instrument Setup screen, touch: a. The Off and On toggle button to make the instrument on which you are running an experiment invisible or visible, respectively, to other instruments on the network.
- Page 53 Appendix A Install and connect to a network Set up the system · Restore Factory Settings (for Admin only): Touch Restore Factory Settings to remove all the data and customized settings and revert to factory settings. Touch Yes to confirm if you want to restore factory settings or Cancel to exit the screen. At the end of the restoration process, the message, "Your instrument has been restored."...
- Page 54 Appendix A Install and connect to a network Set up the system · Run History: The Run History screen displays the entire list of runs performed ™ using a particular SimpliAmp Thermal Cycler. a. In the Run History screen, touch a particular Run ID to view the details of that run.
- Page 55 Appendix A Install and connect to a network Set up the system · Maintenance & Services: You can perform the following in the Maintenance & Services screen: · Software Update: Touch Software Update to update the System firmware. See “Upgrade the system firmware“ on page 34 for instructions on updating the firmware.
- Page 56 Appendix A Install and connect to a network Set up the system · Manage Users (for Admin only): Touch Manage Users to manage the instrument when it is being used by multiple users. Touch: · Security Mode to choose the security mode of the instrument. You can choose from Open Mode, Restricted Mode 1, and Restricted Mode 2.
- Page 57 Appendix A Install and connect to a network Set up the system · USB Shortcuts: Touch USB Shortcuts to display the shortcuts available when a USB is inserted into an instrument. a. Touch Show Shortcuts to display the shortcuts. Select from View methods, Export run reports, Backup / Restore (only if signed in as an administrator), and Update software.
-
Page 58: Appendix B Parts And Materials
Parts and materials Instrument part numbers Contact your regional sales office to order kits, accessories, consumables, and spare ™ parts for the SimpliAmp Thermal Cycler (Cat. No. A24811). Consumables ™ Table 6 SimpliAmp Thermal Cycler Consumables Consumable Cat. No. Single Tubes ™... - Page 59 Appendix B Parts and materials Consumables Consumable Cat. No. ™ MicroAmp Optical 96-Well Reaction Plate with Barcode 4306737 4326659 ™ MicroAmp Optical 96-Well Reaction Plate with Barcode and Optical 403012 Caps ™ MicroAmp Optical 96-Well Reaction Plate with Barcode and Optical 4314320 Adhesive Films ™...
- Page 60 Appendix B Parts and materials Consumables Part Name Cat. No. ™ MicroAmp Splash Free 96-Well Base 4312063 ™ MicroAmp Centrifuge Adapter N8013822 SimpliAmp Thermal Cycler User Guide ™...
-
Page 61: Appendix C Troubleshooting
Troubleshooting Troubleshooting Use the following table to help troubleshoot problems with your Veriti ™ Thermal Cycler. Observation Possible cause Recommended action Slow screen response or Screen is out of calibration. Call service to redo touchscreen calibration. screen changes sporadically. Instrument reports error(s). Hardware malfunction. -
Page 62: Return An Instrument For Service
Appendix C Troubleshooting Return an instrument for service Observation Possible cause Recommended action No response when you power Not connected to power source. Switch power on. on the instrument. Connect power cord. Sample tubes melt during run. Incompatible consumables Use recommended consumables. used. -
Page 63: Appendix D Instrument Specification And Layout
Instrument specification and layout This chapter lists the instrument specifications for the SimpliAmp Thermal Cycler ™ using the 96-Well Sample Block. Site requirements ™ The SimpliAmp Thermal Cycler is for indoor use. Ensure that the installation site: • Meets the spatial and weight requirements (see “System specifications“ on page 65) •... -
Page 64: Pollution
Appendix D Instrument specification and layout Technical specifications ™ Pollution The SimpliAmp Thermal Cycler has a Pollution Degree rating of 2. It may be installed in an environment that has non-conductive pollutants only, such as dust particles or wood chips. Typical environments with a Pollution Degree II rating are laboratories and sales and commercial areas. -
Page 65: System Specifications
Appendix D Instrument specification and layout System specifications Reaction volume @ 1 µL 30 seconds after clock start Temperature accuracy ±0.5°C and Temperature non-uniformity < 0.75°C Table 10 Power and communication ports Port Description AC power cable port 10/100 Fast Ethernet port for connecting to a network USB v2.0 port for connecting to an external network drive, jump drive, or other USB storage device RS232 serial communication port for connecting the probe for the... -
Page 66: Location Of Power Point And Ports On The Instrument
Appendix D Instrument specification and layout Location of power point and ports on the instrument Location of power point and ports on the instrument The following graphic displays the location of the power cord insertion point as well as the various ports provided in the instrument. SimpliAmp Thermal Cycler User Guide ™... -
Page 67: Appendix E Predefined Run Methods
Predefined run methods The following run methods (distributed across ten categories) are supplied with the ™ SimpliAmp Thermal Cycler. A particular run method can appear in more than one category. These run methods are based on our recommended protocols and should be considered as starting points for the different applications. - Page 68 Appendix E Predefined run methods Location of power point and ports on the instrument Category Run method ™ • AccuPrime PFX 2-Step Method High Fidelity ™ • AccuPrime PFX 3-Step Method ™ • AccuPrime Taq High Fidelity Method ® • Platinum PFX 2-Step Method ®...
- Page 69 Appendix E Predefined run methods Location of power point and ports on the instrument ™ AccuPrime PFX 3-Step Method Stage Reaction Cover Cycle/Step volume temp. (°C) (µL) Cycles — 105.0 Step 1 RampRate — Temperature 94.0 94.0 Hold Time Infinite Step 2 RampRate —...
- Page 70 Appendix E Predefined run methods Location of power point and ports on the instrument ™ AccuPrime Taq High Fidelity Method Stage Reaction Cover Cycle/Step volume temp. (°C) (µL) Cycles — 105.0 Step 1 RampRate — Temperature 94.0 94.0 Hold Time Infinite Step 2 RampRate...
- Page 71 Appendix E Predefined run methods Location of power point and ports on the instrument ™ AmpliTaq Gold 360 Method Stage Reaction Cover Cycle/Step volume temp. (°C) (µL) Cycles — 105.0 Step 1 RampRate — Temperature 95.0 95.0 72.0 Hold Time Step 2 RampRate —...
- Page 72 Appendix E Predefined run methods Location of power point and ports on the instrument ™ AmpliTaq Gold Method Stage Reaction Cover Cycle/Step volume temp. (°C) (µL) Cycles — 105.0 Step 1 RampRate — Temperature 95.0 95.0 72.0 Hold Time Step 2 RampRate —...
- Page 73 Appendix E Predefined run methods Location of power point and ports on the instrument Basic PCR Taq Method Stage Reaction Cover Cycle/Step volume temp. (°C) (µL) Cycles — 105.0 Step 1 RampRate — Temperature 95.0 95.0 72.0 Hold Time Step 2 RampRate —...
- Page 74 Appendix E Predefined run methods Location of power point and ports on the instrument ™ BigDye Direct PCR Run Method Stage Reaction Cover Cycle/Step volume temp. (°C) (µL) Cycles — 105.0 Step 1 RampRate — Temperature 95.0 96.0 72.0 Hold Time Step 2 RampRate —...
- Page 75 Appendix E Predefined run methods Location of power point and ports on the instrument ™ BigDye Kit Standard Run Method Stage Reaction Cover Cycle/Step volume temp. (°C) (µL) Cycles — 105.0 Step 1 RampRate — Temperature 96.0 96.0 Hold Time Infinite Step 2 RampRate...
- Page 76 Appendix E Predefined run methods Location of power point and ports on the instrument Stage Reaction Cover Cycle/Step volume temp. (°C) (µL) Step 2 RampRate — — — 105.0 Temperature 55.0 Hold Time Step 3 RampRate — — — Temperature 68.0 Hold Time General PCR Method...
- Page 77 Appendix E Predefined run methods Location of power point and ports on the instrument Stage Reaction Cover Cycle/Step volume temp. (°C) (µL) Step 2 Hold Time — — — 105.0 ® Platinium PFX 3-Step Method Stage Reaction Cover Cycle/Step volume temp.
- Page 78 Appendix E Predefined run methods Location of power point and ports on the instrument ® Platinium Taq High Fidelity Method Stage Reaction Cover Cycle/Step volume temp. (°C) (µL) Cycles — 105.0 Step 1 RampRate — Temperature 94.0 94.0 Hold Time Infinite Step 2 RampRate...
- Page 79 Appendix E Predefined run methods Location of power point and ports on the instrument ® SuperScript III 1-Step System Method Stage Reaction Cover Cycle/Step volume temp. (°C) (µL) Cycles — 105.0 Step 1 RampRate — Temperature 60.0 94.0 68.0 Hold Time Step 2 RampRate —...
- Page 80 Appendix E Predefined run methods Location of power point and ports on the instrument Stage Reaction Cover Cycle/Step volume temp. (°C) (µL) Step 3 RampRate — — — 105.0 Temperature 72.0 Hold Time Touchdown PCR Method Stage Reaction Cover Cycle/Step volume temp.
- Page 81 Appendix E Predefined run methods Location of power point and ports on the instrument ™ OpenArray Genotyping Stage Reaction Cover Cycle/Step volume temp. (°C) (nL) Cycles 70.0 Step 1 RampRate Temperature 94.0 99.0 Hold Time Step 2 RampRate — — —...
-
Page 82: Appendix F Safety
Safety WARNING! GENERAL SAFETY. Using this product in a manner not specified in the user documentation may result in personal injury or damage to the instrument or device. Ensure that anyone using this product has received instructions in general safety practices for laboratories and the safety information provided in this document. -
Page 83: Safety Alerts On This Instrument
Appendix F Safety Safety alerts on this instrument Symbol English Français Protective conductor terminal (main Borne de conducteur de protection ground) (mise à la terre principale) Do not dispose of this product in Ne pas éliminer ce produit avec les unsorted municipal waste déchets usuels non soumis au tri sélectif. -
Page 84: Location Of Safety Labels On This Instrument
Appendix F Safety Safety alerts on this instrument Location of safety labels on this instrument ™ Figure 35 Location of the safety label on the rear panel of the SimpliAmp Thermal Cycler Figure 36 Location of the safety label on the 96-Well Sample Block SimpliAmp Thermal Cycler User Guide ™... -
Page 85: Safety Information For Instruments Not Manufactured By Thermo Fisher Scientific
Appendix F Safety Safety information for instruments not manufactured by Thermo Fisher Scientif- Safety information for instruments not manufactured by Thermo Fisher Scientific Some of the accessories provided as part of the instrument system are not designed or built by Thermo Fisher Scientific. Consult the manufacturer's documentation for the information needed for the safe use of these products. -
Page 86: Cleaning And Decontamination
Appendix F Safety Safety and electromagnetic compatibility (EMC) standards Cleaning and CAUTION! Cleaning and Decontamination. Use only the cleaning and decontamination decontamination methods specified in the manufacturer's user documentation. It is the responsibility of the operator (or other responsible person) to ensure the following requirements are met: ·... -
Page 87: Environmental Design
Appendix F Safety Chemical safety Environmental Reference Description design Directive 2012/19/EU European Union “WEEE Directive”—Waste electrical and electronic equipment Directive 2002/96/EC European Union “WEEE Directive”—Waste electrical and electronic equipment Directive 2011/65/EU European Union “RoHS Directive”—Restriction of hazardous substances in electrical and electronic equipment Directive 2002/95/EC European Union “RoHS Directive”—Restriction of hazardous substances in electrical and electronic equipment Directive 2006/66/EC European Union “Battery Directive”... -
Page 88: Biological Hazard Safety
Appendix F Safety Biological hazard safety Biological hazard safety WARNING! BIOHAZARD. Biological samples such as tissues, body fluids, infectious agents, and blood of humans and other animals have the potential to transmit infectious diseases. Conduct all work in properly equipped facilities with the appropriate safety equipment (for example, physical containment devices). -
Page 89: Documentation And Support
Documentation and support Related documentation The following related documents are shipped with the system: Publication Document Description number A24827 ™ SimpliAmp Thermal Cycler Describes the procedures for ™ Installation and Operation installing and using the SimpliAmp Quick Reference Thermal Cycler that is described in ™... -
Page 90: Limited Product Warranty
Documentation and support Limited product warranty • Product documentation, including: – User guides, manuals, and protocols – Certificates of Analysis – Safety Data Sheets (SDSs; also known as MSDSs) Note: For SDSs for reagents and chemicals from other manufacturers, contact the manufacturer. Limited product warranty Life Technologies Corporation and/or its affiliate(s) warrant their products as set forth in the Life Technologies' General Terms and Conditions of Sale found on Life... - Page 92 For support visit thermofisher.com/support or email techsupport@lifetech.com thermofisher.com 30 June 2016...
Need help?
Do you have a question about the SimpliAmp Thermal Cycler and is the answer not in the manual?
Questions and answers