Sirona DAC PROFESSIONAL Operator's Manual
Autoclaves
Hide thumbs
Also See for DAC PROFESSIONAL:
- Operating instructions manual (74 pages) ,
- Service manual (66 pages)

Related Manuals for Sirona DAC PROFESSIONAL


Summary of Contents for Sirona DAC PROFESSIONAL
- Page 1 MPKOMNR kÉï=~ë=çÑW= =a^`=molcbppflk^i= =a^`=molcbppflk^i léÉê~íçê=j~åì~ä English...
-
Page 2: About This Manual
The functionality and value retention of your autoclave depends primarily on careful reprocessing of the instruments and the care taken with the device. We wish you a great deal of success and enjoyment with DAC PROFESSIONAL / DAC PROFESSIONAL Your DAC PROFESSIONAL/ DAC PROFESSIONAL... - Page 3 Pressure Equipment Directive. The four-digit number indicates that an approved certification office monitors this compliance. Scope of delivery Standard scope of delivery DAC PROFESSIONAL / DAC PROFESSIONAL Instruction sheet for downloading the technical documentation Factory test results ...
-
Page 4: Table Of Contents
General notes Table of contents Vacuum test ............... 31 Chapter 1 – Device description ....... 7 Bowie & Dick test ............32 Intended Use ..............7 Checking the water quality of the feed water ..... 33 Views of the device ............8 Checking the preheat temperature of the chamber .. -
Page 5: Safety Instructions
Setting up, installing, starting up Ensure the setting up, installation and initial start-up of the autoclave is only done by persons authorized by Sirona. The electrical connection and the connections to the feed and waste water must only be carried ... - Page 6 Chapter 1 – Device description Maintenance Maintenance must only be carried out by authorized persons. Carrying the autoclave The autoclave must only be carried by two persons. Use the supplied carrying belt to carry the autoclave. Malfunctions ...
-
Page 7: Chapter 1 – Device Description
Only use the autoclave for the intended applications described in the accompanying technical documents and only together with the devices and components recommended by Sirona. As with the preceding instrument preparation, sterilization of instruments and textiles with this autoclave may also only be carried out by competent personnel as defined in §2 of the... -
Page 8: Views Of The Device
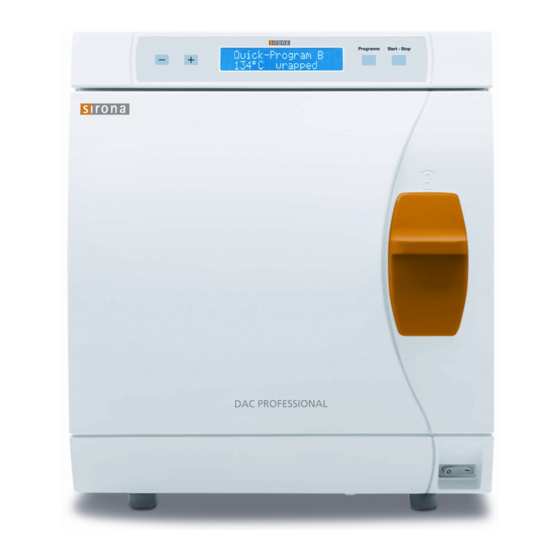
Chapter 1 – Device description Views of the device 1. Control and display panel 2. Door, pivots open to the left 3. Sliding latch 4. Power switch 5. Front foot of the autoclave (adjustable) 6. Port for emptying the internal water storage tank—waste water 7. -
Page 9: Control Panel
Chapter 1 – Device description Control panel The control panel is made up of a two-line alphanumeric LED display and four membrane keys. Chamber pressure (bar) and (steam) temperature (°C) Time (h:min:s) 2-line LC display for program status indicators and parameter indicators Function keys (-) and (+) For selecting, setting, and displaying special functions: printing, date / time, preheating, total number of sterilized batches, water conductivity, error message... -
Page 10: Chapter 2 – Installation
Chapter 2 – Installation Chapter 2 – Installation NOTE Please carefully follow the instructions for the installation given in the service manual. All requirements for the building installation are listed in detail in the service manual. Electrical connections DANGER! Improperly made electrical connections can lead to a short circuit, fire, water damage, and/or electric shock. -
Page 11: Chapter 3 – First Steps
Chapter 3 – First steps Chapter 3 – First steps Switch on the autoclave The autoclave is switched on at the power switch (page 8, Fig. 1/4). After switching the autoclave on at the power switch, the display shows the message: Unlock the door with “+”... -
Page 12: Setting The Date And Time
To use a water preparation unit, please follow the instructions in the service manual. NOTICE Please consult Sirona first if you would like to use a water preparation unit from another manufacturer. Failure to comply with these instructions can damage the autoclave and/or the items to be sterilized. -
Page 13: Chapter 4 – Sterilizing
Bowie & Dick test (see above) can then be omitted. Another test system as defined by EN 867-5 can be used. Due to the variety of test systems available, it is not possible for Sirona to provide technical support for the use of another system. WARNING The results of the tests must be documented. -
Page 14: Preparing The Items To Be Sterilized
Chapter 4 – Sterilizing Preparing the items to be sterilized Follow the cleaning and care instructions of the manufacturer to prepare the items to be sterilized. This is a prerequisite for both proper cleaning and disinfection and subsequent sterilization of the items to be sterilized. -
Page 15: Loading The Autoclave
Chapter 4 – Sterilizing DANGER! The penetration of steam into the washing package can be hindered and/or you obtain poor drying results. The textiles cannot be sterilized. This could represent a risk to the health of the patient and the clinical team. ... - Page 16 Chapter 4 – Sterilizing WARNING Using sterilization containers that are not suitable leads to insufficient stem penetration and the sterilization may not be successful. The drainage of condensate may also be hindered. Poor drying results are the consequence. This can ultimately lead to non-sterile instruments and thus endanger the health of patients and the clinical team.
- Page 17 Stack transparent sterilization wrapping as upright as possible so that alternating paper side is against paper side and film side against film side but if this is not possible then with the paper side facing downwards. Loading variations DAC PROFESSIONAL DAC PROFESSIONAL Instruments Textiles...
-
Page 18: Program Selection
5 min 20 min 20 min *without drying (full load with DAC PROFESSIONAL and DAC PROFESSIONAL : 5 kg) and depending on the loading and conditions set, e.g., mains voltage Table 2: Summary of the use of the particular sterilization programs... -
Page 19: Select Automatic Preheating
Unsupervised operation of electrical equipment, such as this autoclave, is done at your own risk. Sirona does not accept liability for any damage occurring as a result of unsupervised operation. If you have selected a program using the program selection keys, the sterilization temperature is shown on the display in addition to the program you have selected. -
Page 20: Select Extended Drying
Chapter 4 – Sterilizing NOTE If the Quick Program S is started, the warning message Attention: Unwrapped instruments only appears on the display. If the load contains unwrapped instruments only, press the (S) key again to confirm and to start the program. -
Page 21: Program Has Ended
Chapter 4 – Sterilizing Load the autoclave to maximise drying performance. For example, stack transparent sterilization wrap and paper packages like index cards. Follow the instructions in the section Loading the autoclave on page 15. Use the film holder if necessary. ... - Page 22 Chapter 4 – Sterilizing During the drying phase the drying time that has elapsed is shown on the display. This alternates with the message: Programm Start-Stop Immediate removal press “Stop“ To terminate a program, proceed as follows: Press the (S) key. Then acknowledge the subsequent confirmation prompt Immediate removal “Stop”...
-
Page 23: Display Daily Batch Counter
Chapter 4 – Sterilizing Display daily batch counter After each program has run, you will automatically see the last run batch number for the day on the display. Programm Start-Stop Last batch no. You can also manually display the last batch number: Select the “Function”... -
Page 24: Storing Sterilized Items
Chapter 4 – Sterilizing At the end of a program, note the following when removing the sterilized items: Never open the door with force. The autoclave may be damaged and/or hot steam may escape. Use the tray lifter to remove the trays from the autoclave. ... -
Page 25: Chapter 5 – Logging
Chapter 5 – Logging Chapter 5 – Logging Documentation of batch results Batch documentation is essential as evidence of successful completion of the sterilization process and is a mandatory component of quality assurance (MPBetriebV, German Medical Device Operators Ordinance). Data such as program type, batch, and the process parameters for programs that have run are automatically saved in the internal log memory of the autoclave. -
Page 26: Immediate Automatic Output Of Logs
Chapter 5 – Logging Start-Stop Programm Output medium Computer Press the (P) key to confirm. The display returns to the Log output – Output medium menu. Press the (S) key to return to the set-up menu Function: Log output. After pressing the (S) key again, the display shows the initial operating state again. Immediate automatic output of logs Text logs The following conditions must be satisfied for automatic output of logs as soon as a program has ended:... -
Page 27: Delayed Log Output
NOTE! If immediate output of a log is not possible, e.g., because the activated output medium is not connected, a warning appears. Sirona recommends that you use the immediate log output. Delayed log output You can output logs later and independent of when a program ended. You can choose whether selected or all saved logs (up to 40 logs) should be printed. -
Page 28: Displaying The Log Memory
Chapter 5 – Logging Output all saved logs To output all saved logs at a later time, proceed as follows: Select the “Function” set-up menu by pressing the (+) and (-) keys at the same time. The display shows the message Function: Last batch no. Navigate using the (+) or (-) keys until the message: Function: Log output is displayed and press the (P) key. -
Page 29: Deleting Logs In The Internal Log Memory
Chapter 5 – Logging Deleting logs in the internal log memory To suppress the warning Log memory full, for example, if the option Immediate output no is set, you can manually delete the saved logs. The following example shows how you can delete all saved logs. Select the Function set-up menu by pressing the (+) or (-) keys at the same time. - Page 30 Chapter 5 – Logging Table 3: Example of a text log for a successfully completed program ------------------------------------------ Autoclave type DAC PROFESSIONAL ------------------------------------------ Program started Program : Universal program 134 °C wrapped Current date Datum : 2013-12-19 Time at the start of the program...
-
Page 31: Chapter 6 – Functional Testing
Chapter 6 – Functional testing Chapter 6 – Functional testing Automatic functional testing The electronic parameter control continuously and automatically monitors the interaction between those parameters relevant for the sterilization, namely pressure, temperature, and time. The process evaluation system of the autoclave compares the process parameters during the program with each other and monitors these in terms of their thresholds. -
Page 32: Bowie & Dick Test
Chapter 6 – Functional testing NOTE If a log printer or another output medium is connected and “Immediate output” has been set to “yes”, a log is printed out at the same time. Bowie & Dick test The Bowie & Dick test is used to determine the steam penetration of porous materials such as textiles. Various test systems for the Bowie &... -
Page 33: Checking The Water Quality Of The Feed Water
Chapter 6 – Functional testing Checking the water quality of the feed water Whenever the autoclave is switched on, including when a program is running, you can show the water quality on the display. Programm Start-Stop AIN6: Conductivity 15 µS/cm To do so, hold down the (-) key until the message Conductivity appears on the display. -
Page 34: Chapter 7 – Maintenance
Chapter 7 – Maintenance Chapter 7 – Maintenance Checks and cleaning Door seals, chamber, chamber sealing surface, racks, trays Inspect the chamber including the door seal and chamber sealing surface and the racks for loading once a week for any soiling, deposits or damage. If you detect any contamination, remove any trays or cassettes and the rack from the chamber. -
Page 35: Preventing Spotting
Chapter 7 – Maintenance WARNING Please note the following when removing the quick coupling: When emptying the storage chambers, stand to one side of the connection. When pushing the gray release key of the quick coupling, be sure to hold the hose securely in place with your other hand in order to absorb the spring force of the catch. -
Page 36: Cleaning The Filter In The Chamber
Chapter 7 – Maintenance Cleaning the filter in the chamber Remove the filter for inspection and cleaning by rotating it counterclockwise out of the opening. Rinse the filter with water to clean. Screw the filter back into the opening by rotating it clockwise. Please use the key supplied for the chamber filter to unscrew the chamber filter (Fig. -
Page 37: Chapter 8 – Periods Of Disuse
Chapter 8 – Periods of disuse Chapter 8 – Periods of disuse Sterilization frequency Pauses in operation between individual programs are not necessary. At the end of or after interrupting the drying time and removing the sterilized load, you can immediately reload the autoclave and start a program. -
Page 38: Chapter 9 – Function Descriptions
Chapter 9 – Function descriptions Chapter 9 – Function descriptions Sterilization procedure The autoclave sterilizes using the fractionated pre-vacuum method. This ensures complete removal of air and effective wetting or penetration of the items to be sterilized with saturated steam. This method can be used to sterilize all types of loads in a medical practice. - Page 39 Chapter 9 – Function descriptions Vacuum test Program phase Description 1. Evacuation The chamber is evacuated until the pressure for the vacuum test is reached. 2. Equilibration time This is followed by an equilibration time of five minutes. 3. Measurement period The measurement period is ten minutes.
- Page 40 Chapter 9 – Function descriptions Program overview MAIN menu...
- Page 41 Chapter 9 – Function descriptions...
-
Page 42: Chapter 10 – Malfunctions
Chapter 10 – Malfunctions Chapter 10 – Malfunctions Warnings Warnings are not error messages. They help you to ensure your autoclave functions trouble free and to identify undesirable conditions. Pay prompt attention to these warnings to avoid errors. Error messages Error messages are shown on the display with an incident number. - Page 43 Chapter 10 – Malfunctions General incidents Incident Possible cause What you can do: No reading on the display No power Check that the power plug is correctly inserted into the socket. (item 2) Check the mains voltage at the socket. If necessary, change the device fuses on the lower front of the autoclave (see page 8, Fig.
- Page 44 Chapter 10 – Malfunctions Warnings Warning Possible causes What you can do Warning: Door is open The door contact was not Push the sliding latch down to the stop. closed when the autoclave autoclave cannot start was started. Warning: No feed water / Only with feed water supply add feed water –...
- Page 45 Chapter 10 – Malfunctions Warning Possible causes What you can do Power supply to the printer Ensure there is power to the printer; the has been disconnected. red LED “P” on the NITRAprint log printer must light up. Printer is offline. Set the printer to online (press the “SEL”...
-
Page 46: Error Messages
Chapter 10 – Malfunctions Error messages Error message Possible causes What you can do Error 1: Vacuum Door seal, sealing surface on Check the door seal and the sealing system the chamber soiled or faulty. surface of the chamber for faults and soiling and clean, see page 34. - Page 47 Chapter 10 – Malfunctions Error message Possible causes What you can do Error 14: No feed This error message appears See the warning message Warning No water after starting a program. feed water. Error 21: Preheating The monitoring period between If this error occurs repeatedly, set the activating the preheating Automatic preheating function to...
-
Page 48: Door Emergency Open In Case Of Power Failure
Chapter 10 – Malfunctions Door emergency open in case of power failure DANGER! The autoclave must be completely decompressed! Failure to observe this precaution may result in severe burns or injuries. Steam must not escape between the sterile filter and the rear of the autoclave. ... -
Page 49: Replacing The Fuses
Chapter 10 – Malfunctions Replacing the fuses If the fuses have blown (see page 8, Fig. 1/10), proceed as follows to replace them: Switch the autoclave off at the power switch and pull the power plug out from the socket. Open the door manually as described in the section “Door emergency open in case of power failure”. -
Page 50: Glossary
Dynamic sterilizer chamber pressure test Technician from the depot or employee of a customer Used to verify that the rate of pressure changes in the service nominated by Sirona who has been trained by sterilizer chamber during a sterilization cycle does not Sirona. - Page 51 Glossary The steam generator is located outside the sterilization Empty-chamber test chamber. This protects the sterilization chamber from Test with no load; carried out to assess the performance overheating. of the sterilizer without the influence of a load; allows the temperatures and pressures reached to be checked Retardation of boiling against the specified settings.
-
Page 52: Technical Data
Technical Data Technical Data Model name DAC PROFESSIONAL DAC PROFESSIONAL Device dimensions (H×W×D) 48.5 × 42.5 × 75.5 cm 48.5 × 42.5 × 63 cm Sterilization chamber (diameter×D) Ø 25 cm × 45 cm Ø 25 cm × 35 cm Volume of the sterilization chamber 22.6 liter... -
Page 53: Accessories
Accessories Accessories Article Order no.* PROFESSIONAL PROFESSIONA Holders A for 5 tablets or 3 standard tray 65 32 233 64 86 133 cassettes Process challenge Test set for Helix test 58 92 042 device system Additional indicators for Helix test set 59 03 641 (100 pieces) Water preparation... - Page 54 Subject to changes resulting from further technical developments. © Sirona Dental Systems GmbH Sprache: englisch Printed in Germany D3554.201.01.05.02 03.2015 Ä.-Nr.: 118 740 Imprimé en Allemagne Sirona Dental Systems GmbH Order no. 61 33 826 Fabrikstrasse 31 D-64625 Bensheim Germany...
Need help?
Do you have a question about the DAC PROFESSIONAL and is the answer not in the manual?
Questions and answers