Table of Contents
Advertisement
BioDoc-It
Imaging System
2
®
Installation and User Instructions
UVP, LLC
Ultra-Violet Products Ltd.
2066 W. 11th Street
Unit 1, Trinity Hall Farm Estate
Upland, CA 91786
Nuffield Road, Cambridge CB4 1TG UK
Phone: (800) 452-6788
Phone: +44(0)1223-420022
Fax: (909) 946-3597
Fax: +44(0)1223-420561
Web Site: www.uvp.com
81-0358-01 Rev E
Advertisement
Table of Contents

Related Manuals for UVP biodoc-it 2


Summary of Contents for UVP biodoc-it 2
- Page 1 UVP, LLC Ultra-Violet Products Ltd. 2066 W. 11th Street Unit 1, Trinity Hall Farm Estate Upland, CA 91786 Nuffield Road, Cambridge CB4 1TG UK Phone: (800) 452-6788 Phone: +44(0)1223-420022 Fax: (909) 946-3597 Fax: +44(0)1223-420561 Web Site: www.uvp.com 81-0358-01 Rev E...
-
Page 2: Table Of Contents
Installing Emission Filters ............................7 Camera Setup and Installation ..........................7 The camera and zoom lens are assembled at the UVP factory................. 7 Note: The zoom lens shipped may appear different than pictured................7 Using the System ..............................8 Powering Up the Tablet ............................ -
Page 3: Introduction
8-48mm f/1.2 zoom lens, and 16-bit file bit depth. Multiple transillumination options are available, including single UV (302nm), 2UV™ (302/365nm) and 3UV™ (302/365/254nm) versions with illumination areas ranging from 20 x 20cm to 25 x 26cm *System/software configurations may vary by country. Contact UVP or authorized distributor for details. 81-0358-01 Rev E... -
Page 4: System Components
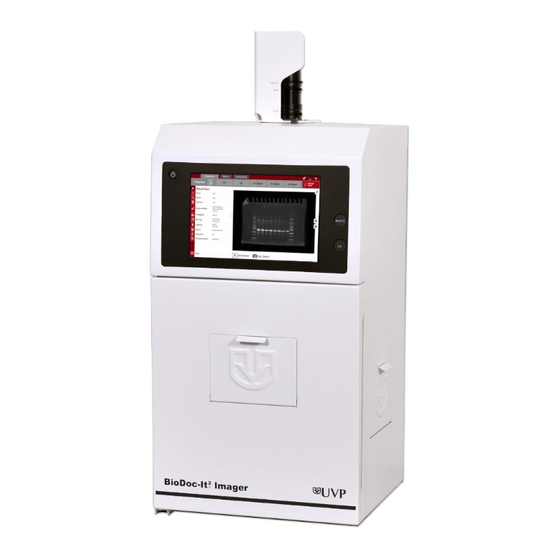
BioDoc-It Imaging System System Components Refer to the packing slip and pictured components below for specific parts and components included with the system. GelCam 315 Camera and Two-Position Filter Tray, Manual Zoom Lens Including EtBr Filter Tablet power switch 10” Integrated Touch White Light and UV Screen Power Buttons... -
Page 5: Specifications
The GelCam 315 uses a USB 2.0 connection. All camera settings are factory pre-set for optimum performance when viewing gels and films under low light level conditions. Contact UVP Technical Support before making any adjustments to camera settings. Ethidium Bromide (EtBr) Emission Filter... -
Page 6: Transilluminator
Optional Equipment UVP offers a variety of optional equipment to support the needs of varying laboratory environments. Refer to Replacement Parts and Accessories at the end of this manual for optional equipment part numbers. -
Page 7: Setup Instructions
Note: The camera and lens must be removed to access the filter tray. Additional and replacement emission filters are available through UVP. Refer to the Replacement Parts and Accessories section of this manual for ordering information. - Page 8 BioDoc-It Imaging System seal is made between the end of the lens and the rubber gasket beneath the darkroom bracket. Plug the camera cable into the top of the camera and the other end into a USB port on back of the darkroom.
-
Page 9: Using The System
BioDoc-It Imaging System Using the System Powering Up the Tablet Computer Firmly press the POWER button on the system, and hold for 3 seconds to power on the internal computer. Wait for the Windows startup screen. This may take a few moments. Once the computer completely boots, the software will load automatically. -
Page 10: Using The Epi (Overhead) White Light
BioDoc-It Imaging System Refer to the transilluminator manual for additional instructions on using the transilluminator. Note: The BioDoc-It integrates a UV interlock switch which will inactivate the UV transilluminator when the main darkroom door is open. This switch is located on the upper right corner of the darkroom door opening and is only accessible when the main door is open. -
Page 11: Touch Screen Interface
BioDoc-It Imaging System Refer to the Digital Zoom section of Touch Screen Interface in this manual for further information. Touch Screen Interface Setting User Preferences The Settings portion of the VisionWorks touch allows the user to select preferences which are normally set once and rarely changed. - Page 12 BioDoc-It Imaging System Post-Processing Tab Auto Rotate: Set Auto Rotate to ON to automatically rotate the image to the desired degree upon image capture. Note: “Auto Rotate” must be set to ON in order to rotate images during image capture, as images cannot be rotated after capture using the VisionWorks touch.
-
Page 13: Identifying The Touch Screen Buttons And Functions
BioDoc-It Imaging System main TS screen. Or, press the “X” button to go back to the main TS screen without saving changes. Identifying the Touch Screen Buttons and Functions ’s built-in touch screen allows for convenient selection of all system functions, including Using the BioDoc-It image capture, save and print. - Page 14 BioDoc-It Imaging System (see “Saving Tab” under Setting User Preferences in this manual). Use the slider bar to adjust various settings. To adjust the settings, do one of the following: Marker Press and drag the marker (small triangle) to the desired position;...
- Page 15 BioDoc-It Imaging System 3. Good exposes to fill the histogram to 25% or 16,000 gray levels. 4. Minimum (Fast Exposure) exposes to fill the histogram to 10% over background. Press the Histogram button to access image histogram adjustment. Use the pointers on the vertical slider bar to make adjustments to this setting.
- Page 16 BioDoc-It Imaging System To access the photo gallery, press to select the Gallery tab. Once active, select the desired image from the top of the “Gallery” Tab Gallery screen. To open a previously-saved image, press the Open Image button. Pressing this button will open the Windows file/folder navigation screen.
- Page 17 BioDoc-It Imaging System date of image capture and “hh-mm-ss” being the time of image capture. NOTE: To manually change the file name when saving an Save image, select Prompt for Location under the Saving tab in Settings prior to saving. Then, each time the Save button is pressed, the user will be prompted to select a file save location and can enter a custom file name.
-
Page 18: Using Templates
BioDoc-It Imaging System Save all images The user will also be prompted to Save Selected Format or Save Selected & Original Formats. See the “Preferences” section of this manual for more information. Using Templates The BioDoc-It is capable of utilizing templates to recall pre-saved systems settings for repeat experiments. An unlimited number of templates can be saved in the system, with up to five quick-access templates available at the top of the main system screen for easy access. -
Page 19: Connecting To A Network
BioDoc-It Imaging System Connecting to a Network BioDoc-It Imaging Systems have built-in wireless networking capability. While it is fairly simple to connect the system to a network, it is highly recommend to obtain assistance from a network administrator to ensure that the process is completed properly. -
Page 20: Service Procedures
BioDoc-It Imaging System Service Procedures Return Procedure A Returned Goods Authorization (RGA) number must be obtained from UVP Customer Service before returning any product. Replacement Parts and Accessories Imaging System, contact UVP’s offices. To order accessories or replacement parts for the BioDoc-It... -
Page 21: Troubleshooting
Windows, please contact your system administrator for assistance. If an error message appears repeatedly and your system administrator does not recognize it as a Microsoft Windows error, contact UVP Technical Support for further assistance. Replacing Transilluminator Tubes Follow these steps to replace the UV tubes in the system’s transilluminator:... -
Page 22: Technical Support
UV filter surface. Technical Support UVP offers free lifetime technical support on all of its products and software. Should you have any questions regarding the product’s use, operation or repair, contact UVP’s offices at the locations below, or visit www.uvp.com.
Need help?
Do you have a question about the biodoc-it 2 and is the answer not in the manual?
Questions and answers