Magicard Enduro Quick Start Manual
Secure id card printer
Hide thumbs
Also See for Enduro:
- User manual (36 pages) ,
- Getting started manual (36 pages) ,
- Brochure (2 pages)

Related Manuals for Magicard Enduro


Summary of Contents for Magicard Enduro
- Page 1 Enduro QuickStart Guide, Drawing No./Stock No. 3623-0080 Issue 1 (2008)
- Page 2 Thank you for choosing the Magicard Enduro Thank you for choosing the Magicard Enduro printer as your secure ID card printer. printer as your secure ID card printer. Before setting up your Enduro printer using Before setting up your Enduro printer using the Ultra Driver CD–ROM, please follow the...
- Page 3 Welcome Welcome Contents Contents Section A Section A Printer installation Printer installation Section B Section B Caring for your printer 10-12 Caring for your printer 10-12 Section C Section C 13-17 13-17 Consumables Consumables Section D Section D Upgrade Double-sided upgrade Section E Section E Legal Information...
-
Page 4: Установка Принтера
Section A Printer Installation Section A Installation d'Imprimante Sección A Instalación De la Impresora Seção A Instalação Da Impressora Sezione A Installazione Della Stampant Kapitel A Drucker-Installation 部分 A 打印机安装 раздел A Установка Принтера Section A Printer Installation Sectie A De Installatie van de printer... - Page 5 Please ensure you have all the items listed Please ensure you have all the items listed before you start installation. before you start installation. 1. Enduro Printer 1. Enduro Printer 2. Hopper and Stacker 2. Hopper and Stacker 3. USB Cable 2m (Do not connect) 3.
- Page 6 It is important to install the Ultra driver CD- ROM first, before connecting the USB cable ROM first, before connecting the USB cable between your PC and Enduro printer. between your PC and Enduro printer. Do not connect to USB yet.
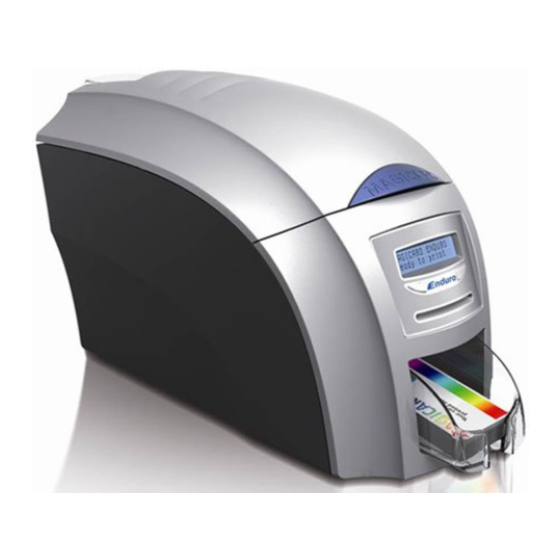
- Page 7 1. Lid opening latch 1. Lid opening latch 2. Thermal print head 2. Thermal print head 3. Card cleaning roller 3. Card cleaning roller 4. LCD display screen 4. LCD display screen 5. Function buttons 5. Function buttons 6. Hand feed/cleaning card entry 6.
- Page 8 Normal office environment with: Normal office environment with: • A properly grounded power supply • A properly grounded power supply • Ambient temperature +10 to 30 C (50 to 86 • Ambient temperature +10 to 30 C (50 to 86 •...
- Page 9 STACKER: Insert the stacker into the aperture in the front STACKER: Insert the stacker into the aperture in the front panel and click into place. The stacker can hold up to 30, panel and click into place. The stacker can hold up to 30, 20 to 40mil (xxmm to xxmm) thick cards.
- Page 10 Open printer. Open printer. A Pull out the unused cleaning roller. A Pull out the unused cleaning roller. B Peel off white protective layer carefully B Peel off white protective layer carefully to reveal tacky surface. to reveal tacky surface. C Place cleaning roller back into printer.
- Page 11 • Remove dye film packaging. • Remove dye film packaging. • Place the loaded spool into the rear slots • Place the loaded spool into the rear slots and the take up spool into the front slots. and the take up spool into the front slots. •...
- Page 12 Select the adapter for your region and connect to power Select the adapter for your region and connect to power supply unit. Plug in and connect to printer which will supply unit. Plug in and connect to printer which will automatically switch on.
- Page 13 • On completion of installation, connect your Enduro printer • On completion of installation, connect your Enduro printer to the PC with the USB cable. Now your Enduro is ready to the PC with the USB cable. Now your Enduro is ready to print.
- Page 14 Section B Caring of your printer Section B Caring of your printer Section B Caring of your printer Section B Caring of your printer Section B Caring of your printer Section 2 Caring of your printer Section 2 Caring of your printer Section 2 Caring of your printer Section 2...
- Page 15 •Magicard recommend that you clean the rollers and •Magicard recommend that you clean the rollers and print head each time you fit a new roll of dye film.
- Page 16 To prevent the card slipping on the rollers we To prevent the card slipping on the rollers we recommend that you clean your printer using a recommend that you clean your printer using a cleaning card each time you replace the dye-film. cleaning card each time you replace the dye-film.
- Page 17 • Take the cleaning pen from your Enduro cleaning kit. • Take the cleaning pen from your Enduro cleaning kit. • Open the printer and carefully rub the pen several times, •...
- Page 18 Section C Consumables Section C Consumables Section C Consumables Section C Consumables Section C Consumables Section C Consumables Section C Consumables Section C Consumables Section C Consumables Section C Consumables...
- Page 19 Dye film Dye film Product Code Description Product Code Description MA300YMCKO YMCKO 5 panel dye film 300 images per roll. MA300YMCKO YMCKO 5 panel dye film 300 images per roll. MA250YMCKOK YMCKOK 6 panel dye film 250 images per roll. MA250YMCKOK YMCKOK 6 panel dye film 250 images per roll.
- Page 20 Enduro transit bag Enduro transit bag Product Code Description Product Code Description MXXXXXX Robust foam padded transit bag. MXXXXXX Robust foam padded transit bag. (Space for 200 cards, x2 dye films, PSU/cable) (Space for 200 cards, x2 dye films, PSU/cable)
- Page 21 A new cleaning roller is supplied with A new cleaning roller is supplied with each dye film roll. each dye film roll. – Open printer and remove used dye film. – Open printer and remove used dye film. A Pull out the used cleaning roller. A Pull out the used cleaning roller.
- Page 22 On your PC from the start menu, go to <Printer Settings> open the Go to ‘Printer Settings’ from the start menu on your PC, open the <Enduro Printer> and Right Click on it. From the drop down menu ‘Enduro Printer’ and Right Click’ on it. From the drop down menu select <Printing Preferences>...
- Page 23 Both HiCo and LoCo magnetic stripe cards can be used on Use HiCo magnetic stripe cards only (not LoCo). the Enduro. How to use magnetic stripe cards How to use magnetic stripe cards When loading magnetic stripe cards, make sure that the...
- Page 24 Section D Upgrade Section D Upgrade Section D Upgrade Section D Upgrade Section D Upgrade Section D Upgrade Section D Upgrade Section D Upgrade Section D Upgrade Section D Upgrade...
- Page 25 ‘ ‘ Upgrading to double-sided follow steps 1-7 as per Upgrading to double-sided follow steps 1-7 as per ENDURO ENDURO illustration. Please retain and keep safe the spent blue illustration. Please retain and keep safe the spent blue upgrade spool to confirm warranty.
- Page 26 Legal Information Section E Legal Information Section E Legal Information Section E Legal Information Section E Legal Information Section E Legal Information Section E Legal Information Section E Legal Information Section E Legal Information Section E Legal Information Section E...
-
Page 27: About This Guide
3) Warranty Claims: If the MAGICARD printer proves defective during this period, please contact the Ultra Service Center. The Ultra Service Center personnel may first ask you to carry out certain simple checks to confirm the nature of the problem, and if a return is appropriate they will give you a Magicard Return Authorisation Number (MRAN) and consignment instructions to the appropriate repair center.
Need help?
Do you have a question about the Enduro and is the answer not in the manual?
Questions and answers