Table of Contents
Advertisement
Quick Links
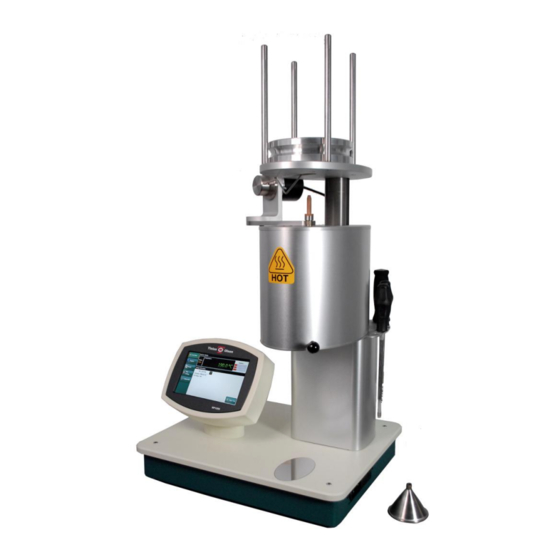
MP1200 & MP1200M
Extrusion Plastometer
(Melt Indexer)
MP1200M shown
SYSTEM INSTALLATION AND OPERATION MANUAL.
Part #: 02002100 (MP1200) & 02002101(MP1200M)
Revision 2c
Date: 8 August 2013
This document contains confidential and proprietary information of Tinius Olsen
Testing Machine Company. In consideration of the receipt of this document, the
recipient agrees not to reproduce, copy, use or transmit this document and/or the
information therein contained, in whole or in part, or to permit such action by others,
for any purpose, except with prior written permission of Tinius Olsen Testing Machine
Company. All rights reserved.
___________________________________________________________________
TINIUS OLSEN TESTING MACHINE COMPANY
1065 Easton Road
Horsham, Pennsylvania 19044-8009 USA
www.TiniusOlsen.com
Advertisement
Table of Contents

Summary of Contents for Tinius Olsen MP1200
- Page 1 Tinius Olsen Testing Machine Company. All rights reserved.
-
Page 3: Table Of Contents
Communications ......................1-2 Options and Accessories ....................1-2 1.10 Machine Dimensions: ....................... 1-3 1.11 Electrical Requirements: ....................1-3 Section 2 - Model MP1200 Digital Controller/Timer ................2-1 Introduction ........................2-1 MP1200 Controller/Timer ....................2-1 2.2.1 Touch Screen Keyboard ..................2-1 2.2.2 Machine Display .................... - Page 4 Installing the PPDT ordered with the MP1200 ..............6-1 Field Installation, Setup and Configuration of the PPDT for encoder type ENCI (for units that were repaired or not originally purchased with the MP1200)......6-1 PPDT Arm Length Adjustment ..................6-2 Section 7 –...
- Page 5 Section 12 – User Settings ........................ 12-9 12.1 General Settings......................12-9 12.1.1 Language......................12-9 12.1.2 Printer Selection....................12-9 12.1.3 Alarms…………………………………………..…………………………….………12-9 12.1.4 Position......................12-9 12.1.5 Volume......................12-9 12.1.6 Brightness......................12-9 12.2 Calibration Offsets......................12-10 12.3 Date/Time ........................
- Page 6 PID gains ........................19-2 19.4 Recovery Parameters....................19-3 19.5 Temperature Controller Status parameters: ..............19-4 19.6 Automatic Line voltage compensation ................19-4 Section 20 - Recommended Spare Parts List .................. 20-1 Section 21 - MP1200 Packing/Shipping Instructions ..............21-1...
- Page 7 TINIUS OLSEN TESTING MACHINE COMPANY FACTORY CERTIFICATE This is to certify that the Tinius Olsen MP1200 Extrusion Plastometer (Melt Indexer) and Accessories are checked prior to shipment and found to conform to the applicable portions of ASTM D 1238 and ISO 1133 Test Methods (when used with the appropriate options).
- Page 9 CAUTION: Do not use a sharp object to press any of the buttons on the Model MP1200 Controller, as this will damage the LCD screen. CAUTION: The tools used on the machine may get hot during use.
- Page 10 CAUTION: Do not exceed the flash point of the material being tested CAUTION: Possible pinch points associated with the weight-lowering device exist. One is between the lift cap and the lifter top at the bottom most position of the platform and the second exists between the weight lowering platform and the piston rod.
-
Page 11: And Iso
WARRANTY The Tinius Olsen Testing Machine Company guarantees its products to be free from defects in material and workmanship under normal use and service for which they were intended, and under condition of proper maintenance for one year from date of receipt of equipment. - Page 12 Clean the bore of the furnace prior to use. The machine may emit “smoke“ from the bore as oil coating used to protect the bore from rust during shipping burns off when first turned on.. Please note that the MP1200 was calibrated at the factory prior to shipping. . Thank you for your purchase!
-
Page 13: Section 1 - Introduction
3364). Other methods, such as D2116, D3159, D3275 and D3307, require the optional corrosion resistant cylinder, orifice and piston foot. A basic machine (MP1200) may be used for Procedure A - Manual Operation. A weight (s) will be required to apply the test load. The amount of load is material dependent, so weights are sold separately. -
Page 14: Prompt Driven Operation
450°C. Three platinum RTD Probes sense the cylinder temperature, sending signals to the MP1200 Controller, which regulates the temperature of the upper and lower portions of the cylinder to within ± 0.1°C. The temperature of the lower portion of the cylinder is displayed as the Actual Temperature (AT). -
Page 15: Machine Dimensions
1.10 Machine Dimensions: MP1200 - 51 cm (20 inches) wide by 38 cm (15 inches) deep and 58 cm (24 inches) in height. Net weight approximately 21 kilograms (46 pounds), not including any weights or options. MP1200M - 51 cm (20 inches) wide by 38 cm (15 inches) deep and 95 cm (38 inches) in height. -
Page 16: Section 2 - Model Mp1200 Digital Controller/Timer
(Manual Cut-off Procedure) and Procedure B (Automatic Timed Procedure). It also can be used to obtain results for Procedures C & D of ASTM 1238. CAUTION: Do not use a sharp object on the Model MP1200 Controller, as this may puncture the touch screen. 2.2.2 Machine Display Status 2.2.2.1... - Page 17 MP1200 Home Screen MP1200M Home Screen Tinius Olsen MP1200 Extrusion Plastometer Page 2-2 Operation Manual # 02002215...
-
Page 18: Navigation Keys
FILE box. The MP1200 comes from the factory with 7 sample programs already entered. It is unlikely that any one of these example programs will be an exact match for the material that is to be tested. -
Page 19: Three-Zone Temperature Control
232) provided as standard. Up to ten machines can be interfaced to a single computer 2.6 Multiple Data Determinations (Captures) The MP1200, when equipped with the optional PPDT gives the operator the ability to make up to 10 individual flow rate/volume rate (melt index) determinations within a single sample charge when performing a test to ASTM Procedure B. -
Page 20: Section 3 -Operating Tools
3 Section 3 –Operating Tools The following tools are included with each MP1200 as standard equipment. Refer to Figure 3-1 for an illustration. See Section 16 for cleaning instructions. IMPORTANT: All these tools are made of materials that are softer than the cylinder. This is to prevent any scoring or damage to the walls of the cylinder. - Page 21 Figure 3-1 – MP1200 Melt Indexer Tools Supplied with Machine 1. Piston Rod Assembly: D2 Tool Steel Orifice (P/N 02001030) A. Piston Rod (ASTM) (P/N 02002163) Level Assembly (P/N 02001271) B. Guide Collar (P/N 02002149) Funnel (P/N 02002155) C. SS Piston Foot (P/N 02001086) Cutoff Tool (P/N 02001090) 2.
-
Page 22: Section 4 - Available Options & Accessories
Table 4-1 shows the weights that can be supplied for the standard test conditions in ASTM D 1238 and ISO 1133. The piston rod and piston foot (less the collar) weigh 100 grams. All the weights are marked in grams. Tinius Olsen certifies that the weights are accurate to within +/- 0.5% of the stamped weight. -
Page 23: Ppdt Automatic Timing Switch (P/N 02001505)
4.6 Manual Cutoff Option (P/N: 02002104) This optional accessory is available on both the MP1200 & MP1200M. It can be used to cut the extrudate instead of using the cutoff tool. The operator turns a hand crank to cut the material. -
Page 24: Corrosion Resistant Accessories
P/N: 02001034: Go/No-Go Gauge, standard ASTM D 1238/ISO1133 orifice NOTE: The certified Go/No-Go gauges are only certified by the gage manufacturer. An ISO 17025 certified gage can be supplied at an additional cost. Tinius Olsen MP1200 Extrusion Plastometer Page 4-3 Operation Manual # 02002215... -
Page 25: Flow Rate Ratio Attachment Package (P/N 02001418)
WLD weight platform to a predetermined height (determined by manually programming the MP1200 controller or using Horizon software). The purge feature is then engaged, applying a downward force on the weight to purge the material from the bore until the weight is stopped by the weight platform. -
Page 26: Semi-Automatic Pneumatic Purge & Clean
P/N: 02002165 - Combination ASTM/ISO Piston Rod) P/N: 02002149 – Guide Collar, MP1200 Note: The piston rods listed above are for the MP1200 model only. Piston rods from the MP600 and older models will not work with the MP1200. Tinius Olsen MP1200 Extrusion Plastometer... -
Page 27: Piston Foot Options
Charging Tool Tips P/N: 02001136 500 Cleaning Patches Brass Cleaning Brushes: A. Handle (P/N: 02001144) B. Brush, MI Cylinder (P/N: 02001143) C. Brush 0.0825” Orifice(P/N:02001142) D. Brush 0.0413” Orifice (P/N: 02001146) Tinius Olsen MP1200 Extrusion Plastometer Page 4-6 Operation Manual # 02002215... -
Page 28: Section 5 - Set-Up And Installation
Remove the precision level from the piston and store it in a safe place. Turn the machine ON using the switch on the right side of the machine. Depending on the model, one of the two main screens will appears. Tinius Olsen MP1200 Extrusion Plastometer Page 5-1 Operation Manual # 02002215... - Page 29 Main Screen MP1200 Main Screen MP1200M Tinius Olsen MP1200 Extrusion Plastometer Page 5-2 Operation Manual # 02002215...
-
Page 30: Connections
5.4 Connections Figure 5.4 – 1 – USB Connections on Left Side of MP1200 & MP1200M Figure 5.4 – 2 - Rear of Standard MP1200 & MP1200M Tinius Olsen MP1200 Extrusion Plastometer Page 5-3 Operation Manual # 02002215... - Page 31 Figure 5.4 – 3 - Rear of MP1200M built for Optional Pneumatic Purge Device Figure 5.4 – 4 - Rear of MP1200M built for Optional Pneumatic Purge & Cleaning Device Tinius Olsen MP1200 Extrusion Plastometer Page 5-4 Operation Manual # 02002215...
-
Page 32: Updating The Firmware Of The Mp1200
Click on the file name Firmware. 5.5.5 Click on MP1200_USB Disk.zip and save on your hard drive or a USB thumbdrive. (You may also click on and save MP1200 update instructions.doc but the content is detailed below) 5.5.6 Copy MP1200_USB Disk.zip from your hard drive to a USB thumb drive 5.5.7... - Page 33 You may want to save your program under a different name. 5.5.7 Plug the USB drive into the MP1200 and turn on the power. There will be a popup box prompting to upgrade the firmware. Select ‘Yes’ before the progress bar finishes.
-
Page 34: Section 6 - Optional Programmable Piston Displacement Transducer (Ppdt)
6.1.4 Make sure that the MP1200 is turned off, then plug the PPDT into appropriate port at the rear of the MP1200 controller cabinet and tighten screws with a small slotted screwdriver. -
Page 35: Ppdt Arm Length Adjustment
PPDT is working correct, the PPDT arm should be replaced and recalibrated. A brief discussion of this procedure can be found in Section 19.1. Tinius Olsen MP1200 Extrusion Plastometer Page 6-2 Operation Manual # 02002215... -
Page 36: Section 7 - Mp1200M Motorized Weight Support And Lowering/Raising Device With Swing-Away Feature (Wld)
WLD. Should the WLD lowering be initiated inadvertently when an obstruction is present, immediately press the “STOP” button located on the left side of the MP1200 display. Press NAVIGATION if the WLD buttons are not shown. -
Page 37: Dc Motor Calibration
Verify WLD Motor Controller pot settings. 7.2.3 7.3 DC MOTOR CALIBRATION After power up, the MP1200 will always prompt the user to send the WLD (no matter 7.3.1 where it currently is) to its HOME position. This allows the WLD to find the upper sensor (proximity switch) which it uses for reference. -
Page 38: Zeroing The Encoder On The Wld (Synchronize With Ppdt)
7.4.1 Place a clean die in the bore, then place a clean piston it the bore. 7.4.2 From the MP1200 control panel, go to the TEST MODE and then go to the NAVIGATION mode. Use the Jog Down button to lower the weight until it is on the piston and the weight support plate is clear of the weight. -
Page 39: Section 8 - Printer (Optional)
8 Section 8 – Printer (Optional) Certain USB printers may be attached to the MP1200. Tinius Olsen does not sell printers at this time. The following printers have been checked for proper operation with the MP1200 HP OfficeJet 6000 (Model E609A) -
Page 40: Section 9 - Manual & Automatic Extrudate Cut-Off Tools
9 Section 9 – Manual & Automatic Extrudate Cut-Off Tools Tinius Olsen now offers manual and automatic extrudate cutters options to further automate the testing process. Both the manually operated (hand cranked) and the automatic (motorized) Cut-Off tool options are designed to use a... -
Page 41: Installation Instructions
9.2 Installation Instructions 9.2.1 Mount the Extrudate Cut-Off Tool to the base of the MP1200 furnace using the mounting screws and hardware as shown in Figure 9-2. Figure 9-2 9.2.2 Center the blade as shown in Figure 9-3. Loosening the locking screws about 1/8 turn to allows the Cut-Off Tool to slide on its base. -
Page 42: Operation
Manual Cut test and at the end of each programmed capture period. For an Automatically Timed Flow Rate test, the cutter will automatically activate at the start of the 1 capture and at the end of each subsequent capture. Tinius Olsen MP1200 Extrusion Plastometer Page 9-3 Operation Manual # 02002215... -
Page 43: Section 10 - Setup & Operation Of The Pneumatic Purge / Purge & Cleaning Attachment On A Model Mp1200 Melt Indexer W/Wld
The PPC attachment, air regulator w/bracket and exhaust muffler are removed from the MP1200 for shipment and must be re-installed at set-up. Refer to Drawing 5-6-819 for the Purge Only system and 5-6-820 for the Purge & Clean system. The air hoses are also marked and disconnected from the cylinders. -
Page 44: Pneumatic Purge/Purge & Clean Attachment Parts List
10.2.5 The piston extractor tool assembly. 10.3 Initial Setup Procedures: 10.3.1 Unpack and setup the MP1200 Melt Indexer and its accessories following the standard instructions. 10.3.2 Locate the exhaust filter muffler (Item 17 on 5-6-819; 10 on 5-6-820) and attach to the bulkhead fitting (Item 28 on 5-6-819;... - Page 45 REGULATOR. 10.3.11 Check the operation of the Purge Cylinder as follows: Power up the MP1200. If the air supply is properly connected, the cylinder(s) should be retracted at this time if all the hoses were connected correctly. Follow the on-screen instructions for positioning the WLD in the “HOME”...
- Page 46 10.3.12Check the operation of the Cleaning Cylinder (if present) as follows: Power up the MP1200. If the air supply is properly connected, both cylinders should be retracted at this time if all the hoses were connected correctly.
-
Page 47: Operation
The purge feature can be used prior to a test to purge the test charge to a predetermined starting point. The operator will charge the material into the bore and start the test, lowering the WLD platform to a predetermined height (set by manually programming the MP1200 controller in the PROGRAM mode). -
Page 48: Software Operation
10.4.2 Software Operation Go to the Machine Tab for the desired MP1200, then click on Method Editor, then Control Options. Check the box next to Pneumatic Purge and Cleaning Device. Check the box next to Pre-Test Purge and enter the desired time period for the Pre-Test Purge Delay, if desired. -
Page 49: Operational Notes
Pre-Test Purge and the proper weight application. If the standard Flow Rate Ratio weights (without center holes) are used the purge option cannot be used in Flow Rate Ratio testing. Tinius Olsen MP1200 Extrusion Plastometer Page 10-7 Operation Manual # 02002215... -
Page 50: Section 11 - Configuration Mode
11.1.6 Clean On/Off - If the MP1200M is equipped with a pneumatic cleaning- attachment and it is to be used, press the ON button. 11.1.7 Cut On/Off- If the MP1200 is equipped with an automatic cutter attachment and it is to be used, press the ON button. Figure 9-1 Machine Settings Screen... -
Page 51: Pid Controls
Set Point temperature, current actual temperature, and the PID gains for that zone) and the actual temperature reading (shown to the nearest 0.01 Figure 9-2 PID Setting Screen (Values shown are not actual settings) Tinius Olsen MP1200 Extrusion Plastometer Page 11-2 Operation Manual # 02002215... - Page 52 A higher output value will keep the heaters on longer than a lower output value. The heaters will be full on when the output is 100%, and full off when 0%. Tinius Olsen MP1200 Extrusion Plastometer Page 11-3 Operation Manual # 02002215...
- Page 53 Der. Mod. Falling 1000 Prop. Mod. Rising 1000 1000 Der. Mod. Rising 1000 1000 Lock Time Anti-Lock Time Table 9-1 – Default Factory PID Settings Middle Bottom Period 30 s Tinius Olsen MP1200 Extrusion Plastometer Page 11-4 Operation Manual # 02002215...
-
Page 54: Calibrate
Middle (45 mm above the top of the die), then finally the Top (75 mm above the Top of the die). Allow adequate time for the readings to stabilize between each movement of the reference Tinius Olsen MP1200 Extrusion Plastometer Page 11-5 Operation Manual # 02002215... -
Page 55: Calibrate Ppdt
Short Calibration – Short Calibration is used to enter the arm length (after repair or replacement) and to zero the PPDT. Press the Short Calibration key. This will display the Final Calibration Step screen. Tinius Olsen MP1200 Extrusion Plastometer Page 11-6 Operation Manual # 02002215... -
Page 56: Calibrate Wld
WLD Calibration is accessed by selecting CONFIGURATION (passcode 835), then CALIBRATE, then CALIBRATE WLD. It will only be active if the WLD selection on the Machine Settings screen is set to ON. Tinius Olsen MP1200 Extrusion Plastometer Page 11-7 Operation Manual # 02002215... -
Page 57: Diagnostic
11.4 Diagnostic There are no user serviceable/adjustable features in the diagnostics mode. Tinius Olsen MP1200 Extrusion Plastometer Page 11-8 Operation Manual # 02002215... -
Page 58: Section 12 - User Settings
12.1.1 Language – Press the box next to LANGUAGE and select the desired language. 12.1.2 Printer Selection – Press the box next to PRINTER and select the printer that is connected to the MP1200, if any. 12.1.3 Alarms – Turn the alarms ON or OFF as desired. -
Page 59: Calibration Offsets
Because of the wide range of temperatures that the MP1200 Controller may be used, it may be necessary to enter Calibration Offsets for each test temperature (set temperature). -
Page 60: Date/Time
(Top , Middle, and Bottom) to make the displayed temperature for each zone match the reference thermometer at that point. 12.2.4 The MP1200 normally only shows the temperature at the Bottom zone. However all three zone readings can be seen on the PID tab found under Configuration (include screen shot). -
Page 61: Section 13 - Testing Polymers According To Astm D 1238 "Procedure A" (Manual Cut-Off Operation)
13 Section 13 – Testing Polymers According to ASTM D 1238 “Procedure A” (Manual Cut-Off Operation) CAUTION: Do not use a sharp object to press any of the buttons on the Model MP1200 Controller, as this might damage the LCD display. CAUTION: Prior to shipment, the cylinder of the machine is coated with oil to prevent rust from forming. - Page 62 0° setting should also be entered when the Calibration Offset screens are displayed. 13.2.7 Press the Test Load box. Again, a keypad is shown next. Enter the desired test load in kilograms. Press the DONE button when finished. Tinius Olsen MP1200 Extrusion Plastometer Page 13-2 Operation Manual # 02002215...
- Page 63 In all tests, make sure the preheat time (420 +/- 30 seconds) is observed and then start making cut(s) after the lower scribe line on the piston disappears. Tinius Olsen MP1200 Extrusion Plastometer Page 13-3 Operation Manual # 02002215...
- Page 64 13.2.14If the MP1200 is equipped with the Auto-Cutter option, you can turn it on or off on this screen. Press the CONTINUE button. 13.2.15The next screen that appears allows the operator to select the Standard Identifiers used to identify the specimens. Use of the Standard Identifiers is optional.
- Page 65 13.2.29Don’t Save – Press Don’t Save to return to the Select Program screen. 13.2.30Save As – Press Save As to save a new program. Use the keyboard that appears to enter the desired program name. 13.2.31Save – Overwrites existing file Tinius Olsen MP1200 Extrusion Plastometer Page 13-5 Operation Manual # 02002215...
-
Page 66: Test Procedure
To charge the cylinder, insert the funnel into the cylinder, and then slowly pour the material into the funnel. Do Tinius Olsen MP1200 Extrusion Plastometer Page 13-6 Operation Manual # 02002215... - Page 67 Press Start to move to the next screen. NOTE: Materials with high melt flows may require the orifice to be plugged in addition to supporting the weight. Use the optional Tinius Olsen High Melt Flow Orifice Plug (TO P/N 02001455).
- Page 68 IT IS IMPERATIVE THAT THE MACHINE IS CLEANED AFTER EACH TEST. If no more tests are needed, remove the piston and orifice from the furnace before turning the MP1200 off to prevent them from being welded in place as any material left in the barrel hardens.
- Page 69 At End of Preheat Alarms Alarms Alarms Capture Start Capture Start Capture Start Alarms Alarms Alarms Capture End Capture End Capture End Table 11-1 Factory Programmed MP1200 Example Test Parameter Screens Tinius Olsen MP1200 Extrusion Plastometer Page 13-1 Operation Manual # 02002215...
- Page 70 Test Results Test Results Melt Density Melt Density Alarm: Alarm: At End of Preheat At End of Preheat Alarms Alarms Capture Start Capture Start Alarms Alarms Capture End Capture End Tinius Olsen MP1200 Extrusion Plastometer Page 13-2 Operation Manual # 02002215...
-
Page 71: Section 14 - Testing Polymers According To Astm D 1238 Procedure B (Automatically Timed Flow Rate) When The Melt Density Is Known
14 Section 14 - Testing Polymers According to ASTM D 1238 Procedure B (Automatically Timed Flow Rate) when the Melt Density is known. CAUTION: Do not use a sharp object to press any of the buttons on the Model MP1200 Controller, as this might damage the LCD display. CAUTION: Prior to shipment, the cylinder of the machine is coated with oil to prevent rust from forming. -
Page 72: Creating A New Procedure B Program
Enter a temperature near or below the ambient temperature (or enter 0°) and then press the DONE button. A 0° setting should also be entered when the Calibration Offset screens are displayed. Tinius Olsen MP1200 Extrusion Plastometer Page 14-2 Operation Manual # 02002215... - Page 73 14.2.12Press the Entered button next to MELT DENSITY TYPE (assuming that the melt density value for the material being tested is known). 14.2.13Press on the Entered Value box and use the keyboard that appears to enter the melt density value. Tinius Olsen MP1200 Extrusion Plastometer Page 14-3 Operation Manual # 02002215...
- Page 74 (the actual travel distance that is selected depends on the expected flow rate of the material). However, the machine can be set up to take discrete measurements (captures) at defined intervals within the 0.25 or 1.0 inch of travel. Tinius Olsen MP1200 Extrusion Plastometer Page 14-4 Operation Manual # 02002215...
- Page 75 Press the Done button when finished. 14.2.19If more than one capture is desired, press the Auto Fill button to have the MP1200 calculate the start heights for the additional captures. The Starting Heights are automatically set back-to-back based on the “Piston Travel Cap 1”...
- Page 76 14.2.29Comments (Pre-Test) - If desired, press the box next to Comments (Pre- Test). This will allow the operator to enter comments, prior to the test. A check mark will appear in the box to confirm the selection. Tinius Olsen MP1200 Extrusion Plastometer Page 14-6 Operation Manual # 02002215...
- Page 77 14.2.36Don’t Save – Press Don’t Save to return to the Select Program screen. 14.2.37Save As – Press Save As to save a new program. Use the keyboard that appears to enter the desired program name. 14.2.38Save – Overwrites existing file Tinius Olsen MP1200 Extrusion Plastometer Page 14-7 Operation Manual # 02002215...
-
Page 78: Test Procedure
It is important that the test does not start until after the minimum preheat time has expired. To charge the cylinder, insert the funnel into the cylinder, and then slowly pour the material Tinius Olsen MP1200 Extrusion Plastometer Page 14-8 Operation Manual # 02002215... - Page 79 (MP1200M only). Press Start to move to the next screen. OTE: Materials with high melt flows may require the orifice to be plugged in addition to supporting the weight. Use the optional Tinius Olsen High Melt Flow Orifice Plug (P/N 02001471 for standard D1238 die or 02001481 for “half-die”).
- Page 80 14.3.12When the weight drives the arm of the PPDT to the “Start Capture 1” Height, a momentary alarm will sound. The MP1200 will automatically start recording the time it takes for the piston to travel the programmed “Piston Travel CAP 1”...
- Page 81 IS IMPERATIVE THAT THE MACHINE IS CLEANED AFTER EACH TEST. If no more tests are needed, remove the piston and orifice from the furnace before turning the MP1200 off to prevent them from being welded in place as any material left in the barrel hardens.
-
Page 82: Section 15 - Testing Polymers According To Astm D 1238 Procedure B (Automatically Timed Flow Rate) When The Melt Density Is Unknown (Procedure For Calculating The Melt Density Of A Polymer)
NOTE: The instructions in this Section are based on ASTM D 1238. This test method should be thoroughly studied by all operators prior to using the MP1200. Copies of the standard are available from ASTM at 100 Barr Harbor Drive, West Conshohocken, PA 19428-2959, USA –... -
Page 83: Creating A New Procedure B Program
(or enter 0°) and then press the DONE button. A 0° setting should also be entered when the Calibration Offset screens are displayed. Tinius Olsen MP1200 Extrusion Plastometer Page 15-2 Operation Manual # 02002215... - Page 84 15.2.12Press the Entered button next to MELT DENSITY TYPE (assuming that the melt density value for the material being tested is known). 15.2.13Press on the Entered Value box and use the keyboard that appears to enter the melt density value. Tinius Olsen MP1200 Extrusion Plastometer Page 15-3 Operation Manual # 02002215...
- Page 85 (the actual travel distance that is selected depends on the expected flow rate of the material). However, the machine can be set up to take discrete measurements (captures) at defined intervals within the 0.25 or 1.0 inch of travel. Tinius Olsen MP1200 Extrusion Plastometer Page 15-4 Operation Manual # 02002215...
- Page 86 Press the Done button when finished. 15.2.19If more than one capture is desired, press the Auto Fill button to have the MP1200 calculate the start heights for the addition captures. the Starting Heights are automatically set back-to-back based on the “Piston Travel Cap 1”...
- Page 87 This will allow the operator to enter comments, prior to the test. A check mark will appear in the box to confirm the selection. 15.2.30Comments (Post-Test) - If desired, press the box next to Comments (Post- Tinius Olsen MP1200 Extrusion Plastometer Page 15-6 Operation Manual # 02002215...
-
Page 88: Test Procedure
15.3.4 Verify that the Program File shows the desired program and that all information displayed on the screen is correct. Press the Start Test button to Tinius Olsen MP1200 Extrusion Plastometer Page 15-7 Operation Manual # 02002215... - Page 89 The time that the funnel is allowed to sit in the cylinder should be kept to a minimum. 15.3.7 After charging the cylinder, lightly tamp the material down with the charging Tinius Olsen MP1200 Extrusion Plastometer Page 15-8 Operation Manual # 02002215...
- Page 90 WLD (MP1200M only). Press Start to move to the next screen. NOTE: Materials with high melt flows may require the orifice to be plugged in addition to supporting the weight. Use the optional Tinius Olsen High Melt Flow Orifice Plug (TO P/N 02001455).
- Page 91 IS IMPERATIVE THAT THE MACHINE IS CLEANED AFTER EACH TEST. If no more tests are needed, remove the piston and orifice from the furnace before turning the MP1200 off to prevent them from being welded in place as any material left in the barrel hardens.
-
Page 92: Section 16 - Cleaning Instructions
Note: If no more tests are needed, ALWAYS remove the piston and orifice from the furnace before turning the MP1200 off to prevent them from being welded in place as any material left in the barrel hardens. -
Page 93: Section 17 - Preventative Maintenance
17.3.2 Refer to Drawing 8-12-1478. Heater connection is J16. Fuse F1 is Bottom, F2 is Middle and F3 is Top. F4 is common L1 for all 3 zones. Tinius Olsen MP1200 Extrusion Plastometer Page 17-1 Operation Manual # 02002215... - Page 94 If any of these tests fail, replace the probe and recalibrate. 17.3.5 The MP1200 Controller, with all heater zones on full, draws about 3 to 4 Amps at 115 VAC service and about 4.5 Amps at 230 VAC service.
-
Page 95: Section 18 - Calibration/Verification - Ppdt Attachment
Follow the guidelines as detailed in the current version of ASTM D 1238, or contact Tinius Olsen Field Service to arrange to have the machine verified by Tinius Olsen personnel. Tinius Olsen’s Field Service Department... - Page 96 (relative to the horizontal) gives the linear position (relative to the horizontal). The Offset is added in to give the height above the top of the orifice (Piston Height). Tinius Olsen MP1200 Extrusion Plastometer Page 18-2 Operation Manual # 02002215...
-
Page 97: Arm Length Calculation
The Offset is simply a value, relative to the true horizontal position of the PPDT arm, that is added in after the sine correction to make the PPDT readings agree with the true piston height. Tinius Olsen MP1200 Extrusion Plastometer Page 18-3 Operation Manual # 02002215... -
Page 98: Temperature Verification/Calibration
18.2 Temperature Verification/Calibration 18.2.1 Suggested Equipment 18.2.1.1 Tinius Olsen Model TO410 Digital Temperature Meter Includes: Tip, Part Number 02002173 Heat Sink, Part Number 02002172 RTD Sensor, Part Number 02005177 Insulator, Part Number 02002174 Collar, Part Number 02002189 Part Number Item Number... -
Page 99: Section 19 - Temperature Control Configuration Mode
(i.e. the mathematical output resulting from the current Set Point temperature, current actual temperature, and the PID gains for that zone) and the actual temperature reading (shown to the nearest 0.01 deg C). Tinius Olsen MP1200 Extrusion Plastometer Page 19-1 Operation Manual # 02002215... -
Page 100: Pid Gains
A higher output value will keep the heaters on longer than a lower output value. The heaters will be full on when the output is 100%, and full off when 0%. Tinius Olsen MP1200 Extrusion Plastometer Page 19-2 Operation Manual # 02002215... -
Page 101: Recovery Parameters
This integral value may not be exactly correct following the change in load within the furnace and unlocking it again after the set time allows for this to be corrected. Tinius Olsen MP1200 Extrusion Plastometer Page 19-3 Operation Manual # 02002215... -
Page 102: Temperature Controller Status Parameters
ADC reports at 5Hz, means 20 seconds. 19.6 Automatic Line voltage compensation The MP1200 monitors the incoming line voltage and automatically compensates for small and medium sized changes in the line voltage and continues to attempt to do so for more extreme cases. - Page 103 GFI receptacle as the small leakage current to ground from the internal filter may cause it to trip. A standard computer grade surge suppressor is recommended for protection. Tinius Olsen MP1200 Extrusion Plastometer Page 19-5 Operation Manual # 02002215...
-
Page 104: Section 20 - Recommended Spare Parts List
0201142) are used when the orifice will not pass the minimum ID requirement. DO NOT USE STEEL BRUSHES. It is recommended that all 3 probes be replaced at the same time. Recalibration of the machine is necessary after probe replacement. Tinius Olsen MP1200 Extrusion Plastometer Page 20-1 Operation Manual # 02002215... -
Page 105: Section 21 - Mp1200 Packing/Shipping Instructions
NOTE: If only one weight is ordered it is placed in the parts box and not in the lower compartment. Tinius Olsen MP1200 Extrusion Plastometer Page 21-1 Operation Manual # 02002215... - Page 106 (Refer to Figure 19-2) Figure 19-2 (Shows cardboard spacer installed) 19.5 Place the MP1200 Melt Indexer into the box making sure that it is sitting flat and securely on the cardboard spacer. (Refer to Figure 19-3) 19.6 Place a piece of foam over the digital display unit making sure it covers the base plate as well..
- Page 107 Figure 19-3 (This picture shows a non motorized MP1200 securely in place with the foam on the table under the cardboard divider.) 19.8 Pack up the parts box (Refer to Figure 19-4). The parts must be placed in the box in the following order: 19.8.1 PPDT Automatic Timing Switch - P/N 02001505 (optional - wrap in foam) &...
- Page 108 (Refer to Figure 19-5). By closing the lid, this will push the parts box down. Once the box is banded, it will secure the machine in place for shipment. Tinius Olsen MP1200 Extrusion Plastometer Page 21-4 Operation Manual # 02002215...
- Page 109 Figure 19-5 (This is how the box should look like before closing.) Tinius Olsen MP1200 Extrusion Plastometer Page 21-5 Operation Manual # 02002215...
- Page 110 Tinius Olsen MP1200 Extrusion Plastometer Page 21-6 Operation Manual # 02002215...
- Page 111 APPENDIX A TYPICAL ASSEMBLY DRAWINGS WITH PARTS LIST & WIRING DIAGRAMS. Version 5b – 15 October 2010...
- Page 112 Version 5b – 15 October 2010...
Need help?
Do you have a question about the MP1200 and is the answer not in the manual?
Questions and answers
MP-1200 ERROR MOTOR STALLED. WHAT CAN BE DONE TO FIX THIS?