
Related Manuals for Jinan QingQi QM50QT-6

Summary of Contents for Jinan QingQi QM50QT-6
- Page 1 QM50QT-6 QM50QT-6D QM50QT-6G QM50QT-6N QM50QT-6R QM50QT-6S...
- Page 2 QM50QT-6V...
-
Page 3: Table Of Contents
CONTENTS FOREWORD PRECAUTIONS FOR SAFE RIDING……………2 Thank you for purchasing QM50QT-6 catena moped. With absorbing advanced motorcycle technology, THE SERIAL NUMBER……………………………3 we have designed and produced this moped with beautiful LOCATION OF PARTS……………………………4 app-earance, reliable performance and comfortable driving. This moped can supply you an inspiring, CONTROLS…………………………………………6... -
Page 4: Precautions For Safe Riding
PRECAUTIONS FOR SAFE RIDING Proper Wearing of Safety Helmet Please obey local traffic regulations and mind the Wear the safety helmet and fasten the belt whenever safety prior to anything. It is advised to control the speed you ride. within safe limits. Garment Recommendation The scooter is designed for a single person. -
Page 5: The Serial Number
Flammable materials, such as cotton waste, should syphon of the chassis. not be put near the engine or the muffler as they might cause fire. No modification is allowable Modification to the unit is not allowed and may not guarantee a safe driving. THE SERIAL NUMBER The serial numbers are required to register the scooter. - Page 6 Please write down the numbers here for future reference. Frame Serial No. : Engine Serial No.:...
-
Page 7: Location Of Parts
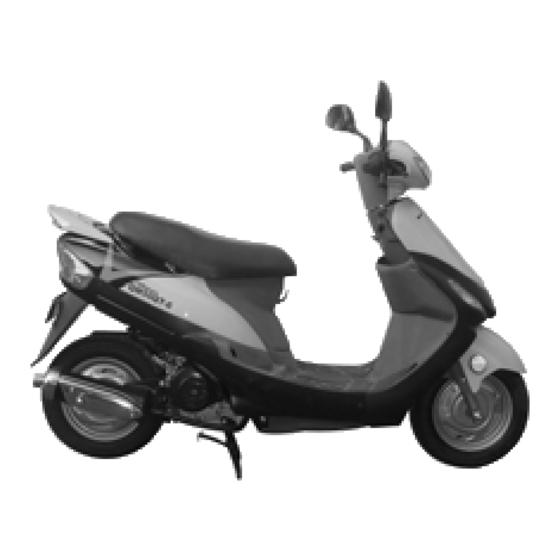
Left side of the motorcycle: LOCATION OF PARTS Steering bar and instrument 1. Head lamp 2. Pothook helmet 1.Horn keyswitch 2.Turning switch 3. Seat 4. Seat lock 3.Rear brake handle 4.Dimmer switch 5. Rear shelf 6. Side reflector 5. Instrument 6. -
Page 8: Controls
CONTROLS Right side of the motorcycle: INSTRUMENT PANEL INDICATIONS 1. Rear tail/brake lamp 2. Battery 3. Rear turn lamp 4. Muffler 5. Rear wheel 6. Front wheel ① Fuel Gauge The fuel gauge shows the proportion of fuel left in the fuel tank. - Page 9 ④ Turning Indicator When the switch is at: The indicator flashes to show the turning lamps are working. The engine can be started. ⑤ High light Indicator It is impossible to pull out the key. The indicator flashes to show the headlamp is working.
- Page 10 LOCK position, and turn it (without pressing) clockwise the low beam is turned on. to OFF position. ② Rear Brake Lever The rear brake lever is on the left grip. Press the RECOMMENDATIONS lever to the grip and the rear brake operates. ●...
- Page 11 SWITCHES ON THE RIGHT HANDLEBARS “ ” : If the switch is set on . the starter motor cannot start and the starting circuit breaks completely. ② Starter Button This button is used to start the engine. Turn the ignition key to ON, squeeze the rear brake lever and press the button, the engine will be started immediately.
- Page 12 you to decrease the engine speed. This scooter is equipped with a main stand and a KICK STARTER LEVER side stand. To use the main, depress it by foot and lift the rear of the scooter until the rear wheel is lift. To use the side, depress the end of it until it rotates to the end and stops.
- Page 13 Press the fuel tank cap to position and rotate it To open the seat as follows: clockwise. 1.Insert the ignition key into the seat lock and turn it clockwise. LUGGAGE TRUNK AND SEAT LOCK 2.Lift the rear of the seat and the seat is opened. Push the seat gently and it will be locked automatically.
-
Page 14: Fuel And Oil Recommendations
FUEL AND OIL RECOMMENDATIONS BREAK-IN OF NEW motorcycle The first 1000km are the most important in the life FUEL of your scooter. Proper break-in operation during this Use unleaded gasoline with an octane number 93 or period will help ensure maximum life and performance higher. - Page 15 Note: AVOIDING CONSTANT LOW SPEED After running for 500Km, replace the gear oil. It will not benefit the engine at a constant low speed 500~1000Km during break-in period. Allow the engine to accelerate Avoid long time engine operation with the freely within the recommended maximum limits.
-
Page 16: Inspection Before Riding
CAUTION INSPECTION BEFORE RIDING The 1000km service should be performed as the outlined in the inspection and maintenance section in Before riding the scooter, be sure to check the this manual. Pay attention to the caution and following items. Never underestimate the importance of warning in that section. - Page 17 CAUTION High light indicator and turning Indicators In case that any of the above item is found indicator abnormal, correct it before driving. Seek help from Horn Correct function the distributor when necessary. Engine oil Oil level. Replenish if necessary. Correct play in the throttle cable Throttle...
- Page 18 Check the surface of the tire: INSPECTION OF THE TIRE Tire Pressure Is there any obvious damage? Observe the wear condition of the tire and determine Are there any nail, stone, glass and etc the tire pressure. If the tire pressure is abnormal, check it in the tire or in the tread? with a tire pressure gauge and adjust it to the correct value.
- Page 19 position by a spring force. INSPECTION OF THE IGNITION UNIT AND ●Have it adjusted by the distributor if necessary. THE LIGHTS AIR FILTER ●Start the engine, turn on the headlamp switch, and ●The air filter prevents dust from getting into the check if the headlight and the rear light are on.
-
Page 20: Riding Tips
RIDING TIPS START THE ENGINE CAUTION Before starting, you must Check the quantity of fuel and engine oil. Erect the center stand. You cannot use the kick starter lever if you release 1) Turn the ignition key to ON. the main stand. 2) Kick the kick-start lever forcefully. - Page 21 the engine is not be able to started after the 2) Open the throttle 1/8~1/4 cycle. button has been pushed 5 seconds, please restart it after time out lasts 10 seconds. ● restart using the kick-starter and check if there is any problem with the starting system ●...
- Page 22 3. Look around to see if it's safe to set out. ADJUST SPEED Send out your starting signal by switching on the turning lamps. Look around to judge the safe condition. You need to squeeze the rear brake lever all the time before you set out CAUTION Special attention should be paid to the traffic approaching you from behind.
-
Page 23: Inspection And Maintenance
engine. INSPECTION AND MAINTENANCE Erect the center stand Park your scooter and erect the main stand on a The maintenance schedule indicates the intervals surface. Make sure the traffic won't be obstructed. between periodic services in kilometers and months. At CAUTION the end of each interval, be sure to inspect, check, Never park your scooter on a slope or a loose surface,... - Page 24 CAUTION You may replace some components when you maintain your scooter. We suggest you use genuine QINGQI replacement parts or their equivalent. If you are an expert or a do-it-yourself mechanic, QINGQI recommends that those items on the maintenance schedule marked with an asterisk (*), be performed by authorized QINGQI dealer or qualified service mechanic.
-
Page 25: Maintenance Schedule
MAINTENANCE SCHEDULE 1000 2000 3000 4000 5000 6000 8000 Intervals Months Nuts of cylinder head and exhaust pipe Cylinder head, cylinder and muffler Carburetor Spark plug Clean every 3000km, replace if necessary Air filter (note②③) Engine oil (note①) Engine oil filter Gear oil (note②) Valve clearance Fuel pipe... - Page 26 ●Please operate every item according to the maintenance interval table if it’s cumulative distance over it in the table. NOTE: I=Inspect and clean adjust lubricate or replace if necessary, C=Clean, R=Replace, T=Tighten Note ①③:Change once in primal 500Km. Note②:It should be ahead replaced if it is in overload、long-distance or rain conditions. Note③:It should be inspected and replaced ahead if it is in muddy or dusty conditions.
- Page 27 TABLE OF LUBRICATION Time interval Beginning and every 6000Km or 6 months Every 1200Km or 12 months Item Accelerator wire Engine oil Accelerator grip Lubrication grease Braking cable Engine oil Speedometer cable Lubrication grease Speedometer gear box Lubrication grease *Braking cam shaft Lubrication grease Front braking grip pintle Lubrication grease...
- Page 28 TOOL To help you carry out the regular maintenance or the maintenance at any moment, we have prepared a set of tool and put it in the article box NOTE: Table 1 When you need a torque spanner in maintenance A (Nut) B (Bolt) Torque requirement(N.m)
- Page 29 CRANK SHAFT BOX OIL 1.Check the oil level a. Stop the motorcycle vertically on a flat ground and run the engine at idle speed for 5 minutes. Note: If the motorcycle stands in an inclined position, the oil level may be incorrect. b.
- Page 30 2.Use spanner to release the bolt to release the old gear oil. 3.After tightening the bolt, use a spanner to dismantle the oil filling plug and prepare to fill the new gear oil. 4.Place the motorcycle flatly and the left side of it is GEAR OIL up.
- Page 31 ①battery 2.1Place the battery erectly, then open the cover. The battery is located under the footboard. This 2.2 Take the electrolyte container out of the plastic bag. battery is sealed type and requires no maintenance such as 2.3 Take up the electrolyte container upside down and fluid level and gravity.
- Page 32 2.6 Make the six plugs of the cover aim at six battery Use a small metal brush or cleaner to remove the sprues. After making sure that every plugs end pierce into carbon deposits at the first 1000km or every 3000km battery sprues, depress the electrolyte container until the lately.
- Page 33 has been carefully selected to meet the vast The air filter element used in this motorcycle is a majority of all operation ranges. If the spark polyurethane foam element. If the filter element has plug color indicates that other than standard become clogged with dust, intake resistance will increase with a resultant decrease in power output and increase in spark plug should be used, it is best to...
- Page 34 4) Reinstall the cleaned air filter element in reverse WASHING THE AIR FILTER ELEMENT order of removal. Be absolutely sure that the filter element is securely in position and is sealing properly. CAUTION Before during cleaning operation, carefully examine the air filter element for any tears in the material.
- Page 35 CARBURETOR performance you ought to expect of your engine. The carburetor is factory set for the best carburetion. Do not attempt to alter its setting. There are two items of adjustment, however, under your care: engine idle speed and throttle cable play. Adjust the carburetor idle speed end throttle cable play periodically.
- Page 36 ●Work is operated when you have supported the THROTTLE CABLE ADJUSTMENT main stand. ● When the engine is warm condition and self-chock is close, you may adjust carburetor. ● Adjust the engine revolutions, hodometer should be used. ●Air screw standard circles:2.5±0.5 circle CAUTION: The air screw can’t be screwed on toughly to 1)Loosen the lock nut ①.
- Page 37 The clearance between the front brake lever and the brake holder should be 10-20mm.Turn the front brake adjusting nut clockwise or counterclockwise until you reach the recommended clearance. Combined application both brakes recommended. Quickly release the throttle grip to the minimum position and squeeze the brake levers.
- Page 38 kept from the vehicles ahead. Bear in mind that Warning the braking distance in rainy days is twice as much as in sunny days. An incorrect free play means a trouble in the Side sliding is apt to occur on wet road, therefore braking system.
- Page 39 introduced into the braking system, resulting in the brakes BRAKE ADJUSTMENT malfunction. Check the brake fluid level before driving and replenish if necessary. Follow the precautions below: To check the fluid level, rotate the steering bar so as to get the brake fluid tank in a leveled position. Always use recommended brake fluid.
- Page 40 counterclockwise to obtain the specified play. Cold inflation tire pressure Turning the adjusting nut clockwise will decrease Solo Dual the play. Front Wheel 125kPa 125kPa 2)After adjusting the play. Check that there is Rear Wheel 175kPa 200kPa no dragging when turning the wheel with the wheel off the ground and that there is enough clearance between the brake lever end grip when the lever is tightly squeezed.
- Page 41 CAUTION (2) Mounting of the fuse The standard tires on your scooter are (3) Place it from the top 3.00-10 4PR in front and rear. The use of a tire other than standard may cause trouble. It is CAUTION highly recommended to use the standard tire Always be sure to replace the blown fuse with supplied by QINGQI.
- Page 42 emery cloth. 4.Following the dismount order conversely when installing. CAUTION: ●The battery may produce the flame gas, so must keep away from fire. ● Must turn the ignition switch to OFF when remove the wire, then follow the steps of the first(-), second(+).
-
Page 43: Troubleshooting
TROUBLESHOOTING Troubleshooting 1. Familiar trouble about the engine and the way of the Elimination Position Trouble Reason The way of eliminating the trouble The ful can not reach the carburetor The fuel tank venthole is blocked Dredge the place blocked The fuel valve is blocked Replace the fuel Fuel supply... - Page 44 2.Familiar trouble about the engine and the way of the elimination Position Trouble Reason The way of eliminating the trouble 1. The CDI device is bad 1. Replace CDI 2. The pulse apparatus is bad 2. Replace the pulse apparatus 3.
- Page 45 3.Familiar trouble about the engine and way of the elimination Position Trouble Reason The eliminating the trouble 1.There is overmuch carbon deposit on the 1.Clean out the overmuch carbon The pressure is over high cylinder head or on the top of the piston deposit 1.
- Page 46 4.Familiar trouble about the engine and way of the elimination Position Trouble Reason The eliminating the trouble The cylinder head and the 1.There is overmuch carbon deposit on the piston or in 1.Clean out the carbon deposit cylinder body are the firebox over hot 1.
- Page 47 5. Familiar trouble about the transmission box and the way of the elimination Position Trouble Reason The eliminating the trouble 1. The transmission belt is worn 1. Replace the belt The motorcycle does not 2. The declining board is mangled 2.
- Page 48 6. Familiar trouble about the transmission box and the way of the elimination Position Trouble Reason The eliminating the trouble 1.There is too much oil 1.Empty the spare oil Leakage 2.The oil seal is worn or damaged 2.Replace the oil seal The crank shaft box rives Replace the crank shaft box Replace or examine and repair...
- Page 49 7. Familiar trouble about the driving and the operation and the way of the elimination Trouble position Trouble Reason The way of eliminating the trouble 1. The bearing in the front erecting pipe of the frame or the bearing socket is damaged 1.
- Page 50 8. Familiar trouble about the driving and the operation and the way of the elimination Trouble position Trouble Reason The way of eliminating the trouble The flange is deflective Modify or replace Rear wheel The shaft is not screwed down Screw down flutters The tire pressure is lack...
- Page 51 Trouble position Trouble Reason The way of eliminating the trouble Exhaust noise is 1. The muffler is broke off 1. Replace over big 2. The muffler is damaged 2. Examine and repair Exhaust system1 1. The muffler transmutes 1. Replace Exhaust is not good 2.
- Page 52 Cleaning and storing Note: Cleaning Never use alkali and acid detergent, gasoline or other Clean your motorcycle frequently to keep a delightful solvent when washing, to avoid damaging. appearance and prolong its service life. When washing is completed, start the engine and run Before cleaning it at idle speed for a few minutes.
-
Page 53: Storage Procedures
STORAGE PROCEDURES ! Warning When operating the engine with the starting motor, disconnect and earth the high voltage lines to avoid If the motorcycle is to be left unused for extended producing sparks. period of time for winter storage or any other reason, the 3. -
Page 54: Specifications
Adjust the pressure of tires as described in the BATTERY TIRE section. Remove the battery from the scooter. Lubricate all places as instructed in this Clean the outside of the battery with mild manual. detergent and remove any corrosion from the Do the INSPECTION BEFORE RIDING as terminals and wiring harness connections. - Page 55 SPECIFICATIONS...
-
Page 56: Wiring Diagram
WIRINGDIAGRAM... - Page 57 Without prior permission of Jinan Qingqi Motorcycle Co., Ltd. no part of this Manual may be reproduced, duplicated or quoted in any form at any time. The data, explanations, photographs and specifications contained in the Manual are of the latest products at the moment of publication.
Need help?
Do you have a question about the QM50QT-6 and is the answer not in the manual?
Questions and answers