
Related Manuals for Avtech Room Alert 32E


Summary of Contents for Avtech Room Alert 32E
- Page 1 Alert Room ® Temperature & Environment Monitoring... Made Easy! Room Alert 32E/W, 12E, 4E & 3E ® Phone 401.628.1600 User’s Guide & 401.628.1601 Reference Manual AVTECH.com AVT-160614-1.0.1...
- Page 2 Resellers: Order Through Your Favorite Reseller - Ask them to contact AVTECH on your behalf. AVTECH has a network of resellers world-wide and we are happy to To download or confirm recommend a reseller in your country. current software and...
-
Page 3: Table Of Contents
Connect Your Room Alert Hardware ................6 If Your Network Is Power Over Ethernet (PoE) Enabled ( Room Alert 32E/W, 12E & 3E) ... 6 If Your Network Is Not Power Over Ethernet (PoE) Enabled .......... 6 Connect Included External Sensors And Other Compatible Components ......6 How To Use Room Alert’s Web Interface ................ -
Page 4: Room Alert Hardware Options
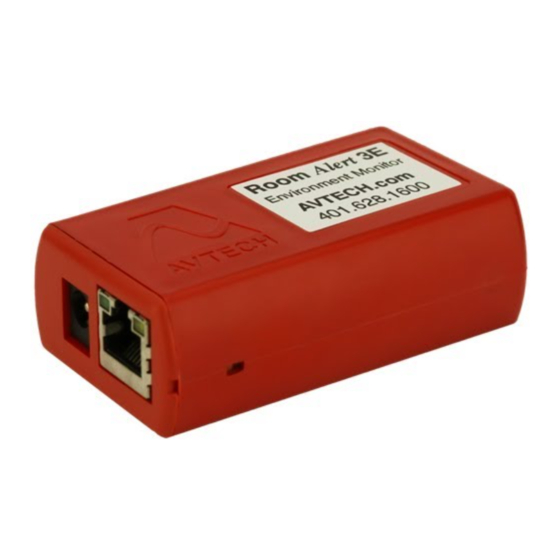
Room Alert Hardware Options Room Alert 3E Front Back Internal Sensors Power Ethernet Reset Switch Digital Port Port Button Sensor Sensor Temperature • Port Port Room Alert 4E Front Back Power Ethernet Digital Switch Reset Custom Port Port Sensor Sensor Button Light Tower Internal Sensors... -
Page 5: Room Alert 32E/W
Room Alert 32E/W WiSH Signal Strength LEDs (RA32W only) Front Power Ethernet PoE, Light Tower & Digital Status Port WLAN & Relay Adapter Sensor Ports Ports LEDs Alarm LEDs Wireless Coaxial Port (RA32W only) Back Relay Analog Switch Reset Power... -
Page 6: Room Alert Hardware Features
Relay Switch Sensor to Room Alert 4E. A standard RJ-11 jack connects a Light Tower & Relay Light Tower & Relay Adapter Port(s) Adapter to Room Alert 32E/W, 12E or 3E via a standard Room Alert 32E/W, 12E & 3E RJ-11 (straight through) telephone cord. -
Page 7: Standard Room Alert Packages
Room Alert 32W coaxial cable. On / Off Button A push button turns the Room Alert 32E/W’s internal Room Alert 32E/W battery back-up on and off. Standard Room Alert Packages Room Alert 3E... -
Page 8: How To Install Your Room Alert
Your Room Alert is now powered and discoverable on your network! Use only AVTECH’s 5V 1A Power Adapter. Other voltages could damage the Room Alert hardware and void your warranty. If you don’t have an AVTECH 5V 1A Power NOTE Adapter, please visit our online store at AVTECH.com... -
Page 9: How To Use Room Alert's Web Interface
How To Use Room Alert’s Web Interface You may configure your Room Alert through its built-in web interface. To access the interface, you may either: Type the IP address of your Room Alert monitor directly into the address bar of your •... -
Page 10: Banner & Header
• You may visit AVTECH.com by selecting the AVTECH logo in the banner. Header Below the banner is the header, where you may view basic information about your device. On the left side of the header, you may find the following information: Device Name •... -
Page 11: Sensor Display Area
The time & date the Room Alert last pushed sensor data to GoToMyDevices. • You may click the GoToMyDevices logo to view the latest device information in your GoToMyDevices account. Sensor Display Area In the main viewing pane of the Status tab is the sensor display area. Here you may view your sensor data and temporarily change Status page settings. - Page 12 Light Towers and Relays • Built-in Analog Sensors Room Alert 32E/W & 12E) • To navigate to the different types of sensors in the Sensor Display Area, you may scroll down the page or select the sensor category from the navigation bar to the left of your screen.
-
Page 13: Settings
Settings Accessing Settings To access your Room Alert’s settings: Settings 1. First select in the navigation bar to the left of your screen. 2. Then select the Click Here To Access Settings button in the window that appears. 3. Your browser will prompt you for a username and password. If you’ve set up a password for your Room Alert, enter it and select OK. - Page 14 Saving Settings To save a setting, click out of the field you just modified and notice that a notification bar appears at the top and bottom of the page. This notification bar contains the following items: A list of Settings pages you have unsaved changes on. •...
-
Page 15: Sensors
Sensors and Accessories sections of AVTECH.com. Notice the Use Alarm Profile drop-down menu next to each sensor. If you have an AVTECH Light Tower, Relay Switch Sensor or built-in relays on your Room Alert, NOTE you may configure Alarm Profiles to toggle them on and off when alarms are detected. - Page 16 Degrees Within Threshold Before Alarm Is Cleared Room Alert 32E/W) You may use this feature, available in the Room Alert 32E/W, to adjust how close your digital temperature sensor readings must get to a high or low threshold before their alarms clear. For example, with the default setting here of 1º...
- Page 17 Profile 1, or choose another profile from the drop-down menu. If you have an AVTECH Light Tower, Relay Switch Sensor or built-in relays on your NOTE Room Alert, you may configure Alarm Profiles to toggle them on and off when alarms are detected.
- Page 18 If your Room Alert model has built-in analog input ports, you may configure the 0-5 VDC analog sensor connected to them in these fields. In the example below, we are configuring AVTECH’s Current Loop 1. Enabled 1. First, enable the sensor by selecting in the set of fields on the left of the screen.
- Page 19 1, or choose another Alarm Profile from the drop-down menu. leave the default, If you have an AVTECH Light Tower, Relay Switch Sensor or built-in relays on your NOTE Room Alert, you may configure Alarm Profiles to toggle them on and off when alarms are detected.
- Page 20 Alert defaults to alarming on “Closed,” as you can see above; you may, however, need to change that depending on your sensor. AVTECH’s Motion Sensor, for example, is “Open” when it detects movement and “Closed” when it doesn’t; in that case, you’d likely want to configure the sensor to alarm on “Open”...
- Page 21 Profile 1, or choose another Alarm Profile from the drop-down menu. If you have an AVTECH Light Tower, Relay Switch Sensor or built-in relays on your NOTE Room Alert, you may configure Alarm Profiles to toggle them on and off when alarms are detected.
- Page 22 Room Alert 32E/W & 12E) You may configure the power sensor that is built in to the Room Alert 32E/W here. This internal power sensor triggers on loss of main power and can send a notification while the battery back- up keeps the Room Alert monitor powered for a short time.
- Page 23 WiSH Sensors Room Alert 32W) Your Room Alert 32W web interface automatically detects Wireless Sensor Hubs (WiSHs) and Wireless Sensor Hub & Powered Relays (WiSPRs) that are in range. Below you see the WiSH Sensor Settings screen detecting a WiSH or WiSPR sensor. 1.
- Page 24 4. Record this number on the sticker on the bottom of your WiSH sensor so you’ll know which physical WiSH corresponds to what you’re seeing in the interface. AVTECH – WiSH (Power) Sensor works with Room Alert 32W and 26W only.
- Page 25 The Profile you choose here applies to all sensors connected to the WiSH being configured: its internal, external digital and external switch sensors. If you have an AVTECH Light Tower, Relay Switch Sensor or built-in relays on your NOTE Room Alert, you may configure Alarm Profiles to toggle them on and off when alarms are detected.
-
Page 26: Alarms
Alarms Settings Alarms Navigate to to open the Alarm Settings screen. Here you may configure light towers and relays. Light Tower/Relay Profile Configuration In this example, we’ll select and name a Light Tower w/Audio in LTA 1 and then configure its Profile 1. - Page 27 Room Alert models 4E and 3E offer 1 additional profile (Profile 1). • Light Tower & Relay Adapter (LTA) A Light Tower & Relay Adapter gives you the option to add an AVTECH Light Tower, Light Tower w/Audio or Relay Switch Sensor to a Room Alert 32E/W, 12E or 3E.
- Page 28 Room Alert 32W & 12E) Here you may set the devices connected through the built-in relay output port(s) to turn on or off in response to your Room Alert 32E/W or 12E rebooting or its sensors going in and out of alarm state.
- Page 29 list in Use Alarm Profile. Note that the default for all sensors is Profile 1. You may also choose No Alarm if you do not want to associate your sensor with a profile. 3. Select Save Settings at the top or bottom of the page. Your Room Alert will automatically reboot and commit your changes.
-
Page 30: Network
Network Navigate to Settings Network to open the Network Settings screen. Device Name To rename your Room Alert: 1. Select the automatically-assigned name in Device Name and enter a new one of up to 15 alphanumeric characters. Room Alert device names may be up to 15 characters and can include the following: letters, numbers, spaces, hyphens (-), underscores (_) and periods (.). - Page 31 To obtain an IP address automatically using DHCP: 1. Select Obtain IP Address Automatically. 2. Typically, leave the BOOTP, DHCP and AutoIP checked (enabled), which is the default. Save Settings 3. Select at the top or bottom of the page. Your Room Alert will automatically reboot and commit your changes.
- Page 32 Ethernet Configuration Typically, you may leave the Ethernet Configuration section at the defaults, which are shown below. However, if you connect your Room Alert to a managed switch that controls your network traffic, you may need to change these settings: 1.
-
Page 33: Smtp Email
1. Check Email Enabled. 2. You may leave Email Footer Enabled checked to include AVTECH contact information with email messages. 3. You may check Use SMS to send a shorter email with a reduced character count. 4. Mail Server: In Domain Name/IP, enter the domain name or IP address of your mail server. - Page 34 In Timeout, you may leave the default, 5 seconds, or enter another interval. • 5. In Return Address (From), enter an email address that resides on your mail server. This is the address alert messages will come from. 6. In Email Recipients, enter the email and email-to-SMS addresses that you’d like to send alerts to.
-
Page 35: Simple Network Management Protocol (Snmp)
Simple Network Management Protocol (SNMP) Because your Room Alert is fully SNMP-compliant, you have the option to monitor it with a -party monitoring application capable of performing SNMP queries. You may configure Room Alert to send SNMP Traps in response to a change in alarm states to up to three host systems running 3 -party SNMP monitoring applications. - Page 36 SNMP Configuration To begin configuring your Room Alert for SNMP: 1. In Community Name, you may leave the default SNMP protocol community name, “public,” or enter a new name. The community name you assign here must match the one in your 3 -party SNMP monitoring application.
- Page 37 To configure your Room Alert to send SNMP Traps: 1. In Trap Send IP 1, enter the IP address of the host system that runs your 3 -party SNMP monitoring application. 2. In Trap Send IP 2 and Trap Send IP 3, you may enter the IP addresses of other host systems that run 3 -party SNMP monitoring applications, or leave the default, 0.0.0.0.
-
Page 38: Security
Security By default, Room Alert does not require log in credentials; you may, however, create a password for your Room Alert for extra security. Navigate to Settings Security to open the Security Settings screen. Password 1. In New Password, you may create a log in password of up to 15 alphanumeric characters for your Room Alert. - Page 39 Username Room Alert 4E) In addition to a password, you may, if you wish, configure a username for your Room Alert 4E. 1. In New Username, you may create a username of up to 8 characters. 2. In New Password, you may create a log in password of up to 15 characters. Use only letters and numbers in your log in username and password—no special characters, please.
-
Page 40: Ping ( Room Alert 4E)
Ping Room Alert 4E) You may configure up to eight IP addresses to ping from your Room Alert 4E in this screen. Room Alert will send a ping to those addresses to check if the host is reachable. If the host is up, the ping will return as successful and register a normal state;... -
Page 41: Advanced
Advanced You may configure a number of advanced options here, including Status screen defaults, Device ManageR “Push,” time & date, trace output and WiSH sensor options. Navigate to Settings Advanced to open the Advanced Settings screen. The Advanced Settings screen has 4 to 5 sub-tabs, depending on your Room Alert model: General •... - Page 42 General Navigate to Settings Advanced General to open the General screen, where you may set defaults for the Status screen. 1. In Refresh Rate enter the number of seconds you would like the Status screen to refresh at. You may enter a value from 5 to 65535. The default is 60 seconds. 2.
- Page 43 Device ManageR Push Configuration Settings Advanced Device ManageR Configuration Navigate to to configure settings for the unit to push to Device ManageR. By default, Device ManageR queries your Room Alert for sensor values at defined intervals. However, you may configure your Room Alert to proactively send sensor updates to Device ManageR by enabling “Device ManageR Push.”...
- Page 44 Time & Date Configuration Navigate to Settings Advanced Date & Time Configuration to configure the time and date defaults for your Room Alert. 1. In Time Zone, select your time zone from the drop-down list. Greenwich Mean Time (GMT) is the default 2.
- Page 45 When the DNS Resolver dialog box opens, enter the hostname of your time server and • select Resolve. After the resolver successfully translates the hostname into an IP address, select • Insert to put that IP address into the IP field of the Date & Time Configuration screen. 7.
- Page 46 Trace Configuration Navigate to Settings Advanced Trace Configuration to configure your Room Alert for trace output, which is useful for troubleshooting. Trace output shows the communication between your Room Alert and your mail server, as well as other information, such as the current firmware version, IP address, MAC address, and requests to web pages.
- Page 47 WiSH Options Room Alert 32W) Navigate to Settings Advanced WiSH Options to access advanced options and filters for each Wireless Sensor Hub (WiSH) or Wireless Sensor Hub & Powered Relay (WiSPR). Advanced WiSH Sensor Options 1. In Enable WiSH Lost Communications Alarms, you may leave the box checked, which is the default, or disable it by unchecking the box.
- Page 48 2. In Allowed WiSH Sensors, you see a list of WiSHs recognized by your Room Alert 32W. To block a certain WiSH, perform these steps: Click on the WiSH to highlight it. • Select Block to move that WiSH to the Blocked WiSH Sensors box. •...
-
Page 49: Updating & Troubleshooting Your Room Alert
How To Discover Room Alert When Your Network Blocks UDP Broadcasts If your network blocks UDP broadcast packets on port 30718, AVTECH’s Device ManageR or Device Discovery might not be able to automatically locate the Room Alert monitor. -
Page 50: How To Reset Room Alert To Factory Defaults
1. Open AVTECH’s Device ManageR software or Device Discovery utility. (If you don’t already have one of them installed, you may download it from your customer account at GoToMyDevices.com.) 2. In Device ManageR, select the Advanced Discovery Options button under the Device Status tab in the navigation bar to the left of your screen;... - Page 51 2. Your Room Alert will automatically reboot and attempt to obtain an IP address via DHCP. 3. To automatically discover your Room Alert on your network, open AVTECH’s Device ManageR software, Device Discovery utility or log in to your GoToMyDevices account.
-
Page 52: Introduction To Avtech's Gotomydevices Cloud Service
Introduction To AVTECH’s GoToMyDevices Cloud Service Monitor unlimited Room Alert devices and sensors through the cloud with from anywhere… anytime! It's quick, easy and powerful. Enjoy the same look and feel from any device, whether you use a phone, tablet, laptop or desktop computer. - Page 53 Color code your sensors to make them more readable using the • intuitive color wheel. • Download your data points to a CSV file to work with them in a spreadsheet application. Locations & Maps Use the mapping feature to see where you have devices installed and immediately know what locations have alerts in progress.
-
Page 54: Introduction To Avtech's Device Manager
Linux/Unix systems across your network. Automatically text or call contacts with alerts using a text, voice or GSM (satellite) modem. Download Device ManageR From Your GoToMyDevices Account Download AVTECH’s Device ManageR software from your active customer subscription at GoToMyDevices.com. Room Alert User’s Guide...
Need help?
Do you have a question about the Room Alert 32E and is the answer not in the manual?
Questions and answers