Advertisement
Quick Links
Download this manual
See also:
User Manual
Gary Hewett & David Small
17 January 2016
The Nikon D‐7100 is a very sophisticated camera capable of taking high quality pictures in a wide variety
of situations. Though the camera appears quite complicated, with just a little training, you can be taking
great pictures very shortly.
This document is an aide to go along with hands on training on the Nikon D‐7100. This is not meant to
be a complete instruction manual. Manuals exist
CHECKLIST:
1. Ensure that the camera battery is fully charged and that an extra battery is brought along.
2. Make sure that two SD cards are in their slots and that the top of the camera shows that at least
500 pictures can be taken.
3. Verify photo size and quality per customer request. Usually set to JPEG Fine unless otherwise
directed.
4. Set ISO to 800 and White Balance (WB) to "A".
5. Make sure that focus is set to auto unless you specifically will manually focus.
6. Image Stabilization (OS) should be set to "On".
7. Make sure that the lens filter is clean and doesn't have any debris or fingerprints
8. Mount the GPS on the hotshoe and plug the cable into the lower right side of the camera.
9. Take the camera outside to verify GPS signal.
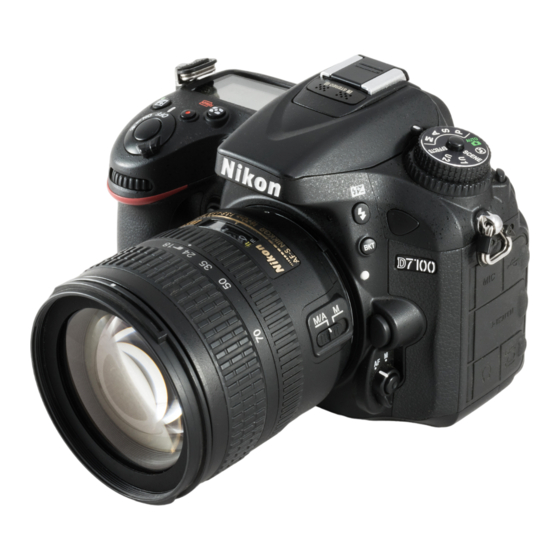
Nikon D‐7100
1
Advertisement

Subscribe to Our Youtube Channel
Related Manuals for Nikon D-7100


Summary of Contents for Nikon D-7100
- Page 1 Gary Hewett & David Small 17 January 2016 Nikon D‐7100 The Nikon D‐7100 is a very sophisticated camera capable of taking high quality pictures in a wide variety of situations. Though the camera appears quite complicated, with just a little training, you can be taking great pictures very shortly. This document is an aide to go along with hands on training on the Nikon D‐7100. This is not meant to be a complete instruction manual. Manuals exist CHECKLIST: 1. Ensure that the camera battery is fully charged and that an extra battery is brought along. 2. Make sure that two SD cards are in their slots and that the top of the camera shows that at least 500 pictures can be taken. 3. Verify photo size and quality per customer request. Usually set to JPEG Fine unless otherwise directed. 4. Set ISO to 800 and White Balance (WB) to “A”. 5. Make sure that focus is set to auto unless you specifically will manually focus. 6. Image Stabilization (OS) should be set to “On”. 7. Make sure that the lens filter is clean and doesn’t have any debris or fingerprints 8. Mount the GPS on the hotshoe and plug the cable into the lower right side of the camera. 9. Take the camera outside to verify GPS signal. ...
- Page 2 Basic Camera Controls Camera settings can be viewed either through the viewfinder by lightly pressing the shutter button or by pressing the “info” button on the lower left of the back of the camera. Turn the camera on by sliding lever to “on” WB (White Balance), QUAL(ity) and ISO can be changed by pressing and holding buttons just to the lower left of writing on the camera “WB” etc then use the thumb (back) wheel to change values and the forefinger (front) wheel to change overall setting. WB = leave on “A” for Auto – use thumb wheel to change. Forefinger wheel changes custom settings and should be on “0” QUAL = “L” & “FINE” – unless something else is specifically requested. ...
- Page 3 Top view of LCD while “WB” is pressed. Lens Switches: Lens Lock – needs to be off (slide is toward front of lens when off) AF‐M – should be on AF (auto‐focus). Focus can be confirmed by the presence of small black rectangle in viewfinder with shutter lightly. M (Manual) can be used for aerial photography. The focus ring can be set to the ∞ (infinity) se ng when the “M” mode is used to ensure that objects more than about 100 feet away are always in focus. NEVER twist the focus ring if the setting is on”AF”. AF‐M on the camera body needs to match the lens setting. “OS” – On‐Off – should be “ON” – image stabilization ...
- Page 4 Leave dial on “S” for single shot for most purposes. “CL” and “CH” are low and high burst modes and generally shouldn’t be used. There is a diopter setting so that the camera view can be set for individual eyesight. Changing the diopter DOES NOT change any of the camera pictures settings. If you use the diopter to get a clear view through the viewfinder, please do a courtesy and reset it for the next user. Use the “P” (Program) dial setting where the camera determines the best shutter speed and F‐stop. Other settings such as “M” (manual), “A” (aperture priority), “S” (shutter priority) should only be used if one is thoroughly familiar with the camera. Don’t use the green camera icon with “auto” over it because it will try using flash which is not appropriate for aerial photography. ...
- Page 5 Top view of camera. From left to right; exposure control knob and LCD Screen shows typical settings. LCD Panel indicator when camera is turned on: Battery charge – make sure fully charged before going on mission Picture size/Quality SD Card used ...
- Page 6 View with the “QUAL” button pressed where image quality can be adjusted. Note that the number “697” is the number of remaining pictures that can be fit on the SD Cards in the camera at setting of L (JPEG quality) and FINE (quality) selected. LCD screen showing ISO setting – “ISO” button on back of camera being held) ...
- Page 7 Side view of camera showing door for SD Cards Door open and SD cards halfway out – make sure that they are fully inserted and stay flush with the camera body. The top card is written to first. The camera holds 2 SD cards (16G in this case). In typical use the top card records pictures first and when it is full the bottom card is used. Alternate settings are available where copies are kept on both cards or where one card is used for highest quality picture and the other for a lower quality. These options are accessed through the menu. Press the “menu” button on the back of the camera then select the camera icon “Shooting Menu” using the joystick. Next press the joystick right and toggle down to ...
- Page 8 This screen shows when the “info” button is pushed (see page 241 in Nikon manual) A “MENU” Screen ...
- Page 9 Using the GPS: The D‐7100 kit includes the Nikon GP‐1a GPS module that fits into the flash shoe on top of the camera. The GPS must be mounted on the camera in order to record location information 1. Slide the GPS into the hot shoe slot on the very top of the camera. 2. Plug the cable into the receptacle at the very bottom left side of the camera. Ensure that the plug is firmly pushed in. ...
- Page 10 4. Make sure that the camera settings are appropriate for the GPS. Press the “Menu” button on the upper left of the camera back. 5. Using the “toggle” wheel highlight the “notepad” on the lower left of the screen. 6. Highlight “GPS” in the menu then toggle right. Note that both “Standby timer” and “Use the GPS to set camera clock” are turned “ON” ...
- Page 11 7. Right toggle “Position” to see the location screen If you do not see Latitude and Longitude data that means that the GPS hasn’t picked up a strong signal yet. That also means that the flight on the GPS is likely flashing red. Take the camera outside for a few minutes to get a good signal. The GPS uses the camera battery very fast. Make sure that the camera has a full charge and don’t leave the camera on except when preparing or executing a mission. Take an extra battery or the battery pack. The GPS does NOT make a track, it only records the position on the photo’s EXIF file. If you want a track use the AMOD Data Logger (see AMOD Instructions). ...
Need help?
Do you have a question about the D-7100 and is the answer not in the manual?
Questions and answers