Table of Contents
Advertisement
Advertisement
Table of Contents
Troubleshooting

Related Manuals for Helion ROCK RIDER


Summary of Contents for Helion ROCK RIDER
- Page 1 Owner’s Manual & Technical Information HLNA0768...
- Page 2 Legal Entire contents ©2016 Helion RC Before using your product, review all documentation and inspect the product carefully. If for some reason you decide it is not what you wanted, then do not continue with unpacking, setup or operation of your product. Your local hobby dealer cannot accept a product for return or exchange after partaking in actions that produce wear and tear.
-
Page 3: Table Of Contents
Contents Notice ..................4 Precautions................. 4 Package Contents ..............5 Needed to Complete ..............5 Introduction ................6 Features ..................6 Getting Started ................7 Ikonnik SR2+ Radio System ........... 10 Wiring Schematic ..............14 ESC Programming and Calibration .......... 14 General Care ................15 Maintenance ................ -
Page 4: Notice
Therefore this product is not intended for use or maintenance by children without direct adult supervision. Helion RC and your hobby dealer shall not be liable for any loss or damages, whether direct, indirect, special, incidental, or consequential, arising from the use, misuse, or abuse of this product or any product required to operate or maintain it. - Page 5 • If you have little or no experience operating R/C models, we strongly recommend you seek the assistance of your local hobby dealer. • Do not expose the transmitter to water or excessive moisture. • Do not operate radio controlled products in a lightning or thunder storm. •...
-
Page 6: Package Contents
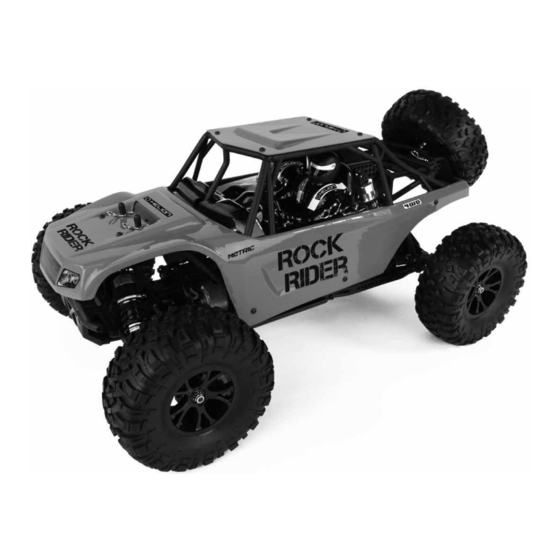
– a balance you’ll only fully appreciate when you get behind the wheel of the Rock Rider. This is a car that takes the skillful yet pedestrian art of rock crawling and gives it beans. And plenty of ‘em! Pop the clips, lift the body, and beneath you’ll find a purpose designed... -
Page 7: Getting Started
• Semi-scale Rock Racer looks Getting Started 1. Remove the components from the box and ensure the contents are correct: • 1 x Rock Rider vehicle • 1 x 1800mAh 6-cell NiMH battery pack • 1 x IKONNIK SR2+ 2.4GHz 2-channel transmitter •... - Page 8 4. Plug the charger into a wall socket, connect the battery to the charger and place the battery on a non-flammable surface. Switch the wall socket ON noting that a fully discharged battery will be topped up in approximately 3 hours. Periodically monitor the temperature of the battery when charging and disconnect if it exceeds 120°F (49°C).
-
Page 9: Controls
12. Use the throttle and steering trim dials to fine-tune the controls of your car. In doing so, ensure that your Rock Rider tracks in a straight line. Also that it doesn’t creep forwards or backwards at zero throttle. -
Page 10: Ikonnik Sr2+ Radio System
The IKONNIK SR2+ Radio System Offering a class-leading feature set, the advanced IKONNIK SR2+ 2.4GHz 2-channel sport radio offers style, comfort and a solid, interference free, performance that you’ll truly appreciate. Functions include servo reversing on both channels, dual rates on steering, throttle and steering trim, a low voltage warning, fail-safe option and ultra-bright LED status lights. - Page 11 Batteries WARNING: Do not attempt to charge non-rechargeable batteries • Remove the lower door from the transmitter to access the battery compartment • Install [8] AA type batteries into the compartment ▪ Pay close attention to battery polarity (+/-) indicators during installation •...
- Page 12 2. Setting the throttle trim ▪ If the wheels spin in a forward direction when the trigger is in the neutral position, turn down the, Th.Trim until the motor stops ▪ If the wheels spin in a reverse direction when the trigger is in the neutral position, turn up the TH.TRIM until the motor stops ▪...
- Page 13 6. Switch OFF the receiver followed by the transmitter, then remove the PAIR / BIND lead. Reboot the system by switching ON the transmitter then the receiver. Your Rock Rider will now be bound and you will have full control of throttle and steering. Replace the cover on the receiver box.
-
Page 14: Wiring Schematic
Wiring Schematic Button Power Switch ESC Programming and Calibration Specification Input voltage: 5 - 6 cell NiMH / NiCd; 2S LiPo Current: BEC Output: 5.6V / 2A Size: 30 x 28 x 22mm Weight: Product Features 1. Low voltage protection 2. -
Page 15: General Care
will beep once then play three notes. 3. If LVC / Overheat Protection is already set to ON (protected) the ESC will beep twice then play three notes. 4. Power OFF the ESC then power OFF the SR2+ transmitter. Check the settings for Crawler Mode and Practice Mode 1. -
Page 16: Maintenance
Maintenance We want you to enjoy your product to its fullest potential. For this to happen it is important to keep your product clean and properly maintained. Lack of cleaning and maintenance can cause component failure. For best and continued performance from your product it is recommended to briefly inspect your product for damage every few uses. -
Page 17: Setting The Gear Mesh
Gears Periodically remove the gear cover to clearly inspect the gears and ensure there is no debris in the gear compartment. Proper gear mesh setting is crucial for proper operation and life of gears in your product. It is important to have the pinion gear (attached to motor) as close to the spur gear (attached to drive shaft) as possible yet while providing a minimal amount of backlash. - Page 18 Shocks Periodically inspect the shocks for smooth motion, leaking oil and dirt residue build up around the shaft or caps. Do not allow dirt to build up around the shock shaft and bottom of the shock. Doing so will reduce the life of the shock and cause a shock to leak oil.
-
Page 19: Storage And Disposal
Tires and Wheels Inspect the tires to ensure they have adequate tread and they are properly glued to the wheels. The tires on your vehicle come pre-glued from the factory; however after running your vehicle it is possible for the glue to come loose in some areas. -
Page 20: Troubleshooting Guide
Disposal Your product is considered electronic waste and should never be discarded in standard garbage containers. Please visit your local hobby dealer (and some home improvement centers) and use the FREE battery disposal center for proper disposal/recycling. Consult your local city hall for information on recycling other electronic waste. -
Page 21: Troubleshooting Tables
Troubleshooting Tables Problem / Possible Cause Possible Solution Symptom Battery voltage too low Charge battery Vehicle will not Battery not connected Re/connect battery turn on Batteries dead in car or transmitter Replace batteries Damaged battery Replace battery Battery voltage too low Charge or change batteries Transmitter will not turn on... - Page 22 Problem / Possible Cause Possible Solution Symptom Inspect and correct any binding components or Steering will not Binding in steering system loosen screws if over tight trim straight, always has right Check and adjust wheel nuts on the right side of Side wheels too tight bias the vehicle to ensure the wheels are not too tight...
-
Page 23: Exploded Views
Exploded Views HLNA0839 HLNA0839 HLNA0801 HLNA0801 HLNA0842 HLNA0842 HLNA0803 HLNA0803 HLNA0918 (M3) XXXX HLNA0918 (M3) HLNA0799 HLNA0848 (E2.5) HLNA0910 HLNA0794 HLNA0798 HLNA0881 HLNA0799 HLNA0800 HLNA0909 HLNA0840 HLNA0840 HLNA0802 HLNA0802 HLNA0840 HLNA0840 HLNA0802 HLNA0802 HLNA0803 HLNA0803 HLNA0796 HLNA0834 HLNA0834 HLNA0837 HLNA0837 HLNA0831 (15x10x4) HLNA0813 HLNA0819... - Page 24 HLNA0852 (M3 x 10) HLNA0852 (M3 x 10) HLNA0809 HLNA0856 (M3 x 20) HLNA0935 (M3 x 12) HLNA0809 HLNA0859 (M3 x 12) HLNA0808 HLNA0858 (M3 x 8) HLNA0862 (M3 x 36) HLNA0797 HLNA0856 (M3 x 18) HLNA0928 (M3 x 10) HLNA0928 (M3 x 10) HLNA0794 HLNA0930...
-
Page 28: Spare Parts List
HLNA0801 Shock Caps (Upper): Rock Rider HLNA0802 Shock Caps (Lower): Rock Rider HLNA0803 Shock Lower Holder and Adjust Ring, 2 sets: Rock Rider HLNA0804 Lower Suspension Arm (Front) 2pcs: Rock Rider HLNA0805 Steering Knuckle Arm, 2 sets: Rock Rider HLNA0806... - Page 29 E Clip, 8mm, 4pcs: Rock Rider HLNA0848 E Clip, 2.5mm, 6pcs: Rock Rider HLNA0849 Round Head Self Tapping Hex Screw, 2x10, 6pcs: Rock Rider HLNA0850 Round Head Self Tapping Hex Screw, M3x6, 6pcs: Rock Rider HLNA0851 Button Head Hex Screw, M3x8, 6pcs: Rock Rider...
- Page 30 Axle Housing (Rear): Rock Rider HLNA0878 Axle Cover (Rear): Rock Rider HLNA0879 Axle Adaptor, 2pcs: Rock Rider HLNA0880 Rear Holder for Rear Shock Support Rod, 2pcs: Rock Rider HLNA0881 Shock Spring (Rear) 2pcs: Rock Rider HLNA0882 Link Set (Rear) 2pcs: Rock Rider HLNA0883...
- Page 31 HLNA0904 Preassembled Tires, 2 sets: Rock Rider HLNA0905 Driver Helmet, 2pcs: Rock Rider HLNA0906 Driver Body, Seat and Dashboard Molding, Set, with Decal: Rock Rider HLNA0907 Differential Shaft (Rear): Rock Rider HLNA0908 Ball Bearing, 11x5x4, 6pcs: Rock Rider HLNA0909 Shock Shaft and Piston (Rear) 2 sets: Rock Rider...
-
Page 32: Warranties
Helion RC product. If you purchased your Helion RC product from a HobbyTown® internet site not affiliated with a local store, please consult that site for its service policies. - Page 33 The place of purchase (retailer where you bought the product) will then contact Model Engines (Aust.) Pty. Ltd. for a Return Authority number and will return the item for warranty assessment to Model Engines (Aust.) Pty. Ltd.. Items delivered to Model Engines (Aust.) Pty. Ltd. for warranty assessment without a Return Authority number will be returned to sender.
- Page 35 Helion-RC.com...
Need help?
Do you have a question about the ROCK RIDER and is the answer not in the manual?
Questions and answers