
Related Manuals for LXNAV V7


Summary of Contents for LXNAV V7
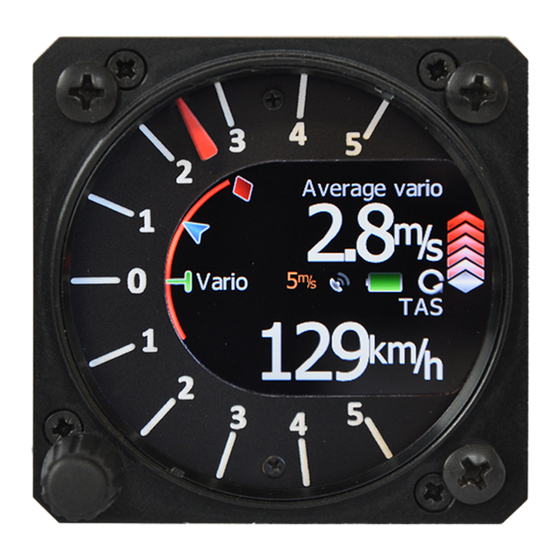
- Page 1 Digital speed to fly variometer and final glide calculator Version 1.96 LXNAV d.o.o. • Kidričeva 24a, 3000 Celje, Slovenia • tel +386 592 33 400 fax +386 599 33 522 info@lxnav.com • www.lxnav.com...
-
Page 3: Table Of Contents
V7 Version 1.96 Januar 2012 Important Notices Limited Warranty Packing Lists Basics LXNAV V7 at a Glance 3.1.1 LXNAV V7 Features 3.1.2 Interfaces 3.1.3 Options 3.1.3.1 External Options 3.1.4 Technical Data System Description 4.1.1 Push Button 4.1.1.1 Power Button Rotary Switch... - Page 4 Flarm 5.3.11 Password 5.3.12 Reset of accelerometer (g-meter) 5.3.13 About Variometer and Altimeter Altimeter Speed Command Flying with the LXNAV V7 On the Ground 7.1.1 Power on Procedure 7.1.2 Set Elevation and QNH 7.1.3 7.1.4 Pre-flight Check Installation Installing the LXNAV V7 Installation of Options 8.2.1...
-
Page 5: Important Notices
Januar 2012 Important Notices The LXNAV V7 system is designed for VFR use only as an aid to prudent navigation. All information is presented for reference only. Terrain, airports and airspace data are provided only as an aid to situation awareness. -
Page 6: Packing Lists
V7 Version 1.96 Januar 2012 Packing Lists LXNAV V7 (in Metric or Imperial units as specified) Main power cable for V7 + CAN terminator Speaker PDA cable – generic RS232 GPS cable – generic RS232... -
Page 7: Basics
To adjust values and settings, LXNAV V7 has one rotary knob combined with a push button. LXNAV V7 can be expanded through CAN bus to one or more repeaters (LXNAV V7D). Both pilots can have equal control of all functions from front or rear seat. -
Page 8: Interfaces
Consumption of LXNAV V7D at 12 V: o 90 mA - maximum brightness without audio. 57 mm (2¼") standard aircraft cut-out for the LXNAV V7 vario unit; length 95 mm (not including connector). Weight 330 g Page 8 of 39... -
Page 9: System Description
4.1.1 Push Button The Rotary switch also has a push button function. LXNAV V7 can detect short or long press of push button, in most cases short press confirms action, long press cancels action or exits from the menu Short press means just a click, long press means pushing button for more than one second. -
Page 10: Switching On The Unit
Januar 2012 4.3 Switching on the Unit A short press of the button with turn on the V7. The first LXNAV welcome screen will appear with some system information (Device name, Version, Serial number...) When the boot procedure is completed, setup elevation dialogue is shown. -
Page 11: Spin" Control
V7 Version 1.96 Januar 2012 4.4.2 “Spin” Control “Spin” controls are designed for numeric parameters. Rotate the knob to increase/decrease the selected value. Combination of push button and knob rotation will change the value with a larger step. . 4.4.3... -
Page 12: Switching Off
Januar 2012 4.5 Switching off By pressing the push button for app. 5 seconds, LXNAV V7 will turn off. All settings are saved in the power off procedure. We strongly recommend switching off the unit using push button and not use a separate master switch.. -
Page 13: Operating Modes
V7 Version 1.96 Januar 2012 Operating Modes LXNAV V7 has three operating modes. A pilot has access to all of them using rotary knob and push button. The diagram below shows the mode structure of the LXNAV V7. Main screen, all navigation and flight parameters defined by pilot ... -
Page 14: Flarm Warning
5.1.2 Direct link between PDA and GPS LXNAV V7 is able to make direct link connection between PDA and GPS. Normally GPS and PDA communicate with LXNAV V7. In the direct link mode the user can transfer data from PDA to GPS (Flight recorder) or the opposite way (read the flight). -
Page 15: Quick Access Menu
(Wind component and distance). 5.3 Settings Mode In the setup menu users can configure the LXNAV V7. Turn the knob to select the appropriate setup item. Press the PUSH button to enter a menu. A dialogue or sub-menu will open. -
Page 16: Navigate
In this menu navigation settings can be configured. If Navigate to home is enabled, LXNAV V7 will navigate back to the takeoff point. This position has been stored in memory just before takeoff but only if GPS OK status is showing. -
Page 17: Logbook
V7 Version 1.96 Januar 2012 5.3.1 Logbook Each flight is stored in logbook. If GPS data is present the logbook will show present date and time of departure. Manual navigation (without GPS) will show duration and departure time will be marked with question marks. -
Page 18: Vario Parameters
V7 Version 1.96 Januar 2012 5.3.3 Vario Parameters This option is used to set the following parameters: 5.3.3.1 Vario needle filter Sets a time constant of the vario needle. The value can be adjusted between 0.1 and 5 s with step 1.0 s or 0.1 s. Default value is 1.5 s. -
Page 19: Sc Switch
Defines the integration period for the average vario in seconds. The default is 20 seconds. 5.3.3.9 Auto reset integrator Resets the integrator to zero when the V7 vario unit switches from SC to VARIO mode. If this item is not checked the integrator will not be reset to zero. -
Page 20: Temperature Offset
The LXNAV V7 is supplied with an external outside air temperature (OAT) sensor. With the offset setting it will correct static errors of temperature measurement. 5.3.4 Sounds In the Sounds setup menu audio settings for the LXNAV V7 and alarms settings can be modified. 5.3.4.1 Vario Volume The sounds slider changes the audio volume. -
Page 21: Vario Audio Mode
V7 Version 1.96 Januar 2012 Volume can be also adjusted directly with rotary knob in main menu. 5.3.4.2 Vario Audio mode Vario audio mode has the following options: Linear positive: sound is interrupted with silence every few milliseconds when the needle is positive;... - Page 22 V7 Version 1.96 Januar 2012 Glider ballast can be entered as: overload factor, which is defined as: Empty glider weight Pilot weight Water ballast overload Minimum glider weight Load, which is entered in kg/m or lb/ft ...
-
Page 23: Display
V7 Version 1.96 Januar 2012 5.3.6 Display The display menu controls screen brightness. Use Brightness control to adjust intensity of the LCD backlight. Mechanical needle, which can indicate vertical speed, speed to fly value, netto vertical speed, or Relative vertical speed in vario or SC mode. -
Page 24: Communication
Each port can be configured separately, but baudrate on PDA must not be lower than the setting on GPS port. To get better performance of LXNAV V7 it is recommended that both baudrates be set as high as possible. NMEA output on PDA port can be enabled or disabled. If you are not using a PDA port, this setting should be disabled. -
Page 25: Flarm
(e.g.: 100 km/h, 130 km/h, and 150 km/h). The program will calculate the values of a, b and c, which should be noted and entered into the LXNAV V7. Stall speed is used to generate stall warnings which are available only with integrated Voice module (Not integrated in LXNAV V7). -
Page 26: Reset Of Accelerometer (G-Meter)
V7 Version 1.96 Januar 2012 5.3.11 Reset of accelerometer (g-meter) Accelerometer can any time be reset manually. After take off it is reset automatically. 5.3.12 About In about page is information about firmware versions, hardware versions and serial numbers. Page 26 of 39... -
Page 27: Variometer And Altimeter
Electronic TE compenstaion Compensation with TEprobe Altimeter The altimeter of the LXNAV V7 is temperature compensated from -20ºC up to + 60ºC. The altimeter is calibrated up to 20000 m. 6.1 Speed Command Speed command flying based on the MacCready theory is a very useful tool to optimise cross-country speed. -
Page 28: Flying With The Lxnav V7
Januar 2012 Flying with the LXNAV V7 To get the best out of the LXNAV V7 it is important that some preparation is done prior to take-off. Trying to configure the instrument or set a task while flying is very hazardous especially in a competition. -
Page 29: Pre-Flight Check
7.1.3 Pre-flight Check After elevation setup the LXNAV V7 will switch to normal operation mode. It is recommended that the MacCready, ballast and bugs settings be set to match the current glider configuration. Press the push button. The dialogue for MacCready, Ballast and Bugs will appear. -
Page 30: Installation
(average climb) and speed to fly indication during the flight. The LXNAV V7 is connected to 12 Volt power via the 15-pin SUB-D connector. Optionally LXNAV V7D can be connected via the CAN bus and the connectors are labelled with “CAN”... -
Page 31: Installing The Lxnav V7
8.2 Connecting LXNAV V7 LXNAV V7 is connected to 12V DC power supply. Red wire goes to + positive and blue wire goes to – gound. If you don’t use V7D (second seat unit). Can connector should be left terminated with CAN terminator. -
Page 32: Installation Of Options
V7 Version 1.96 Januar 2012 Installation of Options To the LXNAV V7 can be optionally connected 2 seat repeater unit LXNAV V7D. 8.2.1 Ports and Wiring 8.2.1.1 LXNAV V7 ports Total pressure probe Static probe TE probe or (Pitot) Static... - Page 33 5V OUTPUT (maximum 1A) RJ45 plug is NOT designed in accordance with IGC standard. It can be used only with dedicated cable. Do not plug unknown cable to it as it may damage LXNAV V7 unit. 8.2.1.1.2 GPS port (RJ11)
-
Page 34: Lxnav V7 Wiring
On main port is connected V7 wiring. 8.2.1.1.4 Audio port Here is connected speaker with standard 3mm phono jack. 8.2.1.2 LXNAV V7 wiring If CAN BUS cable is not connected to LXNAV V7D, CAN connector must be terminated with CAN TERMINATOR! Page 34 of 39... -
Page 35: Firmware Update
V7 Version 1.96 Januar 2012 Firmware Update Firmware updates of the LXNAV V7 can be easily carried out using PDA or PC. Please visit our webpage www.lxnav.com and check for the updates. You can also subscribe to a newsletter to receive news about the LXNAV V7 automatically. - Page 36 9.2 Updating LXNAV V7 firmware using PC Update procedure of V7 using PC is similar to procedure on OUDIE. You need CC-NP-232 cable and free serial port on your PC. If your PC has no serial ports, you can use USB to SERIAL converter.
- Page 37 V7 Version 1.96 Januar 2012 5. Press “Flash” Button. If update starts, you will see a progress on PC and on V7. 6. Now you can choose second file App_VSEV_x.yy.lxfw and repeat procedure from step 3. Update od »VINB« firmware takes little longer as »VSEV«.
-
Page 38: Options
10.1 Rear Seat Device (LXNAV V7D) In two-seat gliders it is possible to install the LXNAV V7D rear seat device. The V7D looks almost identical to the V7. In fact it runs on exactly the same software as on first seat device. -
Page 39: Revision History
V7 Version 1.96 Januar 2012 11 Revision History November 2011 Initial release of owner manual January 2012 New chapters Ch.9, Ch.8.2 Page 39 of 39...
Need help?
Do you have a question about the V7 and is the answer not in the manual?
Questions and answers