Table of Contents
Advertisement
enrich mate
enrich 2 &3 owner's manual
operating instructions for your
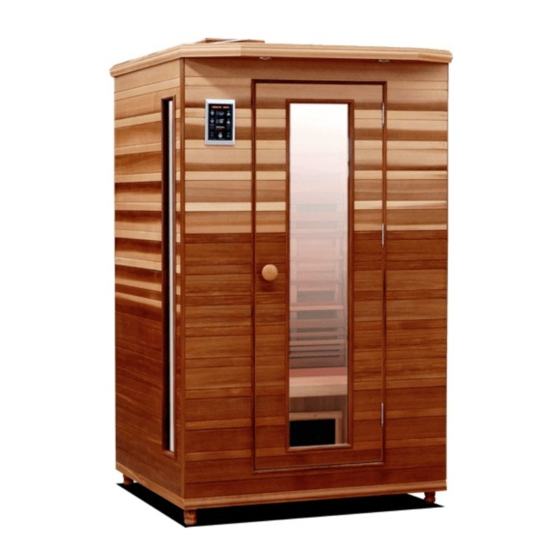
Health Mate
far infrared sauna
®
guidelines and helpful tips
Congratulations on your purchase of your Health Mate
Far Infrared Sauna.
®
We are confident that you will enjoy the many benefits for years to come.
Carefully read this manual before using your Health Mate
Sauna for the first
®
time. We recommend keeping this manual for review and future reference.
healthmatesauna.com
Advertisement
Table of Contents

Related Manuals for Health Mate Enrich mate


Summary of Contents for Health Mate Enrich mate
- Page 1 Far Infrared Sauna. ® We are confident that you will enjoy the many benefits for years to come. Carefully read this manual before using your Health Mate Sauna for the first ® time. We recommend keeping this manual for review and future reference.
- Page 2 Welcome to the Health Mate Family! ® As the leading creator of infrared sauna wellness for over 35 years, Health Mate ® Infrared Sauna continues to provide excellent craftsmanship and innovative technology; hand selected from 100% Western Red Cedar, and crafted from nature to nurture.
-
Page 3: Table Of Contents
Installation and Maintenance: 1. Location, Cleaning & Maintenance 2. Assembly Guide Getting Started Helpful Tips for Enjoying Your Sauna Sessions Safety Precautions for Your Health Mate Sauna Troubleshooting Guide Optional Accessories: a. Outdoor Cover b. Accessories in Western Red Cedar Limited Warranty The information contained in this manual is subject to change without notice. - Page 4 Sauna are as follows: using the sauna for the first time. 1. Your Health Mate cabin is intended to be a self- contained 3. Scratches and stains on the inside of the sauna can be and freestanding unit. It must not be built into to any structure.
-
Page 5: Assembly Guide
a. installation & maintenance 3) assembly guide Assembly of the sauna requires 2 adults to complete. Please read the instructions thoroughly before and during assembly to ensure proper installation of the unit. If you encounter any problems or have questions during the assembly, please feel free to call for Technical Support: (714)739-6600. - Page 6 a. installation & maintenance step 2: side panels 1. The side panels are labeled “left” and “right”. The left side panel is the panel on the left if you are standing in front of the sauna looking at it. 2. Set one side panel onto the bottom panel, carefully aligning it to the bottom panel and back panel.
- Page 7 a. installation & maintenance step 3: bench heater 1. Insert the bench heater panel into the wooden brackets on the side panels. 2. Plug the cable coming out of the bench heater into any of the 4 “HEATER” sockets on the power supply mounted in the back panel.
- Page 8 a. installation & maintenance step 4: floor cables 1. Plug the female end of the main power cord into the “Inlet” socket on the power supply. 2. There are two additional cables that emerge from the bottom panel at the square hole in the back. The thin cable with the round metal plug connects to the “DATA”...
- Page 9 a. installation & maintenance step 5: front panel 1. When handling the front panel, hold the door so that it 2. Inside the sauna, there are two cables that emerge from doesn’t accidentally swing open and hit against the ground the square opening in the bottom panel at the front.
- Page 10 a. installation & maintenance step 6: top panel 1. Set the top panel onto the sauna. Be careful not to pinch 2. There are two cables emerging from the small square any cables between the top, side, and back panels. opening at the back of the top panel.
- Page 11 The installation of your new sauna is now complete! Using a damp cloth, wipe out the sauna to remove any excess sawdust that may have settled on the wall, heaters, or floor. Completed two person Completed three person Enrich Mate Sauna Enrich Mate Sauna healthmatesauna.com...
-
Page 12: B Getting Started
1) preparing for your first infrared sauna home experience 1. Review all health and safety instructions. If in doubt as to 2. The interior & exterior of the Health Mate Infrared Sauna is the advisability of using your infrared sauna, consult with made of the finest Canadian Western Red Cedar. - Page 13 3) powering up 1. Plug in the power cord to the electrical outlet. All lights on the LED Control Panel will flash once. 2. During Off mode, only the Health Mate logo and Current Time will display. 4) setting current time 1.
- Page 14 b. getting started 6) setting the sauna session time and temperature Session Time 1. Tap the Time+ or Time- buttons to adjust the Reduce Session Time sauna session time. Shorten Session Time by 5 Minutes 2. The session time will change in 5 minute increments and can be set between 5 and 60 minutes per session.
- Page 15 b. getting started 8) schedule a reserve sauna session 1. During Off mode, double-tap the Reserve button until the 4. During Off mode, when a sauna session time has been scheduled, the Reserve button will illuminate. display flashes. 5. To check your scheduled session, tap the Reserve button 2.
- Page 16 5. Press the – or + buttons to change the brightness of your color light. Color Sequence: White > Red > Yellow > Orange > Green > Cyan > Blue > Purple > Pink For more information on the color light in your Health Mate, please visit: healthmatesauna.com healthmatesauna.com...
- Page 17 b. getting started 12) powering on the exterior light To turn your sauna’s exterior LED light On or Off, simply press the manual switch located on the ceiling inside your sauna. 13) powered sound system Please refer to the AM/FM Radio & CD Player’s manual for operation instructions. 14) error codes EO: Temperature Sensor Disconnected.
-
Page 18: C Helpful Tips For Enjoying Your Sauna Sessions
Your Health Mate Infrared Sauna is equipped with special infrared heaters. Infrared heat waves reach the body directly without having to heat the intervening air inside the sauna. With this system, breathing is more comfortable and the atmosphere inside the sauna is more enjoyable than in conventional saunas. - Page 19 2) setting session time and temperature Your body will probably need a few weeks to fully adapt to a When using your Health Mate sauna for the first time: regular use of your Health Mate sauna. •...
- Page 20 c. helpful tips for enjoying your sauna sessions 3) useful information and tips for during your sauna session 1. Make sure you have a towel on the floor and on the bench 7. Do not put any lotions or oils on the body or face of the sauna to absorb perspiration.
- Page 21 d. safety precautions 1) general safety precautions 1. Read Instructions 8. Unplug the sauna from the wall outlet before cleaning. Carefully read all safety and operating instructions before Use a damp cloth for cleaning. Do not use liquid cleaners or operating your sauna.
- Page 22 2) warranty precautions 1. When replacement parts are required, be sure to use 5. Your Health Mate sauna is made of the finest Canadian replacement parts specified by the manufacturer or have Cedar. All natural wood products have variations in the the same characteristics as the original parts.
-
Page 23: E Troubleshooting Guide
e. troubleshooting guide Question Answer Control panel is beeping • The temperature sensor inside your control panel housing has been and showing an error disconnected. Call for instructions. message. • First thing you want to do is check the blue Molex connection inside the There is no heat coming from my front heaters. - Page 24 e. troubleshooting guide e. troubleshooting guide Question Answer The controller display is • Try unplugging the sauna for about 5 minutes, then plug it back in. This faint or does not display should correct any display problems. correctly in some other way. The sound system works, •...
- Page 25 e. troubleshooting guide Question Answer Wrong A.C. Power cord • The power cord and the cable in the sauna floor near the power box do not (female end of power cord attach or connect to each other. They both plug into the power supply located does not match the male below the front heater (under a wooden cover).
-
Page 26: General Information
1. general information The Health Mate sauna cover is designed to provide your sauna with extra protection against moisture and wind. It allows access to the sauna without having to remove the cover, and it comes with a 5-year limited warranty. - Page 27 f. optional accessories 3. place the roof peak and prepare the cover Carefully place the roof peak on top of the sauna. The roof peak must form a triangle when you see it from the side of the sauna. Next, take the clear plastic lining and cover the roof peak completely prior to installing the canvas cover.
- Page 28 f. optional accessories 5. attach the cover on the sauna 1. Tap hard on the snap buttons at each side of the cover, with the back of your screw driver to leave a mark on the wood. 2. Lift up the cover and screw on the snap-screw at the center of the mark.
-
Page 29: B. Accessories In Western Red Cedar
The wood used in Health Mate Western Red Cedar saunas, as well as their accessories in Western Red Cedar, have a certified ® chain of custody with the Forest Stewardship Council (FSC ®... -
Page 30: G Limited Warranty
PLH Products, Inc. warrants the Health Mate Infrared Saunas to be free of defects in material and workmanship. Heaters - Tecoloy Lifetime* 5 years Heaters - Carbon 5 years Craftsmanship: 5 years Electrical Components: 1 year Audio Components: * Lifetime warranty is offered to products sold after July 1, 2004 This warranty extends only to the original retail purchaser of the sauna and terminates upon transfer of ownership. - Page 31 g. limited warranty For your record, please complete the following information. You will need to refer to this information when calling customer service: Date of Purchase: Date of Delivery: Model Number: Serial Number: Dealer Information (Name & Telephone): Where is the serial number on my new sauna? Look for a manufacturer’s label next to the DATA and HEATER sockets at the bottom of the front panel.
- Page 32 800.946.6001 | healthmatesauna.com...
Need help?
Do you have a question about the Enrich mate and is the answer not in the manual?
Questions and answers