
Related Manuals for Pentax Optio M20


Summary of Contents for Pentax Optio M20
- Page 1 Digital Camera Operating Manual To ensure the best performance from your camera, please read the Operating Manual before using the camera.
- Page 2 Regarding Product Registration In order to better service you, we request that you complete the product registration, which can be found on the CD-ROM supplied with the camera or the PENTAX website. Thank you for your cooperation. Refer to the PC Connection Manual (bottom right of the front side) for more information.
-
Page 3: For Safe Use Of Your Camera
• If the camera emits smoke or a strange smell, or in the event of any other irregularity, stop using the camera immediately, remove the batteries or unplug the AC adapter, and contact your nearest PENTAX Service Center. Continued use of the camera may result in fire or electric shock. - Page 4 Caution • Never try to disassemble or short the batteries. Also, do not dispose of the batteries in a fire, as they may explode. • Do not charge any batteries other than rechargeable Ni-MH batteries. The batteries could explode or catch fire. Batteries for use with this camera other than Ni-MH batteries cannot be charged.
-
Page 5: Care To Be Taken During Handling
AC plug cord to become damaged due to excessive bending. If the AC plug cord becomes damaged, consult a PENTAX Service Center. • Do not short or touch the output terminals of the product while it is still plugged in. - Page 6 • The liquid crystal display will become black at a high temperature but will return to normal when normal temperatures are returned to. • The response speed of the liquid crystal display becomes slow at low temperatures. This is due to the properties of the liquid crystal and is not a fault. •...
-
Page 7: Table Of Contents
Contents FOR SAFE USE OF YOUR CAMERA ...1 Care to be Taken During Handling ...3 Contents ...5 Composition of the Operating Manual ... 11 Camera Features... 12 Checking the Contents of the Package ... 14 Names of Parts... 15 Names of Operating Parts ... 16 Monitor Indications ... - Page 8 Setting the Camera Functions ... 47 Setting with the Menus ... 47 Menu List ... 50 Setting the Shooting Mode ... 52 Calling Up a Specific Menu ... 56 Setting the Playback Mode... 58 Taking Pictures Taking Pictures ... 61 Letting the Camera Choose the Optimal Shooting Mode (Auto Picture Mode)...61 Letting the Camera Choose the Optimal Settings...
- Page 9 Recording Movies ... 98 Recording a Movie...98 Selecting the Recorded Pixels for Movies ... 100 Selecting the Quality Level of Movies...102 Selecting the Frame Rate... 103 Recording Movies in Black and White or Sepia Tones (Color Mode)... 104 Setting the Movie Anti-Shake Function ... 105 Playing Back and Deleting Images Playing Back Images ...106 Switching Between A Mode and Q Mode...
- Page 10 Printing Using PictBridge ...137 Connecting the Camera to the Printer ... 137 Printing Single Images...138 Printing All Images...140 Printing Using the DPOF Settings ... 141 Disconnecting the Cable from the Printer... 141 Printing Using ImageLink...141 Recording and Playing Back Sound Recording Sound (Voice Recording Mode)...
- Page 11 The meanings of the symbols used in this operating manual are explained below. indicates the reference page number for an explanation of the related operation. indicates information that is useful to know. indicates precautions to be taken when operating the camera. This is the mode for capturing still pictures and recording movies and sound files.
- Page 12 Memo...
-
Page 13: Composition Of The Operating Manual
Refer to the PC Connection Manual for instructions on saving images to a computer and installing ACDSee for PENTAX, and refer to ACDSee for PENTAX Help for instructions on editing and printing images with a computer. -
Page 14: Camera Features
Camera Features In addition to basic picture-taking, the Optio M20 has a variety of shooting modes to suit different situations. This section describes how to make the most of the key features of your camera. Together with the explanations of camera operations, it will enable you to enjoy your camera to the full. - Page 15 Display Images and Sound Files in Calendar Format! With the Optio M20, you can display recorded images and sound files by date in calendar format. (p.109) This lets you quickly find the image or sound file you want to play back.
-
Page 16: Checking The Contents Of The Package
Checking the Contents of the Package Camera Strap Dock insert Optio M20 O-ST51 (*) O-DI58 Software (CD-ROM) USB cable AV cable S-SW58 I-USB7 (*) I-AVC7 (*) Two AA PC Connection Manual Operating Manual alkaline batteries (this manual) Quick Guide Items marked with an asterisk (*) are also available as optional accessories. -
Page 17: Names Of Parts
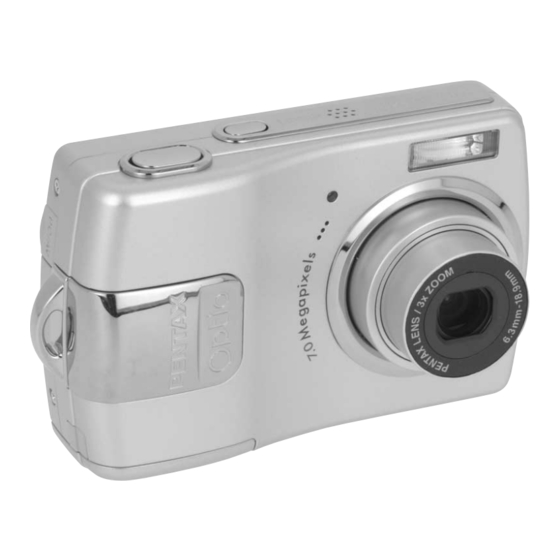
Names of Parts Front Back Strap lug Shutter release button Ambient light sensor Speaker Power switch Flash Self-timer lamp (red) Microphone Lens DC coupler cable cover PC/AV terminal LCD monitor ImageLink Terminal Battery/card cover Tripod socket... -
Page 18: Names Of Operating Parts
Names of Operating Parts Refer to Understanding the Button Functions (p.43 - p.46) for an explanation of the function of each button. Monitor Indications Normal Display in Still Picture Capture Mode The display shows information such as the shooting conditions. Power switch Shutter release button Zoom/w/x/f/y button... - Page 19 1 Shooting mode (p.52) 2 Flash mode (p.81) 3 Drive mode (p.72, p.73) 4 Focus mode (p.79) 5 Camera shake icon (p.77) 6 Digital zoom icon (p.74) 7 Memory status (p.32) + : Built-in memory (without card) a : SD Memory Card r : Card is write-protected Full Display in Still Picture Capture Mode (All of the indications are displayed here for explanatory purposes.)
- Page 20 Full Display in Still Picture Playback Mode (All of the indications are displayed here for explanatory purposes.) The display shows information such as the shooting conditions. A1 to A11 appear when [Normal Display] or [Histogram + Info] is selected. B1 to B9 only appear when [Histogram + Info] is selected.
-
Page 21: Getting Started
Getting Started Attaching the Strap Attach the strap (O-ST51) supplied with the camera. Pass the narrow end of the strap through the strap lug. Pass the other end of the strap through the loop and pull tight. -
Page 22: Powering The Camera
Powering the Camera Installing the Batteries Install the batteries into the camera. Use two AA alkaline, AA lithium, AA Ni-MH, or AA nickel manganese batteries. Open the battery/card cover. Pull the battery/card cover in the direction of 1 and flip the cover open in the direction of 2. - Page 23 Use the AC adapter kit K-AC51 (optional) if you intend to use the camera for a long time. (p.23) • AA alkaline, AA lithium and AA nickel manganese batteries are not rechargeable. • Do not open the battery/card cover or remove the batteries while the camera is turned on.
- Page 24 • In general, battery performance may temporarily deteriorate as the temperature decreases. Be sure to take spare batteries when using the camera in a cold region and keep the batteries warm by placing them in your pocket or inside your coat. Battery performance that has deteriorated due to cold temperature will return to normal performance when the batteries reach room temperature.
-
Page 25: Using The Ac Adapter With A Household Power Supply
AC plug cord AC adapter DC terminal Using the AC Adapter with a Household Power Supply Use of the AC adapter kit K-AC51 (optional) with a household power supply is recommended if you intend to use the camera for a long time or connect it to a computer. -
Page 26: Using The Ac Adapter Abroad
• Make sure that the camera is turned off before connecting or disconnecting the AC adapter. • Make sure that the AC plug cord and the power cord connecting the AC adapter to the camera are inserted securely. The data may become lost if either cord becomes disconnected while data is being recorded. - Page 27 Main Socket Types in the Major Countries and Regions of the World North America U.S.A., Canada Europe, Iceland, Ireland, Italy, Ukraine, Austria, Former Soviet Netherlands, Kazakhstan, Greece, Sweden, Union Denmark, Germany, Norway, Hungary, Finland, France, Belarus, Belgium, Rumania, Russia U.K. Spain Switzerland, Poland, Portugal Asia...
-
Page 28: Installing The Sd Memory Card
Installing the SD Memory Card This camera uses an SD Memory Card. Captured images and sound files are saved on the SD Memory Card if a card is inserted in the camera. They are saved in the built-in memory if a card is not inserted. (p.32) •... - Page 29 Open the battery/card cover. Pull the battery/card cover in the direction of 1 and flip the cover open in the direction of 2. Insert the SD Memory Card into the SD Memory Card socket so that the label is facing toward the LCD monitor.
- Page 30 • The data on the SD Memory Card may be deleted in the following circumstances. PENTAX does not accept any liability for data that is deleted (1) when the SD Memory Card is mishandled by the user.
-
Page 31: Recorded Pixels And Quality Level Of Still Pictures
Recorded Pixels and Quality Level of Still Pictures Choose the number of pixels (size) and quality level (data compression rate) of still pictures according to how you intend to use the pictures you have taken. Higher quality levels and numbers of pixels produce clearer images, but the resulting increase in data volume reduces the total number of pictures that can be taken (stored in the camera's built-in memory or on the SD Memory Card). -
Page 32: Recorded Pixels, Quality Level And Frame Rate Of Movies
Recorded Pixels, Quality Level and Image Storage Capacity a 3072×2304 f 2560×1920 g 2304×1728 h 2048×1536 i 1600×1200 l 1024× 768 640× 480 • The above figures may vary depending on the subject, shooting conditions, shooting mode and SD Memory Card, etc. Recorded Pixels, Quality Level and Frame Rate of Movies Choose the recorded pixels and frame rate (number of frames per... - Page 33 (320×240) 1 min. 3 sec. • The above figures are based on PENTAX standard shooting conditions and may vary depending on the subject, shooting conditions and type of SD Memory Card used. Images will be clearer but file size will be larger.
-
Page 34: Turning The Camera On And Off
Turning the Camera On and Off Press the power switch. The camera turns on and the LCD monitor turns on. When you turn the camera on, the lens cover opens and the lens extends. If the Language Selection screen or Date Adjust screen appears when you turn the camera on, follow the procedure on p.34 to set the display language and/or current date and time. -
Page 35: Playback Only Mode
Playback Only Mode Playback Only Mode is the Playback Mode when the lens is closed. Use this mode when you want to play back an image or sound file straightaway without taking any more pictures. Pressing the shutter release button does not change the mode to A mode. Press the power switch while holding down the Q button. -
Page 36: Initial Settings
Initial Settings Set the language, time, and date after purchasing the camera before you start taking pictures. Language/ first time. Perform the operations in “Setting the Display Language” below to set the language, and in “Setting the Date and Time” (p.37) to set the current date and time. - Page 37 Press the 4 button. The Initial Setting screen appears in the selected language. If the desired settings for [Hometown] and daylight saving time appear, press the 4 button again to display the [Date Adjust] screen. Go to “Setting the Date and Time” (p.37 - p.38). Go to Step 4 in "Setting Hometown and DST"...
- Page 38 Setting Hometown and DST Press the four-way controller (3). The frame moves to [Hometown]. Press the four-way controller (5). The Hometown screen appears. Use the four-way controller (45) to choose the city. Press the four-way controller (3). The frame moves to [DST] (Daylight Saving Time). Use the four-way controller (45) to select P (Off).
-
Page 39: Setting The Date And Time
Setting the Date and Time Set the current date and time and the display style. Press the four-way controller (5). The frame moves to [mm/dd/yy]. Use the four-way controller (23) to choose the date and time display style. Press the four-way controller (5). The frame moves to [24h]. - Page 40 Press the 4 button. The camera returns to capture status. Language, Date, Time, Hometown, and DST can be changed. Refer to the pages below for instructions. • To change the language, follow the steps in “Changing the Display Language” (1p.155). •...
-
Page 41: Quick Start
Taking Still Pictures The standard procedure for taking still pictures is described below. The flash fires automatically depending on the light conditions. Press the power switch. The camera turns on and is ready to take still pictures. In this manual, this is called Still Picture Capture Mode. -
Page 42: Instant Review
• The shooting mode is set to b (Auto Picture mode) in the default settings. (p.61) Turn the power on to enable taking still pictures in b mode. • Press the Green button to switch to the Green Mode and let the camera set all the shooting functions automatically. -
Page 43: Playing Back Still Pictures
Playing Back Still Pictures Playing Back Images Press the Q button after taking a picture. The image appears on the LCD monitor. In this manual, this is called Q mode (Playback mode). Displaying one image in full in Q mode (Q mode default setting) is called single-image display. -
Page 44: Rotating The Displayed Image
3 button Rotating the Displayed Image Press the Q button after taking a picture. The image appears on the LCD monitor. Press the four-way controller (3). The Playback Mode Palette appears. Use the four-way controller (2345) to select s (Image Rotation). -
Page 45: Common Operations
Common Operations Understanding the Button Functions A Mode Power switch Turns the camera off. (p.32) Shutter release button Focuses the camera on the subject when pressed halfway in Still Picture Capture Mode. (Except in s, 3 and \ modes) (p.39) Takes the still picture when pressed down fully. - Page 46 Four-way controller : Changes the drive mode. (p.72, p.73) : Displays the Capture Mode Palette. (p.52) : Changes the flash mode. (p.81) : Changes the focus mode. (p.79) (23) : Adjusts \ in \ mode. (p.80) 4/W button Changes the information displayed on the LCD monitor. (p.77) Green button Switches to the Green Mode.
-
Page 47: Shutter Release Button
Q Mode Power switch Turns the camera off. (p.32) Shutter release button Switches to A mode when pressed halfway. (p.106) Zoom/f/y button Press f during single-image display to change to nine-Image display. Returns to the previous display when y is pressed. (p.108) Enlarges the image when y is pressed during single-image display. - Page 48 Four-way controller : Plays back and pauses a movie or sound file. (p.115, p.145) : Displays the Playback Mode Palette. (p.59) (45) : Displays the previous or next image and sound file (2345) : Moves the display area during zoom display. (p.110) 4/W button Changes the information displayed on the LCD monitor.
-
Page 49: Setting The Camera Functions
Setting the Camera Functions To change the camera settings, press the 3 button to display the [A Rec. Mode] menu or [u Setting] menu. Menus for playing back and editing images and sound files are displayed from the Playback Mode Palette. Setting with the Menus Pressing the 3 button in A mode displays the [A Rec. - Page 50 A guide to available button operations appears on the LCD monitor during menu operation. Ex.) To set the [Quality Level] on the [A Rec. Mode] menu Press the 3 button in A mode. The [A Rec. Mode] menu appears. Press the four-way controller (3). The frame moves to [Recorded Pixels].
- Page 51 Saving the Setting and Start Taking Pictures Press the shutter release button halfway. The setting is saved and the camera returns to capture status. When the shutter release button is pressed fully, the picture is taken. Saving the Setting and Begin Playback of Images Press the Q button.
-
Page 52: A Rec. Mode] Menu
Menu List This displays the items that can be set with the menus and provides descriptions of each item. See the list of default settings in the Appendix “Default Settings” (p.166) to decide whether you want the settings saved when the camera is turned off and whether you want the settings returned to the defaults when the camera is reset. - Page 53 [u Setting] Menu Item Format For formatting the SD Memory Card or built-in memory For adjusting the playback volume and setting the Sound start-up sound, shutter sound, key operation sound and self-timer sound Date Adjust For adjusting the date, time, and date and time styles World Time For setting the world time For setting the language in which menus and...
-
Page 54: Setting The Shooting Mode
Setting the Shooting Mode The Optio M20 has a variety of shooting modes that let you take pictures or record movies and sound in different situations simply by choosing the right mode for the particular situation from the Capture Mode Palette. -
Page 55: O Voice Recording
• In shooting modes other than R, d, O, c and Y, the flash, focus, saturation, contrast, sharpness, white balance, etc. are automatically set to the optimal settings for each mode. • Some functions may not be available or may not function fully depending on the shooting mode. -
Page 56: C Blur Reduction
< Flower Use this mode for taking bright, colorful pictures of flowers with soft outlines. I Portrait Use this mode for taking pictures of people. Gives your subject a bright, healthy look. i Surf & Snow For capturing images with dazzling backgrounds, such as beaches or snowy mountains. -
Page 57: Y Frame Composite
E Pet Ideal for taking pictures of pets. The camera keeps the moving pet in focus until the shutter release button is pressed. You can select settings according to the color of your pet’s coat. (p.71) D Food Use this mode for taking pictures of food. The increased saturation gives pictures a bright, vivid finish. -
Page 58: Calling Up A Specific Menu
Calling Up a Specific Menu Assign menu items to the Green Button and recall these quickly by simply pressing the Green Button. This is useful for going straight to the setting screens of frequently used functions such as EV Compensation, Sensitivity and White Balance. - Page 59 Using the Green Button Press the Green button in A mode. The function assigned to [Green Button] on the [u Setting] menu is called up. Use the four-way controller (45) to change the settings and press the 4 button. The camera returns to capture status. •...
-
Page 60: Setting The Playback Mode
Setting the Playback Mode Press the four-way controller (3) in Playback mode to display the Playback Mode Palette. You can display the playback function you want to use simply by using the four-way controller (2345) to choose an icon and pressing the 4 button. -
Page 61: Playback Mode Palette
Playback Mode Palette Item Slideshow Resize Trimming Image/Sound Copy Image Rotation Digital Filter Brightness Filter Frame Composite For adding a decorative frame to a still picture Red-eye Compensation Voice Memo Z Protect DPOF Start-up Screen Description For playing back recorded images one after another For changing the recorded pixels and quality of images... - Page 62 Viewing a Guide of the Shooting and Playback Modes When Guide Display (p.161) is set to O (On), a guide of the mode selected in the Capture Mode Palette or Playback Mode Palette appears. Press the four-way controller (3) in A mode. The Capture Mode Palette appears.
-
Page 63: Taking Pictures
Taking Pictures Taking Pictures Letting the Camera Choose the Optimal Shooting Mode (Auto Picture Mode) In b (Auto Picture mode), when you press the shutter release button, the camera selects the most appropriate mode from four capture modes: - (Normal mode), A (Night Scene mode), q (Landscape mode), and I (Portrait mode). -
Page 64: Letting The Camera Choose The Optimal Settings (Program Mode)
Letting the Camera Choose the Optimal Settings (Program Mode) In R (Program mode), the camera automatically sets the shutter speed and aperture for taking still pictures. However, you can select other functions such as the flash mode and recorded pixels. Press the four-way controller (3) in A mode. -
Page 65: Reducing Camera Shake And Blurring When Taking Pictures (Blur Reduction Mode)
Reducing Camera Shake and Blurring when Taking Pictures (Blur Reduction Mode) In c (Blur Reduction mode), the camera automatically raises the sensitivity to reduce camera shake and blurring when taking pictures. The camera also sets the shutter speed (set to remain faster than 1/15 sec) and aperture automatically. However, you can select other functions such as the flash mode and recorded pixels. -
Page 66: Taking Pictures In The Basic Mode (Green Mode)
Taking Pictures in the Basic Mode (Green Mode) In the Green Mode, you can enjoy easy picture-taking using standard settings*, regardless of the settings in the [A Rec. Mode] menu. Press the Green button in A mode. The camera switches to the Green Mode. Press the Green button again to return to the status before the Green Mode was selected. - Page 67 • If any other functions have been assigned to the Green button, the camera does not switch to Green Mode. The assigned function is displayed. (p.56) • In Green Mode, you cannot change the information displayed on the LCD monitor by pressing the 4/W button. •...
-
Page 68: Taking Pictures Of Dark Scenes (Night Scene Mode)
Taking Pictures of Dark Scenes (Night Scene Mode) In A (Night Scene mode), you can choose settings appropriate for taking pictures of dark scenes, such as nightscapes. Press the four-way controller (3) in A mode. The Capture Mode Palette appears. Use the four-way controller (2345) to select A (Night Scene). -
Page 69: Framing Your Pictures (Frame Composite Mode)
Framing Your Pictures (Frame Composite Mode) In Y (Frame Composite mode), you can take pictures using the frames stored in the camera. Press the four-way controller (3) in A mode. The Capture Mode Palette appears. Use the four-way controller (2345) to select Y (Frame Composite). - Page 70 Press the shutter release button halfway. The focus frame on the LCD monitor turns green if the subject is in focus. Press the shutter release button fully. The picture is taken. • The number of recorded pixels is fixed at h and the quality level at D.
-
Page 71: Taking Pictures Of People (Portrait Mode)
Taking Pictures of People (Portrait Mode) In I (Portrait mode), Face Recognition AF and Face Recognition AE are activated. Simply point the camera toward your subject’s face and the camera automatically recognizes the location of the subject’s face, adjusts the focus (using Face Recognition AF) and the exposure (using Face Recognition AE) and allows you to take a picture. - Page 72 • If the camera cannot recognize the location of the subject’s face, the camera focuses using the normal Focusing Area (Multiple). • The digital zoom function cannot be used in I mode. • Continuous Shooting cannot be used in I mode. •...
-
Page 73: Taking Pictures Of Your Pet (Pet Mode)
Taking Pictures of Your Pet (Pet Mode) In E (Pet mode), your moving pet is kept in focus while you take the picture, allowing you to capture the color of your pet's coat. Choose the appropriate icon depending on what color your pet is (closer to black or white or in between). Press the four-way controller (3) in A mode. -
Page 74: Using The Self-Timer
Using the Self-timer In Self-timer mode, the picture is taken ten seconds or two seconds after the shutter release button is pressed. Stabilize the camera with a tripod when taking a picture with the self-timer. Use this mode when you want to be included in a group picture. The picture is taken approximately ten seconds after the shutter release button is pressed. -
Page 75: Taking A Series Of Pictures
Taking a Series of Pictures In this mode, pictures are taken continuously for as long as the shutter release button is pressed. Each time a picture is taken, the image is saved in the memory Continuous before the next image is taken. The higher the image quality, the Shooting longer the interval between shots. -
Page 76: Using The Zoom
Using the Zoom You can use the zoom to change the captured area. Press the Zoom/w/x button in A mode. x Tele : enlarges the subject w Wide : widens the area that is captured by the camera The zoom bar indicates the current level of magnification. - Page 77 Setting the Digital Zoom The digital zoom is set to O (On) in the default settings. To take pictures using only the optical zoom, set the digital zoom to P (Off). Press the 3 button in A mode. The [A Rec. Mode] menu appears. Use the four-way controller (23) to select [Digital Zoom].
-
Page 78: Setting The Exposure (Ev Compensation)
Setting the Exposure (EV Compensation) You can adjust the overall brightness of the picture. Use this function to take pictures that are intentionally overexposed or underexposed. Press the 3 button in A mode. The [A Rec. Mode] menu appears. Use the four-way controller (23) to select [EV Compensation]. -
Page 79: Displaying Shooting Information
Displaying Shooting Information The LCD monitor display changes in the following sequence each time you press the 4/W button: Normal Display, Histogram + Info, No Info. For details of each display mode, refer to “Monitor Indications” (p.16). • S appears when camera shake is likely to occur. To prevent camera shake, use a tripod and the self-timer function. - Page 80 Using the Histogram A histogram shows the brightness distribution of an image. The horizontal axis represents brightness (dark at the left and bright at the right) and the vertical axis represents the number of pixels. The shape of the histogram before and after shooting tells you whether the brightness and contrast are correct or not, and lets...
-
Page 81: Setting The Shooting Functions
Setting the Shooting Functions Selecting the Focus Mode Focus Mode This mode is used when the distance to the subject is 40 cm (15.7 in.) or more (60 cm or 23.6 in. for Tele). The camera is Standard focused on the subject in the autofocus area when the shutter release button is pressed halfway. - Page 82 In s mode, you can only select =, q and r. Manual Focus 1p.80 Saving the Focus Mode 1p.96 Manual Focus The procedure for setting the focus manually (\) is described below. Press the four-way controller (5) in A mode. Use the four-way controller (5) to select \ and press the 4 button.
-
Page 83: Selecting The Flash Mode
Selecting the Flash Mode Flash Modes Auto Flash Off Flash On Auto + Red-eye Flash On + Red-eye Soft Flash • The flash will not discharge a (Flash Off) in d mode or when the drive mode is set to 1, or the focus mode is set to s. •... - Page 84 Press the four-way controller (4) in A mode. The flash mode changes each time the button is pressed. You can also change the setting using the four-way controller (23). Press the 4 button. The camera returns to capture status with the selected flash mode.
-
Page 85: Selecting The Recorded Pixels
2, 3, 4 1, 6 Selecting the Recorded Pixels You can choose from seven recorded pixels settings for still pictures. The larger your recorded pixels, the clearer the details will appear when you print your picture. As the quality of the printed picture also depends on the image quality, exposure control, resolution of the printer and other factors, you do not need to select more than the required number of recorded pixels. - Page 86 Press the four-way controller (5). A pull-down menu appears. Use the four-way controller (23) to change the number of recorded pixels. Storage capacity for the selected recorded pixels is displayed when the Recorded Pixels setting is changed. Press the 4 button. The Recorded Pixels setting is saved.
-
Page 87: Selecting The Quality Level
2, 3, 4 1, 6 Selecting the Quality Level You can select the quality (compression rate) of still pictures. The more stars, the lower the compression rate and the clearer the picture, but the file size becomes larger. The recorded pixels setting also affects the file size (p.83). - Page 88 • Quality level is set at D when shooting mode is set to Y. • When shooting mode is set to d, the number of recorded pixels set in [Movie] on the recording mode menu is set. (p.102) • If you use the [Quality Level] function frequently, you can save time by assigning it to the Green button.
-
Page 89: Adjusting The White Balance
2, 3, 4 1, 6 Adjusting the White Balance You can take pictures in natural colors by adjusting the white balance according to the light conditions at the time of shooting. White Balance Auto Daylight Shade Tungsten Light Fluores. Light Manual Press the 3 button in A mode. - Page 90 If you use the [White Balance] function frequently, you can save time by assigning it to the Green button. (p.56) Saving the White Balance 1p.96 Manual Setting Have a blank sheet of white paper or similar material for White balance adjustment ready beforehand.
-
Page 91: Changing The Focusing Area
2, 3, 4 1, 6 Changing the Focusing Area You can change the autofocus area (Focusing Area). Focusing Area Multiple Spot Automatic Tracking AF Keeps moving subjects in focus. Press the 3 button in A mode. The [A Rec. Mode] menu appears. Use the four-way controller (23) to select [Focusing Area]. -
Page 92: Setting The Sensitivity
Setting the Sensitivity You can select the sensitivity to suit the brightness of the surroundings. Sensitivity Auto Sensitivity is automatically adjusted to between 64 and 400. • The lower the sensitivity, the less noise that affects the image. The shutter speed will be slower in low light conditions. •... - Page 93 • When shooting mode is set to c, the sensitivity is automatically adjusted to between 64 and 1600. • If you use the [Sensitivity] function frequently, you can save time by assigning it to the Green button. (p.56) Saving the Sensitivity 1p.96...
-
Page 94: Setting The Instant Review Time (Instant Review)
Setting the Instant Review Time (Instant Review) You can choose the Instant Review time (the length of time the image is displayed immediately after capture) from 0.5sec, 1sec, 2sec, 3sec, 5sec and Off (no display). Press the 3 button in A mode. The [A Rec. -
Page 95: Setting The Image Sharpness (Sharpness)
2, 3 1, 4 Setting the Image Sharpness (Sharpness) You can give the image sharp or soft outlines. Press the 3 button in A mode. The [A Rec. Mode] menu appears. Use the four-way controller (23) to select [Sharpness]. Use the four-way controller (45) to change the sharpness level. -
Page 96: Setting The Color Saturation (Saturation)
Setting the Color Saturation (Saturation) You can set the color saturation. Press the 3 button in A mode. The [A Rec. Mode] menu appears. Use the four-way controller (23) to select [Saturation]. Use the four-way controller (45) to change the saturation level. The following setting is saved. -
Page 97: Setting The Image Contrast (Contrast)
2, 3 1, 4 Setting the Image Contrast (Contrast) You can set the image contrast level. Press the 3 button in A mode. The [A Rec. Mode] menu appears. Use the four-way controller (23) to select [Contrast]. Use the four-way controller (45) to change the contrast level. -
Page 98: Saving The Settings (Memory)
Saving the Settings (Memory) The Memory function is for saving the current camera settings even when the camera is turned off. For some camera settings, the Memory function is always set to O (On) (the settings are saved when the camera is turned off), while for others you can choose on or off (to choose whether the settings are saved or not when the camera is turned off). - Page 99 2, 3, 4, 5 1, 7 Press the 3 button in A mode. The [A Rec. Mode] menu appears. Press the four-way controller (23) to select [Memory]. Press the four-way controller (5). The Memory screen appears. Use the four-way controller (23) to choose an item.
-
Page 100: Recording Movies
Recording Movies Recording a Movie This mode enables you to record movies. Sound is recorded at the same time. Press the four-way controller (3) in A mode. The Capture Mode Palette appears. Use the four-way controller (2345) to select d (Movie). 4, 5 1, 2 Movie... - Page 101 Press the 4 button. d mode is selected and the camera returns to capture status. The following information appears on the LCD monitor. 1 Movie mode icon 2 Focus mode icon (fixed to 3) 3 Recording indicator (appears when recording begins in step 4 and blinks during recording) 4 Recording time 5 Movie anti-shake icon (appears when Movie anti-shake is set to...
-
Page 102: Selecting The Recorded Pixels For Movies
Selecting the Recorded Pixels for Movies You can choose from two recorded pixels settings for movies: [m 640×480] and [D 320×240]. The more pixels there are, the bigger the file size. The data volume also varies depending on the frame rate setting. (p.30) Recorded Pixels for Movies Suitable for viewing on a TV or computer screen. - Page 103 Use the four-way controller (23) to change the number of recorded pixels. Recording time for the selected recorded pixels is displayed when the Recorded Pixels setting is changed. Press the 4 button. The Recorded Pixels setting is saved. Press the 3 button twice. The camera returns to capture status with the current setting.
-
Page 104: Selecting The Quality Level Of Movies
Selecting the Quality Level of Movies You can set the quality level of movies. The higher the quality level, the clearer the details and the bigger the file size. Quality level of movies Best Better Good Press the 3 button in A mode. The [A Rec.Mode] menu appears. -
Page 105: Selecting The Frame Rate
2, 3, 4, 5, 6 1, 8 Selecting the Frame Rate You can choose from two frame rates (number of frames per second) for movies: [30fps] and [15fps]. The more frames per second, the better the quality of the movie, but the file size becomes larger. Press the 3 button in A mode. -
Page 106: Recording Movies In Black And White Or Sepia Tones (Color Mode)
Recording Movies in Black and White or Sepia Tones (Color Mode) In d (Movie mode), you can set the color mode to Black and White or Sepia, as well as Full Color, when recording a movie. Press the 3 button in A mode. The [A Rec. -
Page 107: Setting The Movie Anti-Shake Function
2, 3, 4, 5 1, 6 Setting the Movie Anti-Shake Function In d (Movie mode), you can use the Movie anti-shake function to correct camera shake. Press the 3 button in A mode. The [A Rec.Mode] menu appears. Use the four-way controller (23) to select [Movie]. Press the four-way controller (5). -
Page 108: Playing Back And Deleting Images
Playing Back and Deleting Images Playing Back Images Switching Between A Mode and Q Mode In this manual, the capture mode, such as for taking still pictures, is referred to as “A mode”. The playback mode, such as for displaying captured images on the LCD monitor, is referred to as “Q mode”. -
Page 109: Playing Back Still Pictures
Playing Back Still Pictures Refer to “Playing Back Images” (p.41) for instructions. -
Page 110: Nine-Image Display, Folder Display And Calendar Display
Nine-Image Display, Folder Display and Calendar Display Nine-Image Display You can display nine captured images on the LCD monitor at a time. In Q mode, press f on the Zoom/ f/y button. A page consisting of nine thumbnail images appears. The displayed images change nine at a time page by page. - Page 111 Switching to Folder Display or Calendar Display In nine-image display, press f on the Zoom/f/y button to switch to folder display or calendar display. Press the Green button to switch between folder display and calendar display. In Q mode, press f on the Zoom/f/y button. The screen changes to nine-image display.
-
Page 112: Zoom Playback
Zoom Playback You can magnify an image up to eight times. A guide showing the center of the magnified portion of the image appears on the LCD monitor during zoom playback. Enter the Q mode and use the four-way controller (45) to choose the image you want to magnify. - Page 113 2, 3 Setting the Quick Zoom Function When the Quick Zoom function is enabled, you can display an image at maximum magnification (×8) simply by pressing y on the Zoom/f/y button once. Press the 3 button in Q mode. The [u Setting] menu appears. Use the four-way controller (23) to select [Quick Zoom].
-
Page 114: Displaying Shooting Information In Playback Mode
Displaying Shooting Information in Playback Mode Shooting information can be displayed on the LCD monitor in Q mode. Pressing the 4/W button changes the display mode. Refer to p.18 for details of each display mode. Displaying Shooting Information 1p.77 Normal Display 100 - 0026 100 - 0026 0026... -
Page 115: Slideshow
1, 2, 3 Slideshow You can play back recorded images one after another. Enter the Q mode and use the four-way controller (45) to choose an image to start the slideshow with. Press the four-way controller (3). The Playback Mode Palette appears. Use the four-way controller (2345) to select u (Slideshow). - Page 116 Press the 4 button. The screen for setting the slideshow conditions appears. Use the four-way controller (23) to select [Interval]. Press the four-way controller (5). A pull-down menu appears. Use the four-way controller (23) to change the interval and press the 4 button. You can choose from 3sec, 5sec, 10sec, 20sec, and 30sec.
-
Page 117: Playing Back Movies
Playing Back Movies Playing Back a Movie You can play back the movies you have taken. Sound is played back at the same time. Enter the Q mode and use the four-way controller (45) to choose the movie you want to play back. -
Page 118: Connecting The Camera To Av Equipment
Connecting the Camera to AV Equipment Terminal cover By using the AV cable, you can take pictures and play back captured images on equipment with a video IN jack, such as a TV. Make sure the camera and TV are turned off before connecting the camera to the TV. Open the terminal cover and connect the AV cable to the PC/AV terminal. -
Page 119: Deleting Images
Deleting Images Delete images and sounds with mistakes or that are unnecessary. Deleting Single Images/Sound Files You can delete single images and sound files one at a time. Protected images and sound files cannot be deleted. (p.122) Enter the Q mode and use the four-way controller (45) to choose the image/sound file you want to delete. - Page 120 Deleting a Sound File If sound has been recorded with an image (p.146), you can delete the sound without deleting the image. Enter the Q mode and use the four-way controller (45) to choose an image with sound. Press the i button. The confirmation screen appears.
-
Page 121: Deleting Selected Images And Sound Files (From Nine-Image Display)
Deleting Selected Images and Sound Files (from Nine-Image Display) You can delete several images/sound files selected from the nine-image display at once. Protected images and sound files cannot be deleted. In Q mode, press f on the Zoom/ f/y button. Nine thumbnail images appear. - Page 122 Press the i button. A confirmation dialog appears. Use the four-way controller (23) to select [Select & Delete]. Press the 4 button. The selected images and sound files are deleted. Delete all selected Delete all selected Delete all selected images/sounds images/sounds images/sounds Select &...
-
Page 123: Deleting All Images
Deleting All Images You can delete all the images and sound files at once. Protected images and sound files cannot be deleted. (p.122) Press the i button in Q mode. A confirmation dialog appears. Press the i button. A confirmation dialog appears. Use the four-way controller (23) to select [Delete All]. -
Page 124: Protecting Images And Sound Files From Deletion (Protect)
Protecting Images and Sound Files from Deletion (Protect) You can protect stored images and sound files from being accidentally deleted. Press the four-way controller (3) in Q mode. The Playback Mode Palette appears. Use the four-way controller (2345) to select Z (Protect). - Page 125 1, 2, 4, 6 3, 5, 7 Protecting All Images and Sound Files Press the four-way controller (3) in Q mode. The Playback Mode Palette appears. Use the four-way controller (2345) to select Z (Protect). Press the 4 button. The screen for selecting [Select image/ sound] or [All Images/Sounds] appears.
-
Page 126: Editing And Printing Images
Editing and Printing Images Editing Images Changing the Image Size and Quality (Resize) By changing the size and quality of a selected image, you can make the file size smaller than the original. You can use this function to continue taking pictures when the SD Memory Card or built-in memory is full, by making the images smaller and overwriting the original images to make more space available. - Page 127 Press the 4 button. A confirmation dialog for overwriting the image appears. If the image is protected, a confirmation screen does not appear. The image is automatically saved with a new file name. Use the four-way controller (23) to select [Overwrite] or [Save as]. Press the 4 button.
-
Page 128: Trimming Images
Trimming Images You can delete the unwanted part of a picture and save the trimmed image as a separate image. Enter the Q mode and use the four-way controller (45) to choose the image you want to trim. Press the four-way controller (3). The Playback Mode Palette appears. -
Page 129: Copying Images And Sound Files
1, 2, 4, 6 3, 5, 7 Copying Images and Sound Files You can copy images and sound files from the built-in memory to the SD Memory Card and vice versa. This function can only be selected when an SD Memory Card has been inserted in the camera. Make sure that the camera is turned off before inserting or removing the SD Memory Card. - Page 130 Copying Files from the SD Memory Card to the Built-in Memory Selected images and sound files from the SD Memory Card are copied to the built-in memory one at a time. Use the four-way controller (23) to select [{}f]. Press the 4 button. Use the four-way controller (45) to select the file you want to copy.
-
Page 131: Using The Digital Filters
1, 2, 3, 5, 7 4, 6, 8 Using the Digital Filters This function lets you edit selected images with digital filters to change the color, etc. You can choose from nine filters: B&W, sepia, red, pink, purple, blue, green, yellow and soft. Enter the Q mode and use the four-way controller (45) to choose the image you want to edit. -
Page 132: Using The Brightness Filter
Using the Brightness Filter This function lets you adjust the brightness of the selected image. Enter the Q mode and use the four-way controller (45) to choose the image you want to edit. Press the four-way controller (3). The Playback Mode Palette appears. Use the four-way controller (2345) to select q (Brightness Filter). -
Page 133: Adding A Frame (Frame Composite)
1, 2, 3, 5, 9 4, 6, 7, 8, 10 Adding a Frame (Frame Composite) This function lets you add a decorative frame to still pictures. There are three frames already stored in the camera. Enter the Q mode and use the four-way controller (45) to choose the image to which you want to add a frame. - Page 134 SD Memory Card, in Step 3, select Y (Frame Composite) and press the 4 button. Visit the PENTAX website at the URL below to download new frames. http://www.pentax.co.jp/english/support/digital/optio_frame.html • The three frames stored in the internal memory cannot be deleted.
-
Page 135: Red-Eye Compensation
1, 2, 3, 5 4, 6 Red-eye Compensation You can correct images where the flash has caused the subject to appear with red eyes. Enter the Q mode and use the four-way controller (45) to choose the image you want to correct. Press the four-way controller (3). -
Page 136: Setting The Printing Service (Dpof)
Setting the Printing Service (DPOF) DPOF (Digital Print Order Format) is the format for storing print order data on still pictures captured with a digital camera. Once the print order data has been stored, the pictures can be printed according to the DPOF settings using a DPOF-compatible printer or photo processing lab. - Page 137 Press the 4 button. The message [DPOF setting for this image] appears. To make DPOF settings for another image, use the four-way controller (45) to select another image. If DPOF settings have already been made for an image, the previous number of copies and date setting (O or P) will be displayed.
-
Page 138: Printing All Images
Printing All Images When you choose the number of copies and whether or not to insert the date, the settings are applied to all the images stored in the camera. Display the screen for DPOF settings in Q mode. Refer to Steps 1 to 3 on p.134. Use the four-way controller (23) to select [All Images]. -
Page 139: Printing Using Pictbridge
Printing Using PictBridge By connecting the camera to a printer that supports PictBridge using the USB cable (I-USB7) provided, you can print images directly from the camera without using a PC. Connect the camera to the printer and select the images you want to print and the number of copies on the camera. •... -
Page 140: Printing Single Images
Printing Single Images In the printing mode selection screen, use the four-way controller (23) to select [Single Image]. Press the 4 button. The setting screen appears. Use the four-way controller (45) to choose an image to print. Use the four-way controller (23) to choose the number of copies. - Page 141 Use the four-way controller (2345) to choose the paper size. You can only choose a size that is supported by your printer. Press the 4 button. The Paper Size setting is saved, and the screen returns to the print settings screen. Use the four-way controller (23) to select [Paper Type] and press the four-way controller (5).
-
Page 142: Printing All Images
Printing All Images In the printing mode selection screen, use the four-way controller (23) to select [All Images]. Press the 4 button. The setting screen appears. Choose the number of copies and whether to insert the date or not. The number of copies and date setting that you choose apply to all the images. -
Page 143: Printing Using The Dpof Settings
Printing Using the DPOF Settings In the printing mode selection screen, use the four-way controller (23) to select [DPOF AUTOPRINT]. Press the 4 button. The DPOF settings you have made appear. Use the four-way controller (45) to check the number of copies for each picture, whether to insert the date or not, and the total number of copies. - Page 144 printer • Some a printer dock. • The camera cannot be connected to another printer or PC via USB while connected to the printer dock. functions may not work when using the camera with...
-
Page 145: Recording And Playing Back Sound
Recording and Playing Back Sound Recording Sound (Voice Recording Mode) You can record sound with the camera. The microphone is located above and to the left of the lens on the camera. When recording sound, aim the camera to obtain the best conditions. Four-way controller 4 button 3 button... - Page 146 Press the shutter release button fully. Recording stops. • If you press and hold down the shutter release button for more than one second in Step 4, recording continues until you take your finger off the button. • Sound is saved in WAVE monaural files.
-
Page 147: Playing Back Sound
Playing Back Sound You can play back the sound files you made in O mode. Press the Q button. Use the four-way controller (45) to choose a sound file to play back. Press the four-way controller (2). The sound file is played back. 1 Total file recording time 2 Playback time The following operations can be... -
Page 148: Adding A Voice Memo To Images
Adding a Voice Memo to Images You can add a voice memo to your still pictures. Recording a Voice Memo Enter Q mode and use the four-way controller (45) to choose the still picture to which you want to add a voice memo. -
Page 149: Playing Back A Voice Memo
Playing Back a Voice Memo Enter the Playback mode and use the four-way controller (45) to choose the still picture with the voice memo that you want to play back. U appears on images with voice memos in single-image display. Press the four-way controller (2). -
Page 150: Settings
Settings Camera Settings How to display the [u Setting] menu Four-way controller 4 button 3 button Formatting an SD Memory Card or the Built-in Memory Formatting will delete all the data on the SD Memory Card. All the data in the built-in memory will be deleted if no SD Memory Card is inserted in the camera. -
Page 151: Changing The Sound Settings
How to display the [u Setting] menu Four-way controller 4 button 3 button Changing the Sound Settings You can adjust the volume of operation sounds and change the type of sound. Use the four-way controller (23) to select [Sound] on the [u Setting] menu. - Page 152 Use the four-way controller (23) to select [1], [2], [3] or [Off] and press 4 button. The selected sound type is saved. Set [Shutter Sound], [Operation Sound] and [Self-timer Sound] in the same way as in Steps 5 to 7. Select [On] or [Off] for the self-timer sound.
-
Page 153: Changing The Date And Time
How to display the [u Setting] menu Four-way controller 4 button 3 button Changing the Date and Time You can change the initial date and time settings. You can also set the style in which the date appears on the camera. Use the four-way controller (23) to select [Date Adjust] on the [u Setting] menu. - Page 154 Press the four-way controller (5). The frame returns to [Date Style]. Press the four-way controller (3). The frame moves to [Date]. Press the four-way controller (5). The frame moves to one of the following items depending on the date style set in Step 4.
-
Page 155: Setting The World Time
How to display the [u Setting] menu Four-way controller 4 button 3 button Setting the World Time The date and time selected in “Setting the Date and Time” (p.37) and “Changing the Date and Time” (p.151) serve as the W (Hometown) date and time. - Page 156 Press the 4 button. The World Time setting is saved. Press the 3 button twice. The camera returns to capture status with the current setting. Select W (Hometown) in Step 3 of p.153 to set the city and DST setting for the Hometown city. Displaying the Time of the Destination on the LCD Monitor (Select Time) Use the four-way controller (23) to select [World Time]...
-
Page 157: Changing The Display Language
How to display the [u Setting] menu Four-way controller 4 button 3 button Changing the Display Language You can change the language in which the menus, error messages, etc. are displayed. You can choose from English, French, German, Spanish, Portuguese, Italian, Swedish, Dutch, Russian, Thai, Korean, Chinese (traditional and simplified) and Japanese. -
Page 158: Changing The Image Folder Name
How to display the [u Setting] menu Four-way controller 4 button 3 button Changing the Image Folder Name You can change the image folder name from the standard name to the date that pictures were taken. When the name is changed to the date, pictures are saved in separate folders by the date they were taken. -
Page 159: Changing The Usb Connection Mode
How to display the [u Setting] menu Four-way controller 4 button 3 button Changing the USB Connection Mode Choose the appropriate USB connection mode depending on whether you are going to connect the USB cable to a PC or a PictBridge- compatible printer. -
Page 160: Changing The Video Output Format
How to display the [u Setting] menu Four-way controller 4 button 3 button Changing the Video Output Format When you connect the camera to AV equipment, choose the appropriate video output format (NTSC or PAL) for taking and playing back images. Use the four-way controller (23) to select [Video Out] on the [u Setting] menu. -
Page 161: Automatically Adjusting The Brightness Of The Lcd Monitor (Auto Lcd Dimmer)
How to display the [u Setting] menu Four-way controller 3 button Automatically Adjusting the Brightness of the LCD Monitor (Auto LCD Dimmer) You can use the Auto LCD Dimmer to automatically adjust the brightness of the LCD monitor to the optimal setting according to the surrounding brightness. -
Page 162: Setting Auto Power Off
How to display the [u Setting] menu Four-way controller 4 button 3 button Setting Auto Power Off You can set the camera to turn off automatically when no operation is performed for a fixed time. Use the four-way controller (23) to select [Auto Power Off] on the [u Setting] menu. -
Page 163: Setting The Guide Display
How to display the [u Setting] menu Four-way controller 4 button 3 button Setting the Guide Display You can set to display or hide guides when the mode is selected in Capture Mode Palette (p.52) and Playback Mode Palette (p.58), and shooting mode display when the power is turned on. -
Page 164: Resetting To Default Settings (Reset)
How to display the [u Setting] menu Four-way controller 4 button 3 button Resetting to Default Settings (Reset) You can reset the camera settings to their defaults. Refer to “Default Settings” (p.166) for the reset settings. Use the four-way controller (23) to select [Reset] on the [u Setting] menu. -
Page 165: Changing The Start-Up Screen
How to display the Playback Mode Palette 2, 3, 5 4, 6 Changing the Start-up Screen You can choose an image to be displayed as the start-up screen when the camera is turned on. Press the Q button. The camera enters Q mode. Press the four-way controller (3). -
Page 166: Appendix
Appendix List of World Time Cities The following are cities that can be set for [Hometown] and [Destination] in World Time. Region City North Honolulu America Anchorage Vancouver San Francisco Los Angeles Calgary Denver Chicago Miami Toronto New York Halifax Central and Mexico City South... - Page 167 • The video output mode shown in the Video output column in the table on the left is selected when Hometown is selected in Initial Setting (p.34). • Change the video output mode manually when Hometown in [World Time] of the [H Settings] is changed.
-
Page 168: Default Settings
Default Settings The table below lists the factory default settings. The meaning of the indications for menu items with a default setting is explained below. Last Memory Setting : The current setting (last memory) is saved when the camera is turned off. : The setting returns to the default setting when the camera is turned off. - Page 169 Item MF Position White Balance Sensitivity EV Compensation Memory Digital Zoom DISPLAY File # Sharpness Saturation Contrast [u Setting] Menu Items Item Volume Start-up Sound Sound Shutter Sound Operation Sound Self-timer Sound Date Style (date) Date Style (time) Date Adjust Date Time World Time Setting...
-
Page 170: Playback Mode Palette Items
Item Quick Zoom Green Button Guide Display Playback Mode Palette Items Item Interval Slideshow Screen Effect Sound Effect Start-up Screen Optio Logo screen Key Operation Item Q button Operation Mode Zoom/w/x Zoom Position button Drive Mode Four-way Shooting Mode controller Flash Mode Focus Mode 3 button... -
Page 171: Functions Available For Each Shooting Mode
Functions Available for Each Shooting Mode Yes : Can be set and function is available. No : Cannot be set. : Can be set but function is not available. , (Auto) Yes Yes Yes No No a (Flash Off) Yes Yes Yes Yes Yes b (Flash On) c (Auto + Red-eye) No d (Flash On + Red-eye) No... -
Page 172: Optional Accessories
Optional Accessories A number of dedicated accessories are available for this camera. AC adapter kit K-AC51 This kit includes the DC coupler D-DC51, the AC adapter D-AC5 and the AC plug cord D-CO2. The ending of the AC plug cord name differs depending on the country. -
Page 173: Messages
Messages Messages such as the following may appear on the LCD monitor during camera operation. The batteries are exhausted. Replace with new batteries. If Battery depleted using rechargeable batteries, charge the batteries. (p.22) The SD Memory Card is full and no more images can be saved. - Page 174 Data being processed Messages such as the following may appear on the LCD monitor when using the PictBridge function. No paper in the printer No ink in the printer Printer error Data error Paper stuck in the printer This message appears when the camera takes more than five seconds to display an image due to image processing, or when the SD Memory Card or built-in memory is being formatted.
-
Page 175: Troubleshooting
Troubleshooting Problem Batteries are not installed Camera will not Battery is installed turn on incorrectly Battery power is low Camera is connected to a PC Camera is connected No image on LCD to a TV monitor Image is displayed but is hard to see Flash is charging Shutter will not... - Page 176 Problem Subject is difficult to focus on with autofocus Subject is not in Subject is not in focus focusing area Subject is too close Focus mode is set to q Flash mode is set to a (flash off) Drive mode is set to 1 Flash does not Focus mode is set to discharge...
-
Page 177: Main Specifications
Main Specifications Type Fully automatic compact digital still camera with built-in zoom lens Effective Pixels 7.0 megapixels Sensor 7.38 megapixels (total pixels) 1/2.5 inch interline transfer CCD with a primary color filter Recorded Pixels Still Picture Movie Sensitivity Auto, manual (64/100/200/400/800/1600: Standard Output Sensitivity) * When blur reduction mode is selected, output sensitivity is automatically set until standard output sensitivity 1600 for automatic sensitivity. - Page 178 Movie 640×480 320×240 The recording time is for reference only. The actual recording time may vary depending on the SD memory card and the subject. White Balance Auto, Daylight, Shade, Tungsten Light, Fluorescent Light, Manual Lens Focal Length Aperture Lens Composition 6 elements in 5 groups (one aspherical element) Zoom Type Picture Range Lens Cover...
- Page 179 Focus Modes Autofocus, Macro, Super Macro, Infinity, Pan Focus, Manual Focus Type Still Picture (from lens front) Focus Lock Exposure AE metering Mechanism Compensation Shooting Modes Green, Auto Picture, Program, Night Scene, Movie, Voice Recording, Landscape, Flower, Portrait, Surf & Snow, Sport, Blur reduction, Kids, Pet, Food, Frame Composite Movie Continuous...
- Page 180 Battery Life Number of Recordable Images 220 pictures (AA alkaline batteries)*1 330 pictures (AA nickel manganese batteries)*1 460 pictures (AA NiMH batteries)*1 700 pictures (AA lithium batteries)*1 Playback Time 500 min. (AA alkaline batteries)*2 570 min. (AA nickel manganese batteries)*2 640 min.
-
Page 181: Warranty Policy
Shipping charges are to be borne by the owner. If your PENTAX was purchased outside of the country where you wish to have it serviced during the warranty period, regular handling and servicing fees may be charged by the manufacturer’s representatives in that country. - Page 182 Therefore, we recommend that you review the warranty card supplied with your product at the time of purchase, or contact the PENTAX distributor in your country for more information and to receive a copy of the warranty policy.
- Page 183 For customers in USA STATEMENT OF FCC COMPLIANCE This device complies with Part 15 of the FCC Rules. Operation is subject to the following two conditions: (1) This device may not cause harmful interference, and (2) this device must accept any interference received, including interference that may cause undesired operation.
-
Page 184: Declaration Of Conformity
Product Name: PENTAX Digital Still Camera Model Number: Optio M20 Contact person: Customer Service Manager Date and Place: September, 2006, Colorado Declaration of Conformity PENTAX Imaging Company A Division of PENTAX of America, Inc. Street, Suite 300 Golden, Colorado 80401 U.S.A. Phone: 303-799-8000 FAX: 303-790-1131... - Page 185 Information on disposal for users 1. In the European Union If your product is marked with this symbol, it means that used electrical/electronic products should not be mixed with general household waste. There exists a separate collection system for these products. Used electric/electronic equipment must be treated separately and in accordance with legislation that requires proper treatment, recovery and recycling of these products.
-
Page 186: Index
Index Symbols [A Rec. Mode] menu A mode ...9, 106 Q button ...43, 45 Q mode ...9, 106 [H Setting] menu s Green Mode | Green Button i Delete ...42, 117 x Tele ...74 w Wide ...74 y Magnify ...110 f Nine-image display g Self-timer ...72... - Page 187 Dock insert ...141 DPOF printing ...141 DPOF settings ...134 File # ...96 Flash ...81 Flash Off a ...81 Flash On b ...81 Fluorescent Light J ... 87 Focus Mode ...79 Focusing ...79 Focusing Area ...89 Folder display ...109 Format ...148 Four-way controller ...44, 46 Frame Composite...
- Page 188 Recording movies Recording sounds Red-eye Compensation Red-eye reduction cd ... 81 Resetting settings Resize ...124 Rotating ...42 Saturation ...94 Saving by date Saving settings SD Memory Card Select time ...154 Self-timer g ...72 Sensitivity ...90 Sepia ...104, 129 Setting the exposure Shade H ...
- Page 189 Memo...
- Page 190 Memo...
- Page 191 Memo...
- Page 192 PENTAX U.K. Limited PENTAX France S.A.S. PENTAX (Schweiz) AG PENTAX Scandinavia AB PENTAX Imaging Company A Division of PENTAX of America, Inc. PENTAX Canada Inc. • Printed on recycled paper • Specifications and external dimensions are subject to change without notice. 57746 2-36-9, Maeno-cho, Itabashi-ku, Tokyo 174-8639, JAPAN (http://www.pentax.co.jp/)
Need help?
Do you have a question about the Optio M20 and is the answer not in the manual?
Questions and answers