Table of Contents
Advertisement
COMBI-KETTLE
PROVENO E
Type: 40 l, 60 l, 80 l, 100 l, 150 l, 200 l, 300 l, 400 l
Accessories:
MIXER, MANUAL COOLING, AUTOMATIC COOLING, ICEBANK COOLING, AUTOMATIC WATER
FILLING, EASYRUN 1.1 PROGRAMMING
Installation and Operation Manual
Original instructions
Rev 1.2
(24.08.2016)
S/N: 10911210170030 Valid from 17 .10.2012
4222150, 4222152, 4222154, 4222156, 4222158, 4222160, 4222162, 422164
Advertisement
Table of Contents

Related Manuals for Metos PROVENO E


Summary of Contents for Metos PROVENO E
- Page 1 COMBI-KETTLE PROVENO E Type: 40 l, 60 l, 80 l, 100 l, 150 l, 200 l, 300 l, 400 l Accessories: MIXER, MANUAL COOLING, AUTOMATIC COOLING, ICEBANK COOLING, AUTOMATIC WATER FILLING, EASYRUN 1.1 PROGRAMMING Installation and Operation Manual Original instructions Rev 1.2...
-
Page 2: Table Of Contents
Rev. 1.2 (24.08.2016) PROVENO E TABLE OF CONTENTS General ...............................5 1.1. Symbols used in the manual ........................5 1.2. Symbols used on the appliance ........................5 1.3. Checking the relationship of the appliance and the manual ................5 1.3.1. Proveno combi-kettle versions........................6 Safety Instructions ..........................11 2.1. - Page 3 Rev. 1.2 (24.08.2016) PROVENO E 4.2.14. EasyRun 1.1 programming.........................35 4.2.15. Possible power failure during timing or EasyRun program ...............38 4.2.16. Programming lockup reset ........................39 4.2.17. CleanPlus cleaning aid program - ClnP ......................40 4.2.18. Self-control (HACCP) (option) ........................40 4.2.19. Energy consumption readout ........................41 4.3.
- Page 4 Rev. 1.2 (24.08.2016) PROVENO E...
-
Page 5: General
General Rev. 1.2 (24.08.2016) PROVENO E General Carefully read the instructions in this manual as they contain important information regarding proper, effi cient and safe installation, use and maintenance of the appliance. Keep this manual in a safe place for eventual use by other operators of the appliance. -
Page 6: Proveno Combi-Kettle Versions
General Rev. 1.2 (24.08.2016) PROVENO E 1.3.1. Proveno combi-kettle versions The mixer and timer are standard options on all versions. The user panel and the available functions on the combi-kettle are different depending on what options are available This manual covers all options except the EasyRun 99.9 programming option that is covered in a separate manual included with the combi-kettles with the option installed. - Page 7 General Rev. 1.2 (24.08.2016) PROVENO E Proveno combi-kettle with HACCP, mixer, timer, automatic water fi lling and cooling 1. Heating 2. HACCP 3. Mixer 4. Mixer start and pause 5. Mixer stop 6. Displays for heating, HACCP and mixer 7. Return kettle bowl to upright position 8.
- Page 8 General Rev. 1.2 (24.08.2016) PROVENO E Proveno combi-kettle with HACCP , mixer, timer, automatic water fi lling and EasyRun 1.1 programming 1. Heating 2. HACCP 3. Mixer 4. Mixer start and pause 5. Mixer stop 6. Displays for heating, HACCP and mixer 7.
- Page 9 General Rev. 1.2 (24.08.2016) PROVENO E Proveno combi-kettle with HACCP, mixer, timer and automatic water fi lling 1. Heating 2. HACCP 3. Mixer 4. Mixer start and pause 5. Mixer stop 6. Displays for heating, HACCP and mixer 7. Return kettle bowl to upright position 8.
- Page 10 General Rev. 1.2 (24.08.2016) PROVENO E Proveno combi-kettle with HACCP, mixer and timer 1. Heating 2. HACCP 3. Mixer 4. Mixer start and pause 5. Mixer stop 6. Displays for heating, HACCP and mixer 7. Return kettle bowl to upright position 8.
-
Page 11: Safety Instructions
Safety Rev. 1.2 (24.08.2016) PROVENO E Safety Instructions 2.1. General The Proveno combi-kettle has been designed and manufactured in compliance with the Directive regar- ding Safety of Machinery, the Low Voltage Directive, the Directive regarding Electromagnetic Compatibi- lity and the Directive regarding Pressure Equipment currently in force. -
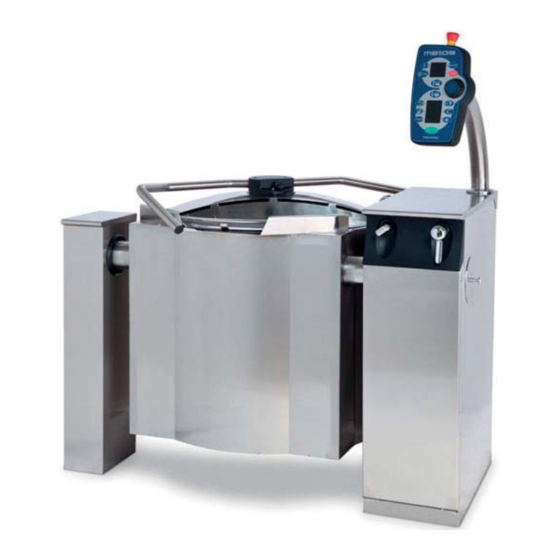
Page 12: Construction Of The Combi-Kettle
Safety Rev. 1.2 (24.08.2016) PROVENO E 2.2. Construction of the combi-kettle The main parts of the combi-kettle are illustrated in the following pictures: 1. Support pillar 2. Safety block 3. Mixer and mixing tool 4. Emptying valve for steam generator 5. - Page 13 Safety Rev. 1.2 (24.08.2016) PROVENO E 1. Safety lid 2. Lifting arm 3. Locking lever of the lid 4. Safety grid for fi ll opening 5. Safety switch 6. Cover for fi ll opening Mains switch 1. Mains switch...
-
Page 14: Safe And Correct Use
Safety Rev. 1.2 (24.08.2016) PROVENO E Proveno combi-kettle with HACCP, mixer, timer, automatic water fi lling, EasyRun 1.1 programming and, cooling 1. Heating 2. HACCP 3. Mixer 4. Mixer start and pause 5. Mixer stop 6. Displays for heating, HACCP and mixer 7. -
Page 15: Avoiding Burns
Safety Rev. 1.2 (24.08.2016) PROVENO E 2.3.1. Avoiding burns • Beware of the inner surface, the upper rim and the lid that may be hot. • Beware of hot steam when opening the lid. • Beware of the hot mixing tool after cooking. Use protective gloves. -
Page 16: Changing The Settings And Adjustments
Safety Rev. 1.2 (24.08.2016) PROVENO E 1. Emergency/stop button 2. Mains switch 3. ON/OFF switch • Make sure before use that the removable lid is properly in place. • Make sure before use that the safety grid is properly in place. -
Page 17: Functional Description
Functional description Rev. 1.2 (24.08.2016) PROVENO E Functional description 3.1. Intended use of the appliance The Proveno combi-kettle is designed for professional food preparation. Using Proveno for other purpo- ses is prohibited. It is forbidden to put corrosive ingredients or substances reacting with each other in the kettle. -
Page 18: Operation Switches And Indicator Lights
Functional description Rev. 1.2 (24.08.2016) PROVENO E 3.4. Operation switches and indicator lights All Proveno’s operation switches are push buttons. Also the central dial has a pushbutton function. The buttons are activated by a light and gentle push or by holding a button down for some time (2-10 se- conds), depending on what function you plan to use. - Page 19 Functional description Rev. 1.2 (24.08.2016) PROVENO E Proveno combi-kettle with HACCP, mixer, timer, automatic water fi lling, EasyRun 1.1 programming and, cooling 1. Heating 2. HACCP 3. Mixer 4. Mixer start and pause 5. Mixer stop 6. Displays for heating, HACCP and mixer 7.
-
Page 20: Display Messages For The User
Functional description Rev. 1.2 (24.08.2016) PROVENO E 3.4.1. Display messages for the user • Blinking number/letter in various fi elds of the display in general: the appliance is waiting for a value to be set with the central dial (approx. 3 seconds). -
Page 21: Operating Instructions
Operation instructions Rev. 1.2 (24.08.2016) PROVENO E Operating instructions 4.1. Before use 4.1.1. Preparing for use Daily check before use • Water supply (hot/cold) is open. • No inappropriate objects in the kettle. • Scrapers are correctly attached to the mixing tool. See ”Positioning the mixing tool and scraper” . -
Page 22: Maintenance Information
Operation instructions Rev. 1.2 (24.08.2016) PROVENO E • Complete the check by releasing the buttons. • Information on the completed safety block check is automatically recorded in the combi-kettle’s me- mory for potential retrieval later on. For the user’s self-control, safety block checks and other procedu- res carried out to maintain the appliance in working order should be recorded in the ’Maintenance... -
Page 23: Operation Procedures
Operation instructions Rev. 1.2 (24.08.2016) PROVENO E 4.2. Operation procedures 4.2.1. Operating the control panel - General When the appliance is started with the ON/OFF switch, all displays and indicator lights on the control panel illuminate for a short time (display test). After that, ‘On’ remains on the temperature display and the time on the timer display (if the kettle is fi... -
Page 24: Positioning The Mixing Tool And Scrapers
Operation instructions Rev. 1.2 (24.08.2016) PROVENO E 4.2.3. Positioning the mixing tool and scrapers Attach the scrapers by placing the pins on the mixing tool into the holes on the scrapers. After that turn the scraper into place by lifting the scraper’s lower part. Finally pull the scraper forward. The bevel (1) will on the lower scraper point upwards and on the side scraper away from the mixer axle. -
Page 25: Cooking
Operation instructions Rev. 1.2 (24.08.2016) PROVENO E It is easiest to attach the mixing tool to the mixer axle when the kettle is in a tilted position. Push the ring on the mixing tool into the kettle’s mixer axle and fi t the mixing... -
Page 26: Changing The Temperature
Operation instructions Rev. 1.2 (24.08.2016) PROVENO E 4.2.5. Changing the temperature Press the temperature button. Select the temperature desired. 4.2.6. Stopping the cooking Press the temperature button for a long time (approx. 2 seconds). The heating goes off when ’On’ appears on the display. - Page 27 Operation instructions Rev. 1.2 (24.08.2016) PROVENO E Pre-set mixing programs (P1 - P6) Select the mixing function. Message ’15’ appears on the mixing display Select the desired mixing program P1 - P6. Start the mixing program. The display shows the number and phase of the program in operation (e.g. P2.2). The pre-set programs...
-
Page 28: Mixing While Tilting
Operation instructions Rev. 1.2 (24.08.2016) PROVENO E 4.2.8. Mixing while tilting This option enables forced mixing at the lowest mixing speed while the kettle is tilted. With the help of this function it is possible to portion more homogenous batches of food into smaller bowls. -
Page 29: Automatic Water Fi Lling (Option)
Operation instructions Rev. 1.2 (24.08.2016) PROVENO E 4.2.10. Automatic water fi lling (option) Press once. Select the amount to be fi lled. Start fi lling by pressing once again. The selected amount of cold water fl ows automatically into the kettle. The display shows all the time the amount in litres poured into the kettle. -
Page 30: Timer Functions
Operation instructions Rev. 1.2 (24.08.2016) PROVENO E 4.2.11. Timer functions Setting the time Setting correct time by the clock is necessary to make timing and data collection possible. Press and simultaneously hold down for about 2 seconds. Set the time. - Page 31 Operation instructions Rev. 1.2 (24.08.2016) PROVENO E Activating the starting time and duration of cooking Press once. The start time can be set at a maximum seven days - 6 hours ahead. The - 6 hours i because of the po- wer failure monitoring system.
-
Page 32: Automatic Cooling
Operation instructions Rev. 1.2 (24.08.2016) PROVENO E Deactivating the activated/programmed operation time Press and keep pressed for about 2 seconds. In case the starting time has not yet been reached, the starting time has to be deactivated by pressing the starting time button for about two seconds. - Page 33 Operation instructions Rev. 1.2 (24.08.2016) PROVENO E Changing the target temperature during cooling Press once. Select a new target temperature (on the display: food temperature). Cooling continues automatically until the new temperature has been reached. Continuing the cooling to a lower temperature When food temperature reaches the temperature set, the fl...
-
Page 34: Manual Cooling (Option)
Operation instructions Rev. 1.2 (24.08.2016) PROVENO E 4.2.13. Manual cooling (option) Cooling is based on cold tap water circulating in the kettle’s steam jacket. Mixing and use of scrapers make the cooling more effi cient. The cooling time depends, for example, on the product and the amount to be cooled, the product’s initial and end temperature, the fl... -
Page 35: Easyrun 1.1 Programming
Operation instructions Rev. 1.2 (24.08.2016) PROVENO E 4.2.14. EasyRun 1.1 programming EasyRun programming consists of 4 different programs, a single step cooking program a two step program where the steps can be either cooking – cooling or cooling cooking a three step program where each step can be either a cooking or cooling step... - Page 36 Operation instructions Rev. 1.2 (24.08.2016) PROVENO E Activating an EasyRun program Press once. Select the desired program Er1, Er2 or Er3 with the central dial. Push the central dial. Select the values you want for the fi rst step by fi rst pressing the button of the appropriate function and setting the desired value with the central dial: If desired a programmed starting time for the fi...
- Page 37 Operation instructions Rev. 1.2 (24.08.2016) PROVENO E Push the central dial Press once In the program display the Er program step and the message ‘run’ is shown. The program is now activa- ted to run. If no starting time was set the buzzer sounds and the program starts to run. If a programmed starting time was set the timer display shows the following values: •...
-
Page 38: Possible Power Failure During Timing Or Easyrun Program
Operation instructions Rev. 1.2 (24.08.2016) PROVENO E Cancelling a program In order to cancel a program before it has been started: Press once Select the value Strt Push the central dial Press and keep pressed for about 2 seconds. The indicator light of the PROG button goes off and ‘On’ is displayed. -
Page 39: Programming Lockup Reset
Operation instructions Rev. 1.2 (24.08.2016) PROVENO E Power failure during both the starting time and operation time In case of power failure during both the starting time and operation time, the kettle’s timer display shows, when the power supply is restored, the total time the timing was delayed: •... -
Page 40: Cleanplus Cleaning Aid Program - Clnp
Operation instructions Rev. 1.2 (24.08.2016) PROVENO E 4.2.17. CleanPlus cleaning aid program - ClnP The CleanPlus – ClnP – program is a preset program that can be used to intensify soaking preferably used together with a cleaning tool. ClnP Cleaning program •... -
Page 41: Energy Consumption Readout
Operation instructions Rev. 1.2 (24.08.2016) PROVENO E 4.2.19. Energy consumption readout The Proveno combikettle is fi tted with energy consumption monitoring that collects the used energy in kilowatt hours (kWh). There are three different collected values, • energy used by last cooking process •... -
Page 42: After Use
Operation instructions Rev. 1.2 (24.08.2016) PROVENO E 4.3. After use 4.3.1. Cleaning Use of a high-pressure hose is forbidden. High-pressure hoses generate huge amounts of water fog that STOP might contribute to contamination of food and food handling surfaces over large areas in the kitchen. - Page 43 Operation instructions Rev. 1.2 (24.08.2016) PROVENO E The dosing and impact time instructions for cleaning detergents must be followed - e.g. exceeding the impact time for foam cleaning detergents in combination with salt residues has been observed to cause severe spot corrosion even on stainless steel.
-
Page 44: Periodic Service
Operation instructions Rev. 1.2 (24.08.2016) PROVENO E Press the lid arm against the lid so that the fi xing cone is guided into the fi xing part and the locking lever snaps in the locked position. Make sure that the lid is locked on the arm. -
Page 45: Installation
Installation Rev. 1.2 (24.08.2016) PROVENO E Installation 5.1. General Please observe the instructions given in this chapter concerning the installation and adjustments that must be done before taking the Proveno combi-kettle into use. Strict observance of the instructions prevents malfunctions and damages potentially caused by defective installation. -
Page 46: Disposal Of The Package
Installation Rev. 1.2 (24.08.2016) PROVENO E 5.1.5. Disposal of the package In connection with unpacking, all packing material must be sorted and disposed of in accordance with local recycling regulations. 5.2. Installation Check before installation from the installation drawing that there is enough space behind the kettle for tilting and servicing. -
Page 47: Dimensions
Installation Rev. 1.2 (24.08.2016) PROVENO E 5.2.1. Dimensions Model Weight (mm) (mm) (mm) (mm) (mm) (mm) (mm) (mm) (mm) (kg) 1740 1055 1740 1180 1745 1010 1235 100E 1745 1010 1235 150E 1945 1075 1170 1000 200E 1945 1035 1155... -
Page 48: Floor Drain Positioning
Installation Rev. 1.2 (24.08.2016) PROVENO E 5.2.2. Floor drain positioning Model (mm) (mm) (mm) (mm) 1047 1172 1227 100E 1227 150E 1162 200E 1277 300E 1312 1126 1000 400E 1312 1126 1200... -
Page 49: Positioning Of Installation Frames
Installation Rev. 1.2 (24.08.2016) PROVENO E 5.2.3. Positioning of installation frames Combined kettles Frame front edges must be aligned Single kettle Model Model (mm) 100E 100E 150E 150E 200E 200E 300E 1126 300E 1126 400E 1126 400E 1126 Frame front edges must be aligned 1. -
Page 50: Subsurface Frame Cast Into The Fl Oor
Installation Rev. 1.2 (24.08.2016) PROVENO E 5.2.4. Subsurface frame cast into the fl oor Installation frames are mounted according to the installation drawing, with the help of distance guides supplied with the delivery. The frames must be installed in a horizontal position and fi xed so that they do not move during casting. -
Page 51: Surface Installation Frame Fi Xed To The Fl Oor
Installation Rev. 1.2 (24.08.2016) PROVENO E 5.2.5. Surface installation frame fi xed to the fl oor Surface frames are mounted according to the installation drawing, with the help of distance guides supp- lied with the delivery. If the inclination of the fl oor is very steep, it may be necessary to level the surface frame closer to the horizontal by placing stainless steel spacers between the frame and the fl... -
Page 52: Installing The Combi-Kettle On The Frame
Installation Rev. 1.2 (24.08.2016) PROVENO E 5.2.6. Installing the combi-kettle on the frame The front and rear cover plates of the kettle’s support and control pillar must be detached before installa- tion. Each plate has been fi xed at its lower edge with two screws. After that, it is also possible to detach the lead-through plate of supply cables and water pipes located at the lower rear edge of the control panel by loosening four screws. - Page 53 Installation Rev. 1.2 (24.08.2016) PROVENO E Next, the control pillar (1) is adjusted by means of the adjusting bolts (3), located on the corners, to a horizontal position and on the same level with the support pillar. When the control pillar (1) is in position, it is fi...
-
Page 54: Electrical Connections
Installation Rev. 1.2 (24.08.2016) PROVENO E When the axle is pushed fully into the bearing and the stop ring makes contact with the bearing mount the locking ring (1) and secure it with the three locking screws (2). After that the three screws (3) for fastening the bearing cover plate can be refi... - Page 55 Installation Rev. 1.2 (24.08.2016) PROVENO E 1. Supply cable 2. Lead-through plate 3. Cable bushing 4. Mains switch 5. N and PE terminals Detach the lead-through plate (2) from the pillar. Slip the supply cable (1) through the cable bushing (3) of the lead-through plate and upwards via the lead-through of the electrical box behind the mains switch (4) to the top terminals.
- Page 56 Installation Rev. 1.2 (24.08.2016) PROVENO E Electrical connections Supply cable connection point 6, 7, 8 Connections from the rear Supply cable connection point Connections from below inside this area 1. Electrical power supply cable. 6. Ice bank cooling (C3/C5) control cable (option).
-
Page 57: Water Connections
Installation Rev. 1.2 (24.08.2016) PROVENO E 5.4. Water connections Water connections of the Proveno combi-kettle can only be carried out by a person with professional STOP competence in the installation and service of heating, plumbing and air conditioning equipment. The location of the water connection points appears from the installation drawing. Both cold and hot water connections must be fi... -
Page 58: Icebank Connections (C3 Option)
Installation Rev. 1.2 (24.08.2016) PROVENO E 5.4.1. Icebank connections (C3 option) The location of the connection points of an external icebank appears from the installation drawing. Icebank in: R1/2” inner thread. The icebank must be fi tted with a solenoid valve to stop the fl ow of coo- ling water after cooling has ended. -
Page 59: Ventilation
Installation Rev. 1.2 (24.08.2016) PROVENO E 3. Reverse osmosis system A reverse osmosis system must be used if the chloride concentration exceeds 60 mg/l. This is very cru- cial in order to avoid corrosion. 4. Water softener If a high level of scale build-up is experienced, a water softener is needed. H+ Ion Exchanger or Kleensteam are recommended systems. -
Page 60: Fastening The Mixer Motor Cover Box
Installation Rev. 1.2 (24.08.2016) PROVENO E 1. Tilting lever 2. Mounting plate of limit switches 3. Limit switch for cooking position 4. Limit switch of tilting end position 5. Locking nut for adjustment 5.7.2. Fastening the mixer motor cover box On the large kettle models (Proveno 150, 200, 300, 400), the cover box of the mixing motor comes unat- tached inside the kettle. -
Page 61: Adjustments, Programming
Installation Rev. 1.2 (24.08.2016) PROVENO E • Press the buttons simultaneously and keep them pressed throughout the test. • On the temperature display, ’tESt’ blinks three times, the heating is switched on again and the tem- perature display is updated according to the temperature rise. -
Page 62: Adjustment Instructions
Adjustment instructions Rev. 1.2 (24.08.2016) PROVENO E Adjustment instructions 6.1. Setting customer specifi c parameters By setting the customer specifi c parameter it is possible to modify certain functions of the Proveno combi-kettle to better suit a kitchen’s or customer’s individual needs. In general, the preset factory set- tings are well suited to most users, so the settings need only be modifi... -
Page 63: Customer Specifi C Parameters, Settings And Factory Presets
Adjustment instructions Rev. 1.2 (24.08.2016) PROVENO E 6.2. Customer specifi c parameters, settings and factory presets The following table contains the parameter values starting from program revision 2r01. The program revi- sion is visible on the temperature display a short moment after switching the kettle on. - Page 64 Adjustment instructions Rev. 1.2 (24.08.2016) PROVENO E Pr code Function Display Value Factory pre- Pr42 C5 cooling tap water emptying delay before Temperature C5td 0 = not in use Ice Bank emptying delay Info 0-15 Pr43 Preset time (min.), after which the cooling is...
-
Page 65: Troubleshooting
Troubleshooting Rev. 1.2 (24.08.2016) PROVENO E Troubleshooting MALFUNCTION POSSIBLE CAUSE WHAT TO DO The kettle cannot be The mains switch is in the OFF position Turn the mains switch fi tted on the rear part of the switched on control pillar right side to the ON position... - Page 66 Troubleshooting Rev. 1.2 (24.08.2016) PROVENO E MALFUNCTION POSSIBLE CAUSE WHAT TO DO The kettle does not tilt The lid of the kettle is on and the mixer display Open the lid shows a 'Lid' signal The emergency/stop button is pushed...
- Page 67 Troubleshooting Rev. 1.2 (24.08.2016) PROVENO E MALFUNCTION POSSIBLE CAUSE WHAT TO DO The automatic The temperature of the cooling wa- Select a fi nal temperature that is possible cooling program is ter is so high that it is not possible...
-
Page 68: Technical Specifi Cations
Technical specifi cations Rev. 1.2 (24.08.2016) PROVENO E Technical specifi cations... - Page 69 Technical specifi cations Rev. 1.2 (24.08.2016) PROVENO E Item Type Specifi cation Overall dimensions incl. support pillar WxDxH 40,60 1047x800x900/1535 mm Overall dimensions incl. support pillar WxDxH 80,100 1154x800x900/1535 mm Overall dimensions incl. support pillar WxDxH 150,200 1360x920x900/1535 mm Overall dimensions incl. support pillar WxDxH...
- Page 70 Technical specifi cations Rev. 1.2 (24.08.2016) PROVENO E Item Type Specifi cation Mixer power 40,60,80,100 0,75 kW Mixer power 150,200,300 1,5 kW Mixer power 2,2 kW Mixer speed range 40 - 400 15 - 140 rpm Mixer programs 40 - 400...
- Page 71 Technical specifi cations Rev. 1.2 (24.08.2016) PROVENO E...
Need help?
Do you have a question about the PROVENO E and is the answer not in the manual?
Questions and answers