
Related Manuals for Pentax Model Optio S60


Summary of Contents for Pentax Model Optio S60
- Page 1 Digital Camera Operating Manual To ensure the best performance from your camera, please read the Operating Manual before using the camera.
- Page 2 Regarding copyrights Images taken using the PENTAX Digital Camera that are for anything other than personal enjoyment cannot be used without permission according to the rights as specified in the Copyright Act. Please take care, as there are even cases where limitations are placed on taking pictures even for personal enjoyment during demonstrations, performances or of items on display.
-
Page 3: For Safe Use Of Your Camera
• If the camera emits smoke or a strange smell, or in the event of any other irregularity, stop using the camera immediately, remove the battery or disconnect the AC adapter and contact your nearest PENTAX service center. Continued use of the camera may result in fire or electric shock. - Page 4 Caution • Never try to disassemble or short the battery. Also, do not dispose of the battery in fire, as it may explode. • Do not charge any batteries other than rechargeable Ni-MH batteries. The battery could explode or catch fire. The batteries that can be used in this camera, only the Ni-MH battery can be recharged.
- Page 5 AC plug cord to become damaged due to excessive bending. If the AC plug cord becomes damaged, consult a PENTAX Service Center. • Do not short or touch the output terminals of the product while it is still plugged in.
-
Page 6: Care To Be Taken During Handling
Care to be Taken During Handling • Take the international warranty card with you when you travel abroad. Also take the Worldwide Service Network that is included in the package. This will be useful if you experience problems abroad. • When the camera has not been used for a long time, confirm that it is still working properly, particularly prior to taking important pictures (such as at a wedding or during traveling). - Page 7 In order to better service you, we request that you complete the product registration, which can be found on the CD-ROM supplied with the camera or the PENTAX website. Thank you for your cooperation. Refer to the PC Connection Manual (bottom right of reverse side) for...
-
Page 8: Table Of Contents
Contents FOR SAFE USE OF YOUR CAMERA ...1 Care to be Taken During Handling ...4 Contents ...6 Contents of the Operating Manual...11 Checking the Contents of the Package ...12 Names of Parts...13 Names of Operating Parts ...14 Getting Started Attaching the Strap...15 Powering the Camera ...16 Installing the Batteries ...16 Using a Household Power Outlet ...18... - Page 9 Taking Pictures Taking Pictures ...46 Changing the Mode ...46 Selecting the Capture Mode ...46 Displaying Shooting Information in Capture Mode ...47 Taking Pictures in Auto Select Mode (Auto Select Mode) ...49 Letting the camera set the functions (Program Mode) ...52 Selecting the Picture Mode According to the Shooting Scene (Picture Mode) ...53 Taking Pictures of Dark Scenes (Night-Scene Mode) ...55...
- Page 10 Playback/Deleting/Editing Playing Back Images ...92 Playing Back Still Pictures ...92 Zoom Display...92 Playing Back Movies ...94 Displaying Shooting Information in Playback Mode ...95 Nine Image Display ...96 Slideshow ...97 Deleting...98 Deleting Individual Images or Sounds ...98 Deleting All Images...100 Protecting Images and Sounds from Deletion (Protect) ...101 Viewing Images on a TV ...103 Using the Remote Control Unit (optional) to View the Previous or the Next Image ...104...
- Page 11 Appendix List of City Codes ...132 Optional Accessories ...133 Messages...134 Troubleshooting...136 Main Specifications ...138 Index...141 WARRANTY POLICY...146...
- Page 12 Memo...
-
Page 13: Contents Of The Operating Manual
Contents of the Operating Manual This operating manual contains the following chapters. 1 Getting Started ––––––––––––––––––––––––––––––––––––––––– This chapter explains what you need to do after purchasing the camera before you start taking pictures. Be sure to read it and follow the instructions. 2 Quick Start ––––––––––––––––––––––––––––––––––––––––––––... -
Page 14: Checking The Contents Of The Package
USB cable Two AA alkaline batteries I-AVC7 (∗) I-USB7 (∗) Operating Manual ACDSee for PENTAX PC Connection Manual (this manual) User Guide Items marked with an asterisk (∗) are also available as optional accessories. For other optional accessories, refer to “Optional Accessories” (p.133). -
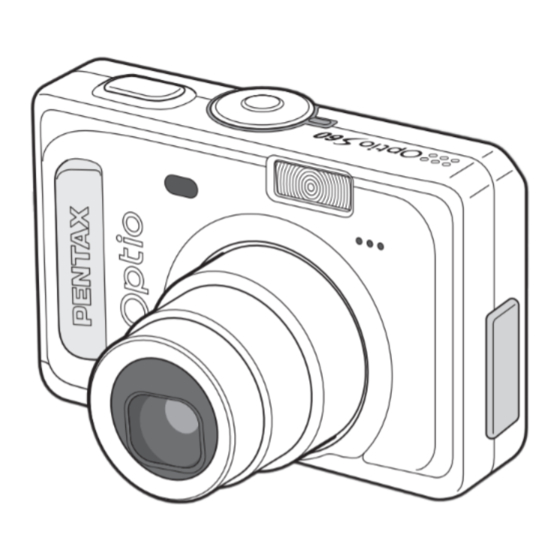
Page 15: Names Of Parts
Names of Parts Front Back Shutter release button Remote control receiver Self-timer lamp Power switch Flash Speaker Microphone Lens Terminal cover PC/AV terminal DC input terminal Flash status lamp (red) Focus status lamp (green) Mode dial Card cover release lever Strap lug Card cover Battery cover... -
Page 16: Names Of Operating Parts
Names of Operating Parts Guide Indications A guide to available button operations appears on the LCD monitor during operation. The buttons are indicated as shown below. Four-way controller (2) Four-way controller (3) Four-way controller (4) Four-way controller (5) MENU button DISPLAY button i Delete button Power switch... -
Page 17: Getting Started
Getting Started Attaching the Strap Pass the narrow end of the strap through the strap lug and pass the other end through the loop. -
Page 18: Powering The Camera
Powering the Camera (when using AA batteries) Installing the Batteries Insert the batteries in the camera. Use two AA alkaline, AA lithium, AA Ni-MH, or AA nickel manganese batteries or one CR-V3 battery. Open the battery cover. Slide the battery cover in the direction indicated by the arrow flip the cover open Insert the batteries according to the (+) and (–) indicators on the battery chamber. -
Page 19: Battery Level Indicator
(CIPA standards: LCD monitor is on, 50% flash use, 23°C.) *2 The playback times are a guideline based on PENTAX measuring conditions and may vary depending on the actual shooting conditions of use. -
Page 20: Using A Household Power Outlet
DC terminal Using a Household Power Outlet If you intend to use the LCD monitor for a long time or connect the camera to a PC, we recommend using the AC adapter D-AC5 (option) to connect your camera to a household power outlet. Make sure that the camera is turned off and open the terminal cover. -
Page 21: Using The Ac Adapter Overseas
Using the AC Adapter Overseas AC adapter D-AC5 (optional) is designed to switch automatically to the voltage (100-240V) and frequency (50Hz, 60Hz) of the electricity supply in the country or region where used. However, electrical socket shapes differ depending on the country or region. - Page 22 Main Socket Types in the Major Countries and Regions of the World North America U.S.A., Canada Europe, Iceland, Ireland, Italy, Ukraine, Austria, Former Soviet Netherlands, Kazakhstan, Greece, Sweden, Union Denmark, Germany, Norway, Hungary, Finland, France, Belarus, Belgium, Rumania, Russia U.K. Spain Switzerland, Poland, Portugal Asia...
-
Page 23: Installing The Sd Memory Card
Installing the SD Memory Card This camera uses an SD Memory Card. Captured images and sounds are recorded on the SD Memory Card or the built-in memory. If a card is inserted the data is recorded on the card (? appears on the LCD monitor). -
Page 24: Data Backup
• The data on the SD Memory Card may be deleted in the following circumstances. PENTAX does not accept any liability for data that is deleted (1) when the SD Memory Card is mishandled by the user. -
Page 25: Recorded Pixels And Quality
Recorded Pixels and Quality Choose the number of recorded pixels and quality best suited to your purpose. Higher quality levels and numbers of recorded pixels produce clearer images for printing, but the resulting increase in data volume reduces the total number of pictures that can be taken. Choose the appropriate number of recorded pixels and quality level on the [A Rec. - Page 26 1024×7680 640×480 • The above table is based on standard shooting conditions specified by PENTAX and may vary depending on the subject, shooting conditions, capture mode, SD Memory Card, etc. High quality photo printing, A4 size or larger prints, editing or creating images etc.
-
Page 27: Turning The Camera On And Off
Turning the Camera On and Off Press the power switch. The camera turns on. The lens cover opens and the lens extends when the camera is turned Press the power switch again. The camera turns off. Switching between Capture Mode and Playback Mode 1p.46 Taking Pictures 1p.46 Checking the SD Memory Card... -
Page 28: Playback Only Mode
The “Battery depleted” error message may appear when you turn on the power after purchasing the camera or after replacing the batteries if the batteries had been removed for a long time. However, this is not an error. Wait a short period and then turn the power switch on again, the power should come on normally. -
Page 29: Voice Recording Only Mode
Voice Recording Only Mode Voice Recording Only mode is for recording sound only. The lens does not extend in this mode. You can use the camera as a voice recorder. Set the mode dial to O and press the power switch. The camera turns on in Voice Recording Only mode. -
Page 30: Initial Setting
Initial Setting After purchasing the camera, before using it for the first time set the language, date and time. If the Initial Setting screen appears when the camera is turned on, follow the procedure below; “Setting the Display Language” to set the language and page 30;... - Page 31 Press four-way controller (3). The frame moves to [DST] (Daylight Saving Time). Use four-way controller (45) to select O (On) or P (Off). Press the OK button. The Date Adjust screen appears. Go to the next page to continue with “Setting the Date and Time”.
-
Page 32: Setting The Date And Time
Setting the Date and Time Set the current date and time and the display style. Press the four-way controller (23), to select the date display style. Press the four-way controller (5). The frame moves to [24H]. Press the four-way controller (23), to select the time display style. - Page 33 The initial setting is completed. The Initial Setting screen will not appear when you use the camera next time. • When the Initial Setting or Date Adjust screen is displayed, you can cancel the setting operation and switch to Capture mode by pressing the MENU button.
-
Page 34: Quick Start
Shutter release button Power switch DISPLAY button i Delete button LCD monitor The standard procedure for taking still pictures is described below. The flash fires automatically depending on the light conditions. Press the power switch. The camera turns on. Set the mode dial to R. Check the image on the LCD monitor. -
Page 35: Instant Review
Using the Shutter Release Button The shutter release button works in a two-step action as follows. Press halfway The focus and exposure are locked when the shutter release button is pressed lightly (halfway). The shutter speed and aperture settings only appear on the LCD monitor when the shutter release button is pressed halfway. -
Page 36: Playing Back Still Pictures
Playing Back Still Pictures i Delete button Q Playback button LCD monitor Four-way controller Playing Back Images You can display the still picture you have just taken. Press the Q Playback button after taking a picture. The mode changes to the Playback mode and the image appears on the LCD monitor. -
Page 37: Rotating The Displayed Image
Rotating the Displayed Image Press the Q Playback button after taking a picture. The image appears on the LCD monitor. Press the four-way controller (3). The image is rotated 90° clockwise each time the button is pressed. • Only still images taken with this camera can be rotated. •... -
Page 38: Common Operations
Common Operations Using the Button Functions Capture Mode DISPLAY button Changes the information displayed on the LCD monitor. (1p.47) Q Playback button Switches to the Playback mode. Press it and hold it down to retract the lens. (1p.34) Zoom button You can change the shooting area by pressing the Zoom button. -
Page 39: Playback Mode
Playback Mode DISPLAY button Changes the information displayed on the LCD monitor. ( Selects all images for printing or protecting on the DPOF screen and Protect screen. (1 i Delete button Deletes the image displayed on the LCD monitor. (1p.98) Q Playback button Switches to the Capture mode. -
Page 40: Voice Recording Mode
Voice Recording Mode Shutter release button When pressed, starts recording, and when pressed again, stops recording. (1p.86) Q Playback button Switches to the Playback mode. When pressed again, returns to Voice Recording mode. Four-way controller (in Playback mode) Starts playback. When pressed again, pauses playback. (1p.87) (45) Selects previous and next image and sound file before playback. -
Page 41: Using The Menus
Using the Menus When you press the MENU button, the menus appear on the LCD monitor. You can set functions, save the settings and change the camera settings on these menus. How to Use the Menus When you are making settings from a menu, a guide to operation appears on the LCD monitor. -
Page 42: Example Of Menu Operation
Example of Menu Operation MENU button R e c . M o d e R e c o r d e d P i x e l s Q u a l i t y L e v e l W h i t e B a l a n c e M u l t i F o c u s i n g A r e a... - Page 43 [Q Playback] Menu Playback P r o t e c t D P O F S l i d e s h o w 3sec R e s i z e I m a g e / S o u n d C o p y D i g i t a l F i l t e r E x i t E x i t...
-
Page 44: Enlarging A Menu Display
Enlarging a Menu Display Pressing the zoom button (x) while a menu is displayed enlarges the menu. Press w to return to the original display. Example of Menu Operation R e c . M o d e R e c o r d e d P i x e l s 2816 Q u a l i t y L e v e l W h i t e B a l a n c e... -
Page 45: Menu List
Menu List [A Rec. Mode] Menu Yes ... Adjustable ... Any changes made are invalid in d, H and = modes. No ... Any changes made are invalid. You can change the setting on the menu, but any changes you make are invalid in actual operation. Item Description For selecting a... - Page 46 Item Description For setting the color Saturation saturation For setting the color Contrast contrast level For adjusting the overall Compensation brightness of the picture * Refer to Capture Modes on page 46 for details • There is no [A Rec. Mode] menu in O mode. •...
- Page 47 [B Set-up] Menu Item Format For formatting the SD Memory Card or built-in memory For adjusting the playback volume and setting the type and Sound volume of start-up sound, shutter sound, key operation sound. Date Adjust For adjusting the date, time and date style For setting the camera to display a date and time for a World Time country or region that is different from the default settings...
-
Page 48: Taking Pictures
Taking Pictures Taking Pictures Changing the Mode Capture mode is for taking pictures and Playback mode is for playing back or deleting images. Switching between Capture Mode and Playback Mode • To change from Capture mode to Playback mode, press the Q Playback button. -
Page 49: Displaying Shooting Information In Capture Mode
Turn the mode dial and match the indicator with one of the following: Rd-=.HC+. Displaying Shooting Information in Capture Mode The LCD monitor display changes each time you press the DISPLAY button. Normal Display Shooting information is displayed when the power is turned on. - Page 50 No Icons No shooting information is displayed. • The focus frame appears in Autofocus mode. • If any of the modes are changed, such as the flash mode, the mode you have changed appears for a few seconds. LCD Monitor Off The LCD monitor turns off.
-
Page 51: Taking Pictures In Auto Select Mode (Auto Select Mode)
Taking Pictures in Auto Select Mode (Auto Select Mode) - (Auto Select Mode) lets the camera automatically recognize the shooting scene and set the optimal settings for the scene. Set the mode dial to -. Press the shutter release button halfway. - Page 52 Using the Help Function You can display the Help screen while taking or viewing pictures in Auto Select mode. The Help screen describes the function of each button, such as the four-way controller keys and zoom button. Set the mode dial to -. Press the 0 button.
-
Page 53: Selecting The Image Quality
Selecting the Image Quality You can set the recorded pixels and quality together in Auto Select Mode. The combination of recorded pixels and quality for each setting is shown below. Image Quality Setting Recorded Pixels Quality Superior 2816×2112 Super 2816×2112 Normal 2048×1536 Economy... -
Page 54: Letting The Camera Set The Functions (Program Mode)
Letting the camera set the functions (Program Mode) In R (Program Mode) the camera automatically selects the shutter speed and aperture; this is the basic picture-taking mode. However, you can select the flash mode or continuous shooting mode, or any other of the functions on the “Rec. -
Page 55: Selecting The Picture Mode According To The Shooting Scene (Picture Mode)
Selecting the Picture Mode According to the Shooting Scene (Picture Mode) You can select the Picture mode according to the shooting scene. There are 9 available modes in Picture mode. Flower (default setting) Lets you take brightly colored flower pictures. Self-portrait Surf Snow... - Page 56 Use the four-way controller (2345) to choose the Picture mode. Press the OK button. The Picture mode is selected. Press the shutter release button halfway. The focus frame turns green if the subject is in focus. Press the shutter release button fully. The picture is taken.
-
Page 57: Taking Pictures Of Dark Scenes (Night-Scene Mode)
Taking Pictures of Dark Scenes (Night-Scene Mode) You can take pictures of dark scenes, such as nightscapes, with the appropriate settings. The shutter speed is slower when taking pictures of dark scenes. To prevent camera shake, secure the camera on a tripod or other surface. Set the mode dial to .. -
Page 58: Taking Landscape Views (Landscape Mode)
Taking Landscape Views (Landscape Mode) This mode lets you take landscape views using the optimal settings. Set the mode dial to H. Press the shutter release button halfway. The focus frame turns green if the subject is in focus. Press the shutter release button fully. -
Page 59: Taking Movies (Movie Mode)
Taking Movies (Movie Mode) This mode lets you take movies. Sound can be recorded at the same time. Set the mode dial to C. The following information appears on the LCD monitor. 1 Flash Off icon 2 Movie mode icon 3 Card/Built-in memory 4 Recordable time Press the shutter release button. - Page 60 Press the shutter release button. Recording stops and the flash status lamp goes off. • The flash will not discharge in Movie mode. • Continuous shooting is not possible in Movie mode. • The LCD monitor cannot be turned off in Movie mode. •...
-
Page 61: Using The Zoom
Using the Zoom You can use the zoom to change the shooting area. Press the Zoom/w/x button in Capture mode. x (Tele) : enlarges the subject. w (Wide) : enlarges the area captured by the camera. The digital zoom function is turned on in initial settings. - Page 62 Disabling the Digital Zoom Function Press the MENU button in Capture mode. The [A Rec. Mode] menu appears. Use the four-way controller (23) to select [Digital Zoom]. Use the four-way controller (45) to select P(Off). Press the OK button. The camera is ready to take pictures. The digital zoom is disabled when you turn the LCD monitor off, even if the digital zoom function is set to On.
-
Page 63: Using The Self-Timer
Using the Self-Timer The picture is taken either 2 or 10 seconds after the shutter release button is pressed. Be sure to stabilize the camera using a tripod, etc. when taking pictures with the self-timer. Press the four-way controller (2) in Capture mode to display g or r on the LCD monitor. -
Page 64: Continuous Shooting (Continuous Shooting Mode)
Continuous Shooting (Continuous Shooting Mode) Pictures are taken continuously while the shutter release button is pressed. Press the four-way controller (2) in Capture mode to display j on the LCD monitor. Press the shutter release button halfway. The focus frame turns green if the subject is in focus. Press the shutter release button fully. -
Page 65: Using The Remote Control Unit (Optional)
Using the Remote Control Unit (optional) You can switch the Drive mode to Remote Control mode and take pictures using the remote control unit for Pentax cameras (optional). The remote control receiver is on the front of the camera. Stabilize the camera using a tripod, etc. -
Page 66: Taking Pictures With Color Filters (Digital Filter Mode)
Life of the Battery for the Remote Control Unit A signal can be sent from the remote control unit to the camera approximately 30,000 times. Contact your nearest PENTAX customer service center if the battery needs changing. (A charge is made for changing the battery.) -
Page 67: Taking Two-In-One Pictures (Two-In-One Mode)
Taking Two-in-One Pictures (Two-in-One Mode) You can take two images in succession and place them side by side to form a single picture. The first image is positioned in the left half of the picture and the second image in the right half. Set the mode dial to +. -
Page 68: Taking Panorama Pictures (Panorama Assist Mode)
Taking Panorama Pictures (Panorama Assist Mode) You can take a number of images and join them together to form a panorama picture. The software (ACDSee for PENTAX) on the CD-ROM (S-SW32) provided with the camera and a computer are necessary for joining the images. - Page 69 Assist with the four-way controller (3). Use the Mode Dial to switch to another mode. • The camera cannot join the images. Use the ACD Photostitcher function provided in the ACDSee for PENTAX software. Refer to “Photosticher Function” (p.23) in the “ACDSee for PENTAX User Guide” for instructions on creating panorama pictures.
-
Page 70: Setting The Shooting Functions
Setting the Shooting Functions Selecting the Focus Mode Focus mode Autofocus mode icon) Macro mode Super Macro mode Infinity-Landscape mode Manual Focus mode Adjust the focus manually with the four-way controller. Press the four-way controller (5) in Capture mode. The focus mode changes each time the button is pressed and the icon appears on the LCD monitor. -
Page 71: Manual Focus
Manual Focus When the mode is set to picture is enlarged to full screen on the LCD monitor for focus adjustment. Pressing the four-way controller (23) displays the indicator on the LCD monitor. Use the indicator as a guide while adjusting the focus with the four-way controller (23). -
Page 72: Selecting The Flash Mode
Selecting the Flash Mode Flash Modes Auto icon) Flash Off Flash On Auto + Red-eye reduction Flash On + Red-eye reduction • The flash is off when the Capture mode is set to C, the Drive mode is set to Continuous Shooting or the Focus mode is set to H. •... -
Page 73: Selecting The Recorded Pixels
Selecting the Recorded Pixels You can choose the number of recorded pixels from [2816×2112], [2560× 1920], [2304×1728], [2048×1536], [1600×1200], [1024×768] and [640×480]. The more pixels there are, the larger the picture and the bigger the file size. The data volume also varies depending on the quality level setting (1p.72). Recorded Pixels 2816 ×2112 High quality photo printing, A4 size or larger prints, editing... -
Page 74: Selecting The Quality Level
Selecting the Quality Level You can choose the image compression rate. The more stars, the clearer the quality and the larger the volume. The data volume also varies depending on the recorded pixels setting (1p.71). Quality Levels Best Better Good Press the MENU button in Capture mode. -
Page 75: Adjusting The White Balance
Adjusting the White Balance The color of the subject changes depending on the light source. For example, the white color in a subject is different when under natural or artificial light. White balance is used to adjust the color of white according to the light source. White Balance F Auto The camera adjusts the white balance automatically. -
Page 76: The Lcd Monitor
Manual Setting Place a white material such as a piece of white paper in front of your camera to adjust white balance. To select K (manual), press the four-way controller (3 2) on the “White Balance” screen. Point the camera at the white material so that it fills the frame of the LCD monitor. -
Page 77: Changing The Focusing Area
Changing the Focusing Area You can change the autofocus area (Focusing Area). Focusing Area This is the default setting with the camera checking several points over a Multi larger area of the image ensuring that the main subject is in focus. The camera only focuses on a small area in the center of the screen, this is Spot ideal for precise focusing on a specific point of the subject. -
Page 78: Ae Metering Modes
Setting the Light Metering Mode to Determine the Exposure (AE Metering) You can choose which part of the screen to use to measure the brightness and determine the exposure. AE Metering Modes Multi-segment Center-weighted Spot Press the MENU button in Capture mode. The [A Rec. -
Page 79: Setting The Sensitivity
Setting the Sensitivity You can select the sensitivity to suit the brightness of the surroundings. Sensitivity Automatically set within a range from 80 to 320. Auto • The lower the sensitivity, the sharper the image and the less noise. The shutter speed will be slower in low light conditions. -
Page 80: Setting The Frame Rate
Setting the Frame Rate You can choose 30 fps (frames per second) or 15 fps for the frame rate when shooting in “Movie mode”. Press the MENU button in Capture mode. The [A Rec. Mode] menu appears. Use the four-way controller (23) to select [Frame Rate]. -
Page 81: Setting The Instant Review Time (Instant Review)
Setting the Instant Review Time (Instant Review) You can choose the Instant Review time from 0.5 sec., 1 sec., 2 sec., 3 sec., 5 sec. and Off (no display). Press the MENU button in Capture mode. The [A Rec. Mode] menu appears. Use the four-way controller (23) to select [Instant Review]. -
Page 82: Setting The Image Sharpness (Sharpness)
Setting the Image Sharpness (Sharpness) You can choose whether the image has sharp or soft outlines. Press the MENU button in Capture mode. The [A Rec. Mode] menu appears. Use the four-way controller (23) to select [Sharpness]. Use the four-way controller (45) to change the setting from x [Normal] to z [Hard (+)] or y [Soft (–)]. -
Page 83: Setting The Color Saturation (Saturation)
Setting the Color Saturation (Saturation) You can set the color saturation. Press the MENU button in Capture mode. The [A Rec. Mode] menu appears. Use the four-way controller (23) to select [Saturation]. Use the four-way controller (45) to change the setting from x [Normal] to z [High (+)] or y [Low (–)]. -
Page 84: Setting The Image Contrast (Contrast)
Setting the Image Contrast (Contrast) You can set the color contrast level. Press the MENU button in Capture mode. The [A Rec. Mode] menu appears. Use the four-way controller (23) to select [Contrast]. Use the four-way controller (45) to change the setting from x [Normal] to z [High (+)] or y [Low (–)]. -
Page 85: Setting The Exposure (Ev Compensation)
Setting the Exposure (EV Compensation) You can adjust the overall brightness of the picture. Use this function to take pictures that are intentionally overexposed or underexposed. Press the MENU button in Capture mode. The [A Rec. Mode] menu appears. Use the four-way controller (23) to select [EV Compensation]. -
Page 86: Saving The Settings
Saving the Settings Saving the Menu Items (Memory) You can choose whether you want the set values to be saved when the camera is turned off. If you select O (On), the settings will be saved in the status they were in immediately before the camera was turned off. If you select P (Off), the settings will be reset to the defaults when the camera is turned off. - Page 87 Press the MENU button in Capture mode. The [A Rec. Mode] menu appears. Use the four-way controller (23) to select [Memory]. Press the four-way controller (5). The [Memory] menu appears. Use the four-way controller (23) to choose an item. Use the four-way controller (45) to select O (On) or P (Off).
-
Page 88: Recording And Playback Of Sound
Recording and Playback of Sound Recording Sound (Voice Recording Mode) You can record sound. The recordable time appears on the LCD monitor according to how much space is available on the SD Memory Card or the built-in memory. Set the mode dial to The recordable time appears on the LCD monitor. -
Page 89: Playing Back Sound
Playing Back Sound You can play back the recording you made in Voice Recording mode. Press the Q Playback button. Use the four-way controller (45) to choose the recording to play back. Press the four-way controller (2). Playback starts. • The following operations can be performed during playback. -
Page 90: Adding Sound (Voice Memo) To Images
Adding Sound (Voice Memo) to Images You can add sound (voice memo) to a captured image. Recording a Voice Memo Enter the Playback mode and use the four-way controller (45) to choose the image to which you want to add a voice memo. O appears on the four-way controller operation guide on the LCD monitor if there is no voice memo attached to the displayed... - Page 91 Setting the Voice Memo Recording Function You can set the camera not to record voice memos while playing back still images to prevent any voice memo from being recorded. Press the MENU button in Playback mode. The [Q Playback] menu appears. Use the four-way controller (23) to select [Record Voice Memo].
-
Page 92: Playing Back A Voice Memo
Playing Back a Voice Memo Enter the Playback mode and use the four-way controller (45) to choose the image with the voice memo that you want to play back. If U appears, a voice memo has been recorded for the displayed image. Press the four-way controller (2). - Page 93 Memo...
-
Page 94: Playback/Deleting/Editing
Playback/Deleting/Editing Playing Back Images Playing Back Still Pictures Press the Q Playback button. Refer to “Playing Back Images” (p.34) for instructions. Zoom Display You can display images magnified up to 12 times. A guide to operation appears on the LCD monitor during magnification. Enter the Playback mode and use the four-way controller (45) to choose the image to magnify. - Page 95 Setting the Quick Zoom Function You can display the image at maximum magnification simply by pressing the Zoom/f/y button once during zoom playback. Press the MENU button in Playback mode. The [Q Playback] menu appears. Use the four-way controller (23) to select [Quick Zoom].
-
Page 96: Playing Back Movies
Playing Back Movies You can play back movies. A guide to operation appears on the LCD monitor during playback. Sound is recorded at the same time. Enter the Playback mode and use the four-way controller (45) to choose the movie to play back. Press the four-way controller (2). -
Page 97: Displaying Shooting Information In Playback Mode
Displaying Shooting Information in Playback Mode Shooting information can be displayed on the LCD monitor in Playback mode. Pressing the DISPLAY button changes the display mode. Normal Display Shooting information is displayed. 1 Protect icon 3 Folder name and file name 5 Four-way controller operation guide... -
Page 98: Nine Image Display
Nine Image Display You can display nine images at the same time. Enter the Playback mode and use the four-way controller (45) to choose an image. Press w/f on the Zoom/f/y button. Nine images appear. Use the four-way controller (2345) to choose an image. -
Page 99: Slideshow
Slideshow You can play back all the images on the SD Memory Card or in the built- in memory continuously. Enter the Playback mode and use the four-way controller (45) to choose the image with which to start the slideshow. Press the MENU button. -
Page 100: Deleting
Deleting Deleting Individual Images or Sounds You can delete images and sound recordings one at a time. • Once deleted, images cannot be restored. • You cannot display the Delete screen from protected images. (1p.101) Enter the Playback mode and use the four-way controller (45) to choose the image or sound to delete. - Page 101 Deleting a Voice Memo only If an image has a voice memo, you can delete the voice memo without deleting the image. Enter the Playback mode and use the four-way controller (45) to choose an image with a voice memo to delete.
-
Page 102: Deleting All Images
Deleting All Images You can delete all the images and sounds at once. • Once deleted, images cannot be restored. • Protected images and sounds cannot be deleted. Press the i Delete button twice in Playback mode. The Delete All screen appears. Use the four-way controller (2) to select [Delete All]. -
Page 103: Protecting Images And Sounds From Deletion (Protect)
Protecting Images and Sounds from Deletion (Protect) You can protect images and sounds from being accidentally deleted. Press the MENU button in Playback mode. The [Q Playback] menu appears. Use the four-way controller (23) to select [Protect]. Press the four-way controller (5). The Protect screen appears. - Page 104 Protecting All Images and Sounds You can protect all the images and sounds. Press the MENU button in Playback mode. The [Q Playback] menu appears. Use the four-way controller (23) to select [Protect]. Press the four-way controller (5). The Protect screen appears. Press the DISPLAY button.
-
Page 105: Viewing Images On A Tv
Viewing Images on a TV By using the AV cable, you can capture and play back images on a TV or other equipment with a video IN jack. Make sure that both the TV and the camera are turned off before connecting the cable. Open the terminal cover and connect the AV cable to the PC/AV terminal. -
Page 106: Using The Remote Control Unit (Optional) To View The Previous Or The Next Image
Remote control receiver Using the Remote Control Unit (optional) to View the Previous or the Next Image You can use the remote control unit to view the next image or the previous image while watching the images on a TV. Press the shutter release button on the remote control unit. -
Page 107: Setting The Printing Service (Dpof)
Setting the Printing Service (DPOF) You can print the images on the SD Memory Card or the built-in memory using a DPOF (Digital Print Order Format) compatible printer or at a printing service. Printing Single Images Set the following items for each image. Copies: Choose the number of copies up to a maximum of 99. - Page 108 Use the four-way controller (45) to choose the number of copies, then press the four-way controller (3). The frame moves to [Date]. Use the four-way controller (45) to choose whether to insert the date or not. O(On) : The date will be imprinted. P (Off) : The date will not be imprinted.
-
Page 109: Printing All Images
Printing All Images Press the MENU button in Playback mode. The [Q Playback] menu appears. Use the four-way controller (23) to select [DPOF]. Press the four-way controller (5). The DPOF screen appears. Press the DISPLAY button. Use the four-way controller (45) to choose the number of copies. -
Page 110: Direct Printing Using Pictbridge
Direct Printing Using PictBridge By connecting the camera to a printer that supports PictBridge using the USB cable (I-USB7) supplied with the camera, you can print images directly from the camera without using a PC. Select the images you want to print and the number of copies on the camera after it has been connected to the printer. -
Page 111: Printing Single Images
Printing Single Images Use the four-way controller (23) to select [Print One]. Press the OK button. The Print One screen appears. Use the four-way controller (45) to choose the image to print. Use the four-way controller (23) to choose the number of copies. You can print up to 99 copies. -
Page 112: Printing All Images
Printing All Images Use the four-way controller (23) to select [Print All]. Press the OK button. The Print All screen appears. Use the four-way controller (23) to choose the number of copies. The number of copies you choose applies to all the images. -
Page 113: Disconnecting The Camera From The Printer
Disconnecting the Camera from the Printer Disconnect the camera from the printer when you have finished printing. Turn the camera off. Disconnect the USB cable from the camera. Disconnect the USB cable from the printer. -
Page 114: Editing Images
Editing Images Changing the Image Size and Quality By changing the size and quality of a selected image, you can make the file smaller than the original. You can use this function to continue taking pictures when the SD Memory Card or the built-in memory is full, by making the images smaller and overwriting the original images to make more space available in the memory. - Page 115 Use the four-way controller (45) to change the recorded pixels. Press the four-way controller (3). The frame moves to [Quality Level]. Use the four-way controller (45) to change the quality. Press the OK button. Use the four-way controller (23) to select [Overwrite] or [Save as].
-
Page 116: Editing Pictures With Digital Filters
Editing Pictures with Digital Filters The digital filters consist of eight color filters (black-and-white, sepia, red, green, blue, black-and-white + red, black-and-white + green, black-and- white + blue), a soft filter, five illustration filters and two special effect filters. The Digital Filter mode enables you to edit pictures using these filters. - Page 117 Use the four-way controller (23) to choose a digital filter. The filter effect is created and the image appears on the LCD monitor. The example shows an image with illustration filter 1 effect. Press the OK button. Use the four-way controller (23) to select [Overwrite] or [Save as].
-
Page 118: Copying Files
Copying Files You can copy image and sound files from the built-in memory to the SD Memory Card and vice versa. This function can only be selected when a card has been inserted in the camera. When files are copied from the built-in memory to the SD Memory Card, all the files are copied at once. - Page 119 To Copy Files from the Built-in Memory to the SD Memory Card Use the four-way controller (23) to select [ OK button. All the files are copied to the SD Memory Card. To Copy Files from the SD Memory Card to the Built-in Memory Use the four-way controller (23) to select [ and press the OK button.
-
Page 120: Settings
Settings Camera Settings How to call the [B Set-up] menu Formatting an SD Memory Card or the Built-in Memory Formatting will delete all the data on the SD Memory Card if you are using a card, and all the data in the built-in memory if there is no card inserted. -
Page 121: Changing The Sound Settings
S e t - u p F o r m a t S o u n d D a t e A d j u s t W o r l d T i m e S c r e e n S e t t i n g MENU E x i t E x i t... -
Page 122: Changing The Date And Time
How to call the [B Set-up] menu Changing the Date and Time You can change the initial date and time settings. You can also set the style in which the date and time appears on the camera. Select [Date Adjust] on the [B Set-up] menu. Press the four-way controller (5). - Page 123 S e t - u p F o r m a t S o u n d D a t e A d j u s t W o r l d T i m e S c r e e n S e t t i n g MENU E x i t E x i t...
-
Page 124: Setting The World Time
How to call the [B Set-up] menu Setting the World Time The date and time selected in “Initial Setting” (p.28) serve as the Home Time setting. You can display the time in a city other than the Home Time city (World Time). - Page 125 S e t - u p F o r m a t S o u n d D a t e A d j u s t W o r l d T i m e S c r e e n S e t t i n g MENU E x i t E x i t...
-
Page 126: Changing The Start-Up Screen, Background Color And Screen Effects
How to call the [B Set-up] menu Changing the Start-up Screen, Background Color and Screen Effects Select [Screen Setting] on the [B Set-up] menu. Press the four-way controller (5). The Screen Setting screen appears. Changing the Start-up Screen You can display an image recorded with the camera as the welcome screen when the camera is turned on. - Page 127 S e t - u p F o r m a t S o u n d D a t e A d j u s t W o r l d T i m e S c r e e n S e t t i n g MENU E x i t E x i t...
-
Page 128: Changing The Display Language
How to call the [B Set-up] menu Changing the Display Language You can change the language in which the menus, error messages, etc. are displayed. You can choose from English, French, German, Spanish, Italian, Russian, Korean, Chinese (traditional and simplified) and Japanese. Select [Language/ Use the four-way controller (45) to choose the language. -
Page 129: Changing The Video Output Format
S e t - u p F o r m a t S o u n d D a t e A d j u s t W o r l d T i m e S c r e e n S e t t i n g MENU E x i t E x i t... -
Page 130: Changing The Usb Connection Mode
How to call the [B Set-up] menu Changing the USB Connection Mode You can change the USB connection mode depending on whether the USB cable is to be connected to a printer (PictBridge) or a computer. Select [USB Connection] on the [B Set-up] menu. Press the four-way controller (5). -
Page 131: Setting Auto Power Off
S e t - u p F o r m a t S o u n d D a t e A d j u s t W o r l d T i m e S c r e e n S e t t i n g MENU E x i t E x i t... -
Page 132: Registering Functions
How to call the [B Set-up] menu Registering Functions You can choose the functions you use most frequently from those listed in the [A Rec. Mode] menu and register them on the four-way controller. The functions can then be retrieved in Capture mode by pressing the 0 button to display the Function Mode screen, enabling you to change the setting using the four-way controller. - Page 133 S e t - u p F o r m a t S o u n d D a t e A d j u s t W o r l d T i m e S c r e e n S e t t i n g E x i t E x i t E x i t...
-
Page 134: Appendix
Appendix List of City Codes Refer to the following list of city codes when setting the World Time. Tokyo Guam Sydney Noumea Wellington Auckland Pago Pago Honolulu Anchorage Vancouver San Francisco Los Angeles Calgary Denver Mexico City Chicago Miami Toronto New York Santiago Caracas... -
Page 135: Optional Accessories
Optional Accessories A number of dedicated accessories are available for this camera. AC adapter D-AC5 USB cable I-USB7 (∗) AV cable I-AVC7 (∗) Camera case O-CC32 Strap O-ST20 (∗)/Sports strap O-ST30/Leather Strap O-ST24/ Strap O-ST8 Remote control unit E (with zoom function) Remote control unit F Products marked with an asterisk (∗) are the same as those supplied with the camera. -
Page 136: Messages
Messages Messages such as the following may appear on the LCD monitor during camera operation. Messages during shooting Compression error Memory card full Built-in memory full Battery depleted. the image is not stored Image folder cannot be created. Messages during playback No image/sound Camera cannot play this image/sound... - Page 137 Messages for both Memory card error Shooting and playback are impossible due to a problem with the SD Memory Card. You may be able to play back images or sounds on a PC. Card not formatted The SD Memory Card you have inserted is unformatted or has been formatted on a PC or other device and is not compatible with this camera.
-
Page 138: Troubleshooting
Troubleshooting Problem Cause Camera will not Batteries are not turn on installed Batteries are installed incorrectly Battery power is low No image on LCD monitor is set to the LCD monitor Camera is connected to a PC by the USB cable Camera is connected to a TV Image is displayed but is... - Page 139 Problem Cause Subject is not in Subject is difficult to focus focus on Subject is not in focusing area Subject is too close Focus mode is set on q (Macro) or r (Super Macro) Flash does not Flash mode is set to Off Set to Auto or b. (p.70) discharge The Capture mode is set to C or J in d mode,...
-
Page 140: Main Specifications
Main Specifications Type Effective Pixels Sensor Recorded Pixels Sensitivity File Format Quality Level Storage Medium Approximate Image Storage Capacity (when using the built-in memory (11MB)) Quality Level Recorded Pixels 2816×2112 2560×1920 2304×1728 2048×1536 1600×1200 1024×7680 640×480 Approximate Image Storage Capacity (when using the SD memory card (128MB)) Quality Level Recorded Pixels 2816×2112... - Page 141 White Balance Auto, Daylight, Shade, Tungsten Light, Fluorescent Light, Manual Lens Focal Length Maximum Aperture Lens Composition Zoom Type Picture Range Lens Cover Digital Zoom Capture Mode LCD Monitor 2.5-inch TFT color LCD (with backlight) with approx. 115 kilopixels monitor, frame coverage approx.
- Page 142 (CIPA standards: LCD monitor is on, 50% flash use, 23°C.) *2 The playback times are a guideline based on PENTAX measuring conditions and may vary depending on the actual shooting conditions of use.
-
Page 143: Index
Index Symbols Buttons i Delete button 14, 37 Q Playback button 14, 34, 36, 37, 38 0 button 14, 36, 37 x (Tele) 14, 32, 42, 57, 59, 87, 92, 94 w (Wide) 14, 32, 42, 57, 59, 87, 92, 94 f (Nine-image display) 96 y (Magnify) 92 Capture Mode (Mode dial) - Page 144 Changing the Date and Time 120 Changing the Display Language Checking the SD Memory Card Compression rate 72 Connecting to the Printer 108 Contents of the Package 12 Continuous Shooting Mode 62 Contrast 82 Copying Files 116 Daylight (White Balance) 73 DC input terminal 13, 18 Delete 98 Delete a Voice Memo 99...
- Page 145 Nine Image Display 96 NTSC 31, 127 Number of Pixels 71 Number of Recordable Images 17, 24 OK button 14, 36, 37 Optional Accessories 133 Overseas 19, 122 PAL 31, 127 Panorama Assist Mode 66 PC/AV terminal 13, 103 PictBridge 108, 128 Playback 34, 92 Playback Only Mode 26 Playing Back Movies 94...
- Page 146 Taking Movies 57 Taking Pictures 32, 46 Text (Picture Mode) 53 Tungsten Light (White Balance) TV 103 Two-in-One 65 USB Connection Mode 128 Video Output Format 31, 127 Voice Memo 88 Voice Recording Mode 86 Volume 87, 94, 119 White Balance 73 World Time 122 Zoom 59 Zoom button 36, 37...
- Page 147 Memo...
-
Page 148: Warranty Policy
Shipping charges are to be borne by the owner. If your PENTAX was purchased outside of the country where you wish to have it serviced during the warranty period, regular handling and servicing fees may be charged by the manufacturer’s representatives in that country. - Page 149 Therefore, we recommend that you review the warranty card supplied with your product at the time of purchase, or contact the PENTAX distributor in your country for more information and to receive a copy of the warranty policy.
- Page 150 For customers in USA STATEMENT OF FCC COMPLIANCE This device complies with Part 15 of the FCC Rules. Operation is subject to the following two conditions: (1) This device may not cause harmful interference, and (2) this device must accept any interference received, including interference that may cause undesired operation.
-
Page 151: Declaration Of Conformity
According to 47CFR, Parts 2 and 15 for Class B Personal Computers and Peripherals Pentax Imaging Company A Division of PENTAX of America, Inc. Located at: 600 12 Golden, Colorado 80401 U.S.A. Phone: 303-799-8000 FAX: 303-790-1131 Declare under sole responsibility that the product identified herein complies with 47CFR Parts 2 and 15 of the FCC rules as a Class B digital device. - Page 152 Information on disposal for users 1. In the European Union If your product is marked with this symbol, it means that used electrical/electronic products should not be mixed with general household waste. There exists a separate collection system for these products. Used electric/electronic equipment must be treated separately and in accordance with legislation that requires proper treatment, recovery and recycling of these...
- Page 153 Memo...
- Page 154 Memo...
- Page 155 Memo...
- Page 156 2-36-9,Maeno-cho, Itabashi-ku, Tokyo 174-8639, JAPAN (http://www.pentax.co.jp/) Julius-Vosseler-Strasse, 104, 22527 Hamburg, GERMANY (HQ - http://www.pentaxeurope.com) (Germany - http://www.pentax.de) PENTAX House, Heron Drive, Langley, Slough, Berks SL3 8PN, U.K. (http://www.pentax.co.uk) 12/14, rue Jean Poulmarch, 95106 Argenteuil Cedex, FRANCE (for Netherlands) Spinveld 25, 4815 HR Breda, NETHERLANDS (http://www.pentax.nl)
Need help?
Do you have a question about the Model Optio S60 and is the answer not in the manual?
Questions and answers