Table of Contents
Advertisement
Content
Content .................................................. 1
For Your Safety ...................................... 2
Mobile Phone Profile ............................ 7
Preparation Before Use ...................... 10
Basic Operation .................................. 21
Personalizing ....................................... 30
Use Of Menu Functions ....................... 37
Maintenance & Safety ..................... 149
1
Advertisement
Table of Contents

Related Manuals for QMobile NOIR A2


Summary of Contents for QMobile NOIR A2
- Page 1 Content Content ..........1 For your Safety ........2 Mobile Phone Profile ......7 Preparation before Use ...... 10 Basic Operation ........21 Personalizing ........30 Use of Menu Functions ....... 37 Frequently Asked Questions (FAQ) 127 Maintenance & Safety ..... 149...
-
Page 2: For Your Safety
For your Safety For your safety and proper use of the mobile phone, please read the following guidelines carefully: Do not switch the mobile phone on when close to chemical factory, gas station or other explosive objects. While driving, please use headset for safety ... - Page 3 cause interference in the aircraft, never use the mobile phone in an aircraft. The use of the mobile phone is dangerous and illegal; do switch off the mobile phone before boarding. Pay special attention to the use of the mobile ...
- Page 4 When charging the mobile phone, always keep it in the place with good ventilation, heat sink and away from flammable and explosive objects. In order to avoid demagnetization, always keep the mobile phone away from magnetic objects such as CD, credit card etc. Ensure the mobile phone not to contact any ...
- Page 5 cleanser to clean the mobile phone. This mobile phone has shooting, video and audio recording functions, which shall be used as per the related laws and regulations. Always keep the mobile phone out of children’s reach. Do not throw or vibrate the mobile phone because violent treatment to the mobile phone may damage the inner circuits and precise structures.
- Page 6 advance. The content of this manual may vary from the actual content displayed in mobile phone. In such case, the latter shall govern.
-
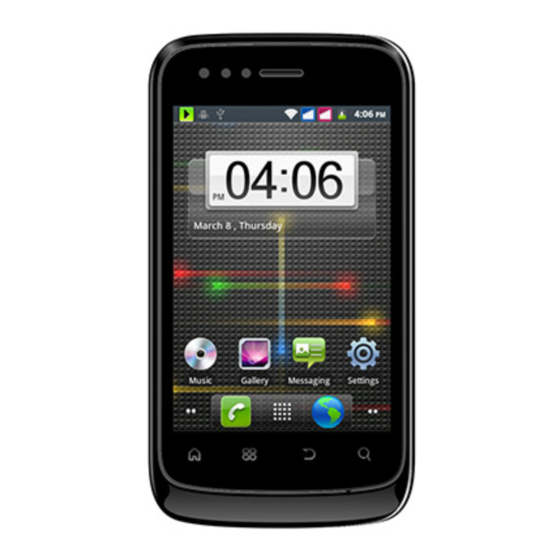
Page 7: Mobile Phone Profile
Mobile Phone Profile The device is dual standby in idle mode. following is the front and rear of the mobile phone. Power key Front camera Light sensor Volume Receiver up/down LCD Screen... - Page 8 Back Menu Home Search Camera...
- Page 9 Speaker...
-
Page 10: Preparation Before Use
Preparation before Use Install SIM Card When registering mobile phone number, you can apply for two different phone numbers, two different mobile phone network service providers and thus obtain two SIM (Subscriber Identification Module) cards. With these two SIM cards, you can use all functions of your mobile phone. - Page 11 please contact immediately your network operator for help. Before SIM card installation, please switch off the mobile phone. The SIM card is installed on the back of the mobile phone. Follow the diagram on how to install the SIM card. Note: As the SIM card is small object, keep it out of children’s reach.
-
Page 12: Install Memory Card
SIM Cards Install Memory card As the mobile phone does not have enough storage space, to use some functions, you need to install a memory card (This mobile phone use Micro SD card.) Install Micro SD card: Open the back cover to take out the battery, release the Micro SD card lock, insert the Micro SD card into its slot, and restore the lock and the battery before restarting... - Page 13 the mobile phone. Micro SD Card...
-
Page 14: Install Battery
Note: As the Micro SD card is small object, keep it out of children’s reach! Install Battery The mobile phone must be used with original battery and accessories. When the battery is idle, it is recommended to put it into the protection box. - Page 15 as prevent the battery contact patch being damaged. Battery...
-
Page 16: Charge Battery
Charge Battery The new battery cannot reach the optimal efficiency unless undergone several continuous complete charges and discharges. When the battery is used up, charge it in time. Over-discharge can damage the battery. After the battery is fully charged, cut off the connection of charger with the AC power supply and the connection with the mobile phone. - Page 17 charged, the icon is full of bars. Charging……. Fully Charged……. Warning: When a travel charger and its accessories are used to charge the battery, please check first they original recognized by the original manufacturer. The use of other accessories may damage your mobile phone and cause risks! Always use them indoor and dry places.
- Page 18 below: New battery or the battery have been idle for a longtime, need charging for longer time also. The standard voltage scope for the battery is 3.6V-4.2V. While charging, keep the battery at room temperature or similar temperature. As time pass by, the battery will gradually be ...
- Page 19 charge indicator to be shown on the screen. Note: Please dispose of the battery according to the local regulations. Try to recycle the battery as possible. Do not treat the waste battery as common waste. Warning: Do not throw the battery into fire so as to prevent fire.
- Page 20 obtaining SIM, you can obtain its PIN1 code. PIN2 Code: It is the personal identification number used for some special functions such as paid call etc. PUK Code and PUK2 Code(8-digit) To change the locked PIN code, you need to use PUK (Personal Unblocking Key) code.
-
Page 21: Basic Operation
immediately for help. Attempting to unlock the code may make the SIM card ineffective permanently. Basic Operation Switch on/off Once you installed your SIM card, battery, and micro SD card, press the POWER button to switch on your phone. The moment you long press the POWER button, it will show the phone options, choose to touch the “Power off”... -
Page 22: Home Screen
will go to sleep mode. ◆ Automatic: If you leave the phone idle for a certain period of time, your phone will change to Sleep mode automatically. 2. Waking up from Sleep mode Your phone wakes up automatically when you have an incoming call. -
Page 23: Applications Menu
1. Home screen The Home Screen provides you separately the shortcuts of Phone, Contacts and Messages in the bottom of the screen. 2. Extended Home screen Slide your finger horizontally across the screen to go to the left or right side of the Home screen. Upon long press and hold on the screen, you can add Shortcuts, Widgets, Folders and Wallpaper to Home screen. - Page 24 forwarding is on or the current call status. You can open the Notifications panel to open the message, reminder, or event notification and see the mobile operator’s name. 1. Opening the Notifications panel When a new notification icon displays in the...
- Page 25 status bar, press and hold the status bar, then slide your finger downward open Notifications panel. If you have several notifications, you can scroll down the status bar to view more notifications. You can also open the Notifications panel on the Home screen by pressing Menu button and then tapping Notifications.
- Page 26 (1) Press VOLUME UP or VOLUME DOWN buttons on the right side of the phone to adjust the ringer volume. (2)When it’s in the lowest level already, pressing the VOLUME DOWN once will change the phone to Vibration Mode. While in Vibration Mode, the vibration icon will appear on the status bar.
- Page 27 then, when the option menu appears, tap Silent Mode. 2. Adjusting the media volume (1) Press VOLUME UP or VOLUME DOWN buttons on the right side of the phone to adjust the media volume to the level you want. At the same time, the music/video volume window appears on the screen, which displays the level of volume synchronously with your adjustment.
- Page 28 adjust the volume of ringtone and alarm here. Tap OK to close the window. Connecting your phone to a computer Once you use the USB cable to connect your phone to a computer, the LED will turn red if the battery is not full.
- Page 29 charging ◆ Allow mock locations 2. USB connected Turn on/off USB storage here. Select to copy files to/from your computer. Copying files to and from the SD card Connect your phone to the computer with the supplied USB cable. When the “USB debugging connected” appears, tap USB connected.
-
Page 30: Personalizing
requirement. Personalizing Making your phone truly yours Personalize your phone with different wallpapers, ringtones, and notification sounds for events such as incoming text, email, calendar reminders, and more. Your phone's Home screen can be customized and extends beyond the screen width, giving you plenty of space to add new information. - Page 31 ringtones or songs to your phone's storage card and choose one to use as your ringtone. To find out how you can copy files to your storage card, see "Copying files to and from the SD card". Press HOME, and then tap Settings> tap Audio profile>...
-
Page 32: Changing Your Wallpaper
ringtone". Changing your wallpaper Personalize your Home screen wallpaper. To change your wallpaper to your desired one, long press anywhere on the idle HOME screen and select wallpaper from the pop-up options. Personalizing your Home screen with widgets ◆ Two methods to add a widget on your Home screen Method 1:Press HOME: Go to Home screen→... - Page 33 If there is no more space for adding a widget, you can add the widget on another screen or rearrange the current Home screen. Adding application icons other shortcuts on your Home screen Two methods to add application icons on the Home screen: Method 1: Press HOME.
- Page 34 other shortcuts to keep your Home screen tidy and organized. 1. Creating a new folder and adding items to it Method 1: Press HOME. Go to Home screen→ long press and hold on the screen→ Tap Folders. Method 2: Tap Menu, tap Add and tap Folders. If you select New Folder, press and hold an application icon or a shortcut that you want to move to the folder.
-
Page 35: Rearranging Or Removing Widgets And Icons
(c) Enter a new folder name and then tap OK. Rearranging or removing widgets and icons on your Home screen Rearrange the widgets and icons on your Home screen to give room for adding more items to the Home screen. You can also remove widgets and icons that you don’t frequently use. - Page 36 3. When the widget or icon is where you want it, release your hold on it. If you've released it but a message shows that there's no space to place the widget or icon, drag it right or left again to another Home screen panel.
-
Page 37: Use Of Menu Functions
Use of Menu Functions QApps Gmail Gmail is Google's web-based email service. Gmail is configured when you first set up your phone. Depending your synchronization settings, Gmail on your phone is automatically synchronized with one or more Gmail Mail accounts on the web. - Page 38 Maps Google Maps lets you track your current location, view real-time traffic situations, and receive detailed directions to your destination. It also provides a search tool where you can locate places of interest or an address on a vector or aerial map, or view locations in street level.
- Page 39 Play store Google play gives you games, books, business, education entertainment, medical, music and audio etc, and you can enter for y our entertainment purpose. You must add a Google account to the device to enter the application. Facebook Facebook is a very popular social networking site around the world giving people the power to share and make the world more open and connected.
-
Page 40: Opera Mini
Opera mini Opera mini gives you convenient way to browser sorts of information. Connect to WIFI or get GPRS from networking service supporter. Twitter Sign in twitter by writing ID and password. You need to have GPRS, or connect with WLAN. Yahoo messenger Sign in Yahoo messenger by writing ID and password. - Page 41 installing and/or using the program, you are must click the “Accept” the agreement, and you are permitted to continue to install and use the software. Latitude Google latitude is based on Google maps, and it can spot the current location in time. Places Google places let you write the key words for searching a new place.
-
Page 42: Making Calls
search the call register of SIM1 and SIM2 and set separately some operations corresponding to SIM1 and SIM2. In mono-SIM standby mode, you can set the available SIM card and see its call register. Making Calls Most SIM cards are preset with a PIN (personal identification number) that is provided by your mobile operator. - Page 43 use the Smart Dial (see Smart Dial) feature to search and call a contact in your contacts list or a number from call history. Press HOME>Phone, and then you’ll go to phone screen. As you enter digits or letters, the panel displays...
- Page 44 numbers and names that match the keys you tapped. If you enter a wrong digit, tap this icon erase that digit. To erase the entire number, press and hold it for a few seconds. If there is no matching contacts in the list after entering the number, tap icon to make a call as desired SIM card.
- Page 45 1. Press HOME and then tap Email. 2. Open the email account where the email with the number is located. 3. In the email account's inbox, tap the email to open it. 4. In the email body, tap the phone number. The phone dialer screen opens with the phone number already entered.
-
Page 46: Receiving Calls
For more information about email, see the Email chapter. ◆ Making an emergency call You can make emergency calls from your phone even if you don't have a SIM card installed or your SIM card has been blocked. Receiving calls When you receive a phone call from a contact, the Incoming call screen appears as below, which displays the caller ID icon, name, phone... - Page 47 ◆ Answering an incoming call When there is an incoming call, drag this icon to the right to answer the call. ◆ Rejecting an incoming call When there is an incoming call, drag to the left to reject the call. Using in-call options 1.
- Page 48 ◆ Add Call: Hold the call on process and begin another call. ◆ Hold: Putting a call on hold On the screen MENU tap Hold to put the call on hold. When you put a call on hold, the Hold call icon appears in the status bar.
- Page 49 icon in status bar changes into which indicates in call status. ◆ Mute: Muting the microphone during a call On the screen, tap MUTE or directly tap to toggle between turning the microphone on or off. ◆ Speaker: Turning the speakerphone on or off during a call.
- Page 50 to accept the second call, and to put the first call on hold. (2) To switch between callers, tap the person you want to talk to on the screen. (3) To end the current call and return to the other call, tap End call.
- Page 51 and then dial the number of the second participant. The first participant is put on hold when you dial the second participant. (3) When connected to the second participant, tap MERGE. another participant conference call, tap ? on the conference call screen, and then dial the number of the contact you want to invite to the conference call.
-
Page 52: Using Call Log
Do one of the following to end the call: On the screen, tap End call. If you are using the provided wired headset, press and hold the button to end the call. If the phone number of the person who called is not in your contacts list, you can choose to save the number to your contacts list after you hang Using call log... - Page 53 Tap the name or number in the list to call. Press and hold a name or number in the list to display the options menu where you can select to view the contact information (if the number is stored in your contacts list), call the number, edit the number before call, send text message, add to contacts, or remove from call log.
- Page 54 Choose this option to call the phone number in call log directly and immediately from SIM 2. c. Edit number before call Choose this will go into the phone screen, and you can edit the number before calling. d. SIM 1 Send text message Choose this option will turn to text message edit screen.
- Page 55 Tap Create new contact. In the blank contact record that appears, enter the contact name and other information. The phone number is automatically added to the Mobile field in the Phone section. To store it as another type of number, for example a Mobile number, tap the Home button.
- Page 56 Choose this option to call the phone number in call log directly and immediately from SIM 1. 2. SIM 2 Call the phone number Choose this option to call the phone number in call log directly and immediately from SIM 2. 3.
- Page 57 number from SIM2. 7. Remove from call log It will remove this call log. Select any option will process the corresponding operation. ◆Checking a missed call You will see the missed call icon in the status bar when you miss a call. Press HOME>...
-
Page 58: Call Services
1. Press HOME> Applications > Phone>Call log or directly HOME> Applications>Call log 3. Do one of the following: To remove one name or number from the list, press and hold the name or number, and then tap Remove from call log. To clear the entire list, press MENU, and then tap Delete all. - Page 59 To open call services, press HOME> Applications> MENU, and then tap Settings > Call Settings>SIM1 or SIM2 ◆ Fixed Dialing Numbers Restrict outgoing calls to a fixed set of numbers. To enable this feature, you must know your SIM card's PIN2 code. ◆...
- Page 60 unreachable) and additional settings(caller ID, call waiting). Browser Tap Home > Applications > Browser. Connect to network, and use it to surf internet. You should ensure that you have GPRS/WAP, please contact networking provider for more information. Contacts...
- Page 61 About Contacts In contacts, you can easily manage your communications with contacts phone, messaging, and email. If you are synchronizing contacts with your Google account, with your PC, and/or with an Exchange Server, any contacts stored in those accounts are displayed in contacts. For more information synchronizing accounts,...
-
Page 62: Display Contacts
Display contacts Press HOME > Applications>Contacts, all of your contacts will automatically be displayed on the screen. If the screen doesn’t display all of them, scroll down to the next page to see more contacts. Choose Menu> Display options will change the display options from the following aspects: ◆... -
Page 63: Delete Contact
Create a new contact 1. Press HOME > Applications >Contacts Menu> New contact to create a new contact. 2. Input the information of the contact, such as first name, last name, phone, email, postal address, organization, more. 3. Tap Done. 4. -
Page 64: Call Logs
contacts. Accounts 1. General sync settings, including Background data and Auto-sync. When background data is on, applications can sync, send, and receive data at any time. When it’s off, it will extend battery life and lower data use; nevertheless, some applications may still use the background data connection. - Page 65 Messaging...
-
Page 66: About Messages
About Messages SMS is a kind of network service. Reading messages To open your message inbox, press HOME> Applications >Messaging. If the list of messages does not fit on the screen, you can scroll down to view more messages by swiping your finger on the screen. - Page 67 multimedia messages (MMS) to other mobile phones pressing HOME>Applications > Messaging>Compose new message. 2.On the All messages screen, tap Compose message and the compose screen opens. 3. When done, tap “Send by SIM1” or “Send by SIM2 “to send the text message. When the...
- Page 68 message is sending, it will appear “Sending” beside that message; when it has been sent out, it will show the time of sending out. If you exceed the limit on the number of characters for a single text message, your text message will be delivered as one but will be billed as more than one message.
- Page 69 Messaging>New message>Menu>Attach, on the attach window, choose one of the options: Pictures, Capture picture, Videos, Capture video, Audio, Record audio, Slideshow. Tap the created slide (for example, Slide 1), tap Insert picture, and then select the picture you want to add to the slide. You can also navigate to the text box and enter a caption for the picture.
- Page 70 in the To field. If you're sending the message to several recipients, separate the phone numbers or email addresses with a comma. As you enter information, any matching phone numbers or addresses from your contacts list are displayed. Tap a match to enter that number or address directly.
-
Page 71: Message Conversations
settings section. Saving and resuming a draft message While composing a text or multimedia message, press BACK to automatically save your message as a draft. And the screen shows” Message saved is displayed in the status bar. draft”. resume composing the message: 1. - Page 72 grouped into conversations or message threads in the All messages screen. Threaded text or multimedia messages let you see exchanged messages (similar to a chat program) with a contact on the screen.
- Page 73 Options of Messages On all messages thread screen, tap Menu will see the following options: 1. SIM Messages: View the messages in SIM card. 2. Delete threads: Delete all the threads. 3. Search: As you enter, the messages contain the words you searched would be listed below. 4.
- Page 74 that message sender. 3. Delete thread: Delete the entire thread. Options of a particular message thread On a certain message thread screen, tap Menu will appear the options as below: 1. Call: Call the sender or receiver of the message. 2.
- Page 75 capture picture, videos, capture video, audio, record audio, slideshow 4. Insert smiley: Insert chosen smiley. 5. Insert quick text. 6. More: Choose between quick texts and delete message. Options of a particular message Press and hold on a phone number of a certain message, and you’ll get the following options: 1.
-
Page 76: New Message Notifications
4. Forward: Forward the message to others. 5. Save message to SIM card 6. Copy message text: Copy the text of that message for further use. 7. View message details: It will show the message type, sender or receiver, and sent time. 8. - Page 77 Email Before sending or receiving emails, you need to create and activate an email account. Only some “Plus” accounts include POP access allowing this program to connect. If you don’t have, please launch the web browser to gain access to these email accounts. Calendar You should create a Google account.
-
Page 78: About Calendar
About Calendar Use your phone's Calendar to create and manage your events, meetings, appointments. Tap menu and choose the desired icon on the above, you can see the following events:... -
Page 79: Creating A Calendar Event
◆ Day view ◆ Week view ◆ Month view ◆ Agenda views ◆today ◆More: options of New event, calendars, settings Creating a calendar event To create a calendar event, you have to login your account first. Then, you can create events in your calendar. - Page 80 4. Enter a name for the event. 5. To specify the date and time of the event, do one of the following: If there is a time frame for the event, tap the From and To date and time to set them. If it is a special occasion such as a birthday or a whole-day event, set the From and To date, then select the All day check box.
- Page 81 ◆ Inviting guests to your event If you want to invite guests to your event, you need to create and add the event in your Google Calendar. An invitation email will be sent to your guests using your Google Account. 1.
- Page 82 Calendar. Viewing, editing or deleting an event You can view, edit, or delete events you created. You can also view event invitations that other people sent to you. ◆ Viewing and editing an event 1. Press HOME> Applications >Calendar. 2. In Month view, tap the day when the event takes place, and then tap the event to open it.
-
Page 83: Calendar Event Reminders
5. Make your changes to the event. 6. When you're done editing, scroll down to the bottom of the screen and then tap Save. Calendar event reminders If you have set at least one reminder for an event, the upcoming event icon will appear in the notifications area of the status bar to remind you of the upcoming event. - Page 84 Press Menu to Clear history or go to advanced panel. On advanced panel, press MENU>Basic panel to go back. Note: The precision of this calculator is limited and can be used only for simple calculation.
- Page 85 Clock About the Clock widget The Clock widget that's by default added on the Home screen shows your current date, time and location.
-
Page 86: Setting The Alarm Clock
Using Clock Application 1. Press this icon will turn to alarm setting screen. 2. Press this icon will turn into picture screen. You can use this function as “Picture” chapter described. 3. Press this icon will turn into music screen. 4. - Page 87 screen, drag your finger up or down to roll the time scroll wheels and set the alarm time and then tap set. After done with the settings, tap Done to save it or tap Revert to go back to default setting screen.
- Page 88 You can also tap the alarm, and choose Delete on the screen. Editing the alarm clock Press and hold on the alarm for a few seconds, the available options will be displayed. Tap Edit alarm and edit it on the setting screen, tap Done or Delete after you finished.
-
Page 89: Sim Management
information of your current location. To unlock the screen, drag the arrow on middle of the clock widget up to the black hole . Then the black hole rotates and your phone changes to the Home screen. To change the date, time, time zone, 24/12-hour format, date format, choose Home>Applications >Settings >Date &... - Page 90 SIM Information Default SIM: Voice call, Messaging and Data connection. General settings: Roaming Contacts & SIM. Wireless & Network You can customize wireless & network settings here, including: 1. Airplane mode Choose the check box to disable all wireless connections.
- Page 91 ◆ Wi-Fi networks: Add Wi-Fi network or showing the networks in range. 4. Bluetooth Turn on or turn off Bluetooth here. 5. Bluetooth settings Manage Bluetooth connections, set device name & discoverability here. ◆ Bluetooth settings: Turn on/off Bluetooth checkbox; Device name (Type or edit device name);...
- Page 92 USB or as a portable Wi-Fi hotspot. 7.VPN settings Tap Add VPN and then choose one of the following: ◆ Add PPTP VPN(Point-to-point Tunneling Protocol) ◆ Add L2TP VPN(Layer 2 Tunneling Protocol) ◆ Add L2TP/IPSec PSK VPN(Pre-shared key based L2TP/IPSec VPN) ◆...
- Page 93 ◆ Network operators Select a network operator. 10. GPRS transfer pref. > Data prefer > Call prefer Call settings You can respectively set the following of SIM1 or SIM2. 1. Voicemail ◆ Voicemail service ◆ Voicemail settings: Set voicemail number 2.
-
Page 94: Audio Profile
Audio profile 1. General ◆ General Vibrate: vibrate phones for incoming calls Volume: Adjust the volume of Ringtone, Media, Alarm incoming call volume notifications checkbox. ◆ Incoming calls Phone ringtone: Choose incoming phone ringtone here. All ringtones are listed below, tap any one it will play automatically and the icon beside will turn green. - Page 95 beside will turn green. Then tap OK to select it and save. ◆ Feedback Audible touch tones: Select to play tones when using dial pad Audible selection: Select to play sound when making screen selection Screen lock sounds: Select to play sounds when locking and unlocking the screen.
- Page 96 3. Meeting The information is the same with General. 4. Outdoor The information is the same with General. Display You can define display settings here. 1. Brightness Adjust the brightness level here (by dragging the brightness slider to the left to decrease or to the right to increase the screen Brightness) 2.
- Page 97 phone screen turns off to conserve battery power. You can set the idle time before the screen turns off here. Choose from the following options: 30 seconds, 1 minute, 2 minutes, 10 minutes and 30 minutes. 5. TV out: Location My Location ◆...
- Page 98 password, or none. 2. SIM card lock ◆ Set up SIM card lock Lock SIM card or Change SIM PIN here, operate it of SIM1 or SIM2 respectively. 3. Passwords ◆ Visible passwords Show password as you type. 4. Device administration ◆...
- Page 99 ◆ Clear storage Clear credential storage of all contents and reset its password. Applications 1. Unknown sources Allow installation of non-market applications or not. 2. Manage applications Manage and remove installed applications You can view all the applications you have in this screen and the applications are classified into 4 sorts: downloaded, running, all, on SD card.
- Page 100 View and control currently running services 4. Development Set options for application development ◆ USB debugging checkbox Debug mode when USB is connected ◆ Stay awake checkbox Screen will never sleep while charging or not ◆ Allow mock locations Accounts & sync 1.
- Page 101 2. Manage accounts ◆ Weather Data Service (Sync Weather Data on/off) 3. Add account Tap to add Corporate or Google account here. Privacy ◆DRM reset Deletes all DRM license. ◆ Factory data reset Erases all data on phone You can return your phone to its original state, as it was when it left the factory.
- Page 102 on again. factory reset drastic measure. permanently erases all your personal data and customized settings, and also removes any programs you have installed. Make sure that you have backed up the information and files you want to keep. If your phone hangs or freezes, we recommend that do a "soft"...
- Page 103 you backed up the data is installed on the phone. Storage You can check out the space of your phone or SD card here. 1. SD card ◆ Total space ◆ Available space ◆ Unmount SD card Unmount the SD card for safe removal ◆Erase SD card 2.
- Page 104 2. Keyboard settings ◆ Android keyboard There are the following settings here: Vibrate on keypress, Sound on keypress, Popup on keypress, Touch to correct words, Auto-capitalization, Show setting key, Voice input, Input languages. 3. Input method Select input method. Voice input & output Voice Recognizer setting Text-to-speech settings ◆...
- Page 105 spoken text. ◆ Install voice data Install the voice data required for speech synthesis. ◆ Speech rate Speed at which the text is spoken. ◆ Language Set the language-specific voice for the spoken text. ◆ Pico TTS Pico TTS settings Accessibility See phone options.
-
Page 106: About Phone
About phone Details of the phone are to be found here. Music About Music Application Enjoy listening to songs and music on your phone using the Music application. You need to copy music files to your storage card first to use the Music application to play music. - Page 107 Music Playing Screen Tap any song will enter the playing screen. When any song is playing, the Music icon appears on status bar of the phone. Drag it down will show the ongoing music and tap it will enter Music...
- Page 108 Playing screen directly. Use the onscreen controls to control music playing, pause, fast-forward, backwards, repeat songs, and more. 1. Tap this icon to play music. 2. Tap this to pause it. 3. Tap this icon to play the next song; press and hold it for seconds to fast-forward within the song.
- Page 109 7. Press this icon will back to the Library, you can tap any other song and play it. 8. Press this icon will turn on or off shuffle. When the button is gray, tap it will turn shuffle on while when the button is Blue,, tap it will turn shuffle off.
- Page 110 Sending music using Bluetooth/Gmail/Messaging You can send music by the following way: 1. Home> Applications > File Manager 2. Press and hold on the song you want to send 3. When the options appear, choose Send. 4. When the options appear, choose one of the following: Bluetooth, Gmail, or Messaging 5.
- Page 111 in a headset to open the FM.” Listen to the radio 1. Press HOME> Applications > FM Radio. 2. Tap to fine tune the radio frequency by -0.1 MHz. 3. Tap to view the All presets list.
-
Page 112: Camera Basics
4. Tap forward and backward to FM station. 5. Tap to fine tune the radio frequency by +0.1 MHz. 6. Tap to tune volume. 7. Tap to pause/play FM radio. In the first time you open FM radio, and it automatically scans for available FM stations, saves them as presets, and plays the first FM station found. -
Page 113: Camera Screen
phone. To open the camera in photo mode and take photos, press HOME> Applications > Camera. When in Gallery, tap menu and then select “Capture picture ”to go into Camera screen. Camera Screen... - Page 114 Viewfinder screen The camera displays in landscape view only. Take a picture Tap this icon Shutter Sound The camera will play a shutter sound when you press the shutter release. Review screen After capturing a photo or video, the Review screen will display the photo or the starting image of the video that you have just captured.
- Page 115 1. In any mode, tap and drag this icon to the other side will change the mode directly. 2. In any mode, tap Menu and choose “switch to camera/video” will also switch the mode. 3. Press HOME> Applications >Camera will directly go into the photo mode and photo taking screen.
- Page 116 Azan alarm Gallery...
-
Page 117: About The Gallery Application
About the Gallery application In using the Gallery application, you can view photos and watch videos that you've taken with your phone's camera, downloaded, or copied onto your storage card. For photos that are in your storage card, you can do basic editing such as rotate and crop. -
Page 118: Viewing A Photo In Landscape Orientation
either in filmstrip or grid view. Tap a photo or video to view it in full screen. Browsing in filmstrip or grid view By default, photos and videos are presented in a horizontal filmstrip. Slide your finger left or right across the filmstrip to go through the photos and videos. -
Page 119: Watching Video
the phone. Zooming in or out on a photo There are two ways you can zoom in or out of a photo: Tap the screen twice quickly to zoom in, then tap the screen twice quickly again to zoom out. You can also press these icons to zoom in zoom out Watching video... -
Page 120: Recording Your Voice
Sound Recorder is useful for recording quick thoughts. You can also record your voice and set it as a ringtone. You need to have a micro SD card installed on your phone to use Sound Recorder. Recording your voice 1. Press HOME> Applications > Sound Recorder. Hold the device's microphone near your mouth. - Page 121 clip. to stop recording. It will appear “Save” and “Cancel”, and you can tap “Save”, then “Save succeeded” which indicates finishing the recording. Tap Play icon can play the recording you have just recorded. 4. Press Menu, then you can Browse Records and enter to All recording screen.
-
Page 122: File Manager
here. (3) Delete: Choose to delete the recording. (4) Share it to: You can share the recording to: Bluetooth, Gmail, or Messaging. And select the checkbox below to “Use by default for this action.” File manager You can manage the files and corresponding parameters. - Page 123 Search You can search for information on your phone and on the Web by using the Quick Search Box. 1. Setting Web and Quick Search Box options (1)Tap Quick Search and enter Quick Search Box, then tap “Menu”, you’ll see “Search Settings”...
- Page 124 Search Box. As you type, matching items on your phone and suggestions from Google web search are shown as a list. The suggested items that appear will depend on the options that you have selected in the search settings. "Applications>Browser>More>Settings" for details.
-
Page 125: Google Search
Google search To use Google search, you must connect WLAN or get GPRS from your networking service supporter. SIM Toolkit STK service is the tool kit of SIM card. This phone supports the service function .The specific items are depended by SIM card and network. Video wallpaper You can set the default video or downloaded video as the wallpaper. -
Page 126: Voice Search
Voice search You should allow Google to use location for improving search result and other services. Do as the phone guides. -
Page 127: Frequently Asked Questions (Faq)
Frequently Asked Questions (FAQ) Keyboard Using the onscreen keyboard When you start a program or select a field that requires text or numbers, the onscreen keyboard becomes available. Using the landscape onscreen keyboard When entering text, you can choose to use the landscape orientation of the onscreen keyboard. - Page 128 orientation to automatically change. The landscape orientation keyboard is not supported in all applications. Use the following keys while entering text using the onscreen keyboard: ◆Press at the bottom of the keyboard to switch to the numeric and symbol keyboard. Then you can enter numbers, symbols and press ALT to turn the page down or up.
- Page 129 Wi-Fi Wi-Fi provides wireless Internet access over distances of about 300 feet (100 meters). To use Wi-Fi on your phone, you need access to a wireless access point or "hotspot". The availability and range of the Wi-Fi signal depends on the number, infrastructure, and other objects through which the signal passes.
- Page 130 security settings of detected Wi-Fi networks are displayed in the Wi-Fi networks section. Tap a Wi-Fi network to connect. If you selected open network, will automatically connected to the network. If you selected a network that is secured with WEP, enter the key and then tap Connect.
- Page 131 Checking the wireless network status Press HOME >Applications>Settings > Wireless & networks. 2. On the Wireless & networks screen, tap Wi-Fi settings, and then tap the wireless network that the phone is currently connected to. A message box is then displayed showing the Wi- Fi network name, status, speed, signal strength, and more.
-
Page 132: Connecting To A Virtual Private Network
here) and Network Notification (Notify or not when an open network is available. 3. Wi-Fi networks: It shows all the networks the phone scanned. If it needs the password to connect, there will be the icon beside the name of that network. 4. - Page 133 allow you to connect and access resources inside a secured local network, such as your corporate network. Preparing your phone for VPN connection Depending on the type of VPN you are using at work, you may be required to enter your login credentials and/or install security certificates before you can connect to your company's local network.
- Page 134 Setting up secure credential storage If your network administrator instructs you to download and install security certificates, you must first set up the phone's secure credential storage. Press HOME >Applications>Settings >Location& Security, and then tap Set password. 2. Enter a new password (at least 8 characters without any spaces) for the credential storage, scroll down and confirm the password, and then tap OK.
- Page 135 1. Press HOME >Applications> Settings > Wireless & networks > VPN settings. 2. Tap Add VPN, and then tap the type of VPN you want to add. There are defaulted types as below: Add PPTP VPN; Add L2TP VPN; Add L2TP VPN;...
- Page 136 to connect to. 3. When prompted, enter your log in credentials, then Connect. When connected, connected icon appears in the notification area of the title bar. 4. Open the web browser to access resources such as intranet sites on your corporate network. See "Using your phone's web browser"...
- Page 137 notification area of the title bar. Wi-Fi Settings See all of Wi-Fi settings on the chapter of “Wireless & Network”. Bluetooth Using Bluetooth Bluetooth short-range wireless communications technology that allows devices to exchange information over a distance of about eight meters without requiring a physical connection.
-
Page 138: Changing The Phone Name
Turning Bluetooth on or off Press HOME > Applications> MENU>Settings > Wireless & networks. 2. Select or clear the Bluetooth check box. An even easier way to turn Bluetooth on or off is with the Bluetooth icon on the Status Bar. Changing the phone name The phone name identifies your phone to other devices. - Page 139 a compatible Bluetooth headset or car kit. It's the same procedure to set up stereo audio and hands-free. For you to listen to music with your headset or car kit, the headset or car kit must support the A2DP Bluetooth profile. Press HOME >...
- Page 140 displayed in the Bluetooth devices section, tap the name. Your phone then automatically tries to pair with the headset. 6. If automatic pairing fails, enter the pass code supplied with your headset. The pairing and connection status is displayed below the hands-free headset or car kit name in Bluetooth devices section.
- Page 141 phone, you should be able to reconnect it automatically by turning on Bluetooth on your phone, and then turning on the headset. However, sometimes you will need to reconnect manually, for example if you have been using your headset with another Bluetooth device. Press HOME >...
- Page 142 If you still cannot reconnect to the headset or car kit, follow the instructions in "Un-pairing from a Bluetooth device" in this chapter, and then follow the instructions under "Connecting a Bluetooth headset or car kit" above. Disconnecting or unpairing from a Bluetooth device Disconnecting a Bluetooth device Press HOME >...
- Page 143 Press HOME > MENU>Applications>Settings > Wireless & networks > Bluetooth settings. In the Bluetooth devices section, press and hold the device to unpair. 3. Tap Unpair. Sending and receiving information using Bluetooth You can use Bluetooth to transfer information between your phone and another Bluetooth- enabled device such as a phone or notebook computer.
- Page 144 device You can send the following types of information, depending on the device you are sending to: Images and videos Calendar events Contacts Audio files Set the receiving device to discoverable mode. You may also need to set it to "Receive Beams"...
- Page 145 3. Follow the steps for the type of item you want to send: Photo or video (in Camera). After capturing a photo, on the preview screen, tap the Share button , and then choose Bluetooth. Photos and videos (in Photos). On the Albums tab, tap an album.
- Page 146 5. Tap the name of the receiving device. 6. If prompted, accept the connection on the receiving device, and enter the same password on both your phone and the other device, or confirm the auto-generated password. 7. On the receiving device, accept the file. The location where the information is saved depends on the type of information and the receiving device.
- Page 147 [your username]\Documents If you send a file to another device, the saved location may depend on the file type. For example, if you send an image file to another mobile phone, it may be saved in a folder named "Images". Receiving information from another device Your device is capable of receiving a wide variety of file types with Bluetooth, including...
- Page 148 3. Tap the Discoverable check box. 4. On the sending device, send one or more files your phone. Refer device's documentation instructions sending information over Bluetooth. 5. If prompted, enter the same password on both your phone and the other device, or confirm the auto-generated password.
-
Page 149: Maintenance & Safety
down the notifications panel, and then tap the relevant notification. When you open a received file, what happens next depends on the file type: Media files and documents are usually opened directly compatible application. example, if you open a music track, it starts playing in the Music application. - Page 150 sales package box. Charger and Adapter Safety Charger and adapter are designed for indoor use only. Battery Information and Care Please dispose of your battery properly. Do not disassemble or short-circuit the battery. Keep the battery’s metal contacts clean. Recharge the battery after long periods of non-use to maximize battery life.
- Page 151 phone. The magnetism of the phone may damage the data stored in the magnetic strip. Talking on your phone for long period of time may reduce call quality due to heat generated during use. When the phone is not used for a long period time, store it in a safe place with the power cord unplugged.
-
Page 152: Troubleshooting
Troubleshooting 1.Unable to switch on : Does the battery have power? Is the battery placed correctly 2.SIM failed : The SIM card is dirty. Clean it. Reinstall the SIM card. The SIM card is damaged. Replace it. 3.Poor signals : Check the signal strength icon on the screen. - Page 153 discharge too much; so it cannot be charged until connected certain time. performance has worsened. 6. Unable to register to the network : Too weak signals or strong interference.SIM card installed properly? Bad contact or SIM card damaged? If the SIM card is broken, please contact the network operator to replace it.
- Page 154 11.Only part of the photo set as standby photo can be seen : The size of the photo may be too big. The recommended size is 1200*1600.
Need help?
Do you have a question about the NOIR A2 and is the answer not in the manual?
Questions and answers