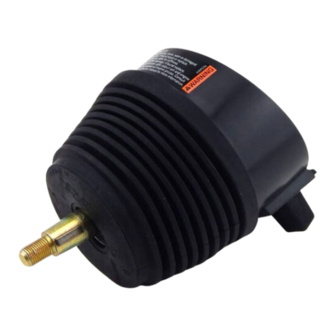
Summary of Contents for SeaSTAR Pro Series
- Page 1 . s e a s t a r s t e e r i n g . c o m I S O 9 0 0 1 SeaStar Sport Tilt Helms Manufactured by teleflex canada liMited PartnershiP...
- Page 2 Don't compromise performance... use genuine SeaStar parts only! • SeaStar helms • SeaStar Cylinders • SeaStar hoses • SeaStar Oil Substituting non SeaStar parts in any part of the SeaStar hydraulic steering system, may seriously compromise system performance. seastar...
-
Page 3: Safety Information
(including hoses, fittings, oil and the proper tools required for the installation). 3. SeaStar components are highly engineered and safety tested to ensure system integrity, DO NOT substitute any component with non-SeaStar components as this may compromise system performance/reliability. - Page 4 SEASTAR ProSeries tilt helm installation safety information Continued WARNING The safety information provided below is intended to inform you of the dangers that may be present before, during and after use. It is critical that you read and understand ALL the points noted.
-
Page 5: Table Of Contents
INTRODUCTION The SeaStar Steering System is the smoothest and most efficient hydraulic steering system available today. They have been designed for normal pleasure and commercial use where standard rigging arrangements are used. Before proceeding with the installation of this tilt helm, read these instructions thoroughly. Teleflex Marine... -
Page 6: System Installation Overview
Using the Fill and Purge instructions provided in your steering cylinder manual, fill and purge the steering system. OIL LEvEL AND sysTEm CHECk: Step 5 Using the “Oil level and system checks” provided in your steering cylinder manual, confirm proper operation of your steering system. seastar... -
Page 7: Tilt Helm Template
SEASTAR ProSeries TILT HELM TEMPLATE tilt helm installation Tilt Helm Mounting Template NOTICE If you must photocopy this mounting template for use, check ALL " 6 measurements using a measuring device prior to using as a template. " 3 " 4 ( "... - Page 8 seastar...
-
Page 9: Sport Tilt Helm Mounting
SEASTAR ProSeries SPORT TILT HELM tilt helm installation MOUNTING WARNING Use the self-locking fasteners provided ONLy; substituting non-self locking fasteners can result in loosening or separation of equipment leading to loss of steering control causing property damage and/ or personal injury. -
Page 10: Sport Tilt Helm Installation
SEASTAR ProSeries tilt helm installation sport tilt helm installation sTEP 1. Using the template provide on page 3. Confirm that the location of the Tilt Helm will allow unrestricted operation of the steering wheel in ALL tilting positions and will NOT interfere with other functional equipment. -
Page 11: Sport Plus Tilt Helm Mounting
SEASTAR ProSeries SPORT PLUS TILT HELM tilt helm installation MOUNTING WARNING Use the self-locking fasteners provided ONLy; substituting non-self locking fasteners can result in loosening or separation of equipment leading to loss of steering control causing property damage and/ or personal injury. -
Page 12: Sport Plus Tilt Helm Installation
SEASTAR ProSeries tilt helm installation sport Plus tilt helm installation sTEP 1 Using the template provided on page 3. Confirm that the location of the helm will allow unrestricted operation of the steering wheel in ALL tilting positions and will NOT interfere with any other functional equipment. -
Page 13: Remote Fill & Vent Kit Installation
SEASTAR ProSeries tilt helm installation Remote Fill & Vent Kit installation Remote fill & Vent This kit will provide means to fill and vent the steering system above the dash or consul. A 3/4" hole will need to be drilled into the dash/consul ABOvE the helm pump, prior to drilling any holes, confirm that you will not drill into any functioning equipment. -
Page 14: Troubleshooting Guide
SEASTAR ProSeries TROUBLESHOOTING GUIDE tilt helm installation fAULT CAUSE SOLUTION 1. Cannot get helm shaft U-Joint bolt is too tight. Loosen the "Top" bolt no more than 1/4" to allow the Helm shaft to be installed. to go into U-Joint. -
Page 15: Warranty Policy/Procedures
Statement of Limited Warranty We warrant to the original retail purchaser that Teleflex Canada Limited Partnership products have been manufactured free from defects in materials and workmanship. This warranty is effective for two years from date of purchase, excepting that where Teleflex Canada Limited Partnership products are used commercially or in any rental or income producing activity, then this warranty is limited to one year from the date of purchase. - Page 16 TELEFLEx CANADA 3831 NO.6 ROAD RICHMOND, B.C. CANADA V6V 1P6 FAx 604-270-7172 www.seastarsteering.com IsO 10592 © 2006 TELEFLEx CANADA LIMITED PARTNERSHIP PRINTED IN CANADA FORM NO. 279102 04/11 Rev. F...


Need help?
Do you have a question about the Pro Series and is the answer not in the manual?
Questions and answers